Connecting your domain in MakeForms
MakeForms allows you to publish your forms on your own custom domain so they appear fully branded and consistent with your website. By connecting a subdomain such as forms.yourdomain.com, you can control exactly where your forms are hosted. This guide explains how custom domains work in MakeForms and walks you through the complete setup process, from configuring your DNS records to verifying your domain and publishing forms on your own domain.
Adding Your Domain
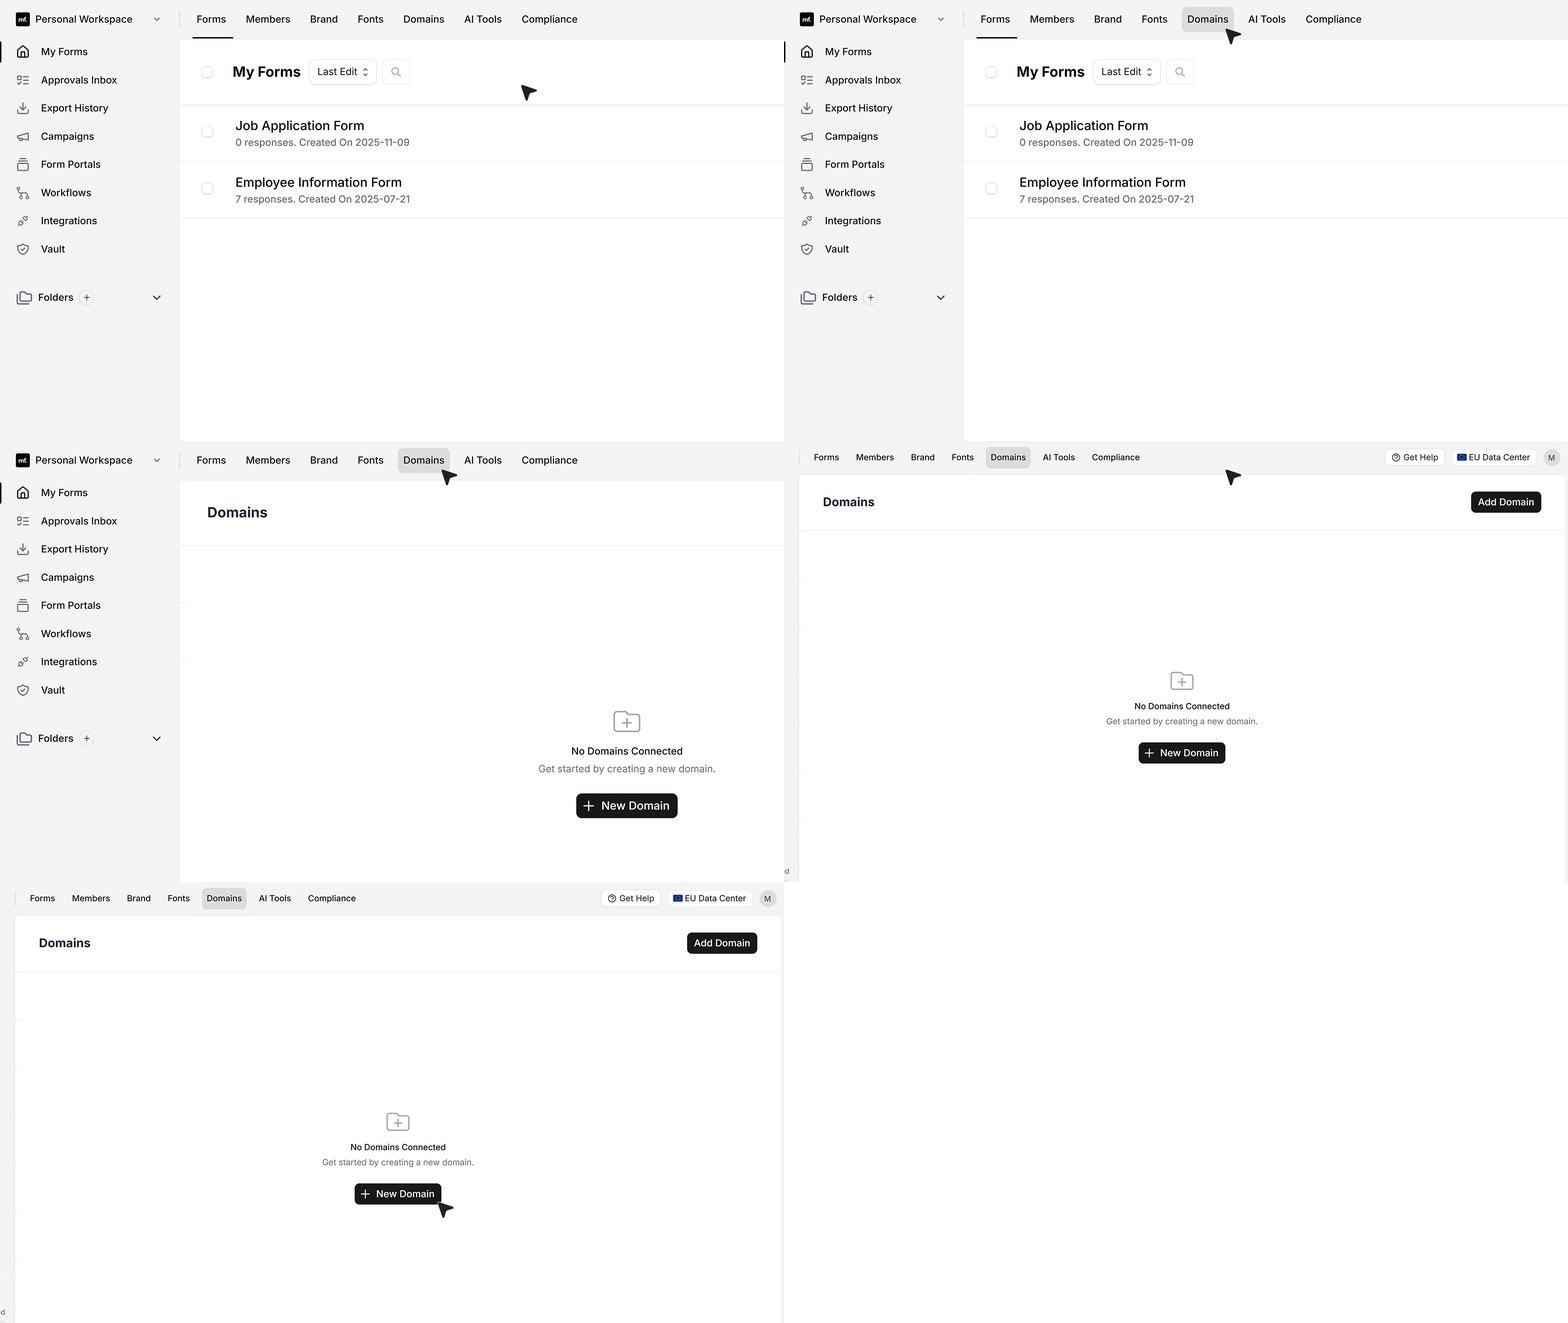
- To start, open the Domains tab in your MakeForms account. If this is your first time, you’ll see that no domains are added yet. Click on New Domain.
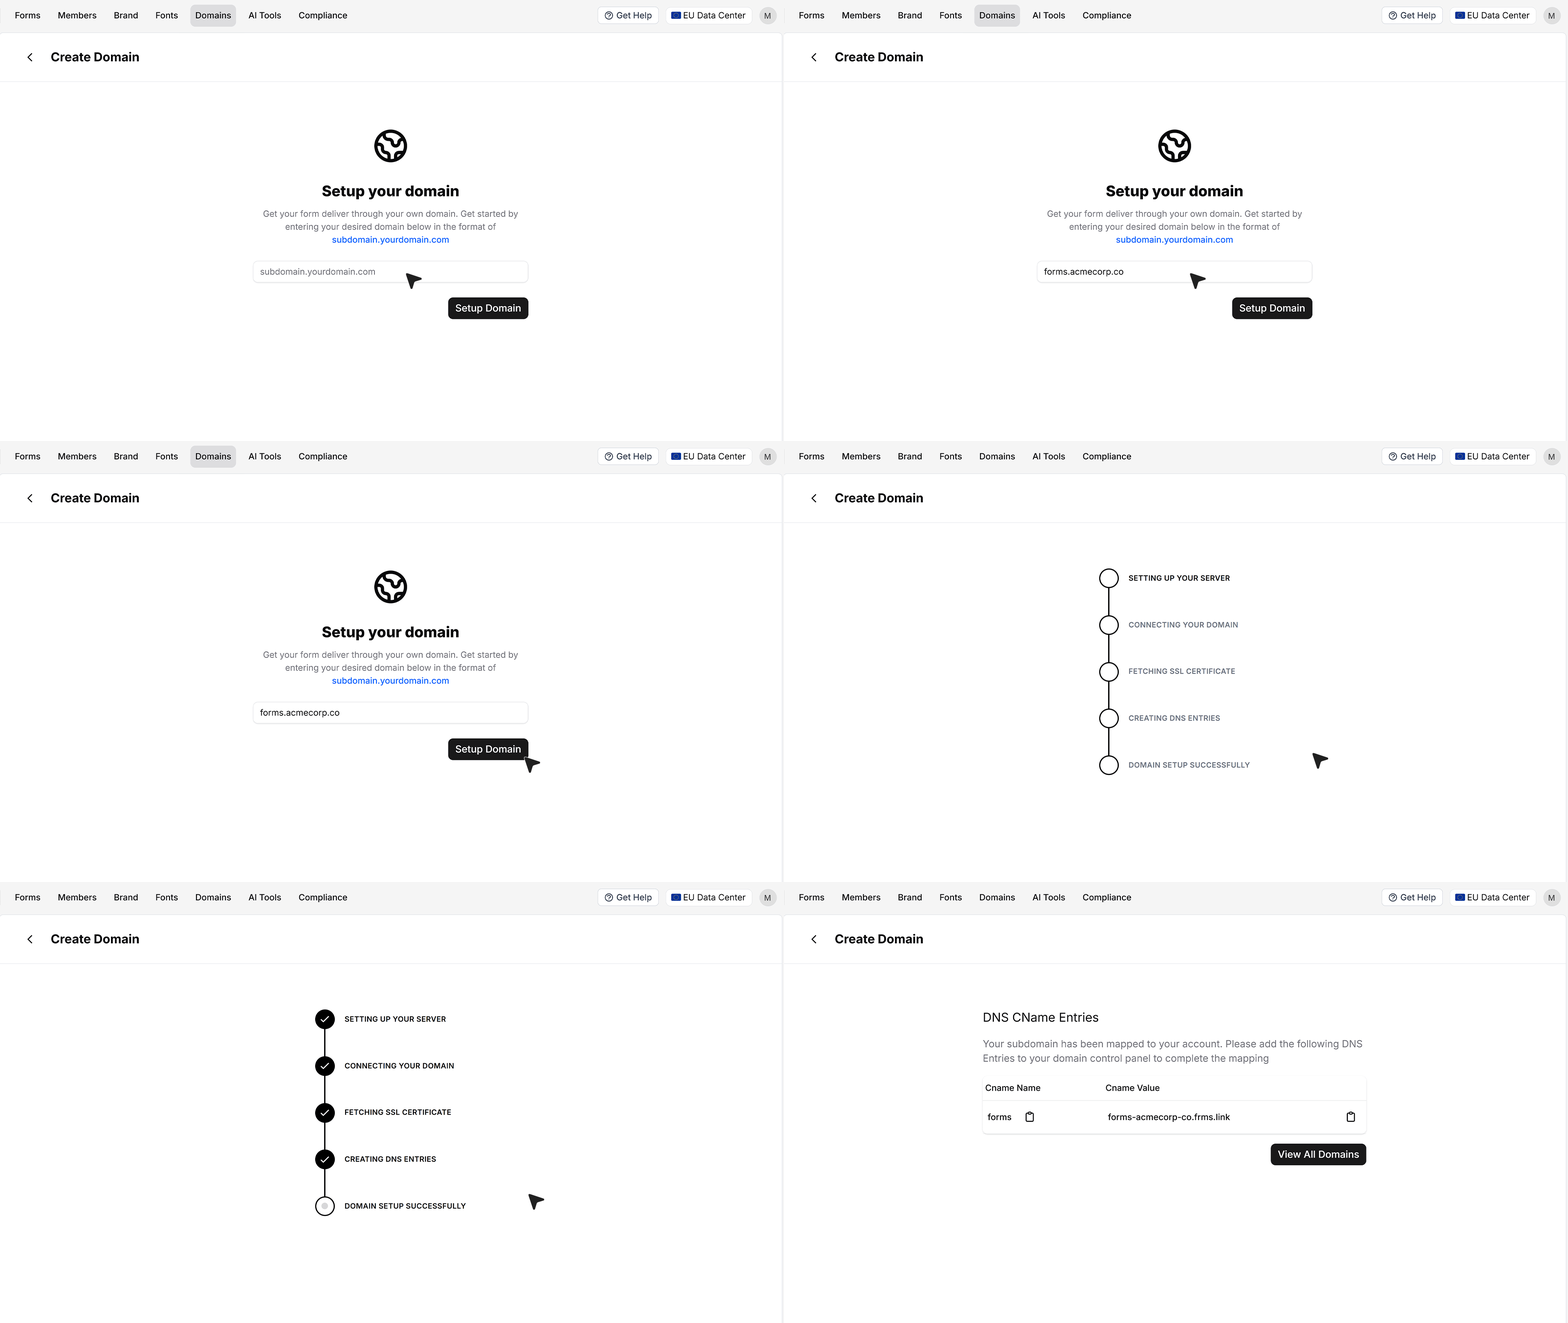
- Enter the subdomain you want to use for your forms. In this guide, we’re using forms.acmecorp.co as an example. Once you’ve added it, click the Setup Domain button to continue. MakeForms will prepare the DNS records and the SSL settings for you.
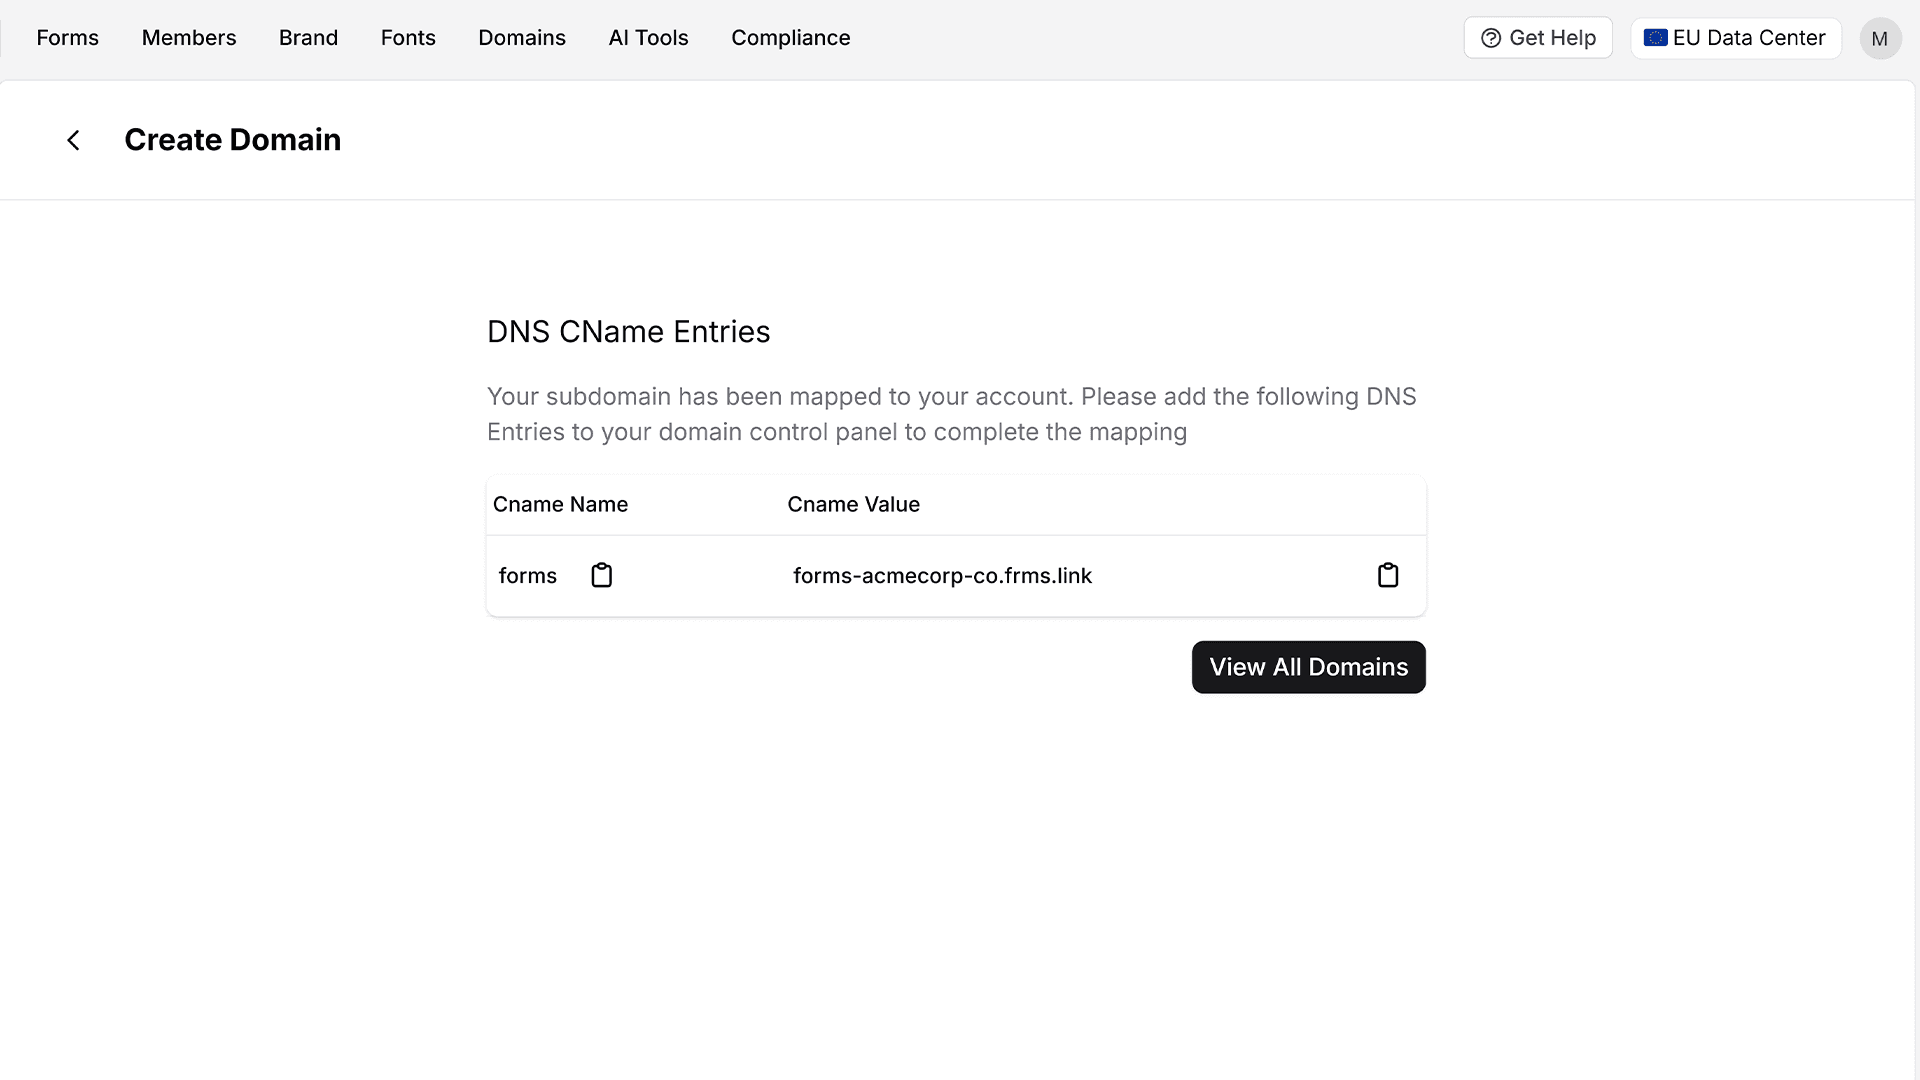
- After you add your subdomain in MakeForms, you’ll see CNAME record that needs to be added in your DNS settings.
Adding the DNS Record
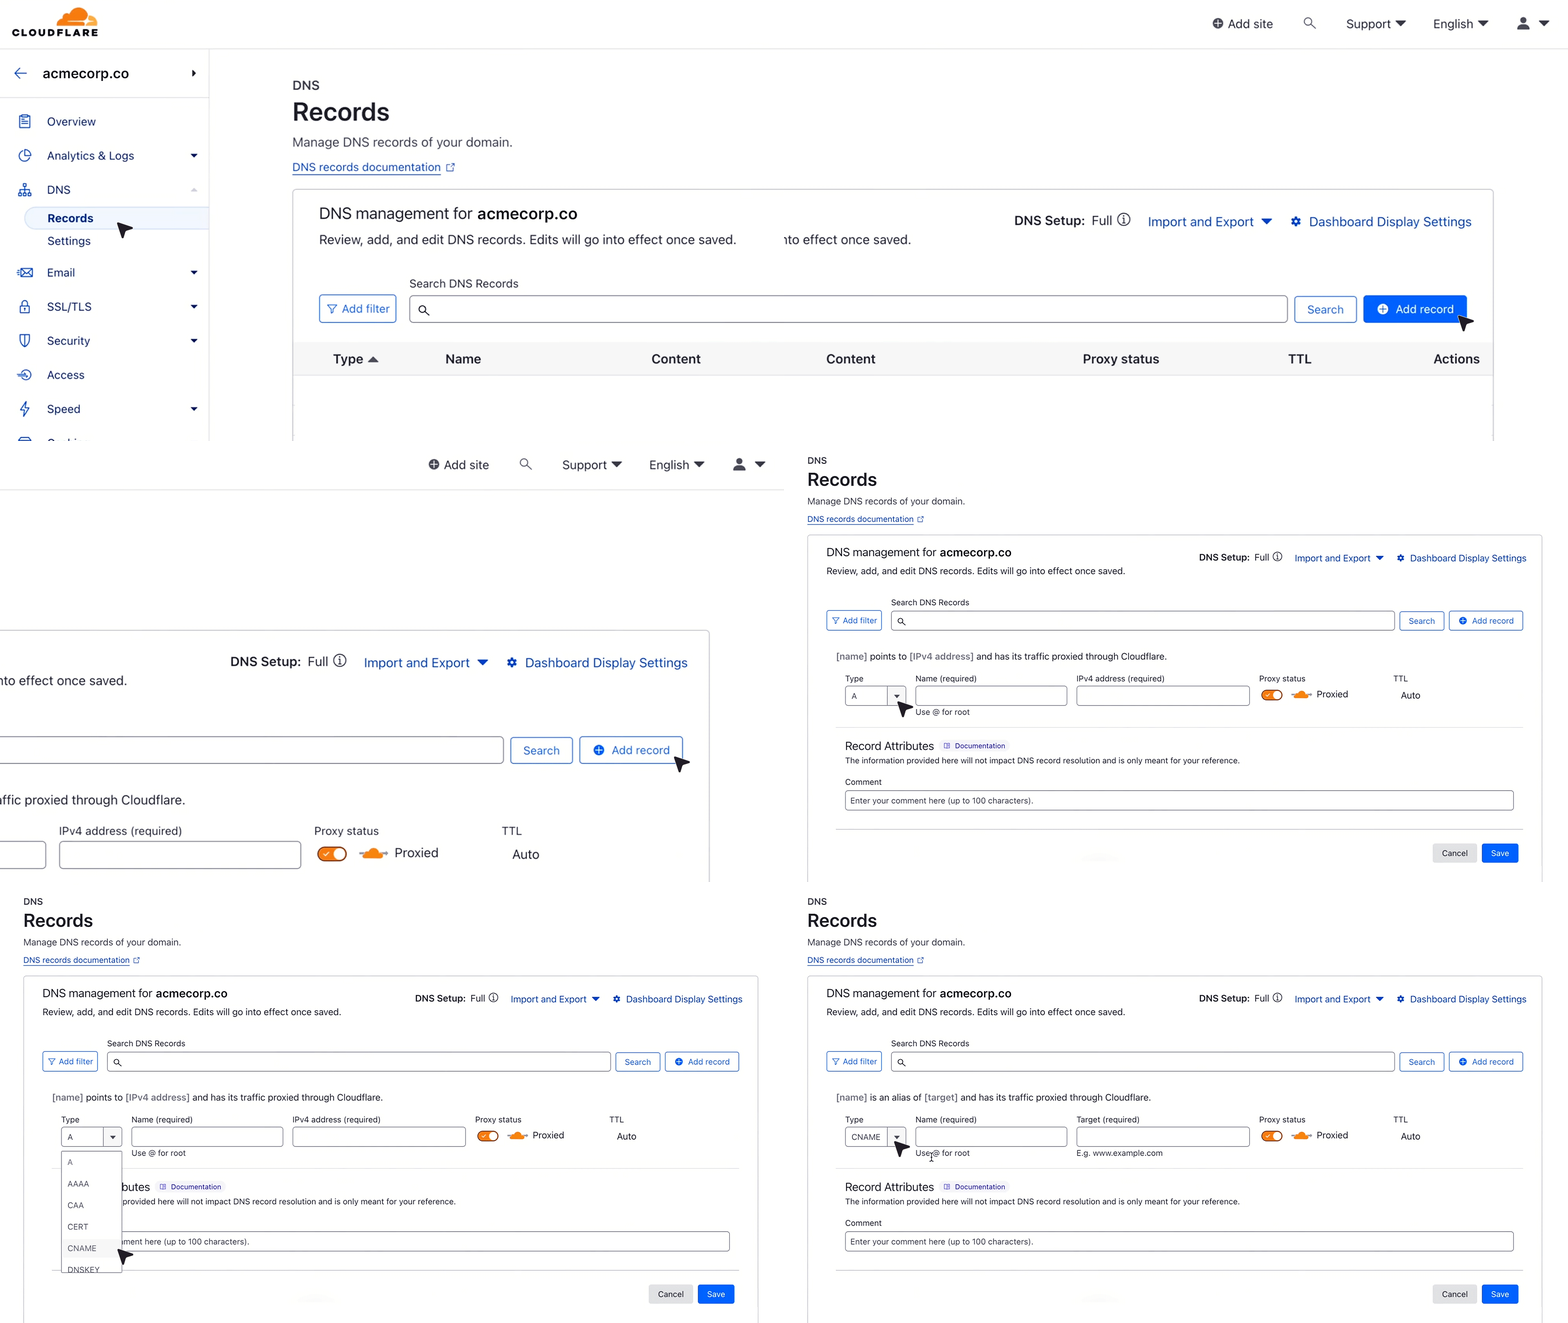
- Now go to your DNS provider — for example, GoDaddy, Cloudflare, or Namecheap — and create a CNAME record. Here, we will set up the entries using Cloudflare. Open your Cloudflare dashboard and go to the DNS Records section for your domain. Create a new DNS record and set the type to CNAME.
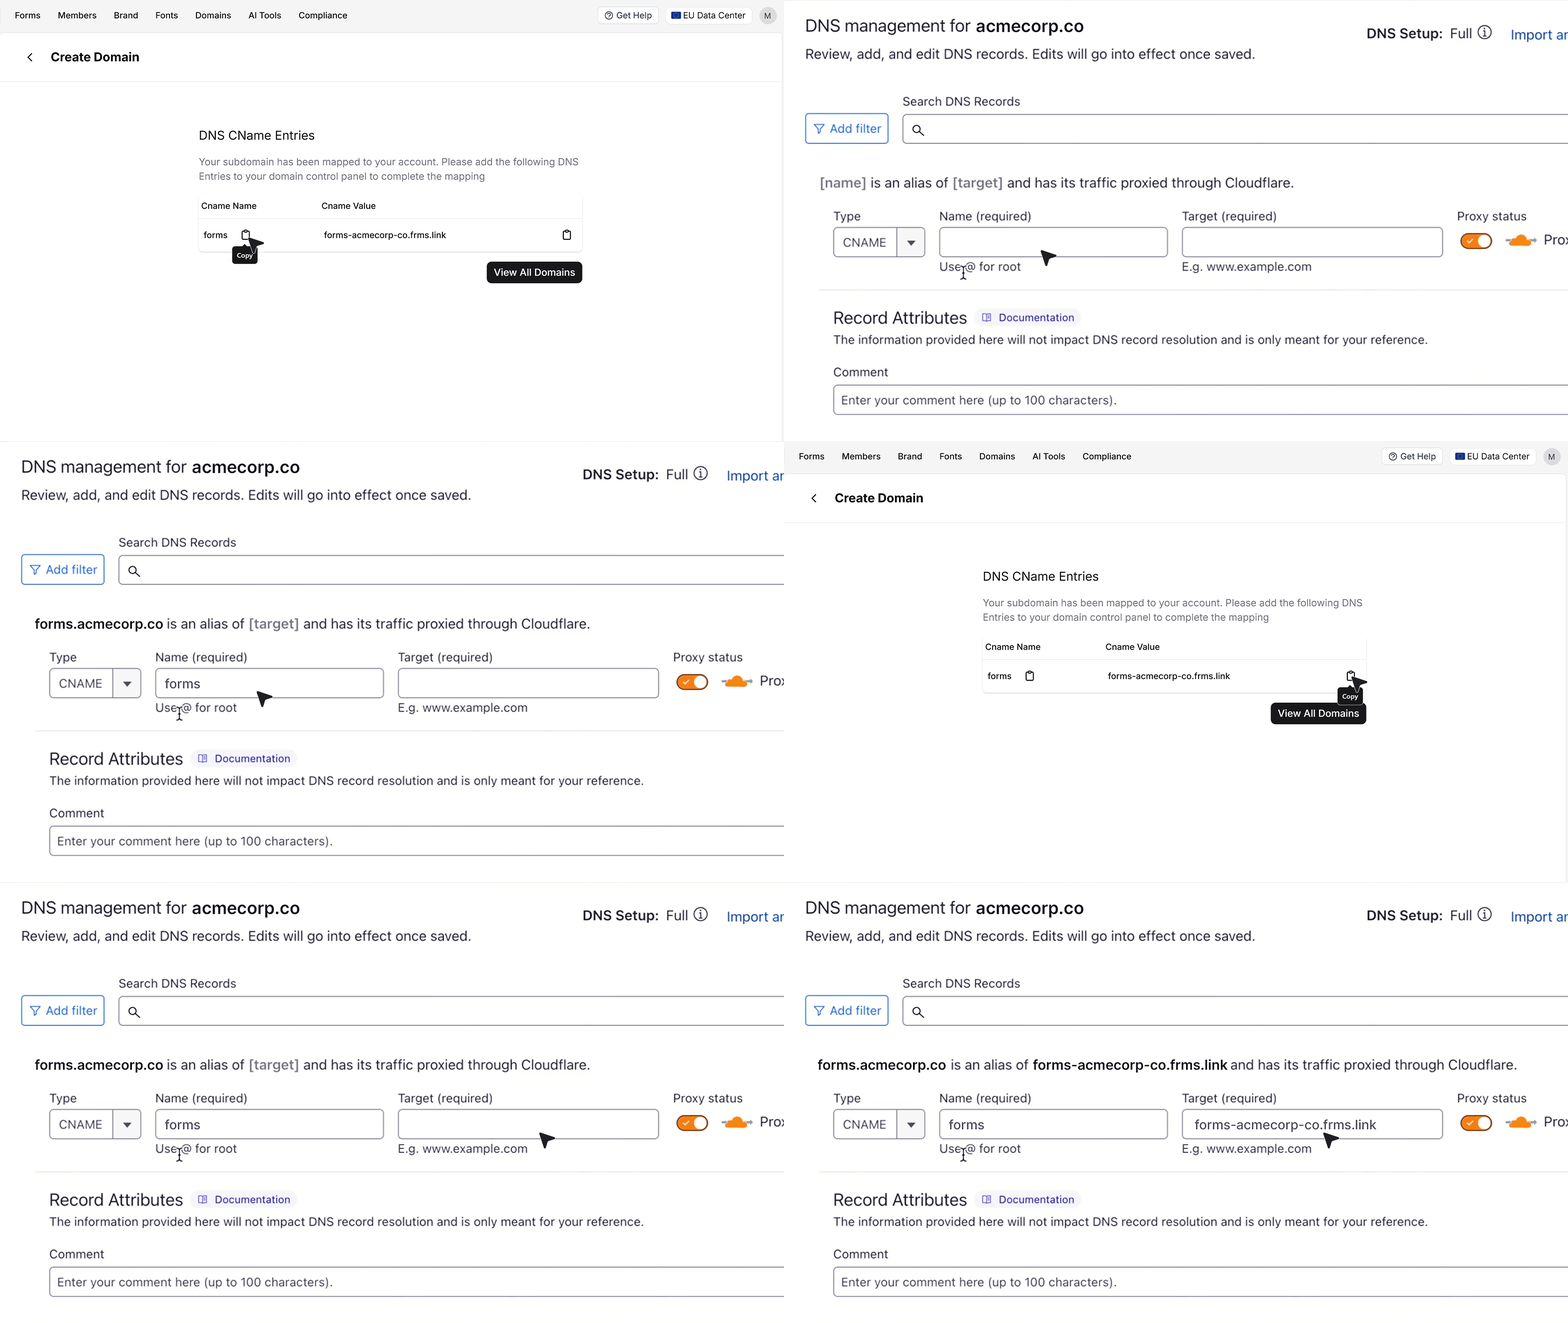
- Paste the CNAME name from MakeForms into the Name field, then return to MakeForms and copy the CNAME value. Paste this into the Target field inside Cloudflare.
- Before saving, turn Proxy off. This step is essential because MakeForms cannot verify your domain or issue the SSL certificate if the record is proxied. Keeping the record on DNS Only ensures a smooth and successful verification. Setting the TTL to 1 minute helps with quicker propagation.
Save the record to complete the DNS configuration. DNS propagation varies based on your provider and may take a few hours.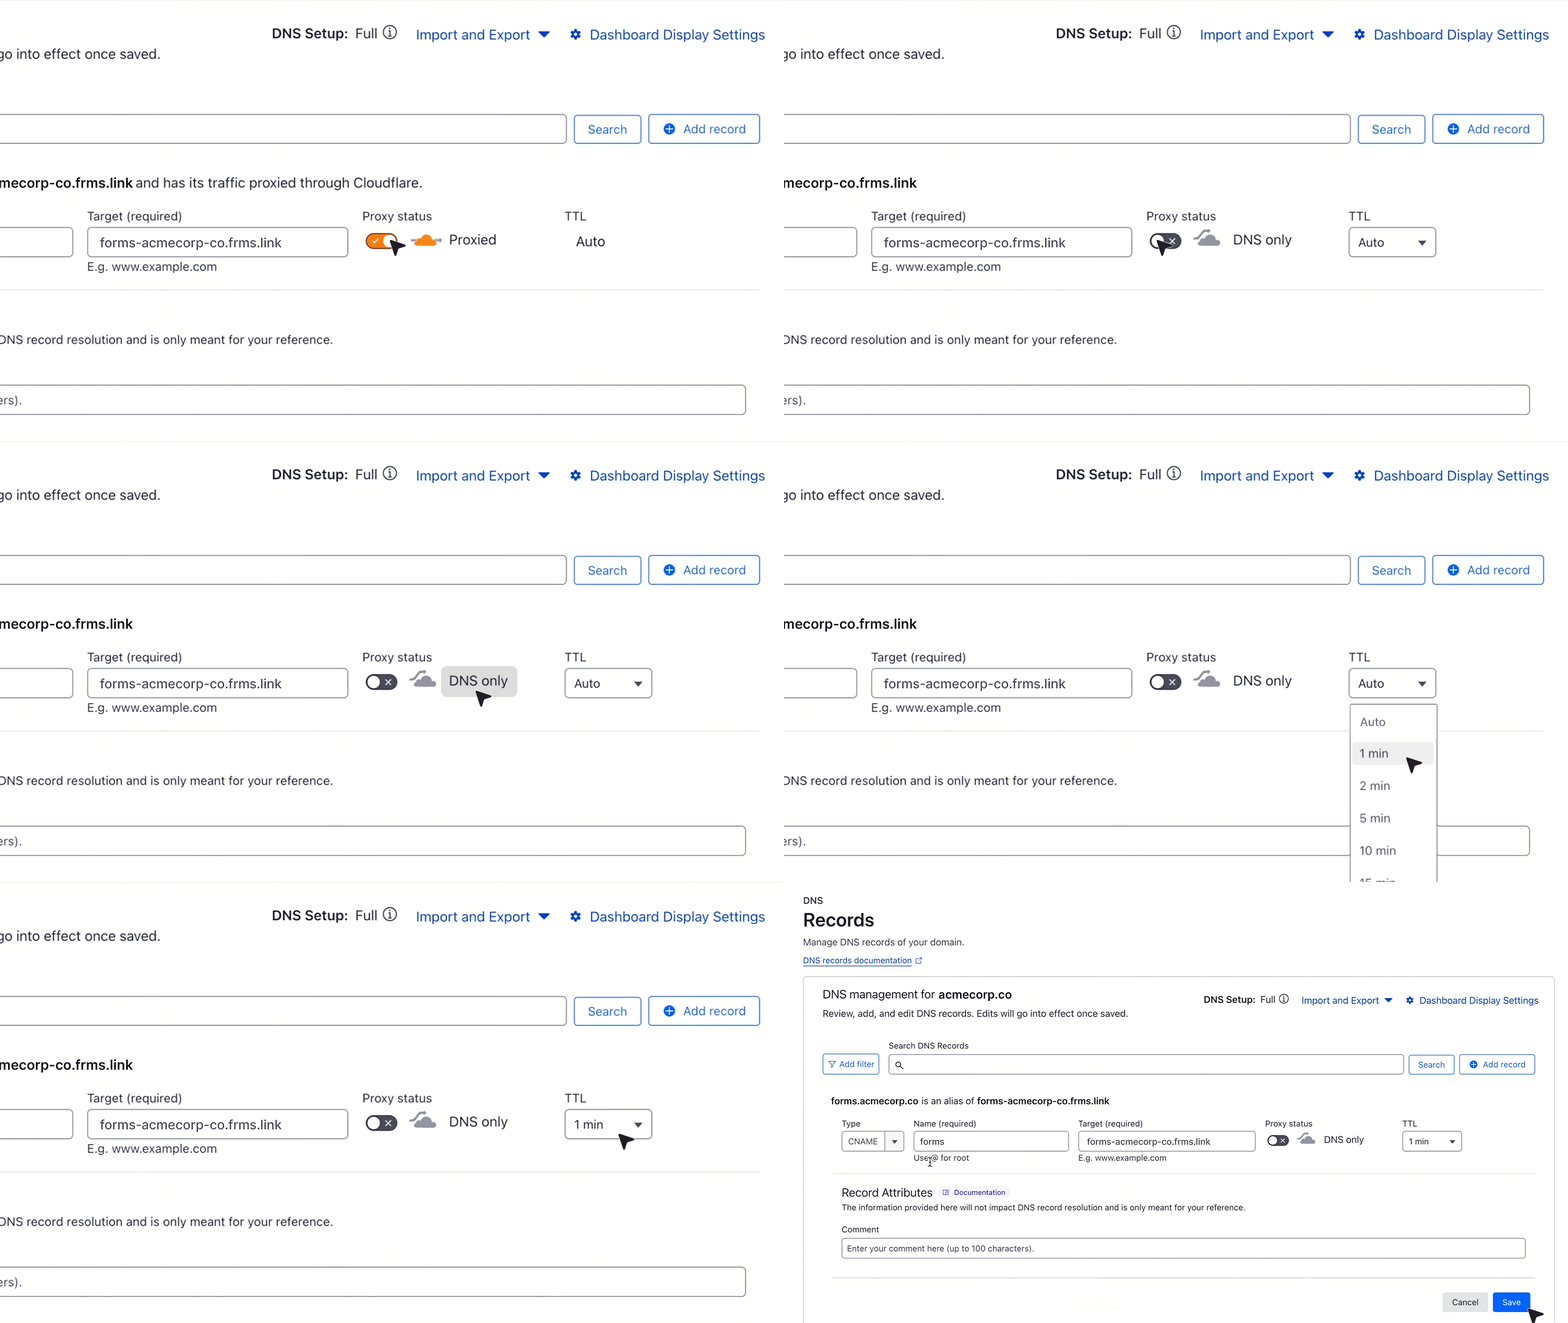
SSL Verification
After adding the DNS record, open the Domains tab in MakeForms. Your domain will show a red lock, meaning SSL isn’t issued yet. Click Manage and then Verify Domain. If the CNAME is correct, SSL will be issued and the lock will turn green. Your domain is now ready to use, and you can set it as the default for new forms if you want.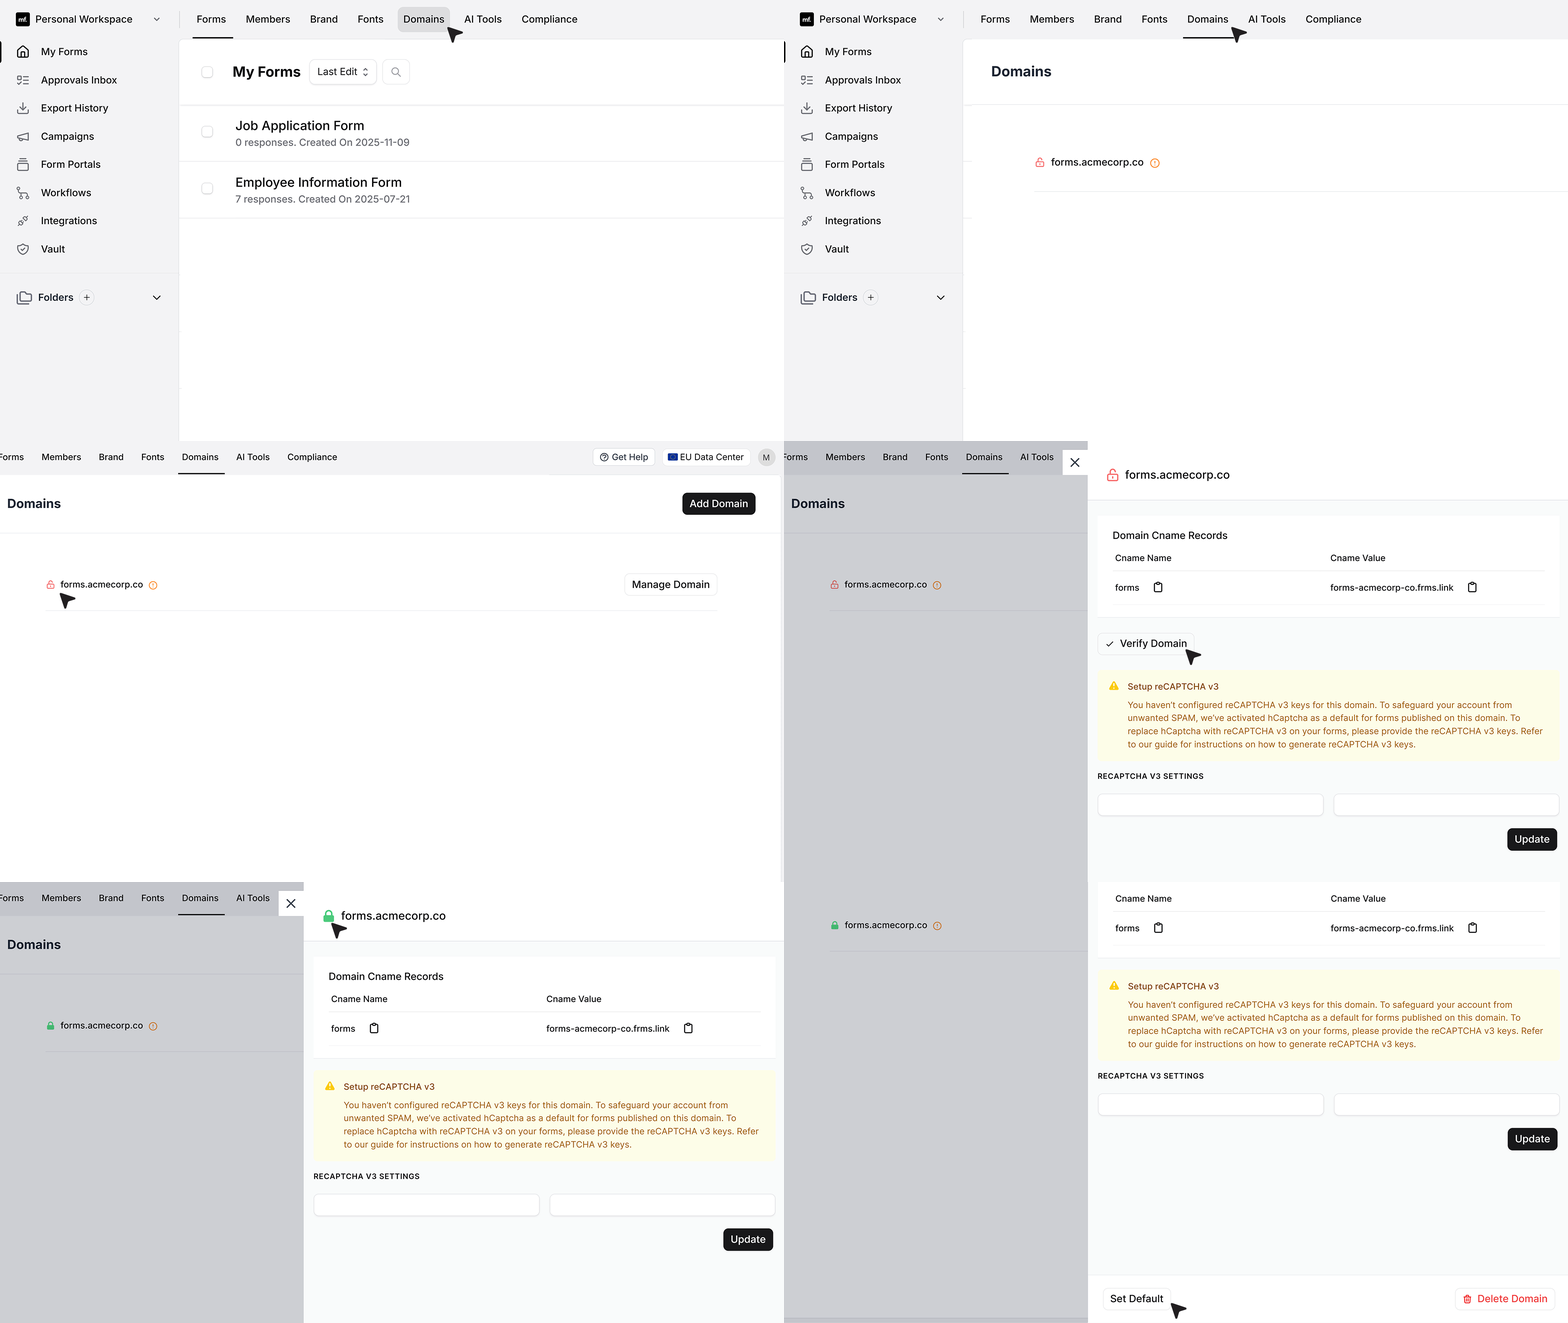
Configuring reCAPTCHA v3
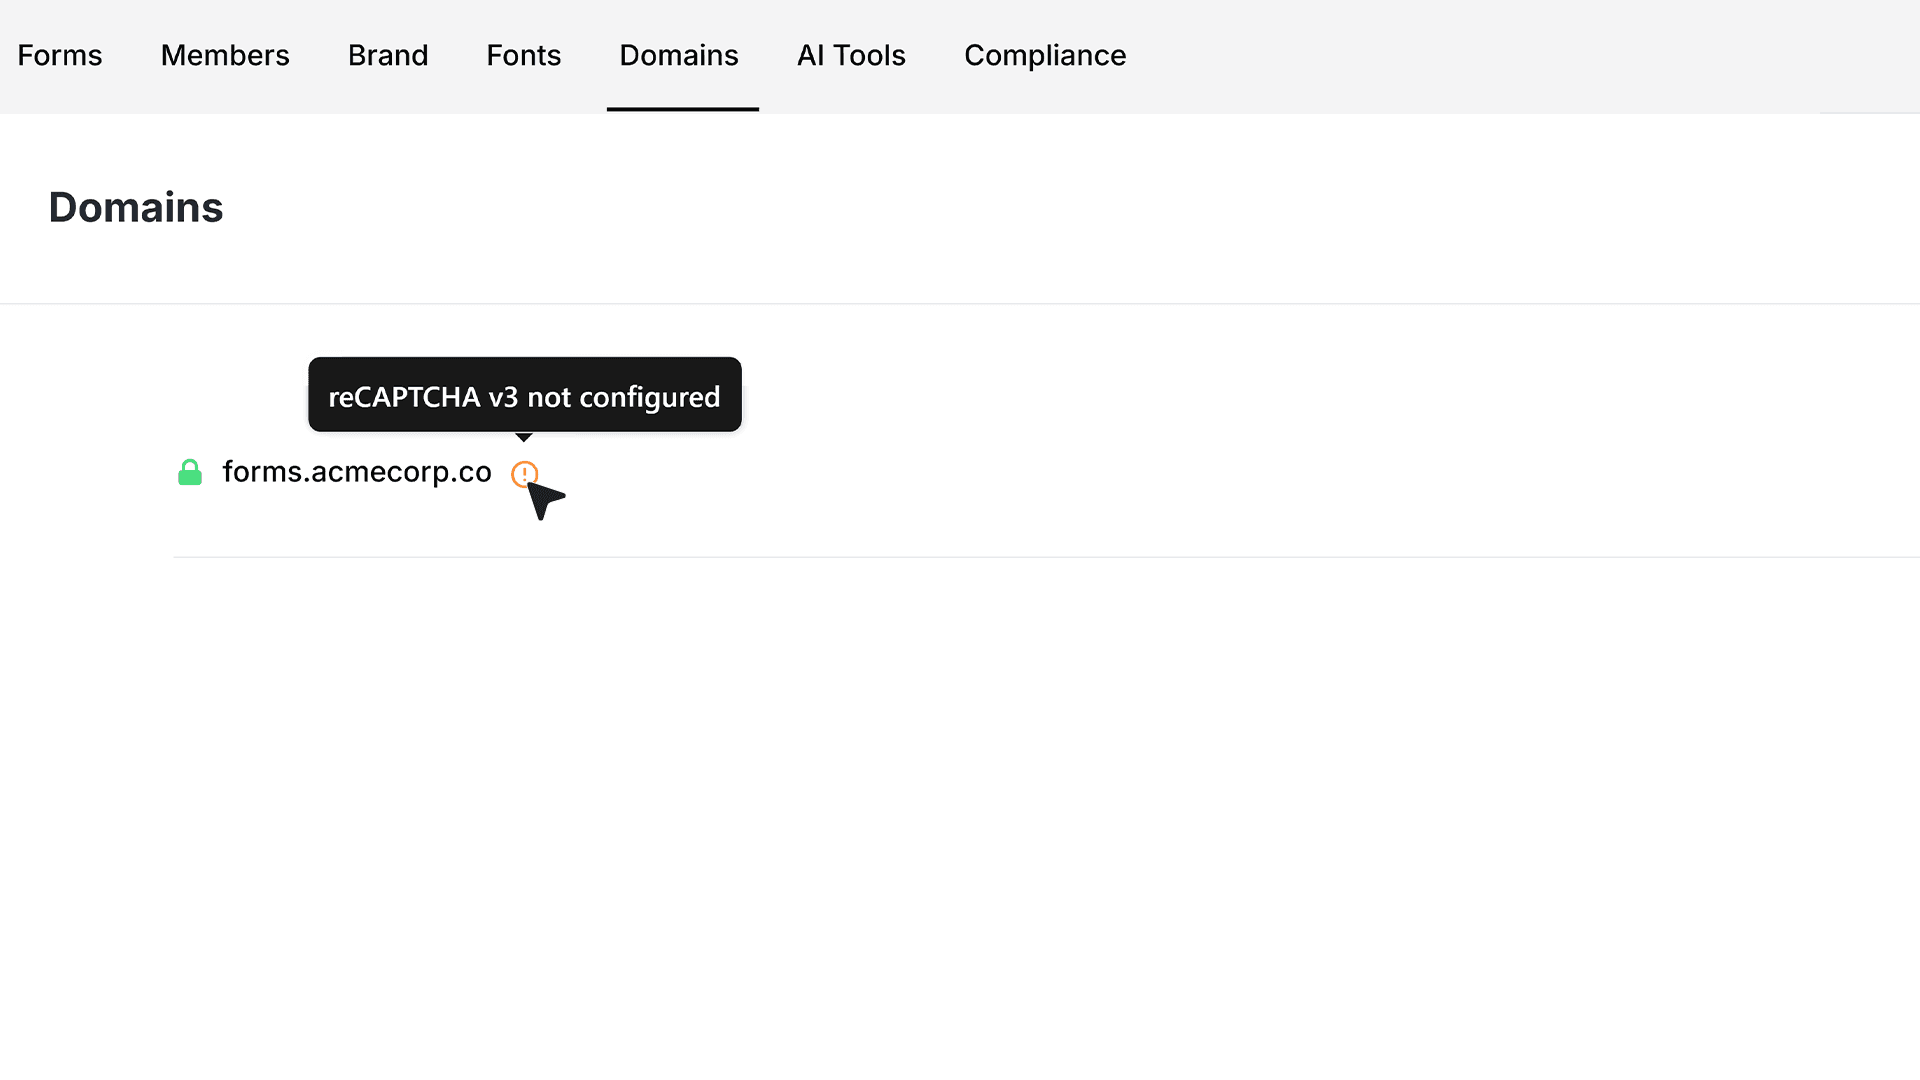
- When forms are published without a custom domain, MakeForms uses its own built-in reCAPTCHA protection. After you connect a custom domain, you must add your own reCAPTCHA v3 keys to keep your forms protected from spam.
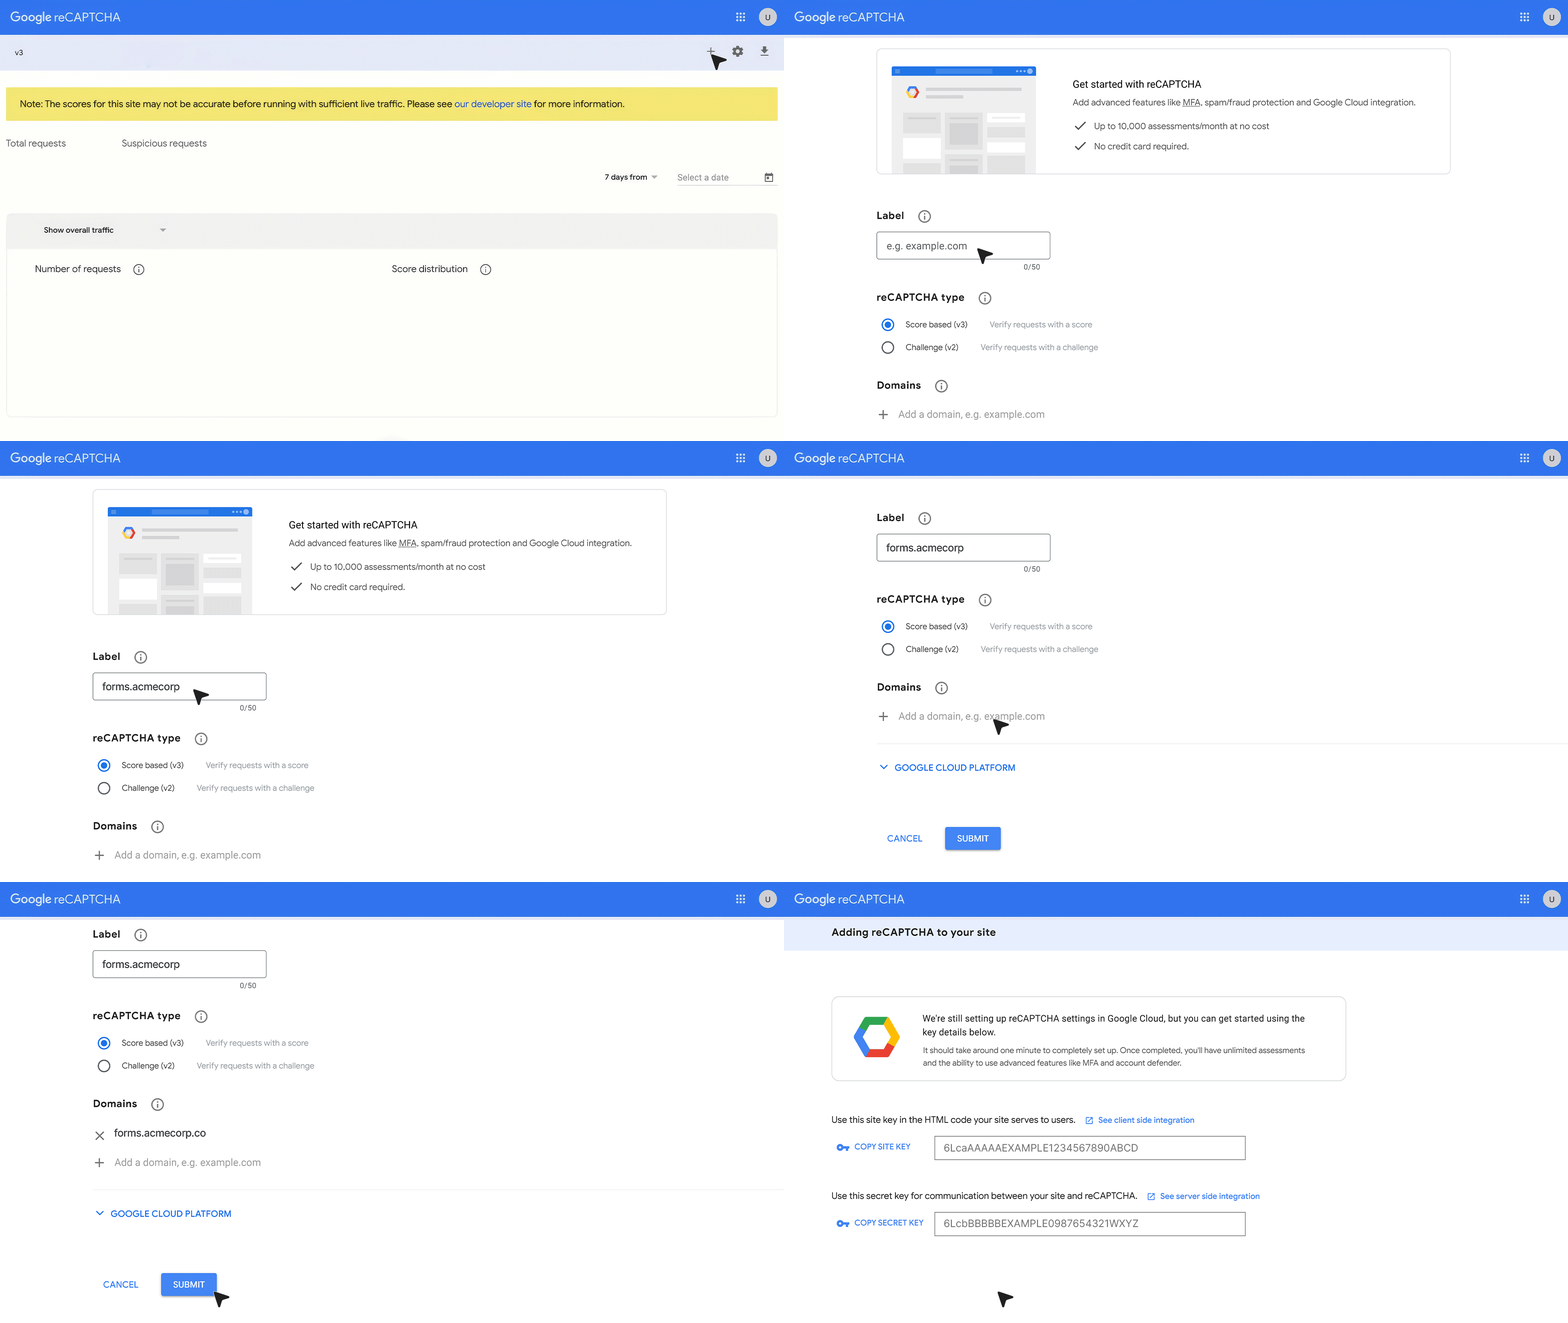
- To create the keys, open the Google reCAPTCHA dashboard, create a new site, Add a label, Choose reCAPTCHA v3, Under "Domains", enter your full domain, and then click Submit to generate the keys.
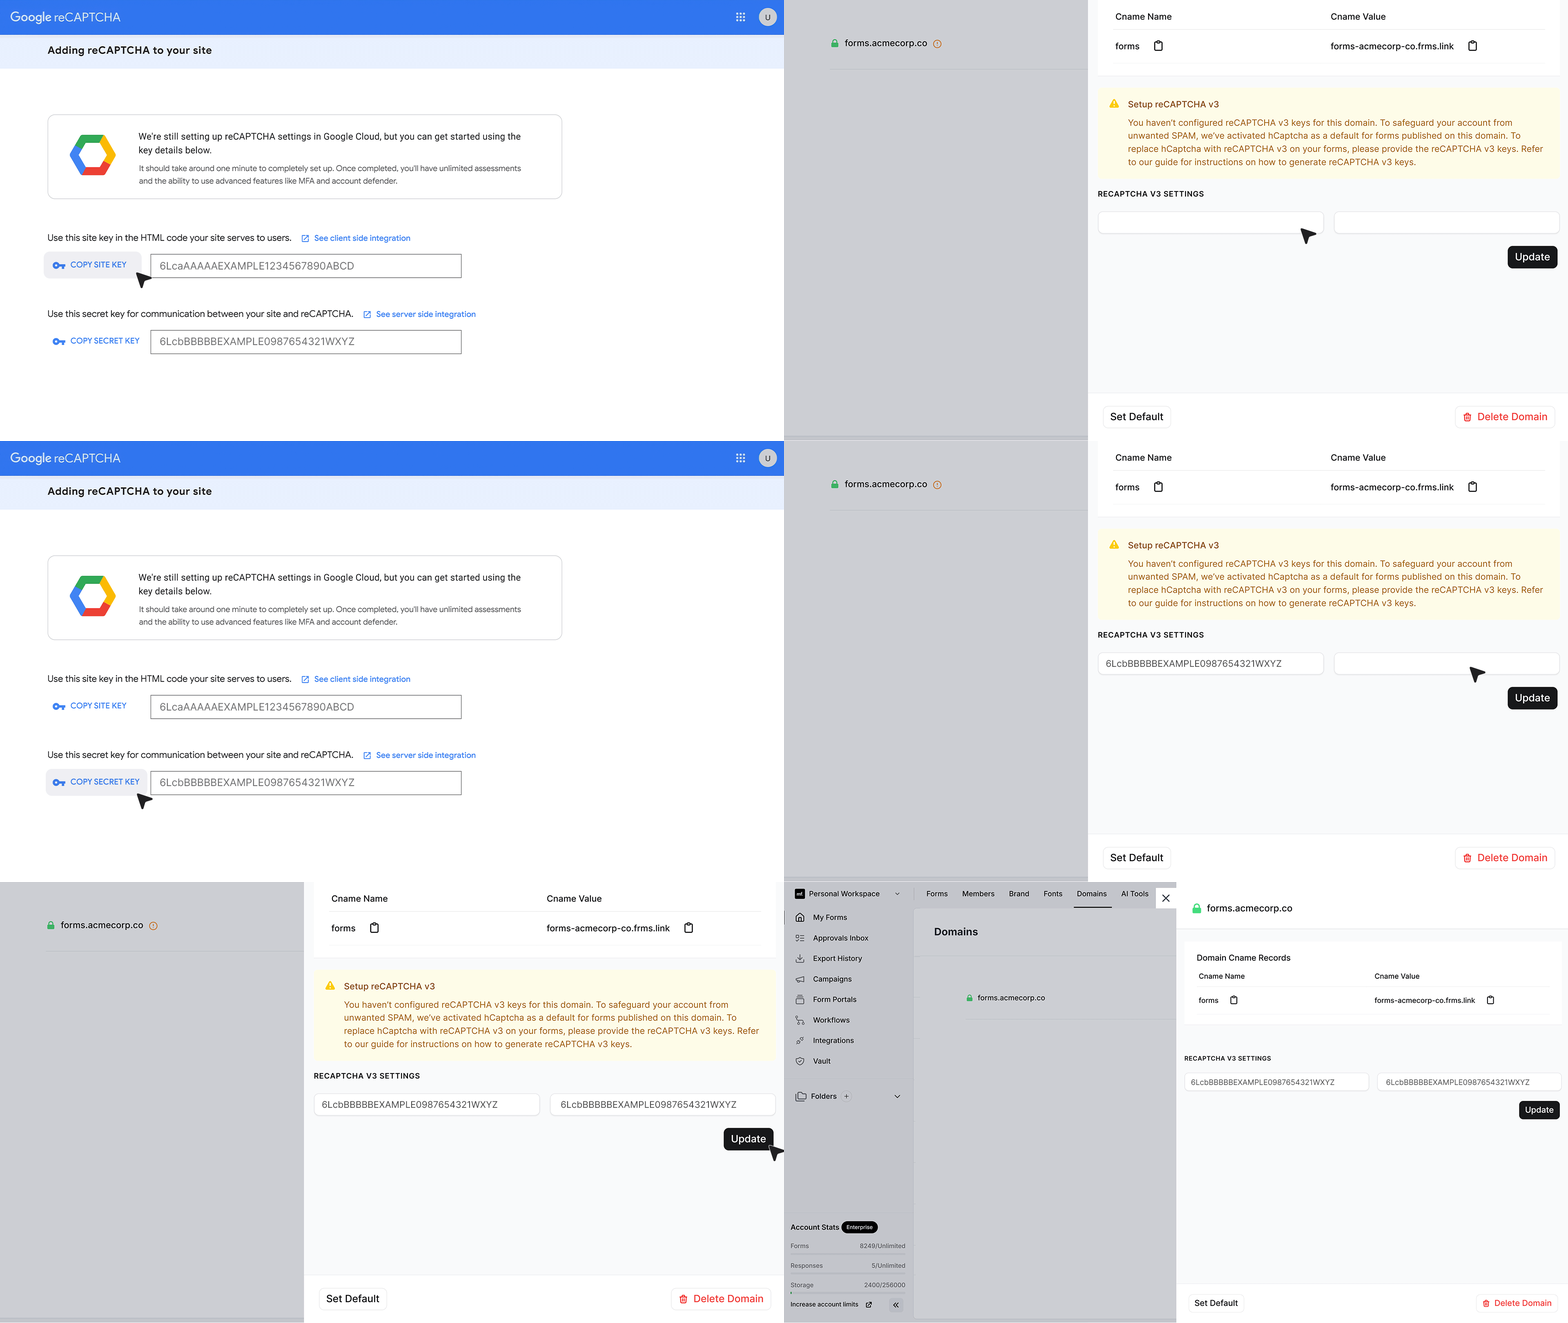
- Copy the Site Key and Secret Key into their fields in MakeForms and click Update. After saving, reCAPTCHA v3 activates automatically on your custom domain, giving your forms seamless, invisible spam protection. Now you’re all set to publish your form.
Publishing Forms on Your Domain
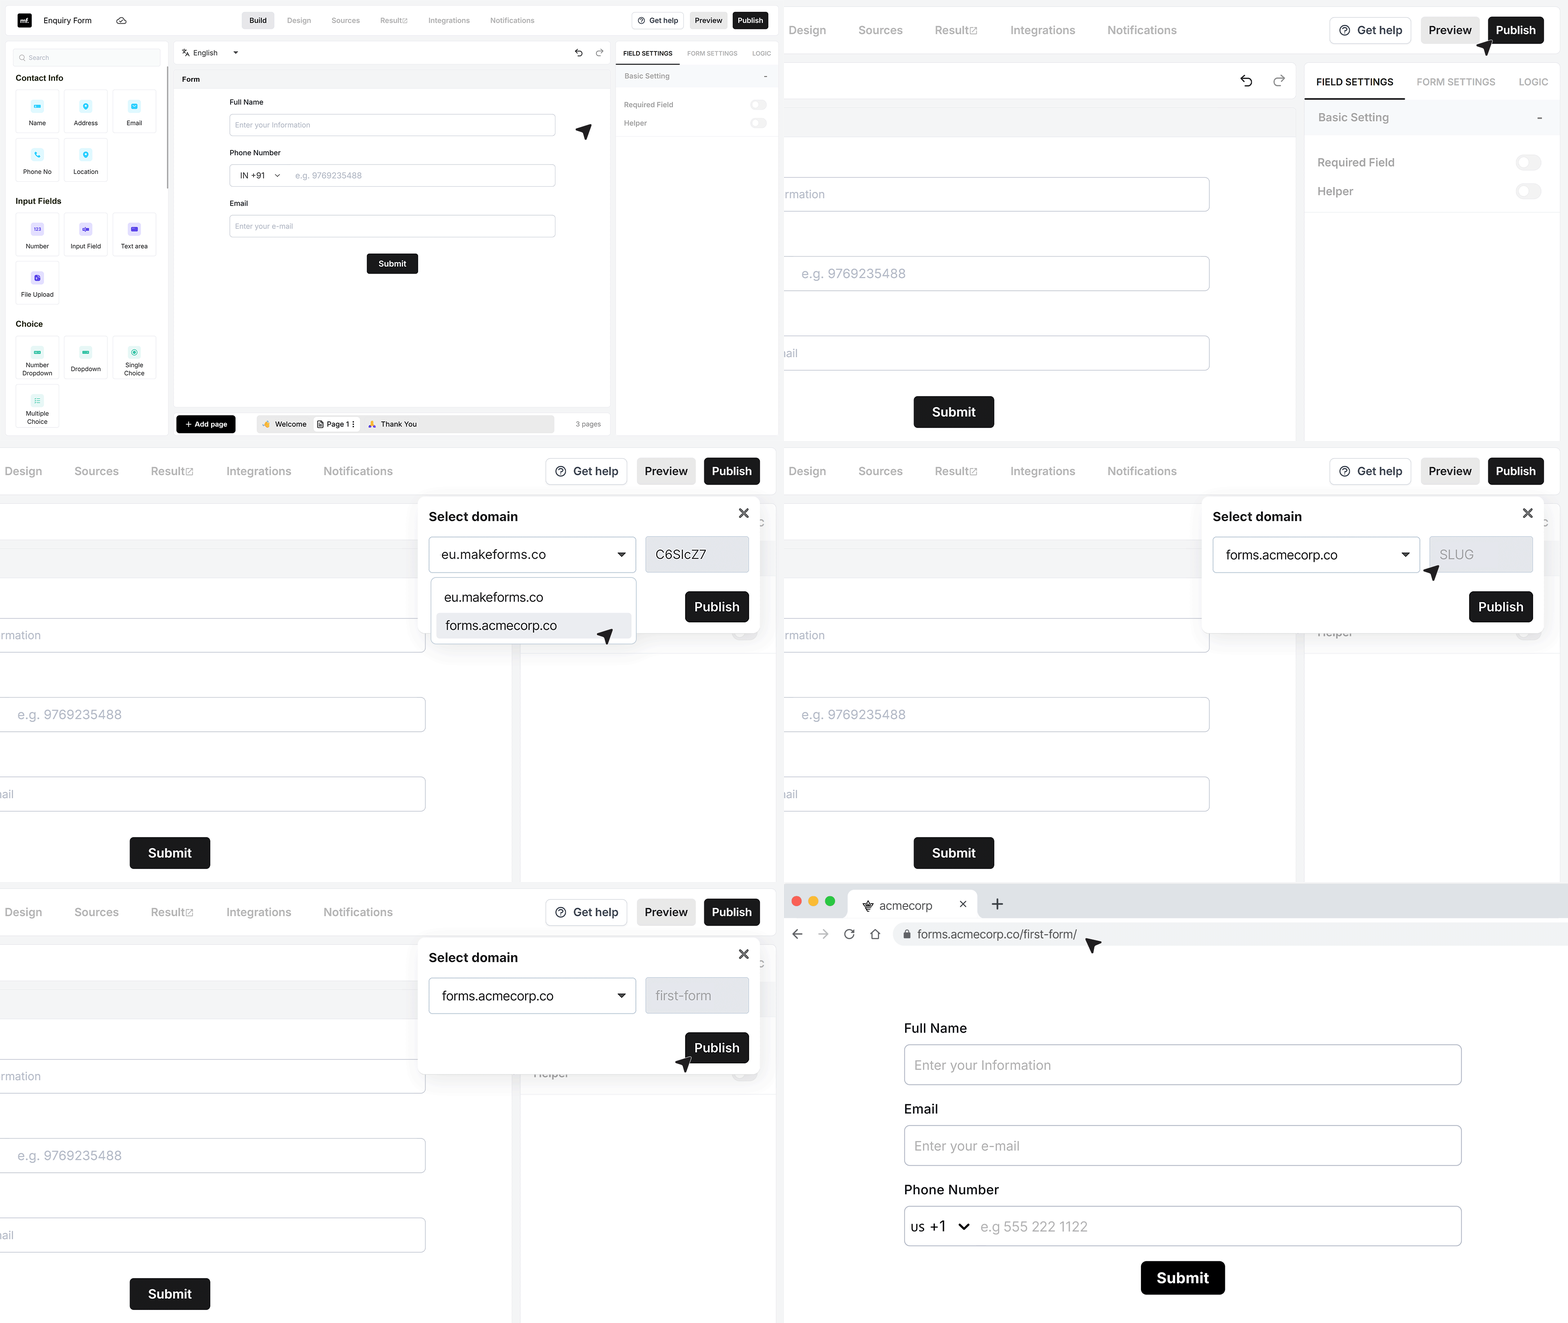
Go to your Forms Dashboard and open the form you want to publish. When you’re done building it, click Publish. You’ll see a dropdown with all the domains you’ve connected. Choose your verified custom domain, type a short URL slug like signup, feedback, or demo-form, and click Publish.
Your form will go live instantly on your custom domain — without any MakeForms branding.