Managing Members in a MakeForms Workspace
MakeForms allows you to collaborate seamlessly with your team by adding members to your workspace. Each member can be assigned a specific access level, giving you full control over who can view, edit, or manage forms and settings within your workspace.
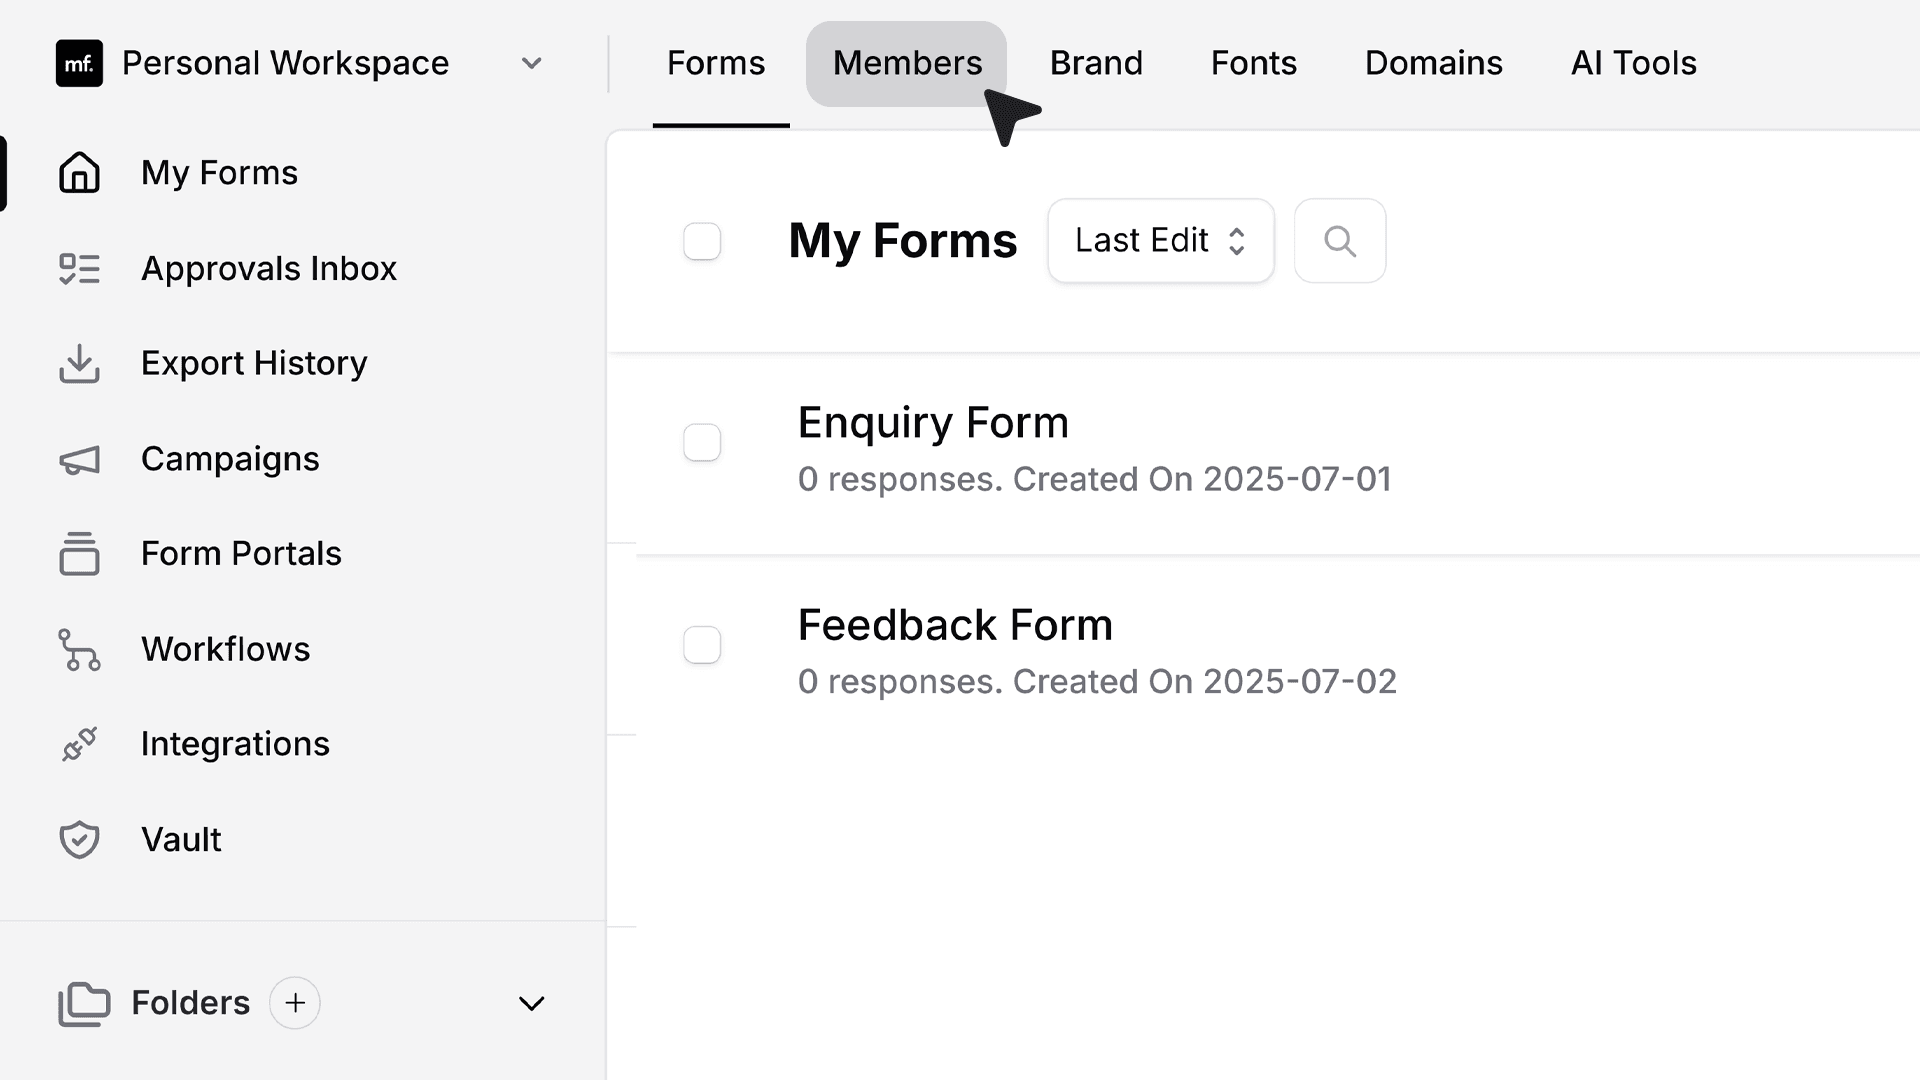
- To begin, open your workspace dashboard and click on the Members tab in the top menu.
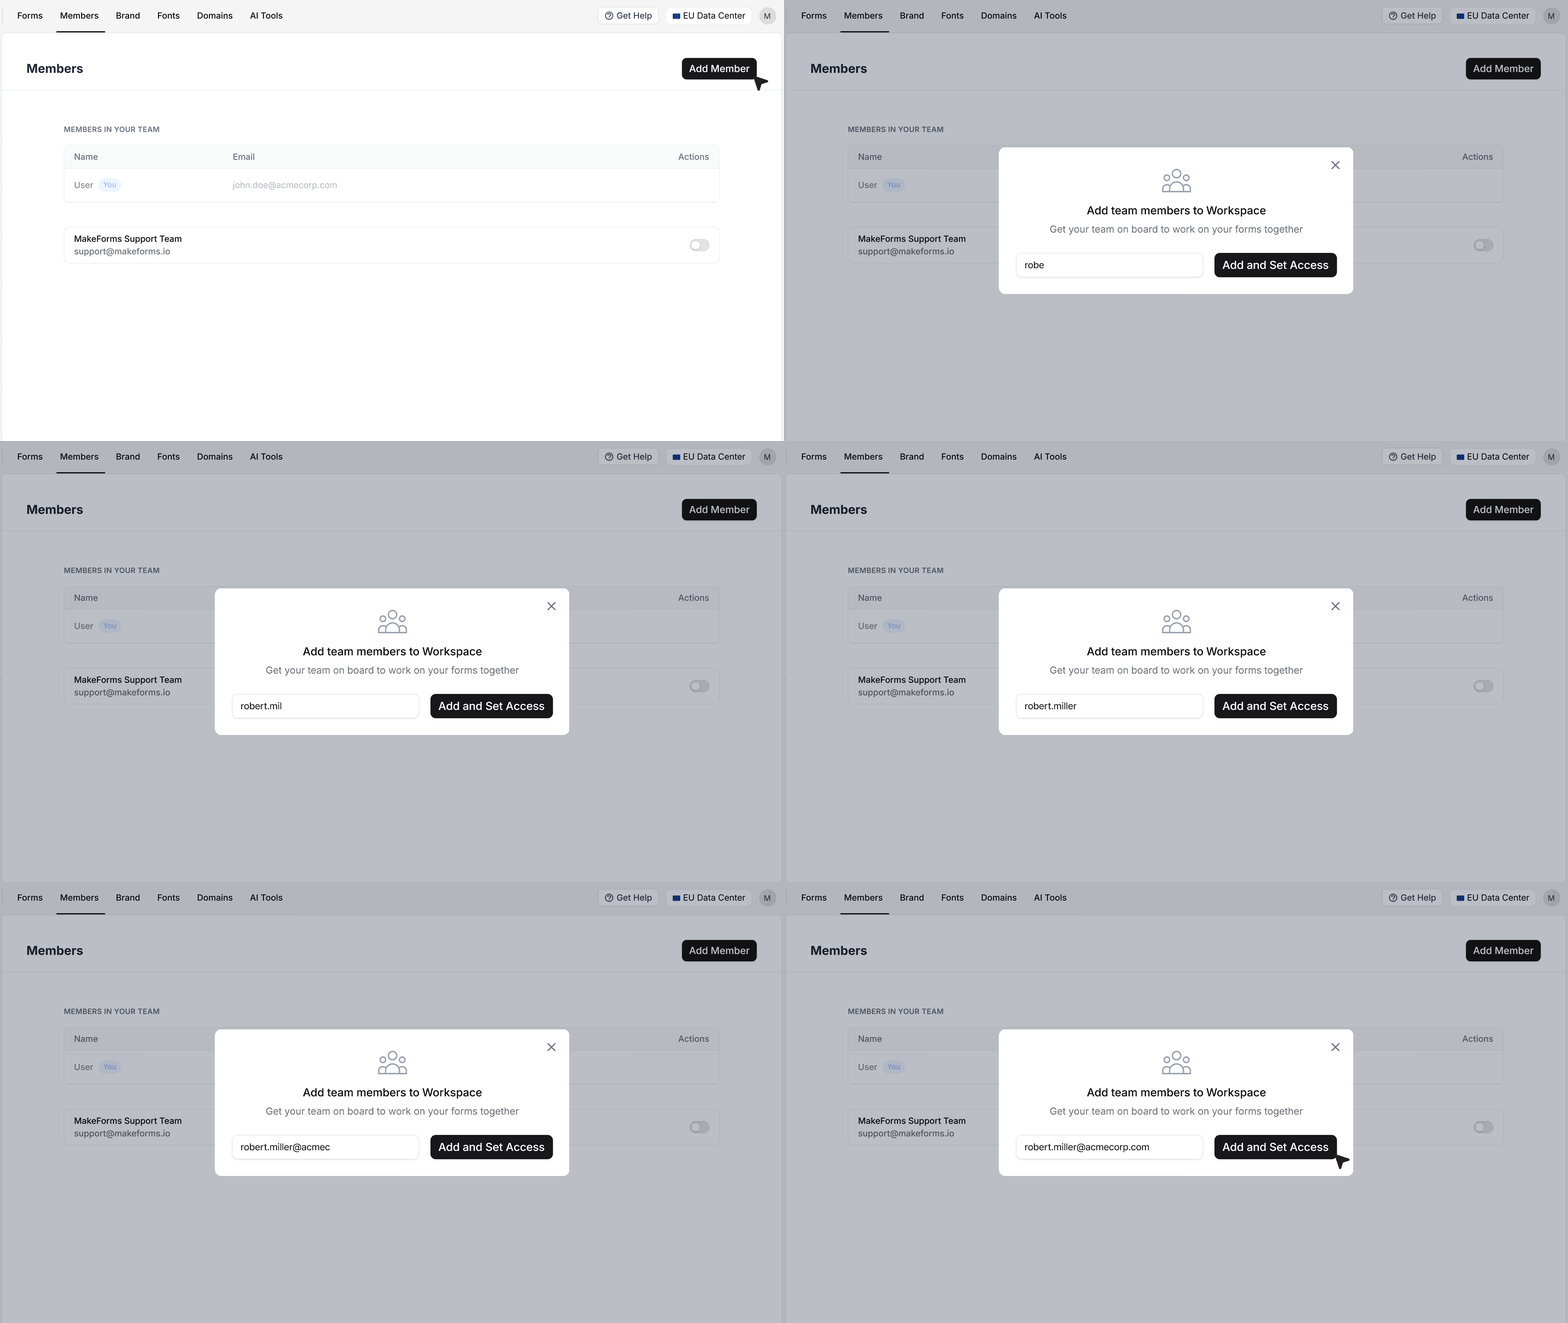
- On the Members page, click Add Member to invite a new team member. Enter the member’s email address and click Add and Set Access. This opens the access control window, where you can assign the appropriate permission level for that member.
- You can now set access for the member. You can either choose a predefined role such as Full Access, View, or Manage (Except Delete), or manually define their permissions.
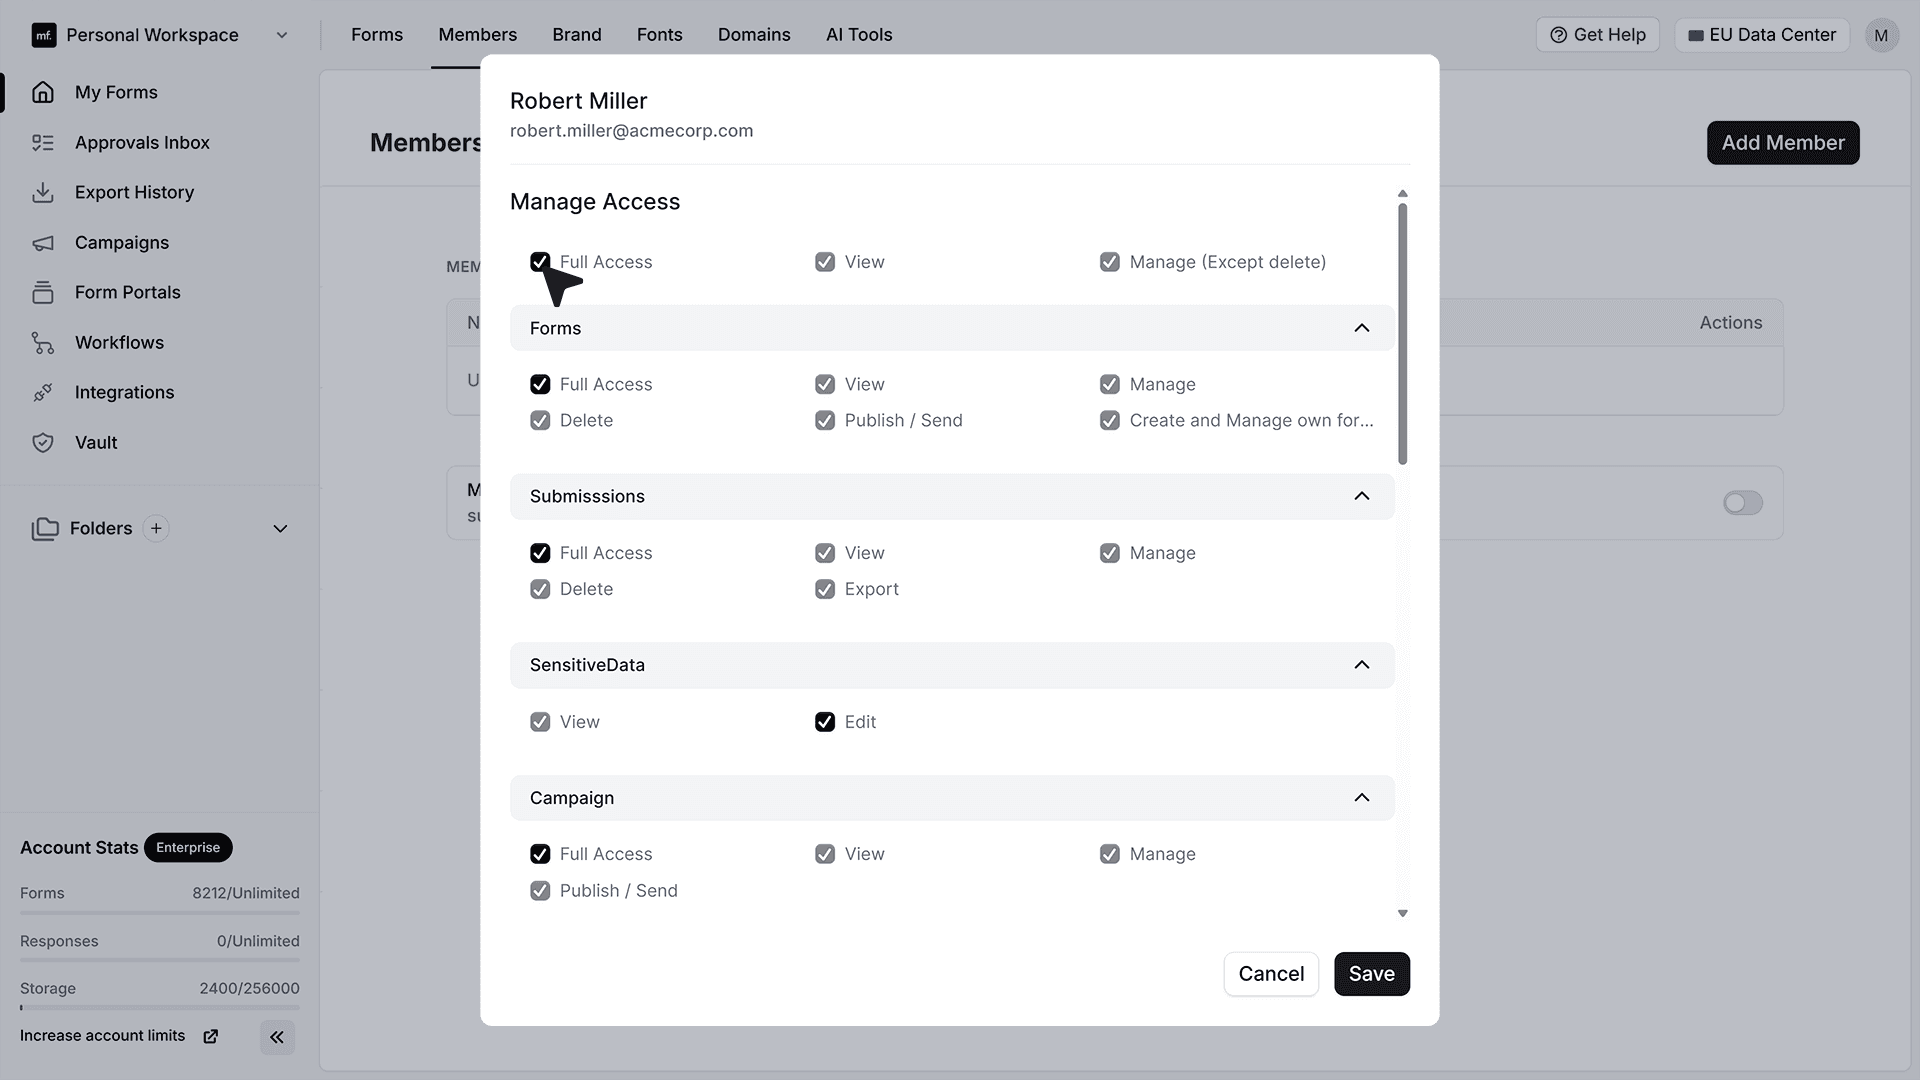
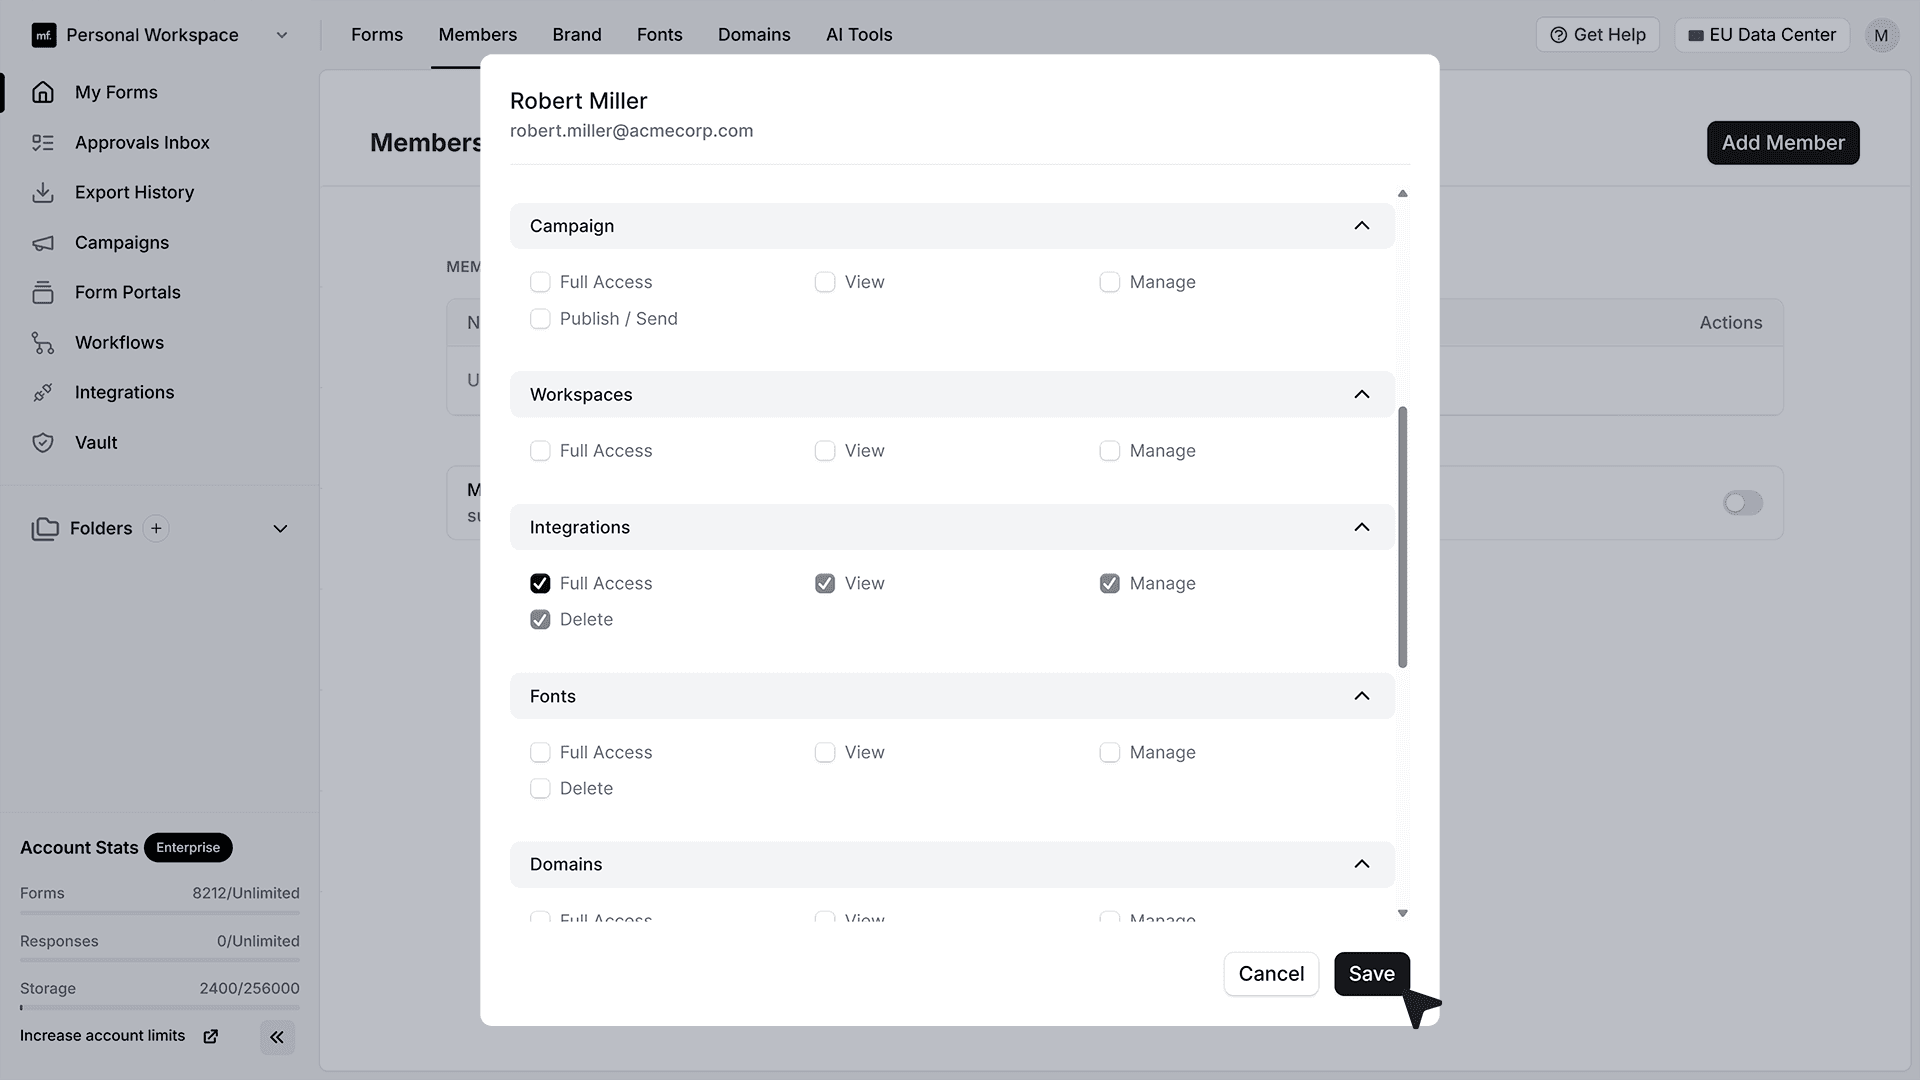
- In the detailed view, you can select specific permissions — such as View, Manage or Delete— across different sections, ensuring each member has the right level of access.
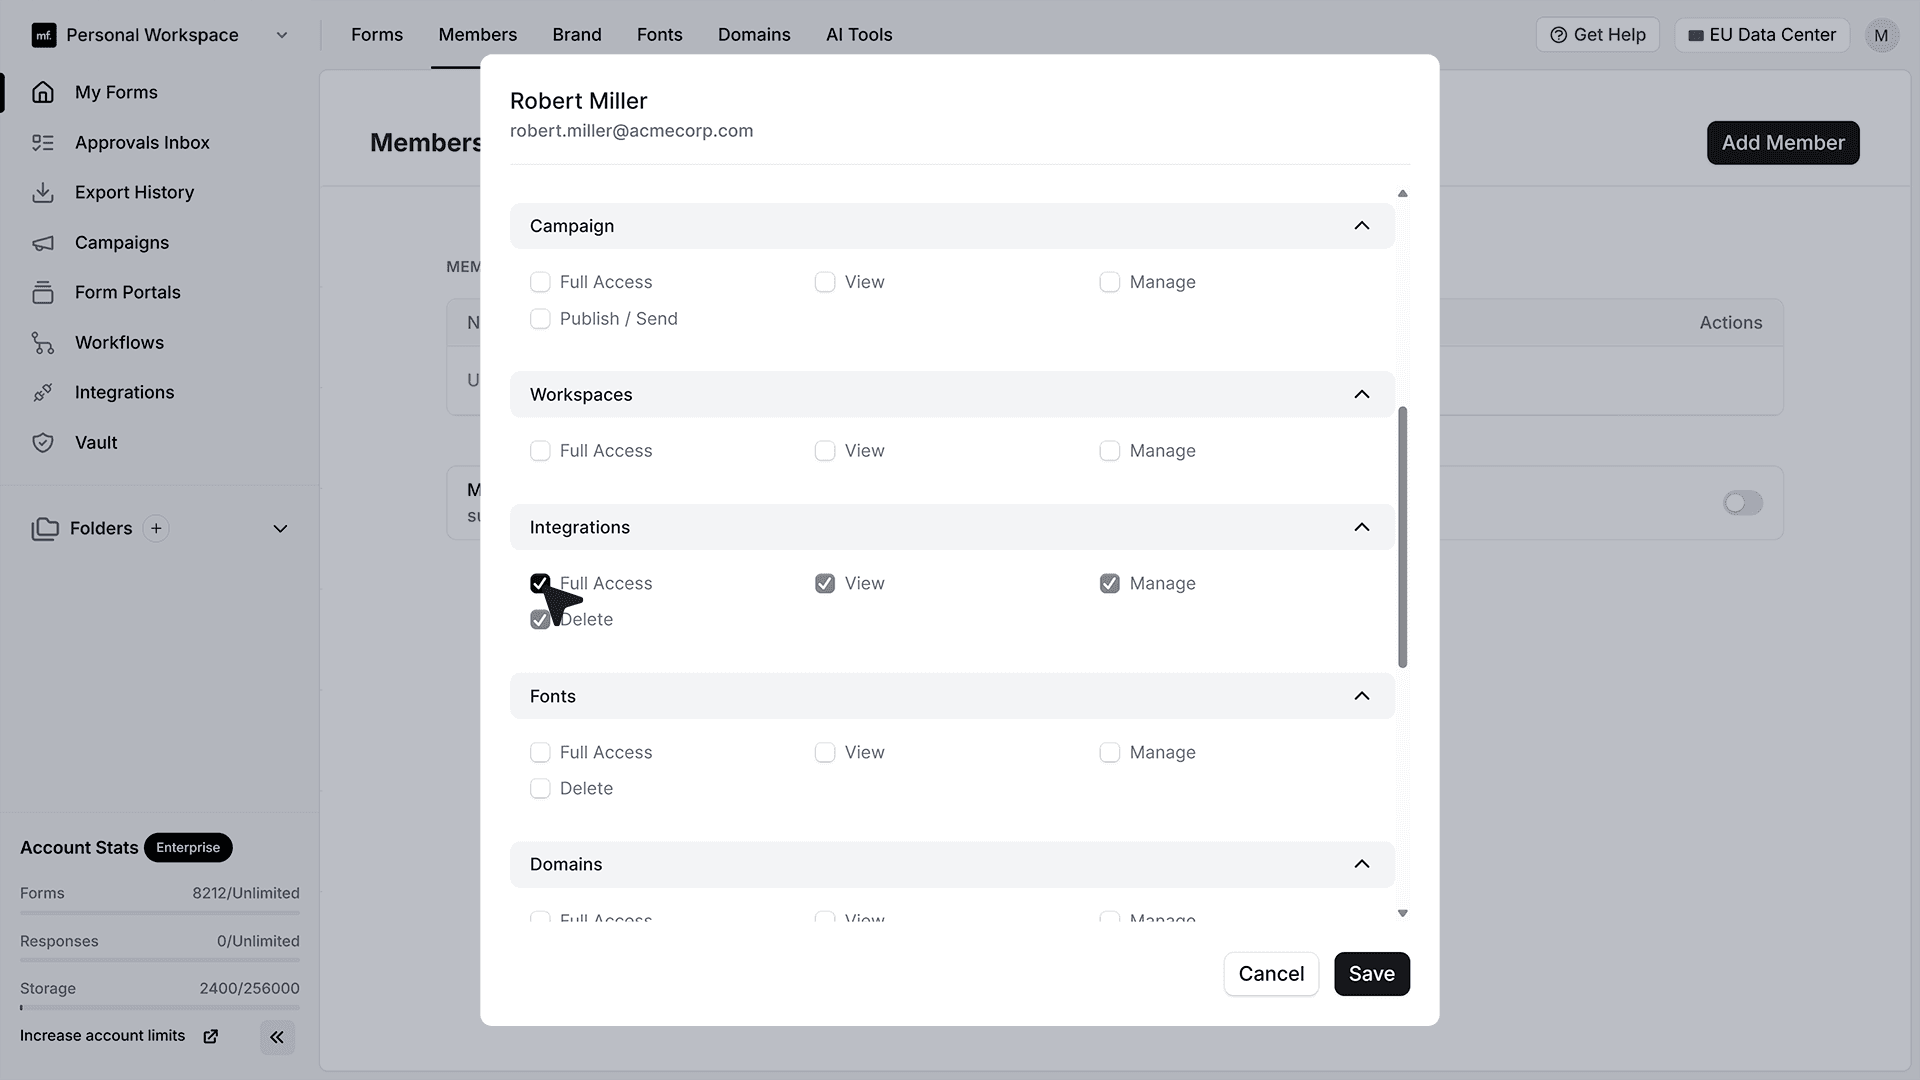
- After choosing the appropriate level, click Save to send the invitation. The invited member will receive an email with a link to join your workspace.
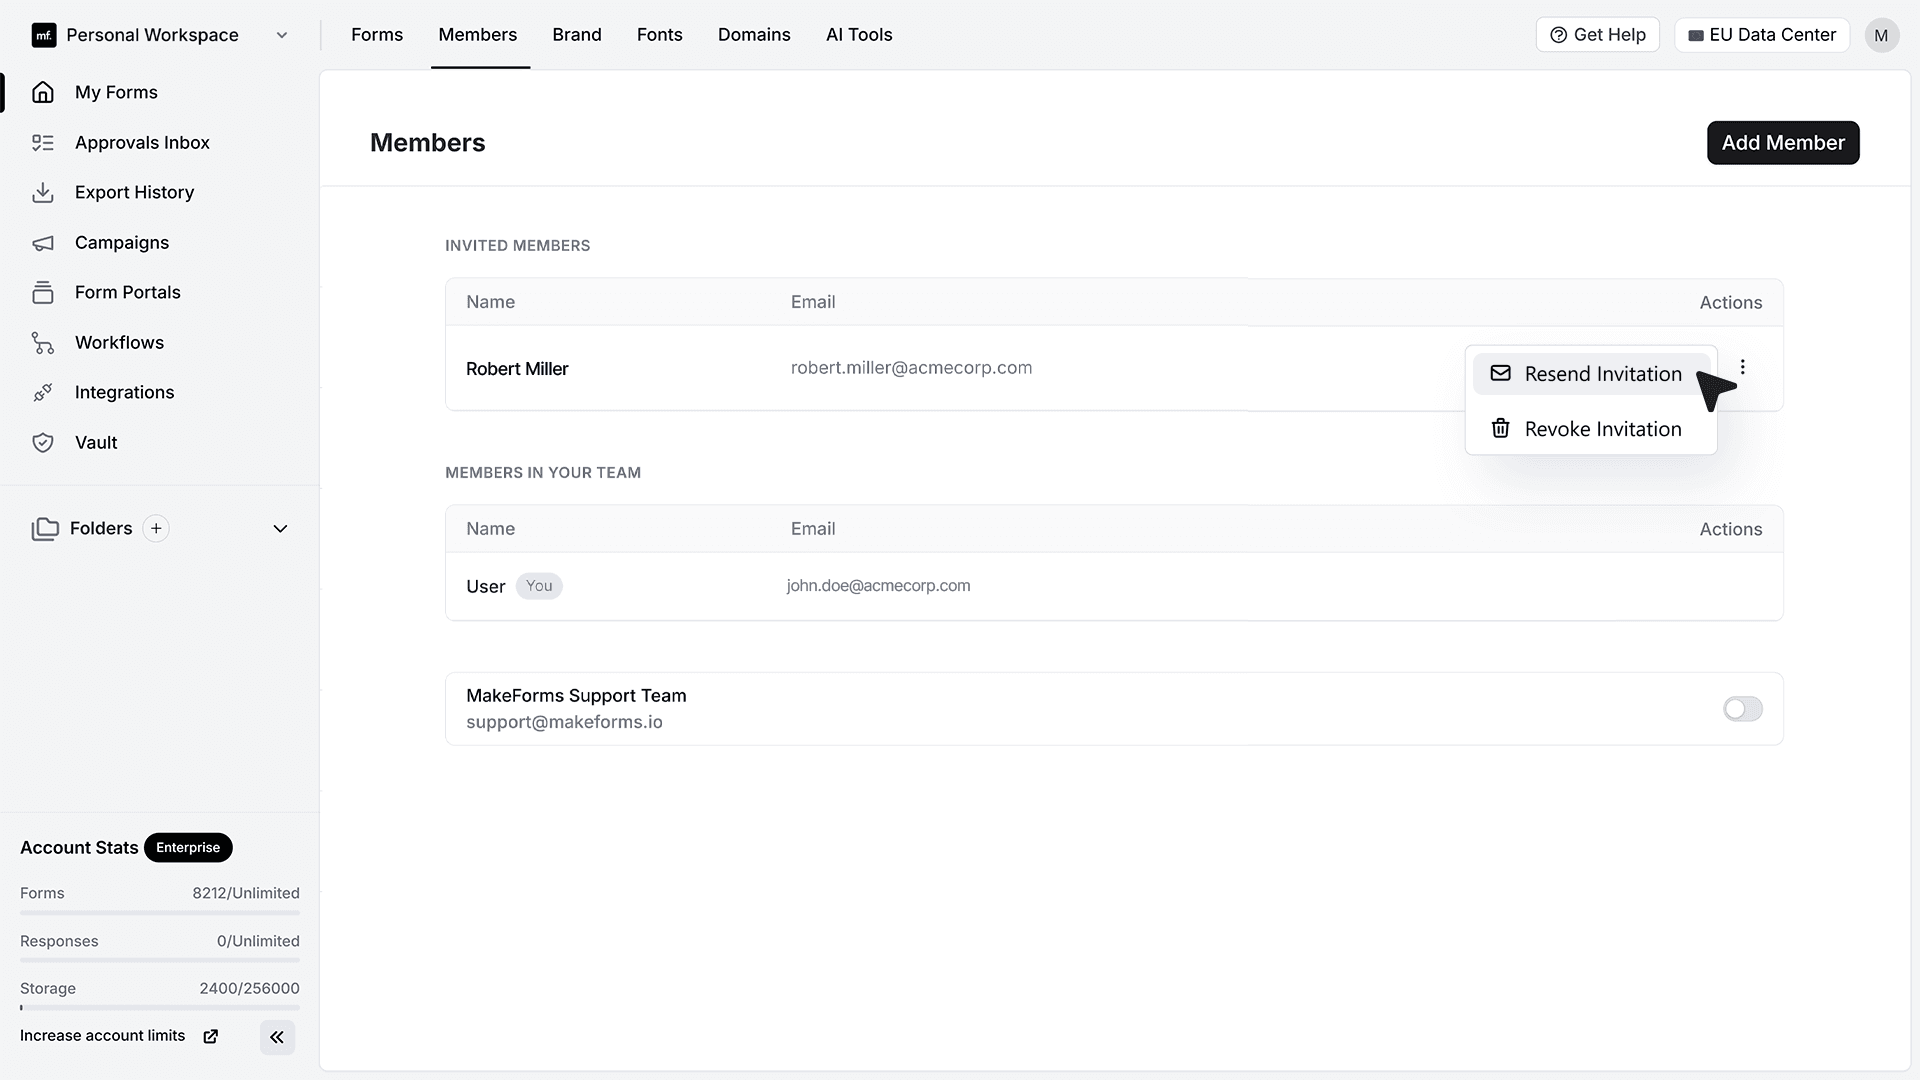
- If a member hasn’t accepted their invite, you can resend it or revoke it anytime before they join. This helps you maintain control over who has access to your workspace.
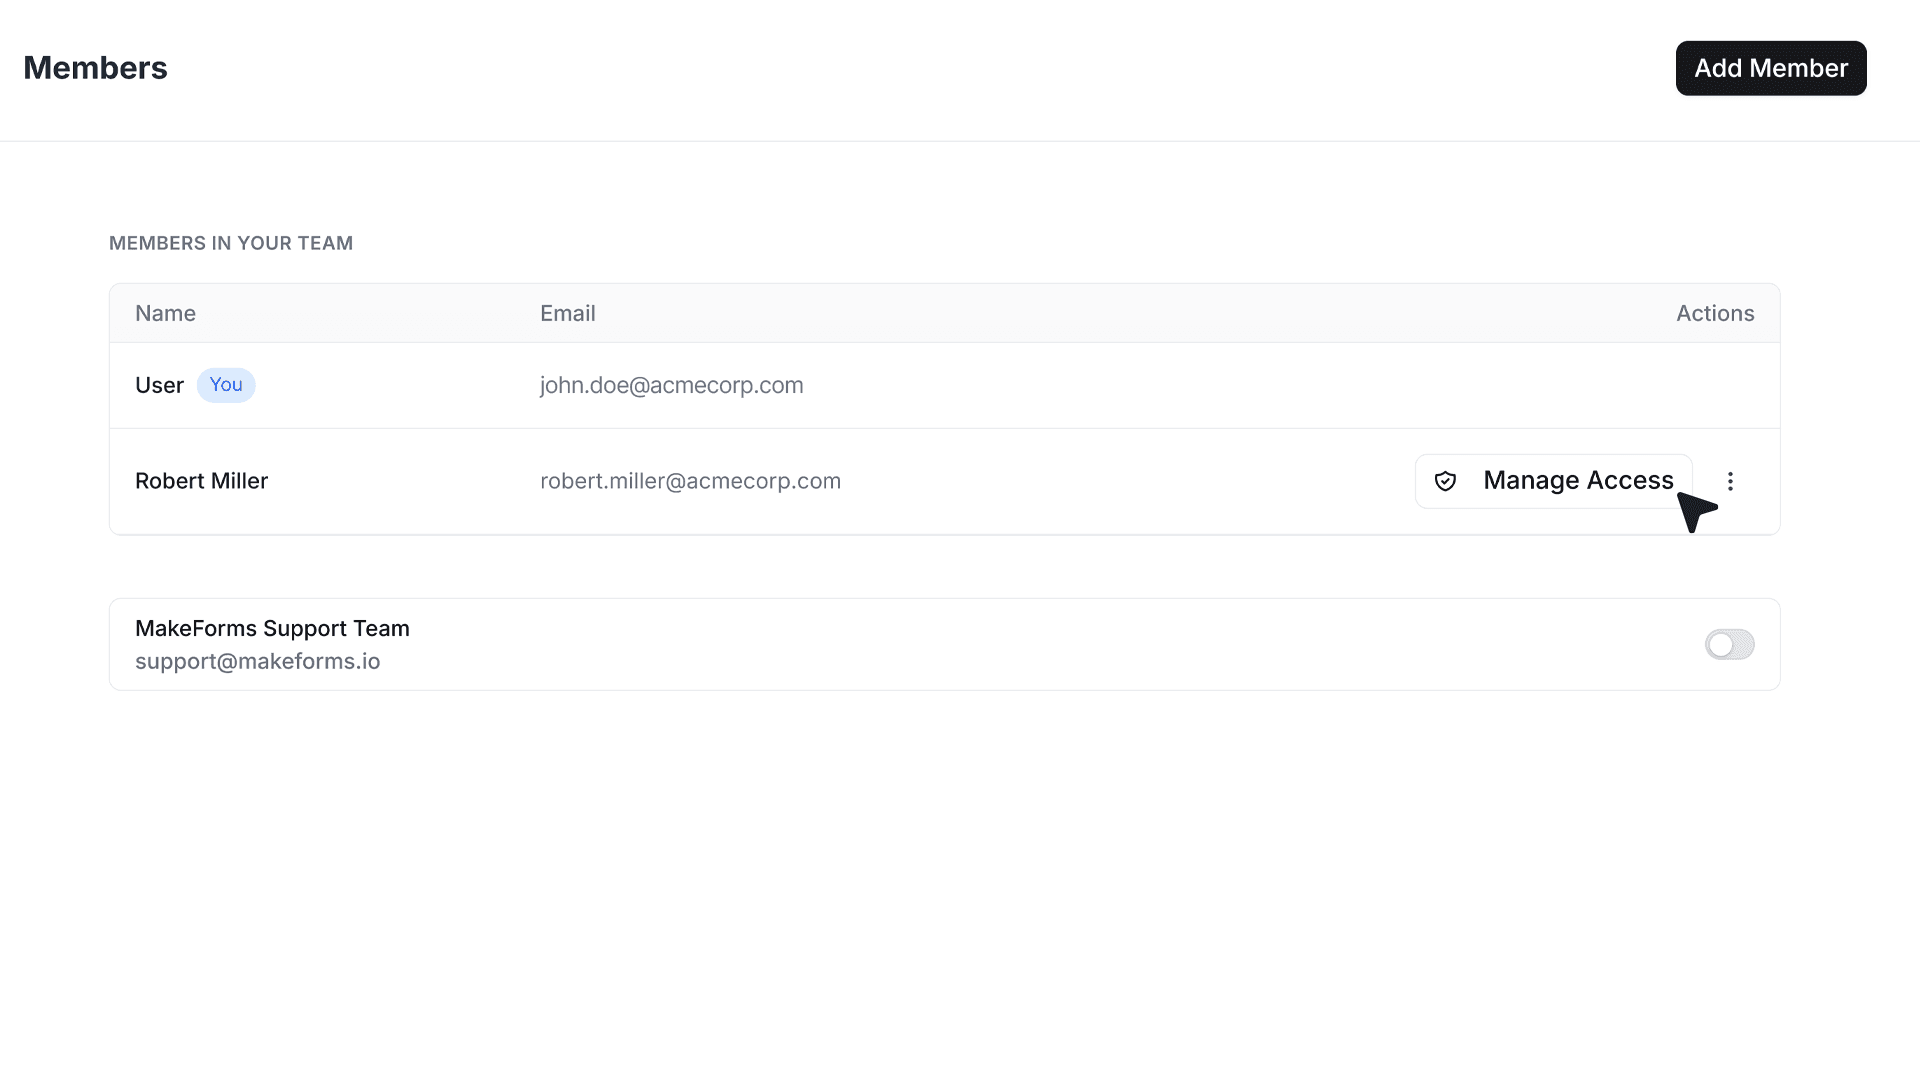
- Once a member has joined your workspace, you can update their access level at any time.
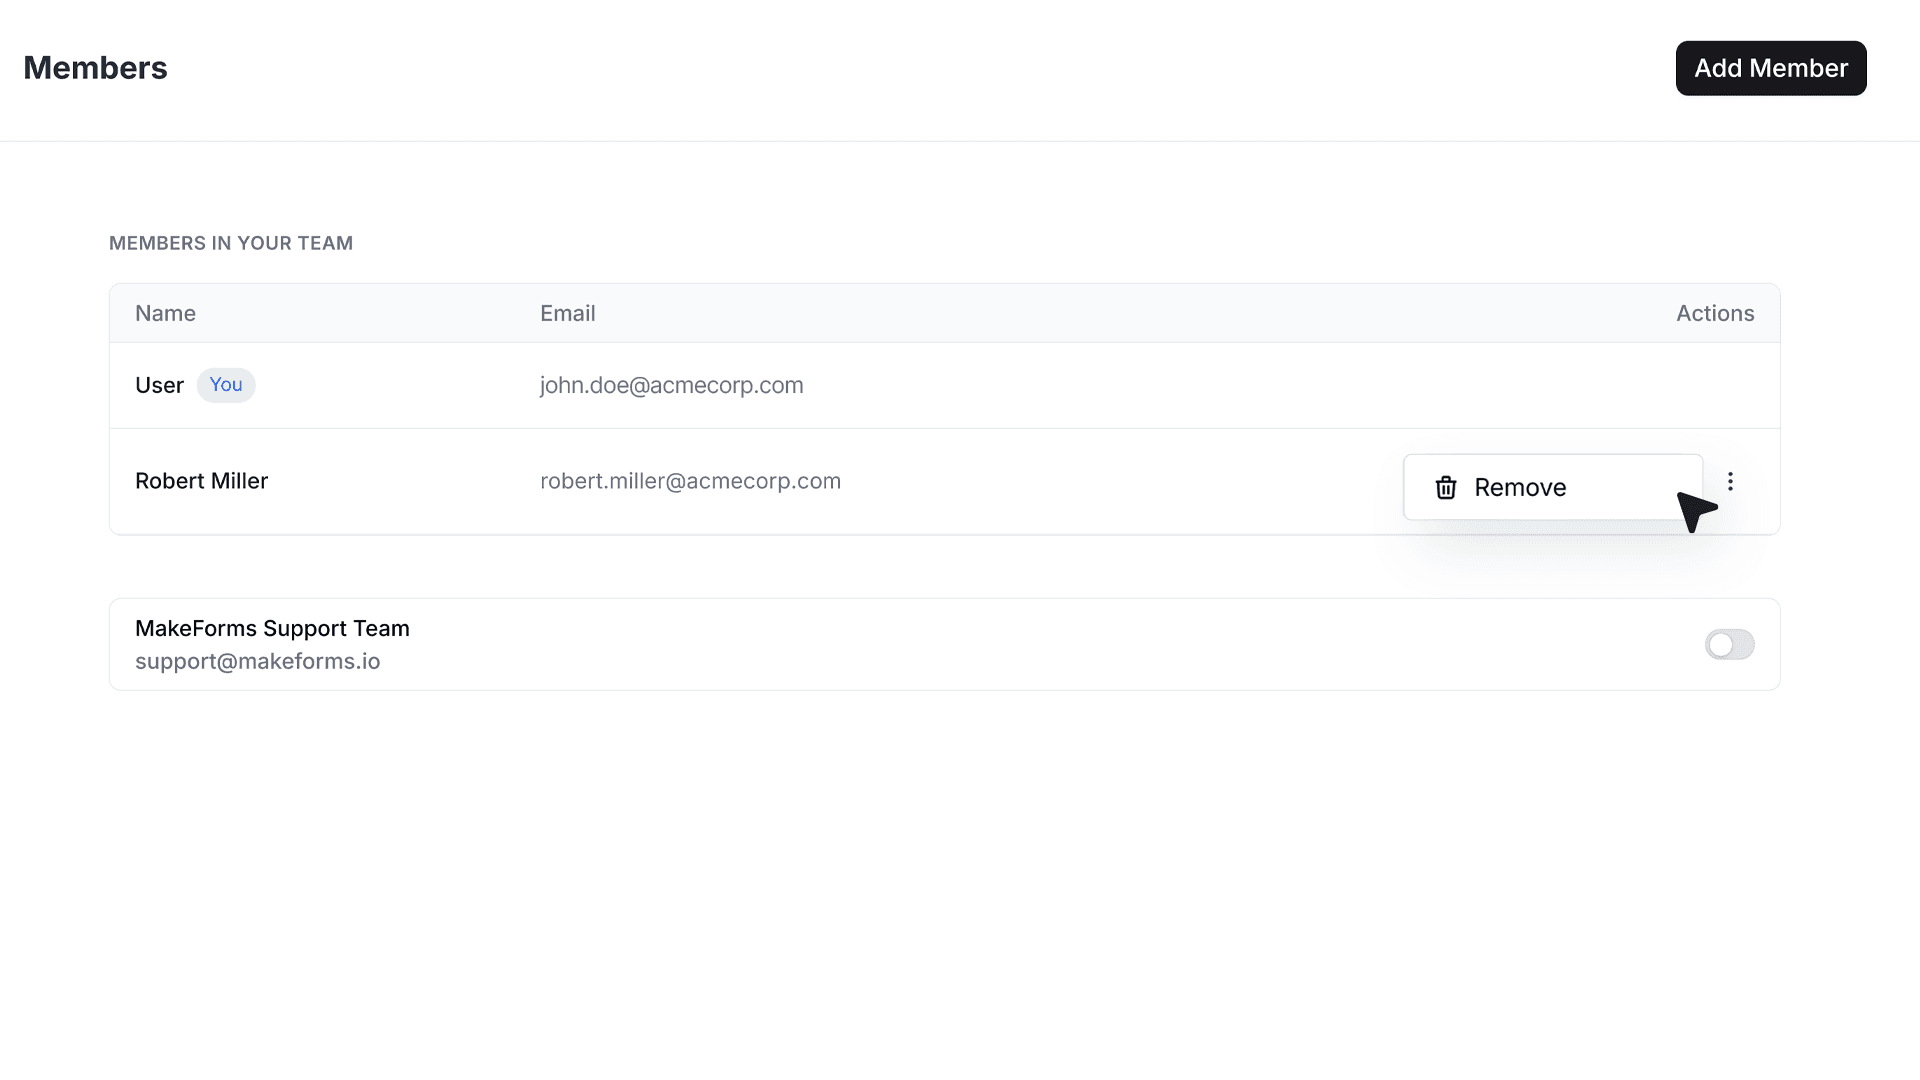
- If a member no longer needs access, you can remove them directly from the Members list. Removing a member instantly revokes their access to all forms and data associated with that workspace.