
If you’ve ever spent hours copying data from offline forms into spreadsheets, you need an online form builder.
If your inbox is overflowing with scattered customer requests, orders, feedback, you need an online form builder.
If you’re still using Google Forms, and chasing people for incorrect or missing details, you need a real online form builder.
Creating online forms has truly become easier than ever, even if you’ve never done it before. It’s time to make the switch.
An online form builder simplifies the entire process of offline forms and turns them into organized, trackable, easy to use online forms.
Today we’ll cover everything you need to know about online form builders:
- What an online form builder is and how it works.
- What to look for when choosing a form builder.
- How to create forms step by step using MakeForms.
- How to choose a form builder for your business.
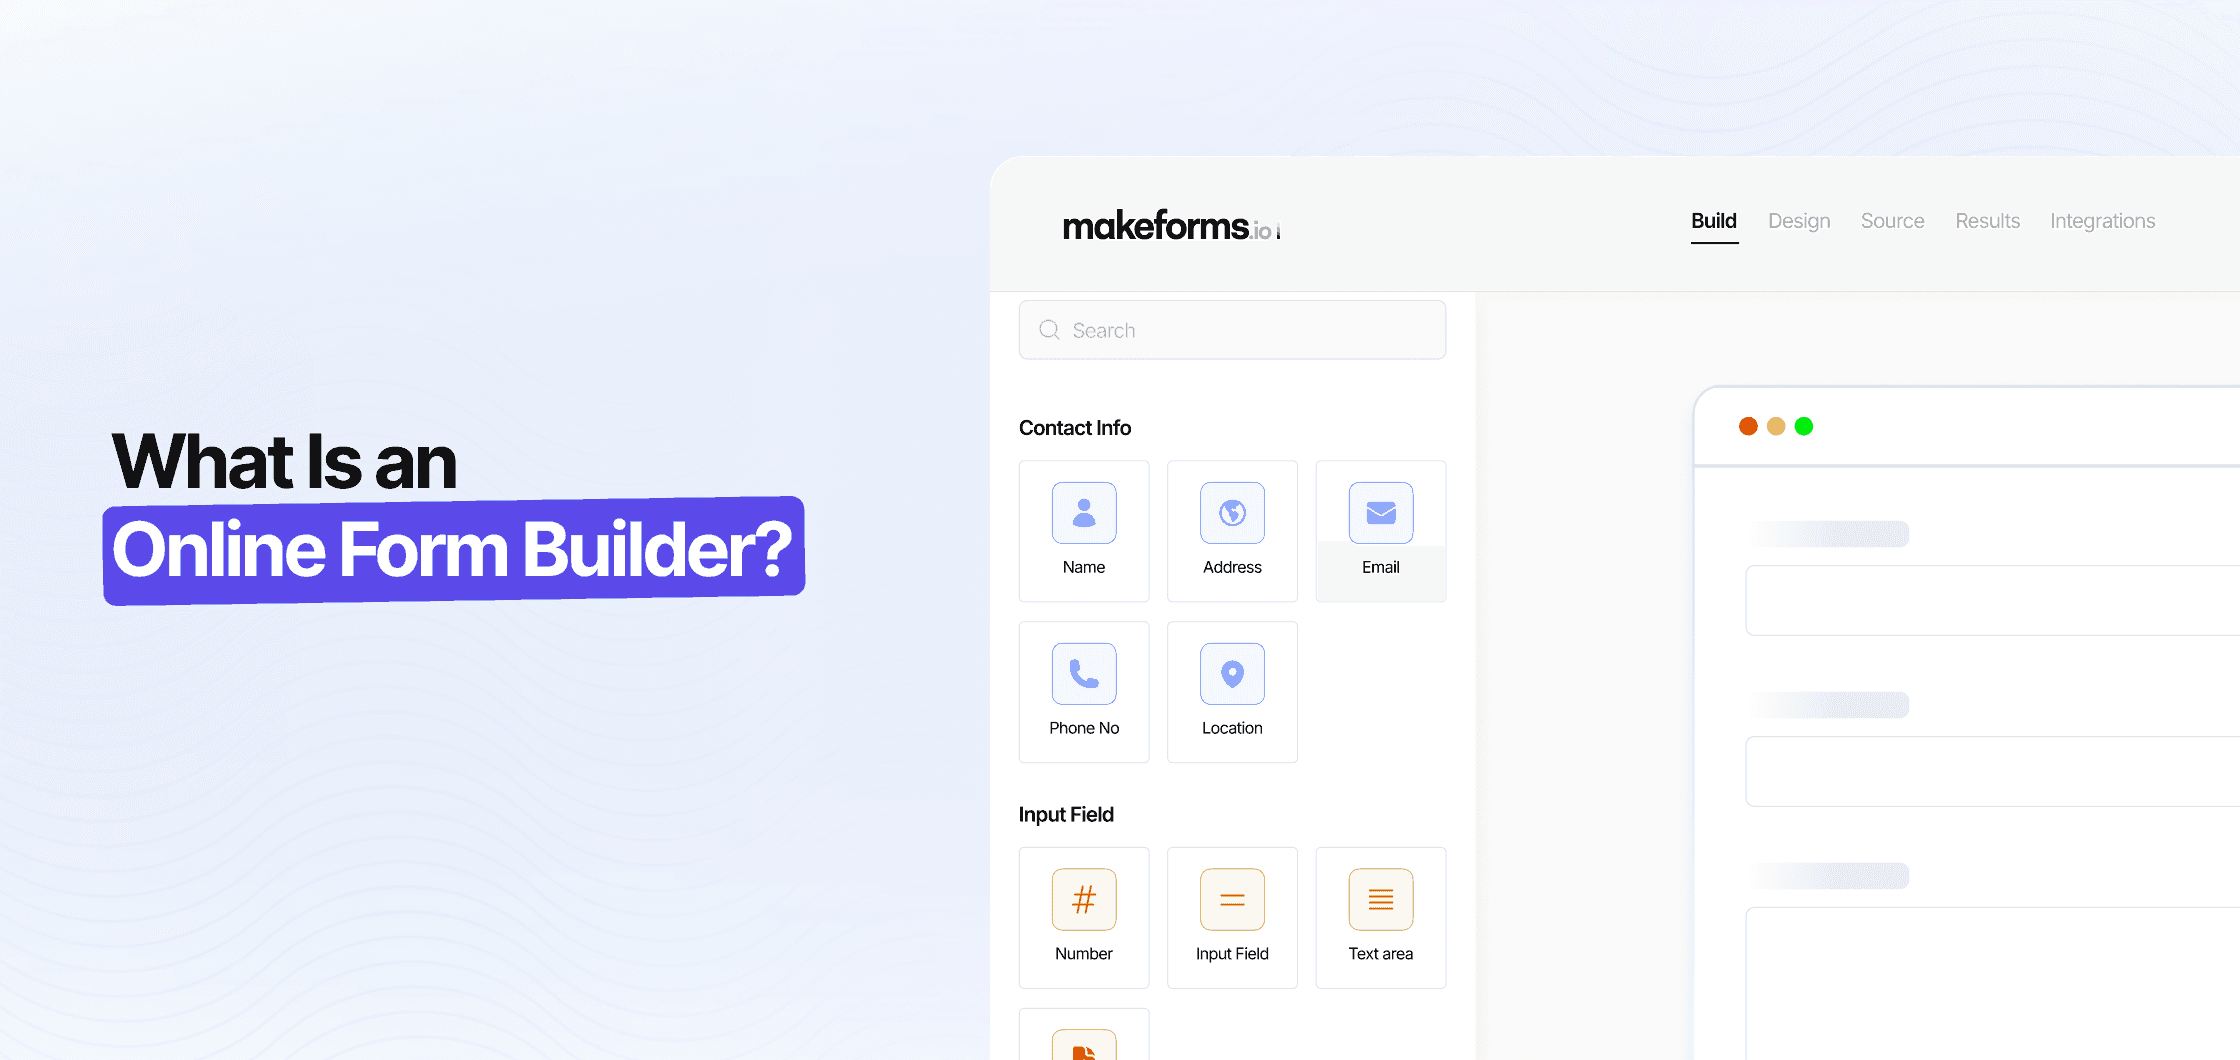
What Is an Online Form Builder?
So, if you’re familiar with Google Forms, then an online form builder should seem like a natural upgrade. Modern form builders provide a simple drag-and-drop workspace where you can quickly add questions, multiple-choice options, dropdowns, or file upload fields. You can also customize the layout, fonts, and colors to match your brand. To choose the right tool for your needs, a
form builder comparison can help you evaluate features, customization options, and ease of use, ensuring a better fit for your workflows.
Literally, anyone can create a professional form quickly and easily. A form builder gives you full control to design, publish, and manage forms.
For eg: A small business wants to gather customer feedback after a service or product experience. Using an online form builder, they can create a branded feedback form in minutes, embed it to their website or share via QR code, and see all responses collected in one dashboard, in table, graph, and chart form.
How Online Form Builders Work
Using an online form builder is simple and does not require any coding.
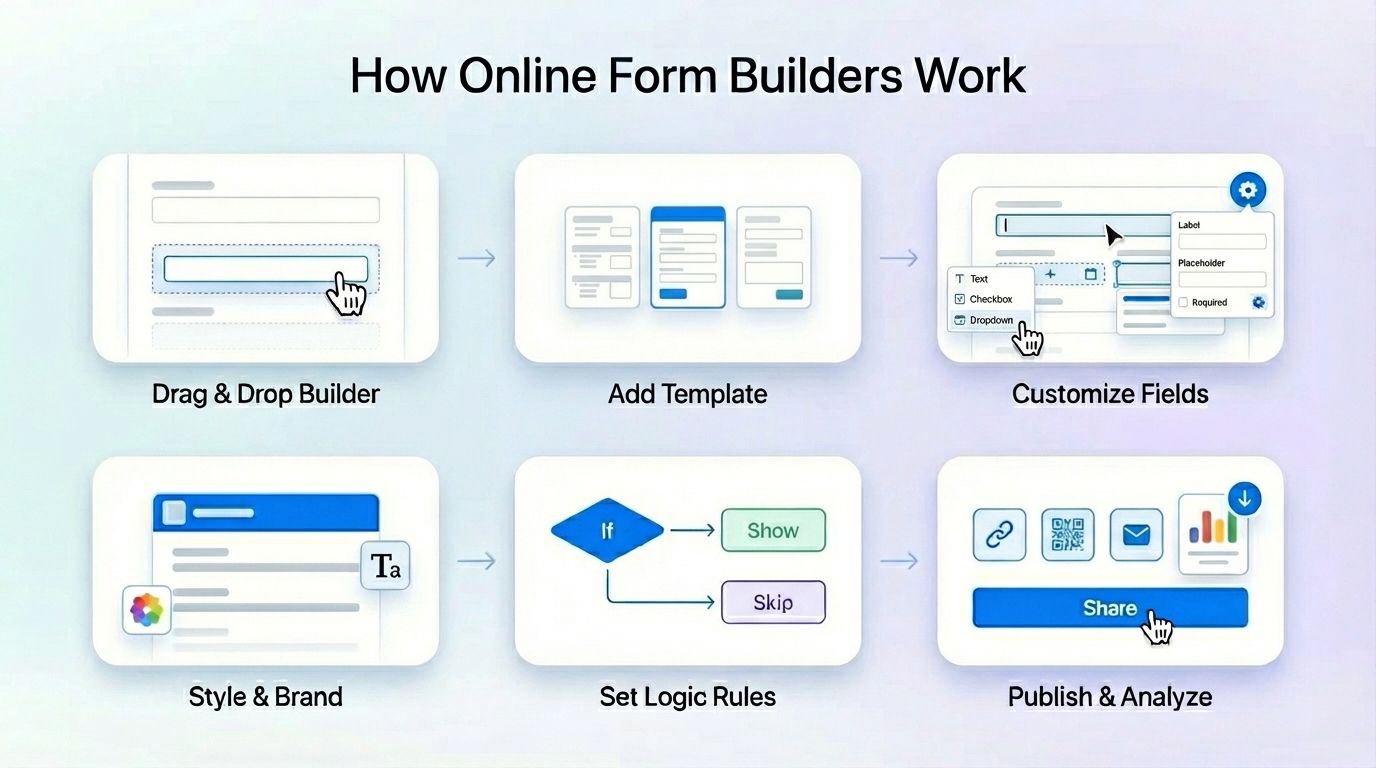
Here’s what you can expect:
- Drag and Drop Workspace: Most online form creators provide a visual workspace where you can drag and drop fields to create a form quickly.
- Start with a template or blank form: You could pick a ready-made template or even use AI to build a form with just a prompt.
For eg: Create a registration form for my workshop titled “How to Choose the Right Home Loan”, collect full names, verified phone numbers, and add a payment section at the end.
- Add and customize fields: You should now have a functional form in front of you which you can further edit. Add questions, remove questions, edit dropdowns, and more. You can adjust the text, labels, and order of fields easily.
For eg: Add a “Preferred time slot” question/field to a booking form.
- Design your form: Change colors, fonts, and buttons to match your brand. Most online form makers also let you add logos or images.
- Use logic/conditional rules: Logic makes your form respond to users’ answers. It shows only the questions that are relevant, keeping the form simple and easy to complete.
For eg: Ask a follow-up question only if a user answers “Yes” to an earlier question.
- Publish and share your form: Once your form is ready, share it via a link, QR code, email, or embed it on your website. All responses are collected automatically in a dashboard.
- Manage and analyze responses: A good form builder lets you review submissions, export data, and generates reports for you.
This is how online form builders can change a previously fragmented and disorganized process into an all-in-one efficient and professional workflow. With the basics of online form builders covered, let’s walk through creating your first form using MakeForms.
How to Create Forms Step-by-Step Using MakeForms
MakeForms is the online form building upgrade you’ve been waiting for. It offers a simple and clear interface with built-in security, automation, and AI. These features make creating forms quick and effortless.
Here’s a simple step-by-step guide to creating forms in minutes
Step 1 - Create Form
Click on “Create Form” in MakeForms. Next, select the type of form based on your goal. You will see several options:
- Standard form: a basic form for general purposes
- One-at-a-time form: displays one question at a time for better user focus
- Choose-a-template: pick a pre-designed form template to save time
- Lead form: designed to capture leads and contact information
- Import a backup form: use an existing form you’ve saved earlier
Pick a template to save time.
Step 2 - Build and customize your form
Use the drag-and-drop feature in the workspace to add and arrange fields exactly where you want them. While building your form, you can do the following:
- Add different types of fields: You can include multiple-choice questions, checkboxes, dropdowns, short or long text fields, or file uploads. These options let you collect the exact information you need from users.
- Edit labels and instructions: Each question can have a label and instruction. This helps users understand what you are asking and reduces confusion.
- Enable security: You can turn on OTP verification to ensure your form responses are genuine. MakeForms is GDPR, PIPEDA, TCPA compliant, which means it complies with data security regulations the EU, Canada, US, and more. For which you don’t need to take any extra steps.
- Apply logic or conditional rules: You’re going to love this one. Logic lets you make your form interactive. Show or hide questions depending on previous answers. This keeps the form short and relevant for each user.
So if someone selects “Yes” for the question “Do you have any food allergies” then the form will show the next question asking, “What allergies do you have?”, if someone says “No”, it skips the follow up completely.
Step 3 - Design your form
Once your fields are in place, you can make the form look and feel like your brand. In the design tab of MakeForms, you can
- Choose colors, fonts, and button styles that match your website or business.
- Upload your logo or a header image so the form looks professional.
- Use layout options to organize the form visually - add sections, headings, or dividers.
For eg: In a survey form, upload your logo at the top and set button color to match your brand palette. - Preview how the form looks on mobile and desktop to make sure it works well on any device.
Step 4 - Preview, publish, and share your form
After building and designing your form, check how it looks and works using the preview option. When you are ready, click “Publish.”
In the Sources section, you can share your form in multiple ways:
- Link: copy the form link and share it anywhere.
- QR code: let users scan the code to open the form.
- Email: send the form directly to users.
- Embed code: place the form on your website.
All responses are saved automatically in your MakeForms dashboard for easy tracking and management.
For eg: Once your customers submit their responses, you can see all the answers organized instantly in your MakeForms dashboard. This makes it easy to review feedback, track results, and take action quickly.
Bonus Step - Use AI to create a form instantly
If you prefer skipping the usual steps, you can use MakeForms’ AI feature. Just type a prompt describing the form you need. The AI will generate a complete form for you in minutes.
For eg: Enter “Create a registration form for a webinar” and the AI builds a ready‑to‑use form right away.
How do you decide which online Form Builder suits you?
Not all online form builders are the same. When choosing one, focus on features that are made for your business use. Here’s a quick checklist for you.
- No-code setup: You should be able to create and publish forms without any technical knowledge.
- Customization: Make your forms match your brand with colors, logos, and layout options.
- Automation and logic: The form builder must have conditional logic to make your forms more effective.
- Security and compliance: Choose tools that follow GDPR, PIPEDA, TCPA, HIPAA rules to protect sensitive data in the region where your customers are located.
- Real-time verification: Features like OTP or email verification help ensure the data you collect is genuine.
- Affordability: Look for a solution that fits your budget and can grow as your business grows.
For eg: A small clinic may choose a HIPAA-compliant builder to protect patient data, while a marketing agency may focus on automation to speed up lead collection and manage responses more efficiently. Considering these key features helps ensure your form builder meets your specific needs and improves overall efficiency.
Why Choose MakeForms
We bring all of the above essential features of an online form builder together into one no-code, AI powered, platform designed for modern teams, at a GREAT price!
Our pricing highlights include unlimited responses on all plans, even on the base plan, generous user limits, with up to 10 users on the Agency plan. We love our simple and straightforward structure, with no hidden costs, and hope you love it too.
Start collecting professional results and build your first form in minutes with MakeForms.
FAQs
It makes creating forms easy, quick, and professional without any coding.