
To embed a Google Form into an email, open your Google Forms dashboard, choose your form, and click the “Send” button. Select the envelope icon, enter the recipient’s email address, and check the box labeled “Include form in email.” This allows users to fill out the form directly within their email.
Forms
How to Embed a Google Form in an Email or a Website [Easy Method]
Embedding forms into emails and websites is a great way to quickly collect responses, reduce back-and-forth communication, and make it easier for your audience to provide the information you need right away. Its use cases are endless, from streamlining the process of gathering feedback, registrations, or data, all within the platforms your audience is already using. Plus, it can seriously improve response rates since people can fill out the form directly without needing to click through to a separate page.
Pratik Ghela . September 13, 2024 . 6 Mins Read
![How to Embed a Google Form in an Email or a Website [Easy Method]](/_next/image?url=https%3A%2F%2Fwebsite-assets.makeforms.io%2FHow_to_Embed_a_Google_Form_9478a2fd9d.png&w=3840&q=75)
Embedding forms into emails and websites is a great way to quickly collect responses, reduce back-and-forth communication, and make it easier for your audience to provide the information you need right away. Its use cases are endless, from streamlining the process of gathering feedback, registrations, or data, all within the platforms your audience is already using. Plus, it can seriously improve response rates since people can fill out the form directly without needing to click through to a separate page.
When embedding forms on a web page, it’s essential to ensure the form is accessible and integrates seamlessly into your site’s layout. Whether you're sticking with Google Forms or trying out alternatives like MakeForms, knowing how to weave these tools into your digital strategy can really boost engagement and make things run smoother.
Today we guide you through the process of embedding Google Forms into emails and websites, sharing links to your forms, and even embedding MakeForm forms into various platforms. By the end, you'll be equipped with the knowledge to effortlessly embed and share forms on your website!
How can I embed a Google Form in email
In cases where you only want to send your Google Form to a select bucket of customers or people, email can be extremely helpful. Embedding your Google Form into email helps you completely minus a step where you redirect them to yet another link.
The process is fairly easy. Let's learn how you can embed Google Form into emails.
Step 1: Open up your Google Forms dashboard and pick the form you want to send on its mission.
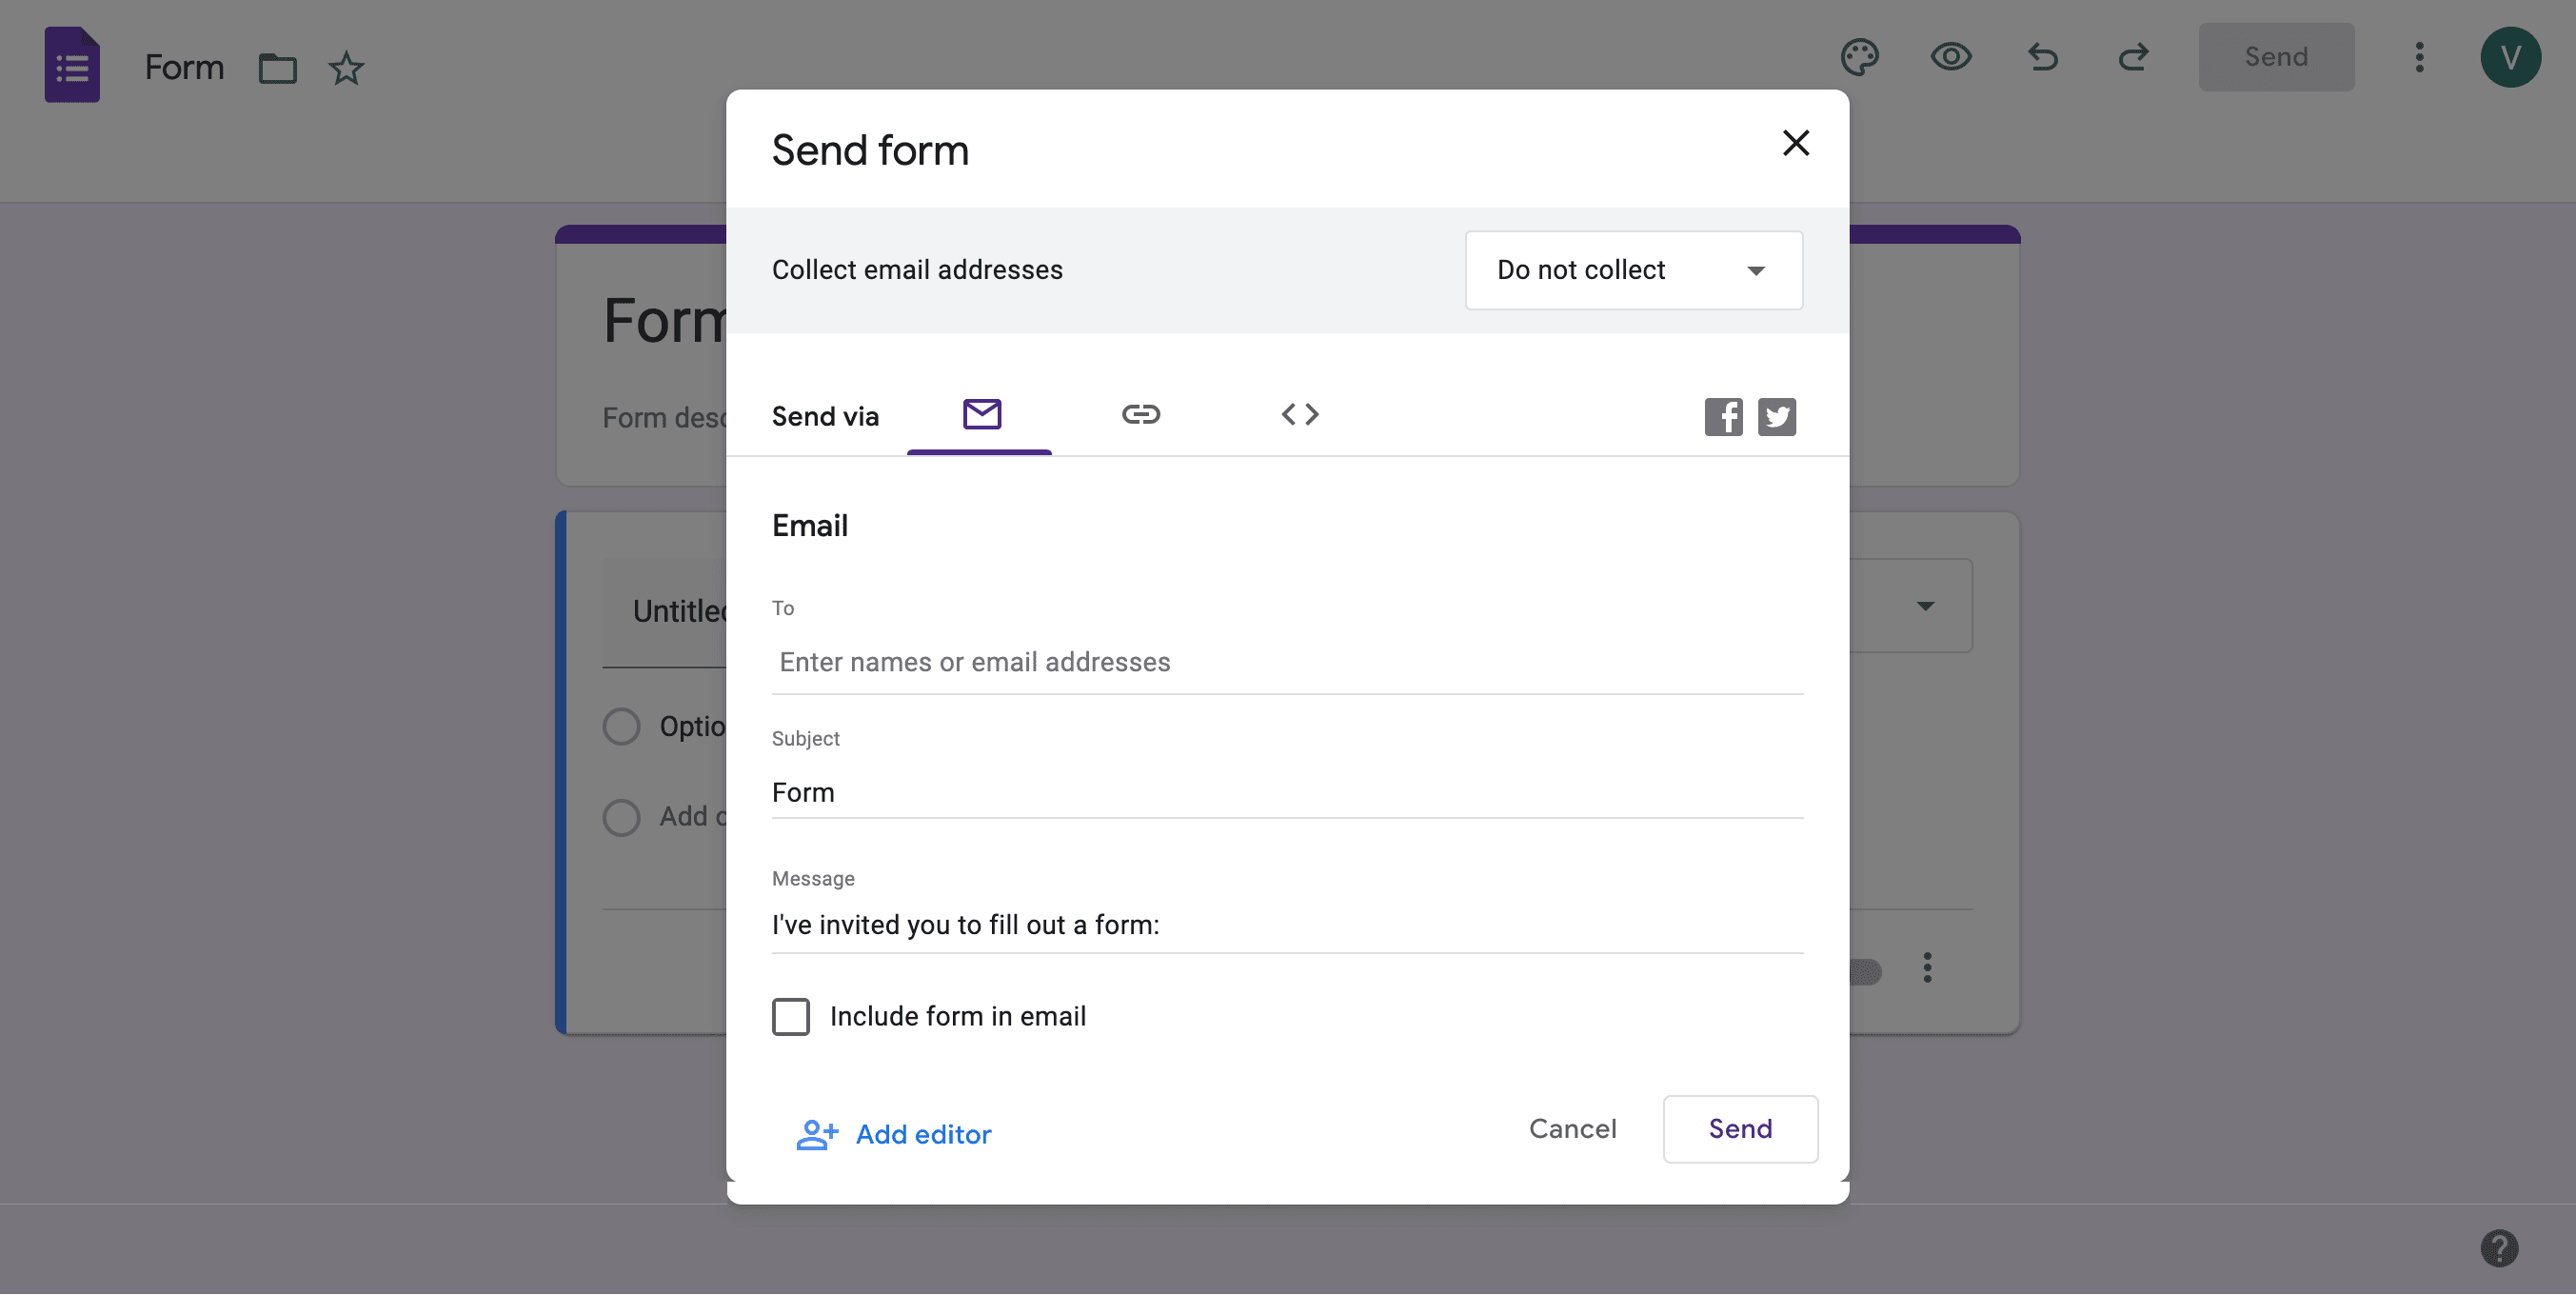
Step 2: Spot the bright blue Send button in the upper right corner, and give it a click.
Step 3: In the "To" field, type in your recipient’s email address. If you’ve got a list of people, just separate their emails with commas.
Step 4: In the "To" field, type in your recipient’s email address. If you’ve got a list of people, just separate their emails with commas.
Step 5: Adjust the email subject line to increase visibility for your Google Form, make sure to personalize it for your audience.
Step 6: Personalize your email by typing in a message in the "Message" section.
Step 7: Don’t forget to check the box that says "Include form in email"—that’s the button that lets your recipients fill out the Google form right there in their inbox.
Step 8: You can also share Google Forms by generating a form link and embedding it into a blog post for easier access to wider audiences.
How to embed Google Form on your website
Websites are a great place to embed Google Forms in order to collect visitor data. Here’s how you can embed a Google Form directly link into your website:
Step 1: Head over to your Google Forms homepage, where all your forms await.
Step 2: From the Recent forms section, pick the Google form you want to showcase on your website, or create a brand-new one if you’re feeling inspired.
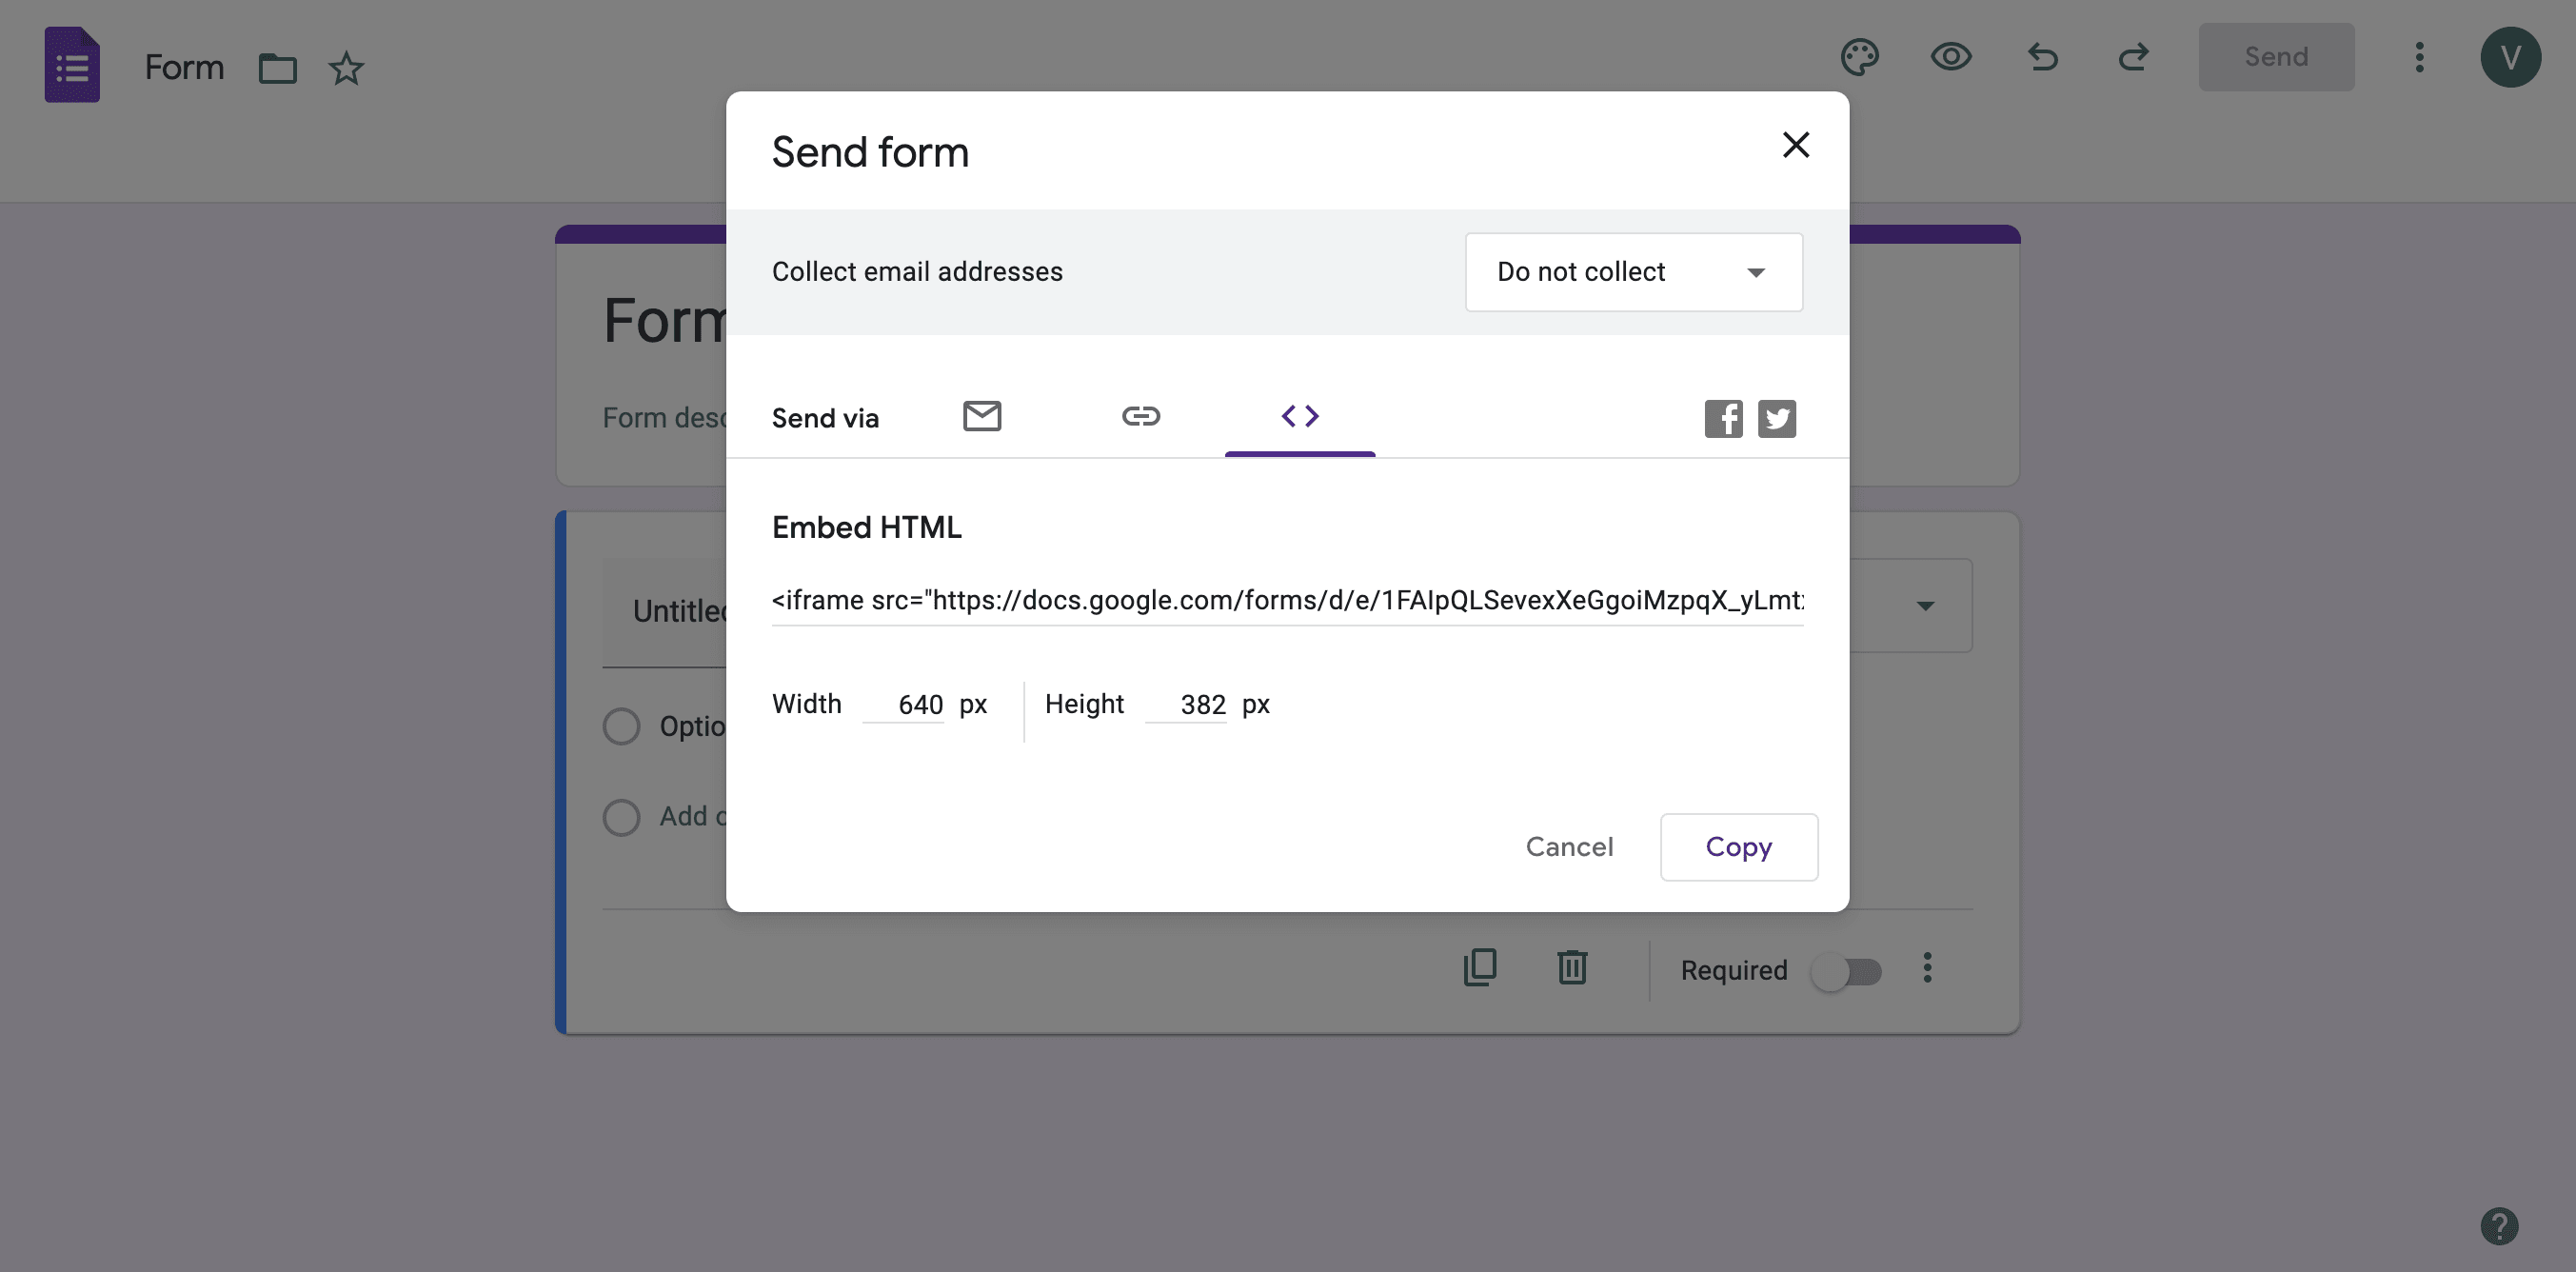
Step 3: Once your form is just the way you like it, click the purple "Send" button in the top right corner to set things in motion.
Step 4: Among the sending options, look for the third one—it’s the icon with two pointed brackets (<>). That’s your gateway to embedding.
Step 5: To embed html code, copy the code that appears under "Embed HTML." If you face any usability issues with your form's appearance on your web page, you can adjust the dimensions in the code before embedding.
Step 6: Finally, paste that copied HTML code exactly where you want your form to appear on your website, and watch it come to life! Another way to ensure smooth embedding of your Google Form is to press Ctrl + C after selecting the code to copy it without errors.
How to send a link to a Google Form you created
A shareable Google Form link is another way through which respondents can receive and fill your forms. These links can be posted on social media or can also be included in your blog posts. It helps you gain traction through social media platforms, like Facebook and X.
Here’s how you can do so:
Step 1: Choose the form you want to use from your Google Forms homepage.
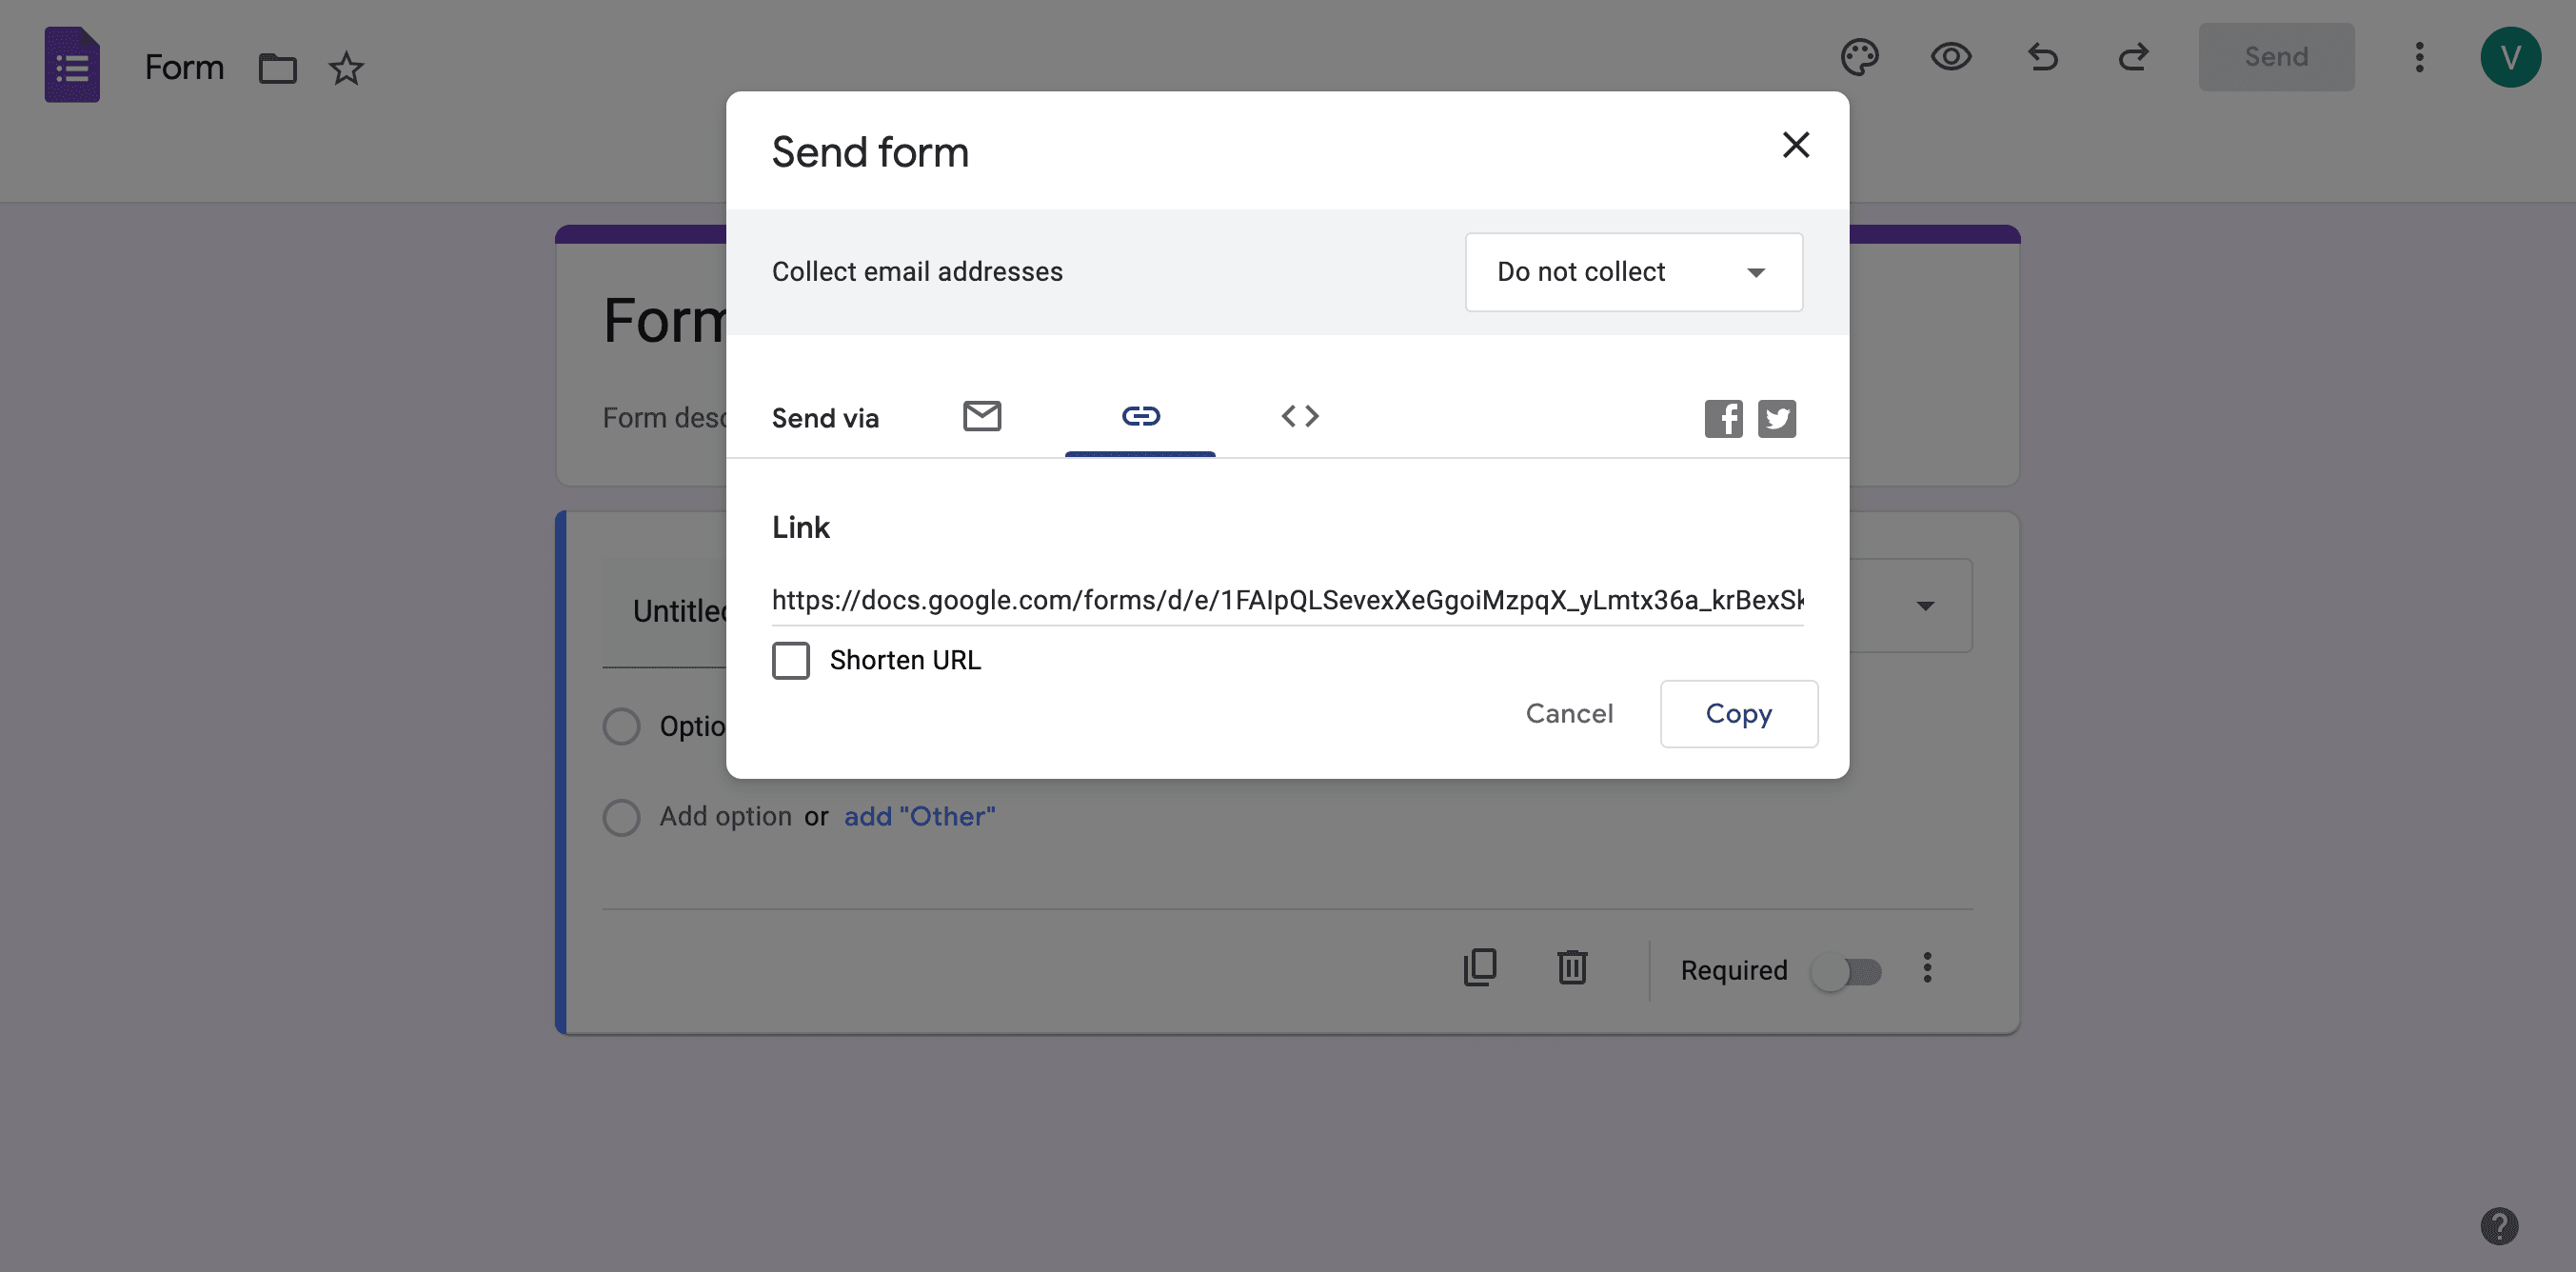
Step 2: Once you’ve customized it and are ready to share, click the "Send" button in the top right corner.
Step 3: Next to "Send via," click the middle icon that looks like a chain link.
Step 4: Make sure to click copy when you generate the link, then share it through various channels like email or social media. You can also shorten it here if you’re planning to share it on social media.
Step 5: Finally, paste the link into a social media post, blog, email, or anywhere else you want it to appear.
What makes MakeForms a good Google Form alternative?
Google Form is one of the oldest players in online form creation. However, it has its limitations. MakeForms is an alternative online forms builder with many futuristic features and advantages.
MakeForm stands out as a strong Google Form alternative due to its advanced customization options, AI features, offering greater flexibility in form design and functionality. Unlike Google Forms, MakeForm allows users to embed forms in various ways, such as side pop-ups, lightboxes, floating buttons, and full-page embeds, making it more versatile for different website layouts.
It also supports detailed styling adjustments, ensuring that forms align with your brand's aesthetics. Additionally, MakeForm provides more robust data management and integration capabilities, making it an ideal choice for businesses and individuals seeking a more tailored and professional form-building experience.
For those with large amounts of data, integrating MakeForms with Google Drive allows for efficient form management and data storage.
How can I embed a MakeForm form into a website
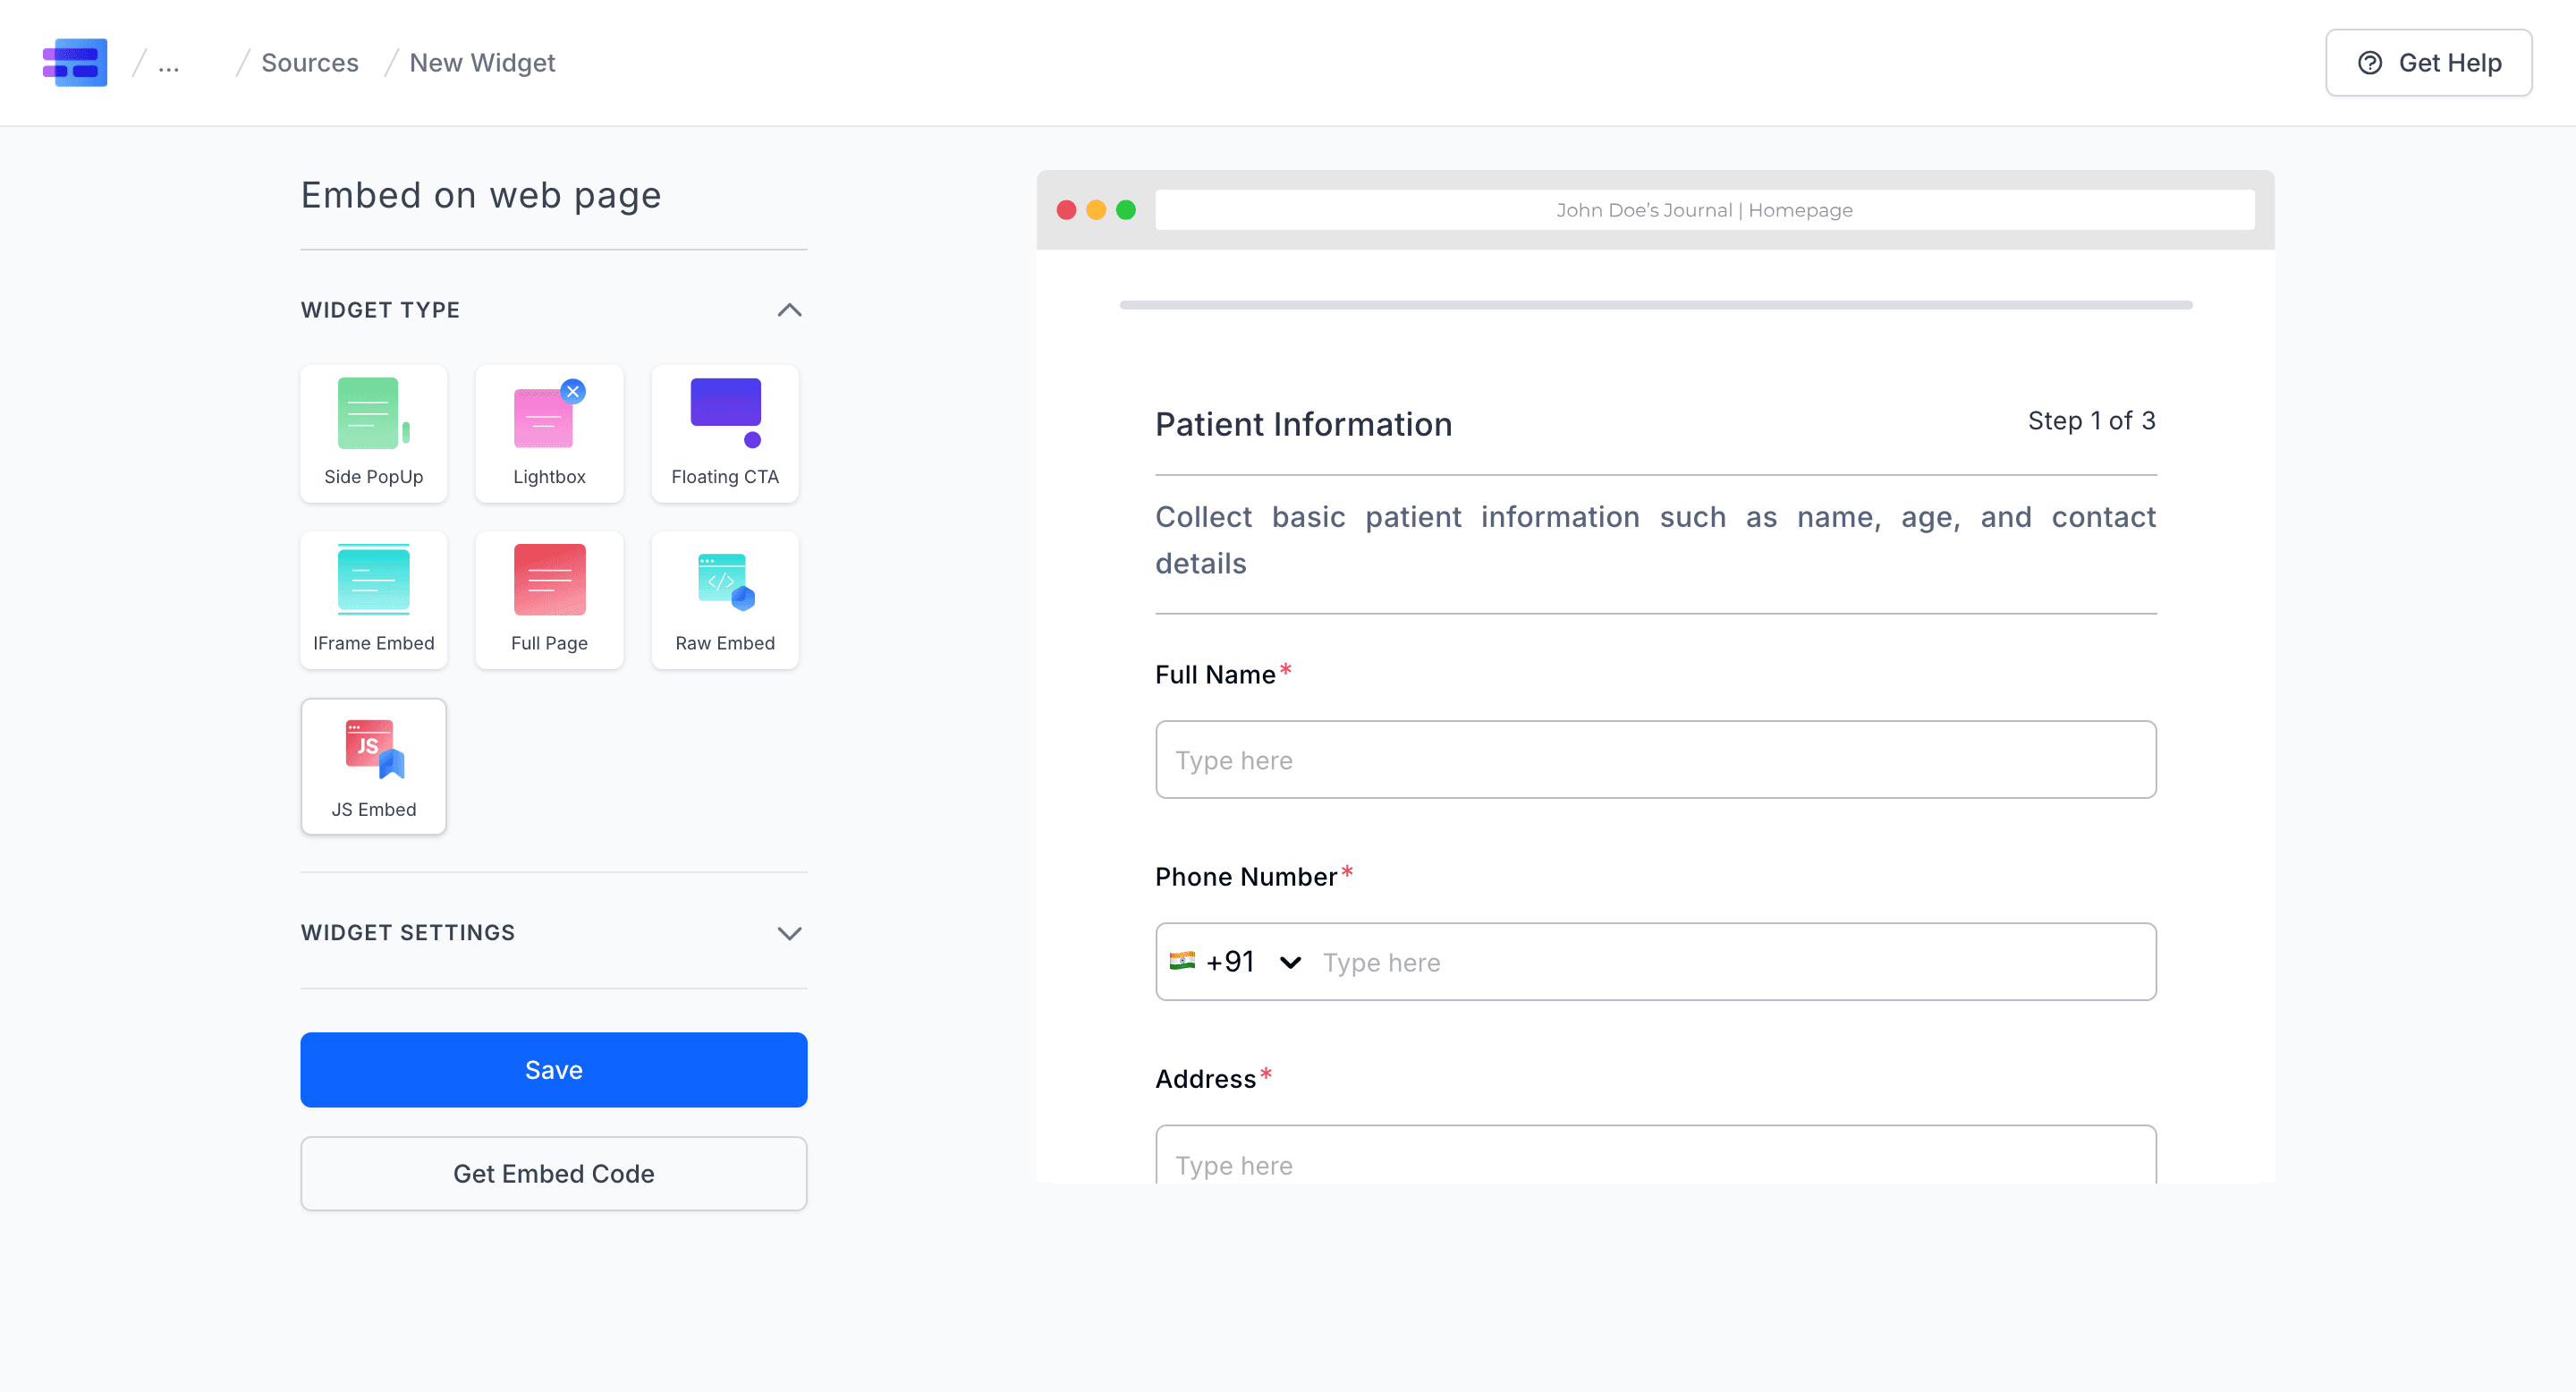
Step 1: Click on Embed Your Form. A pop-up will appear.
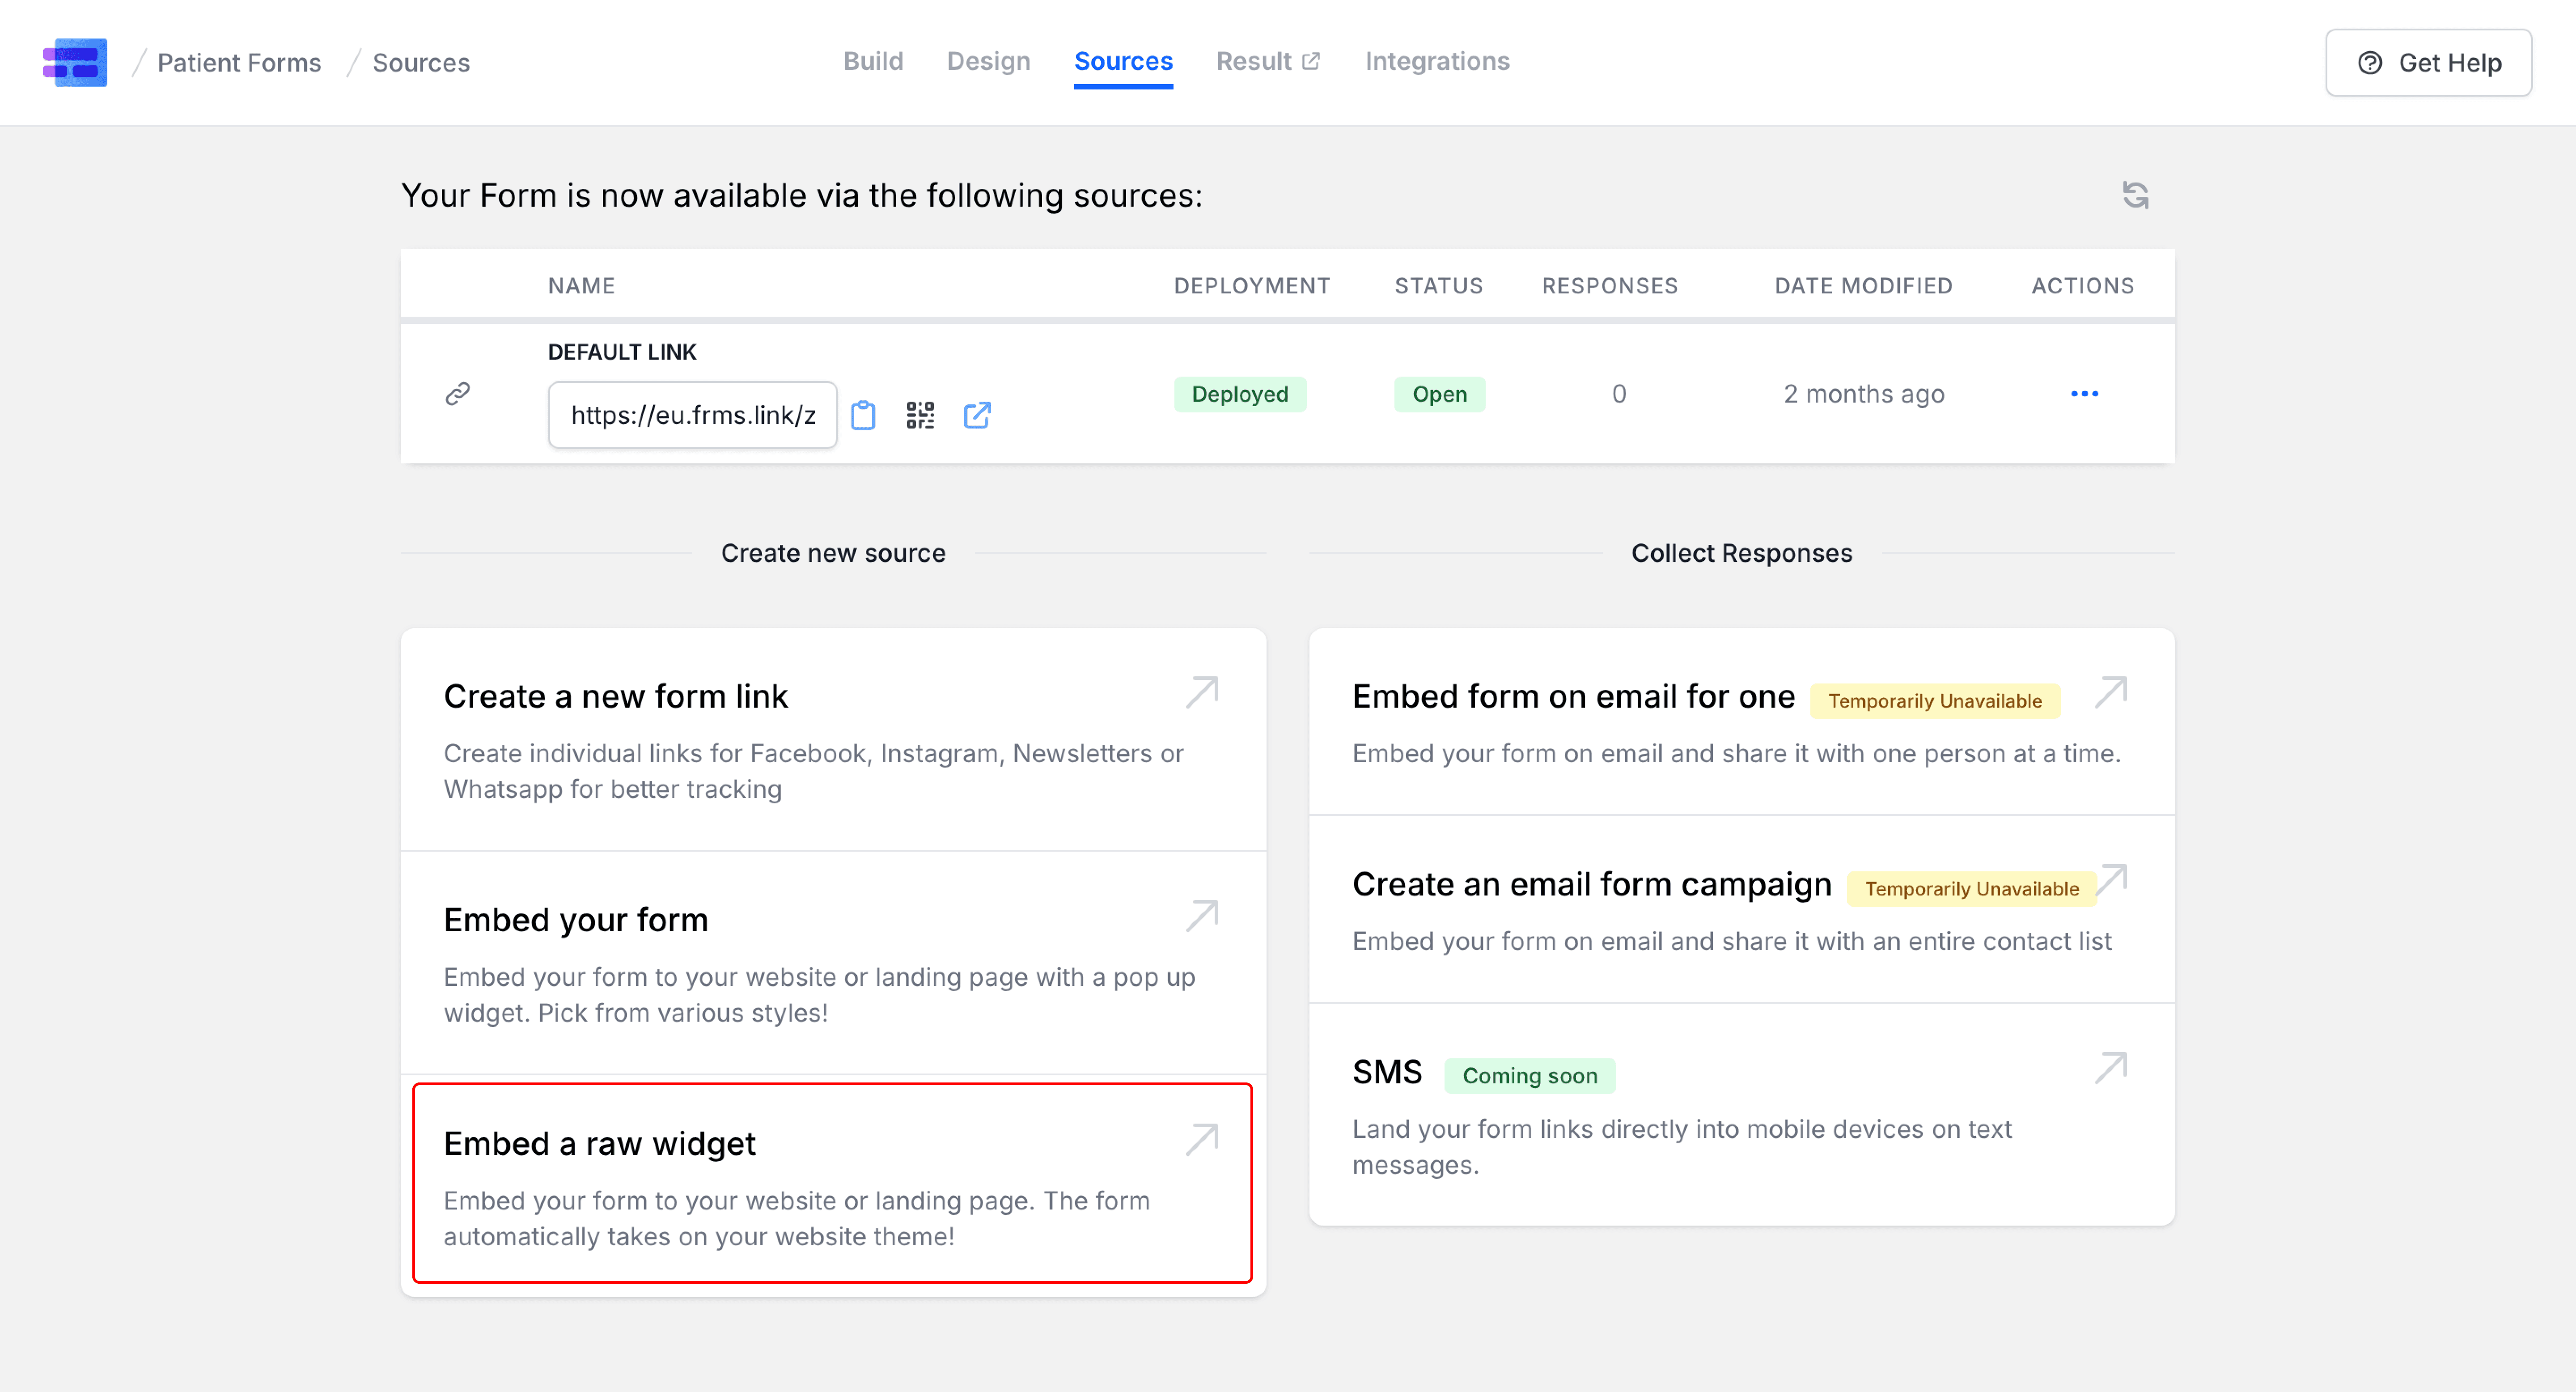
Step 2: Now, you get 6 options in which you can embed a form on your company website through MakeForms:
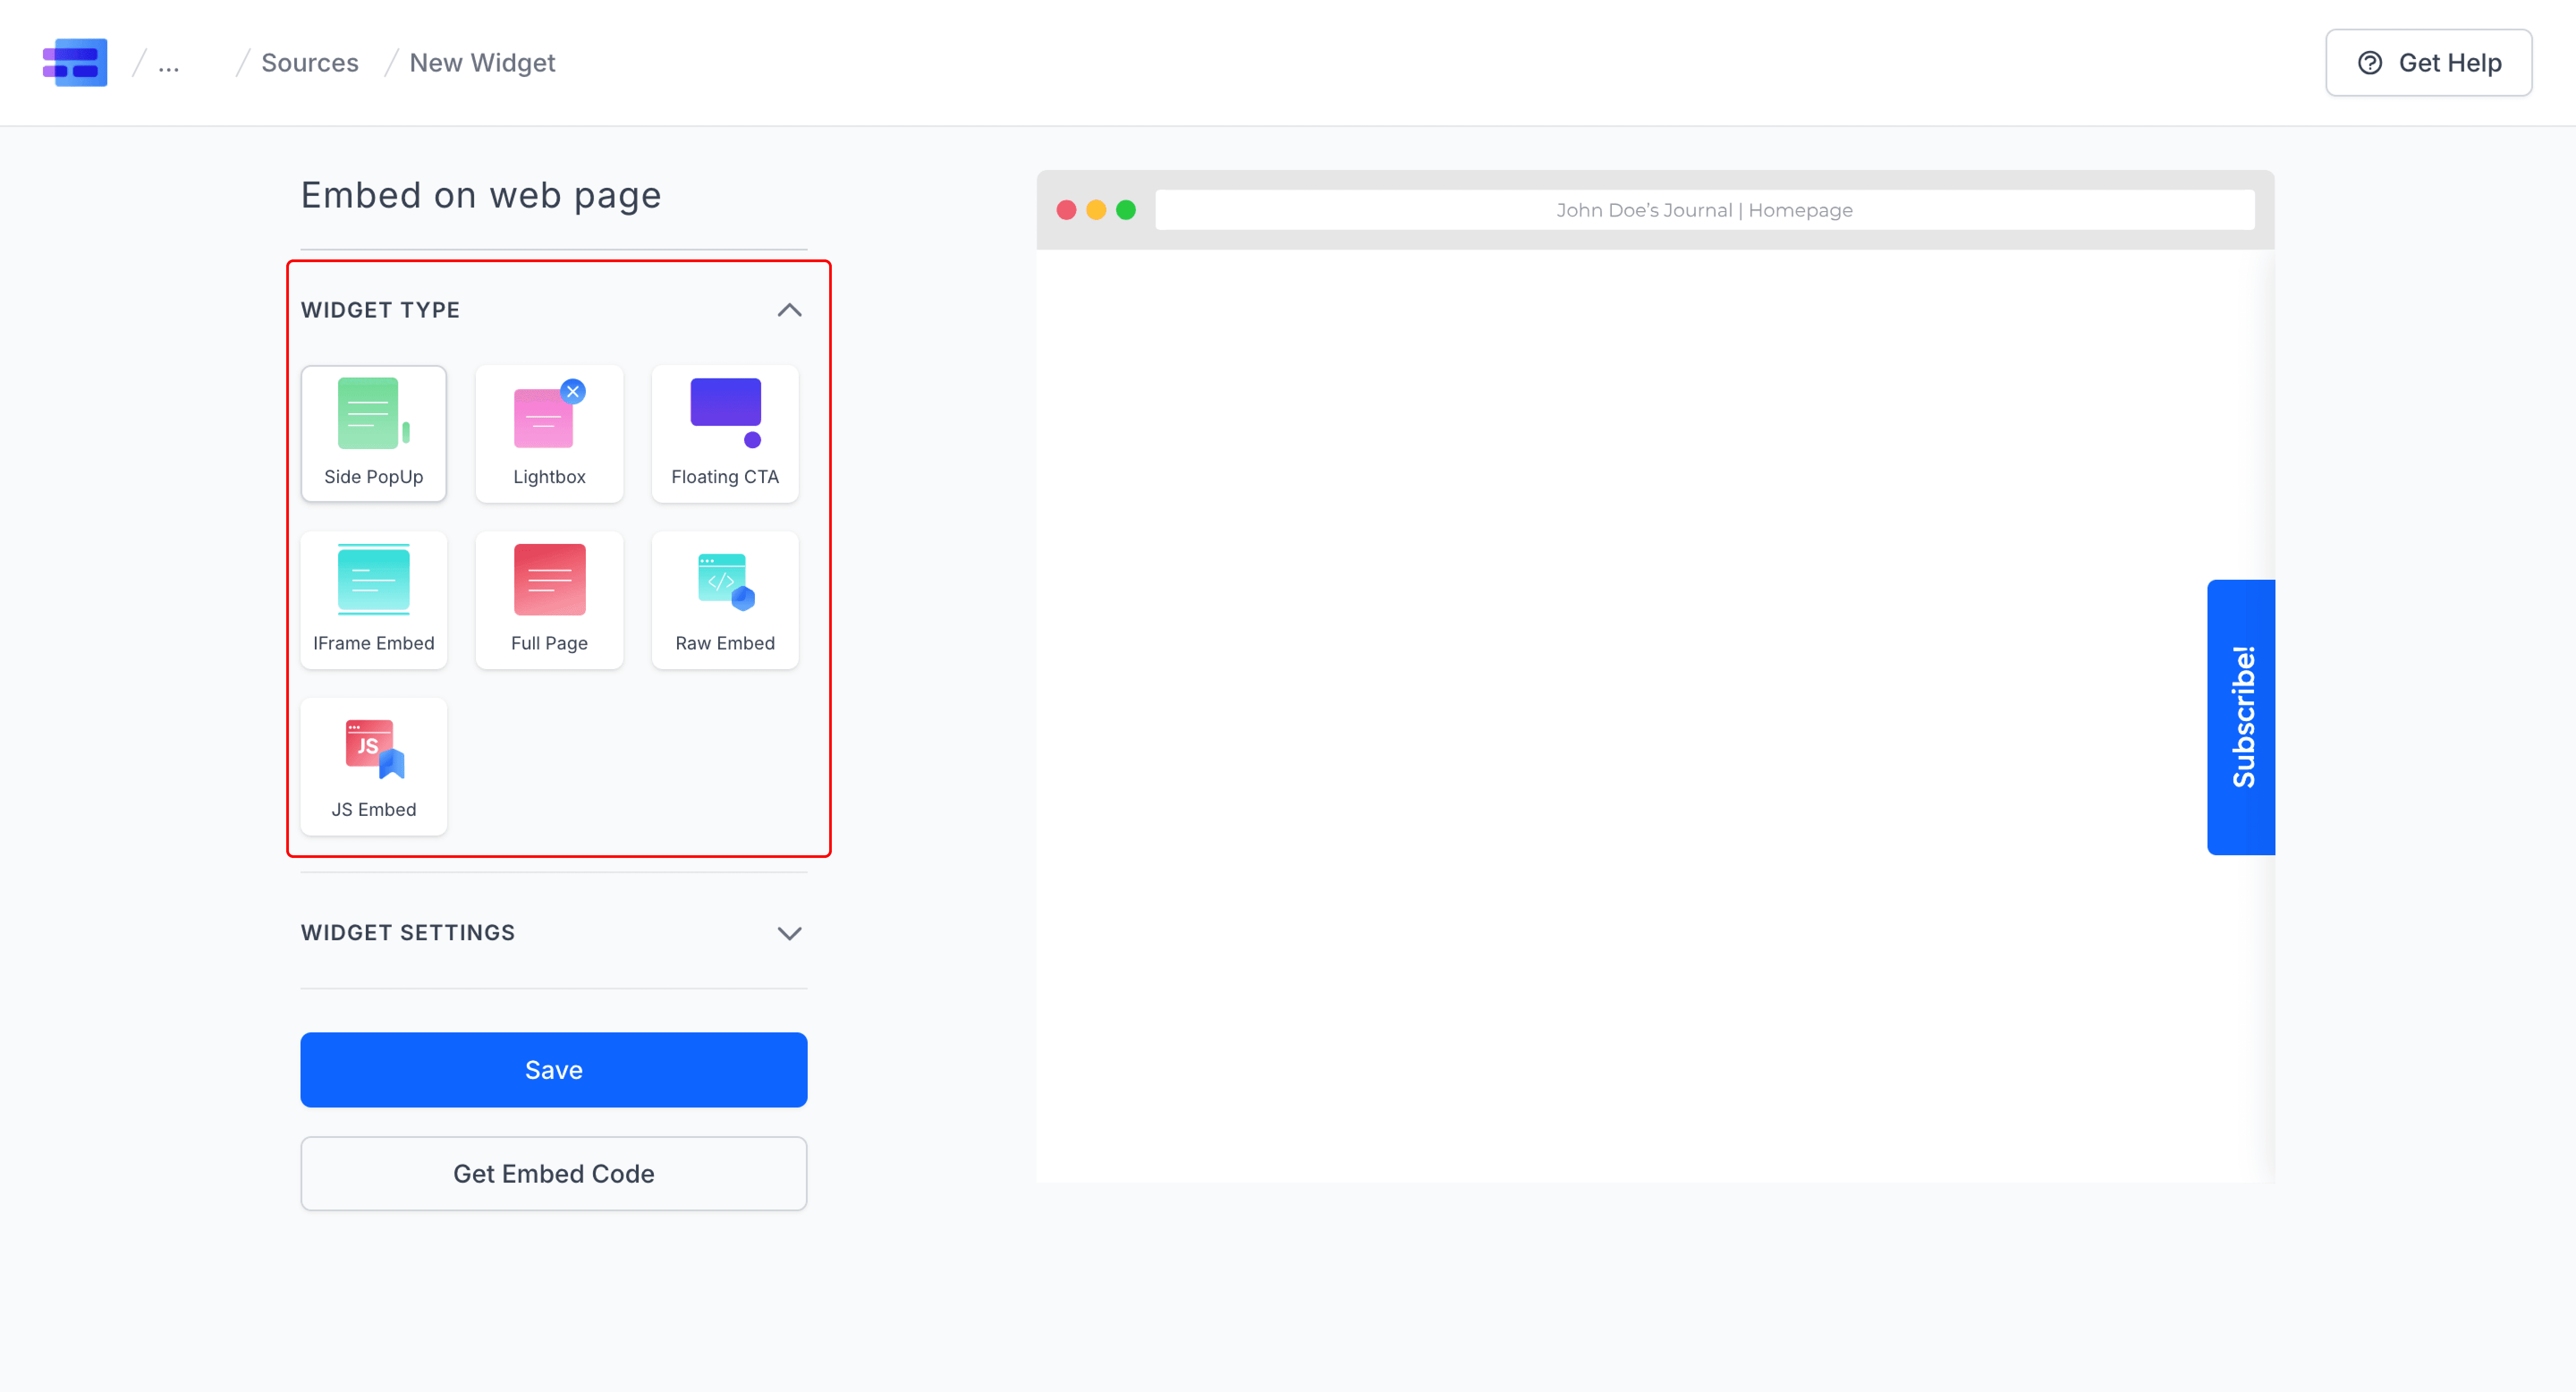
- Side Pop Up
- Light Box Pop Up
- Floating Button
- iFrame Embed
- Full Page
- JS Embed
Let’s look at each one of them.
1. Slide Pop Up
This form pops up from the side.
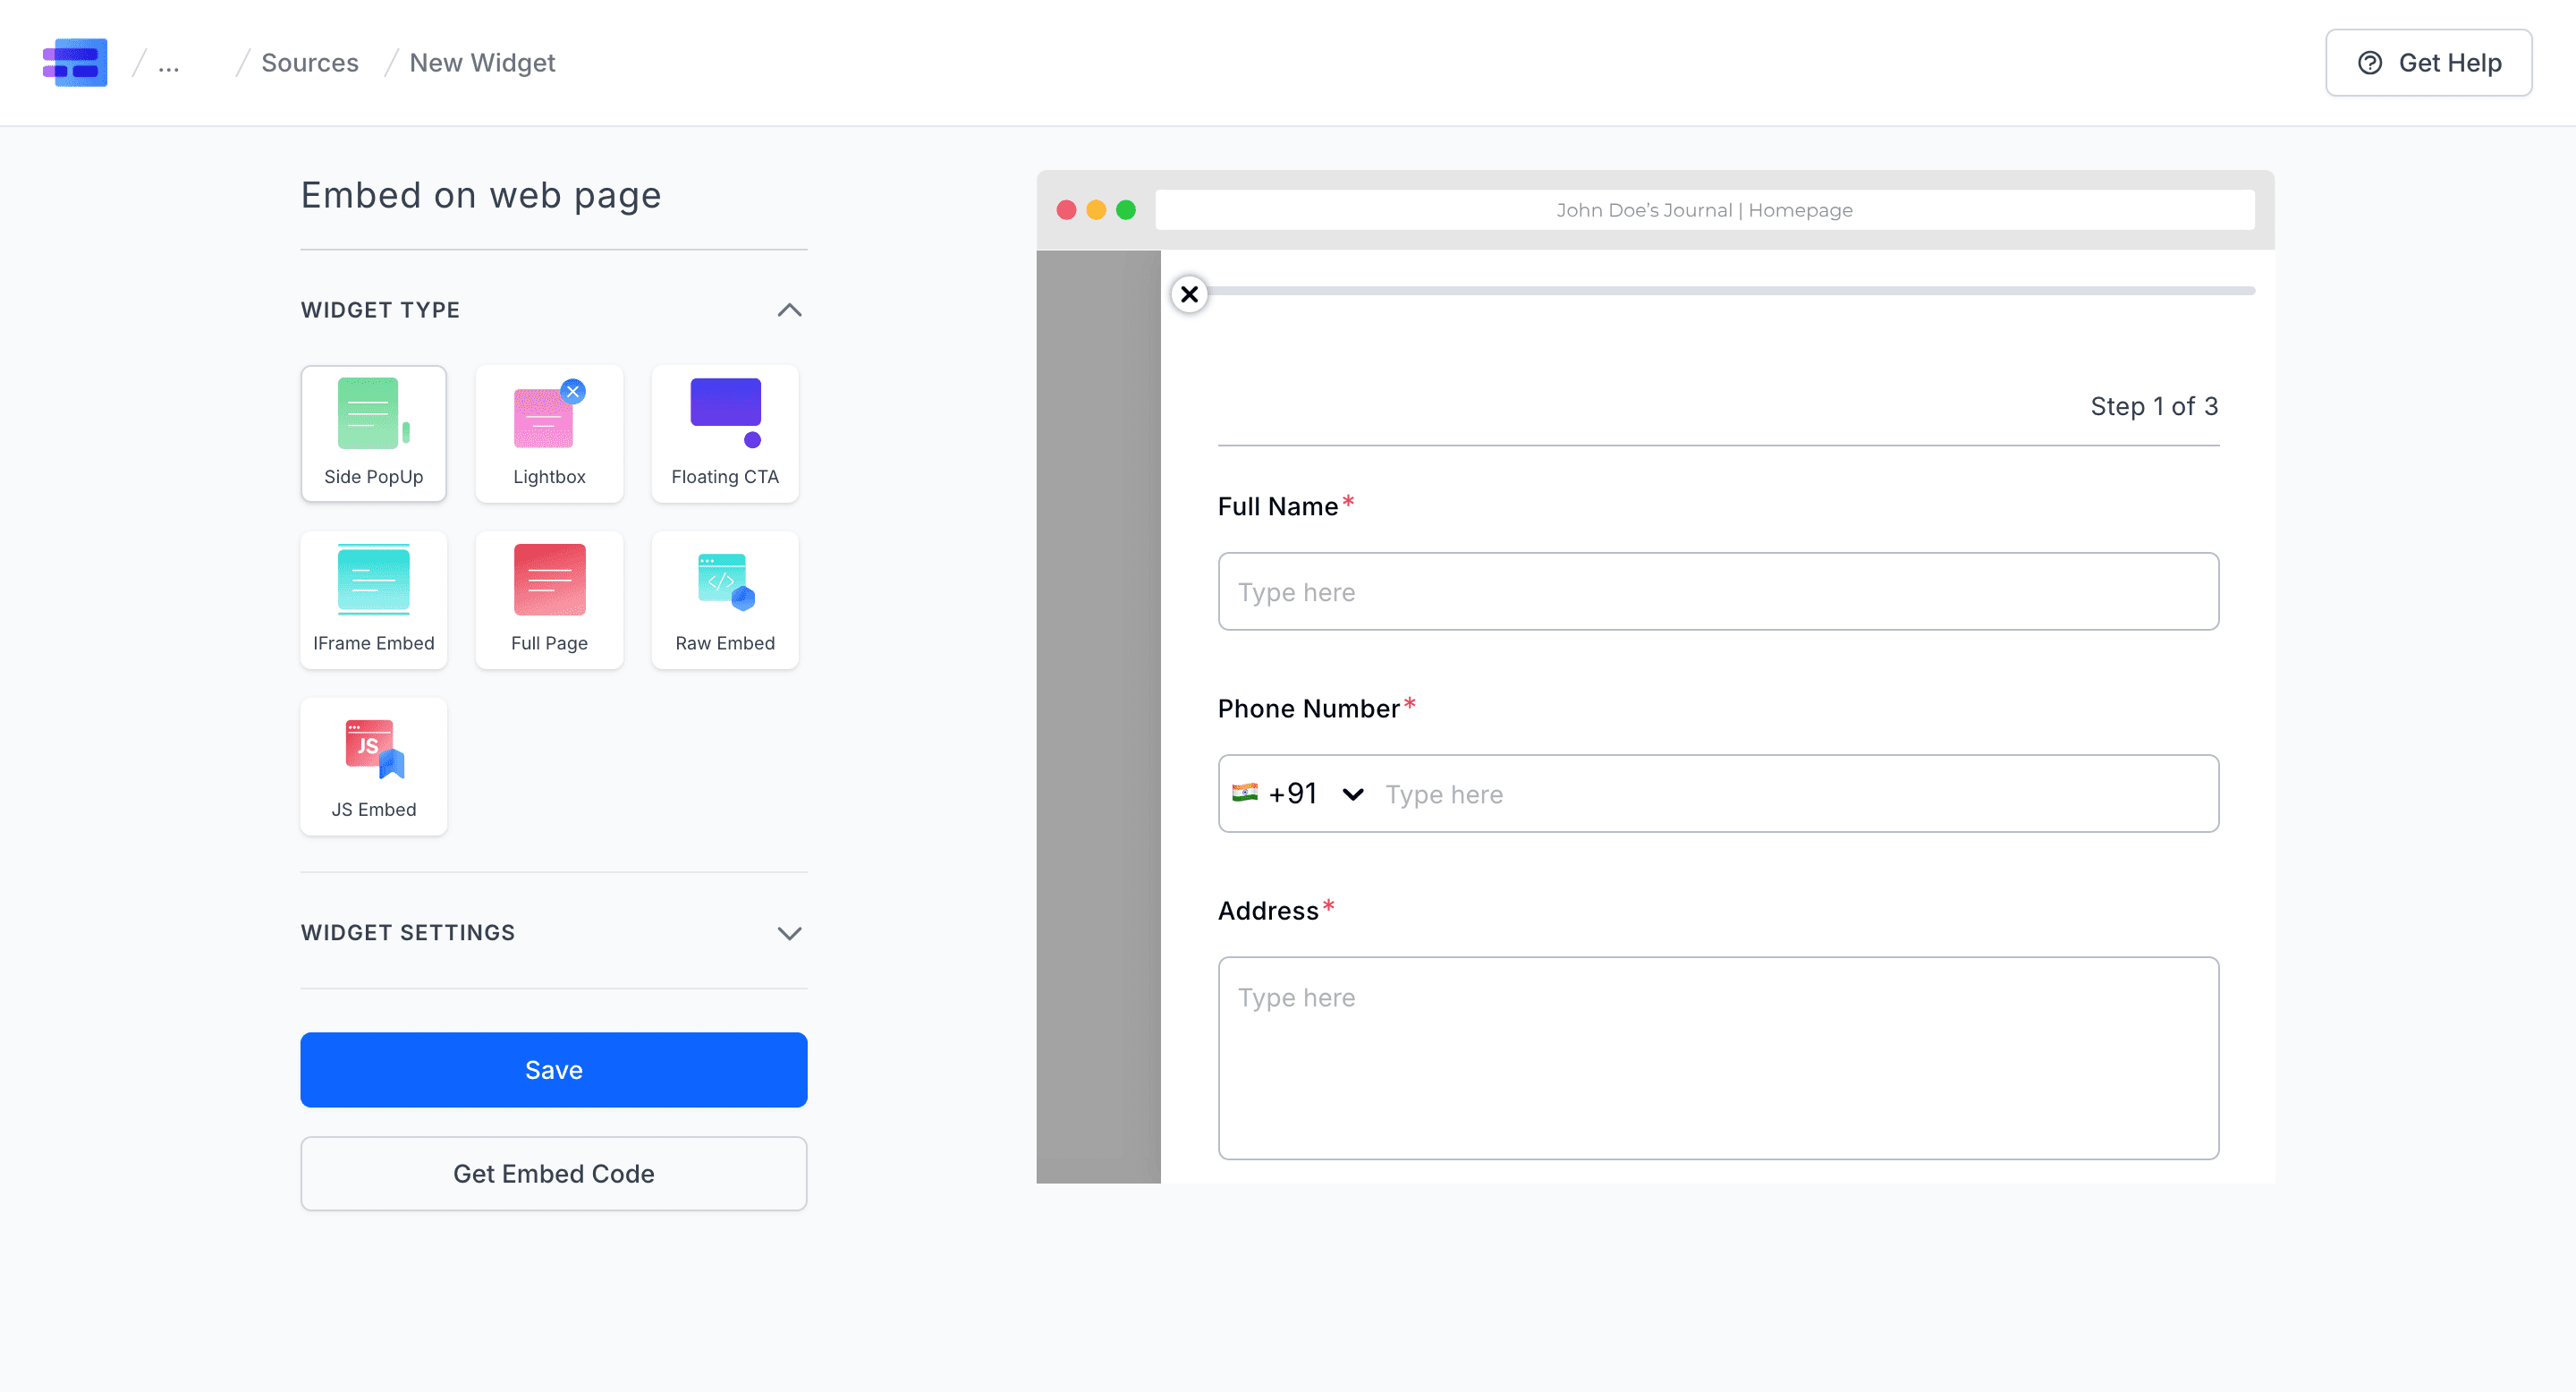
All you have to do is:
- Name the widget in Widget Name
- Change the CTA text
- Change the Font family, weight, and size if you want to
- Choose the background color and the color of your text
- Choose the CTA position
- Click on Get Embed Code Copy it and paste it on the footer of your HTML webpage of your website.
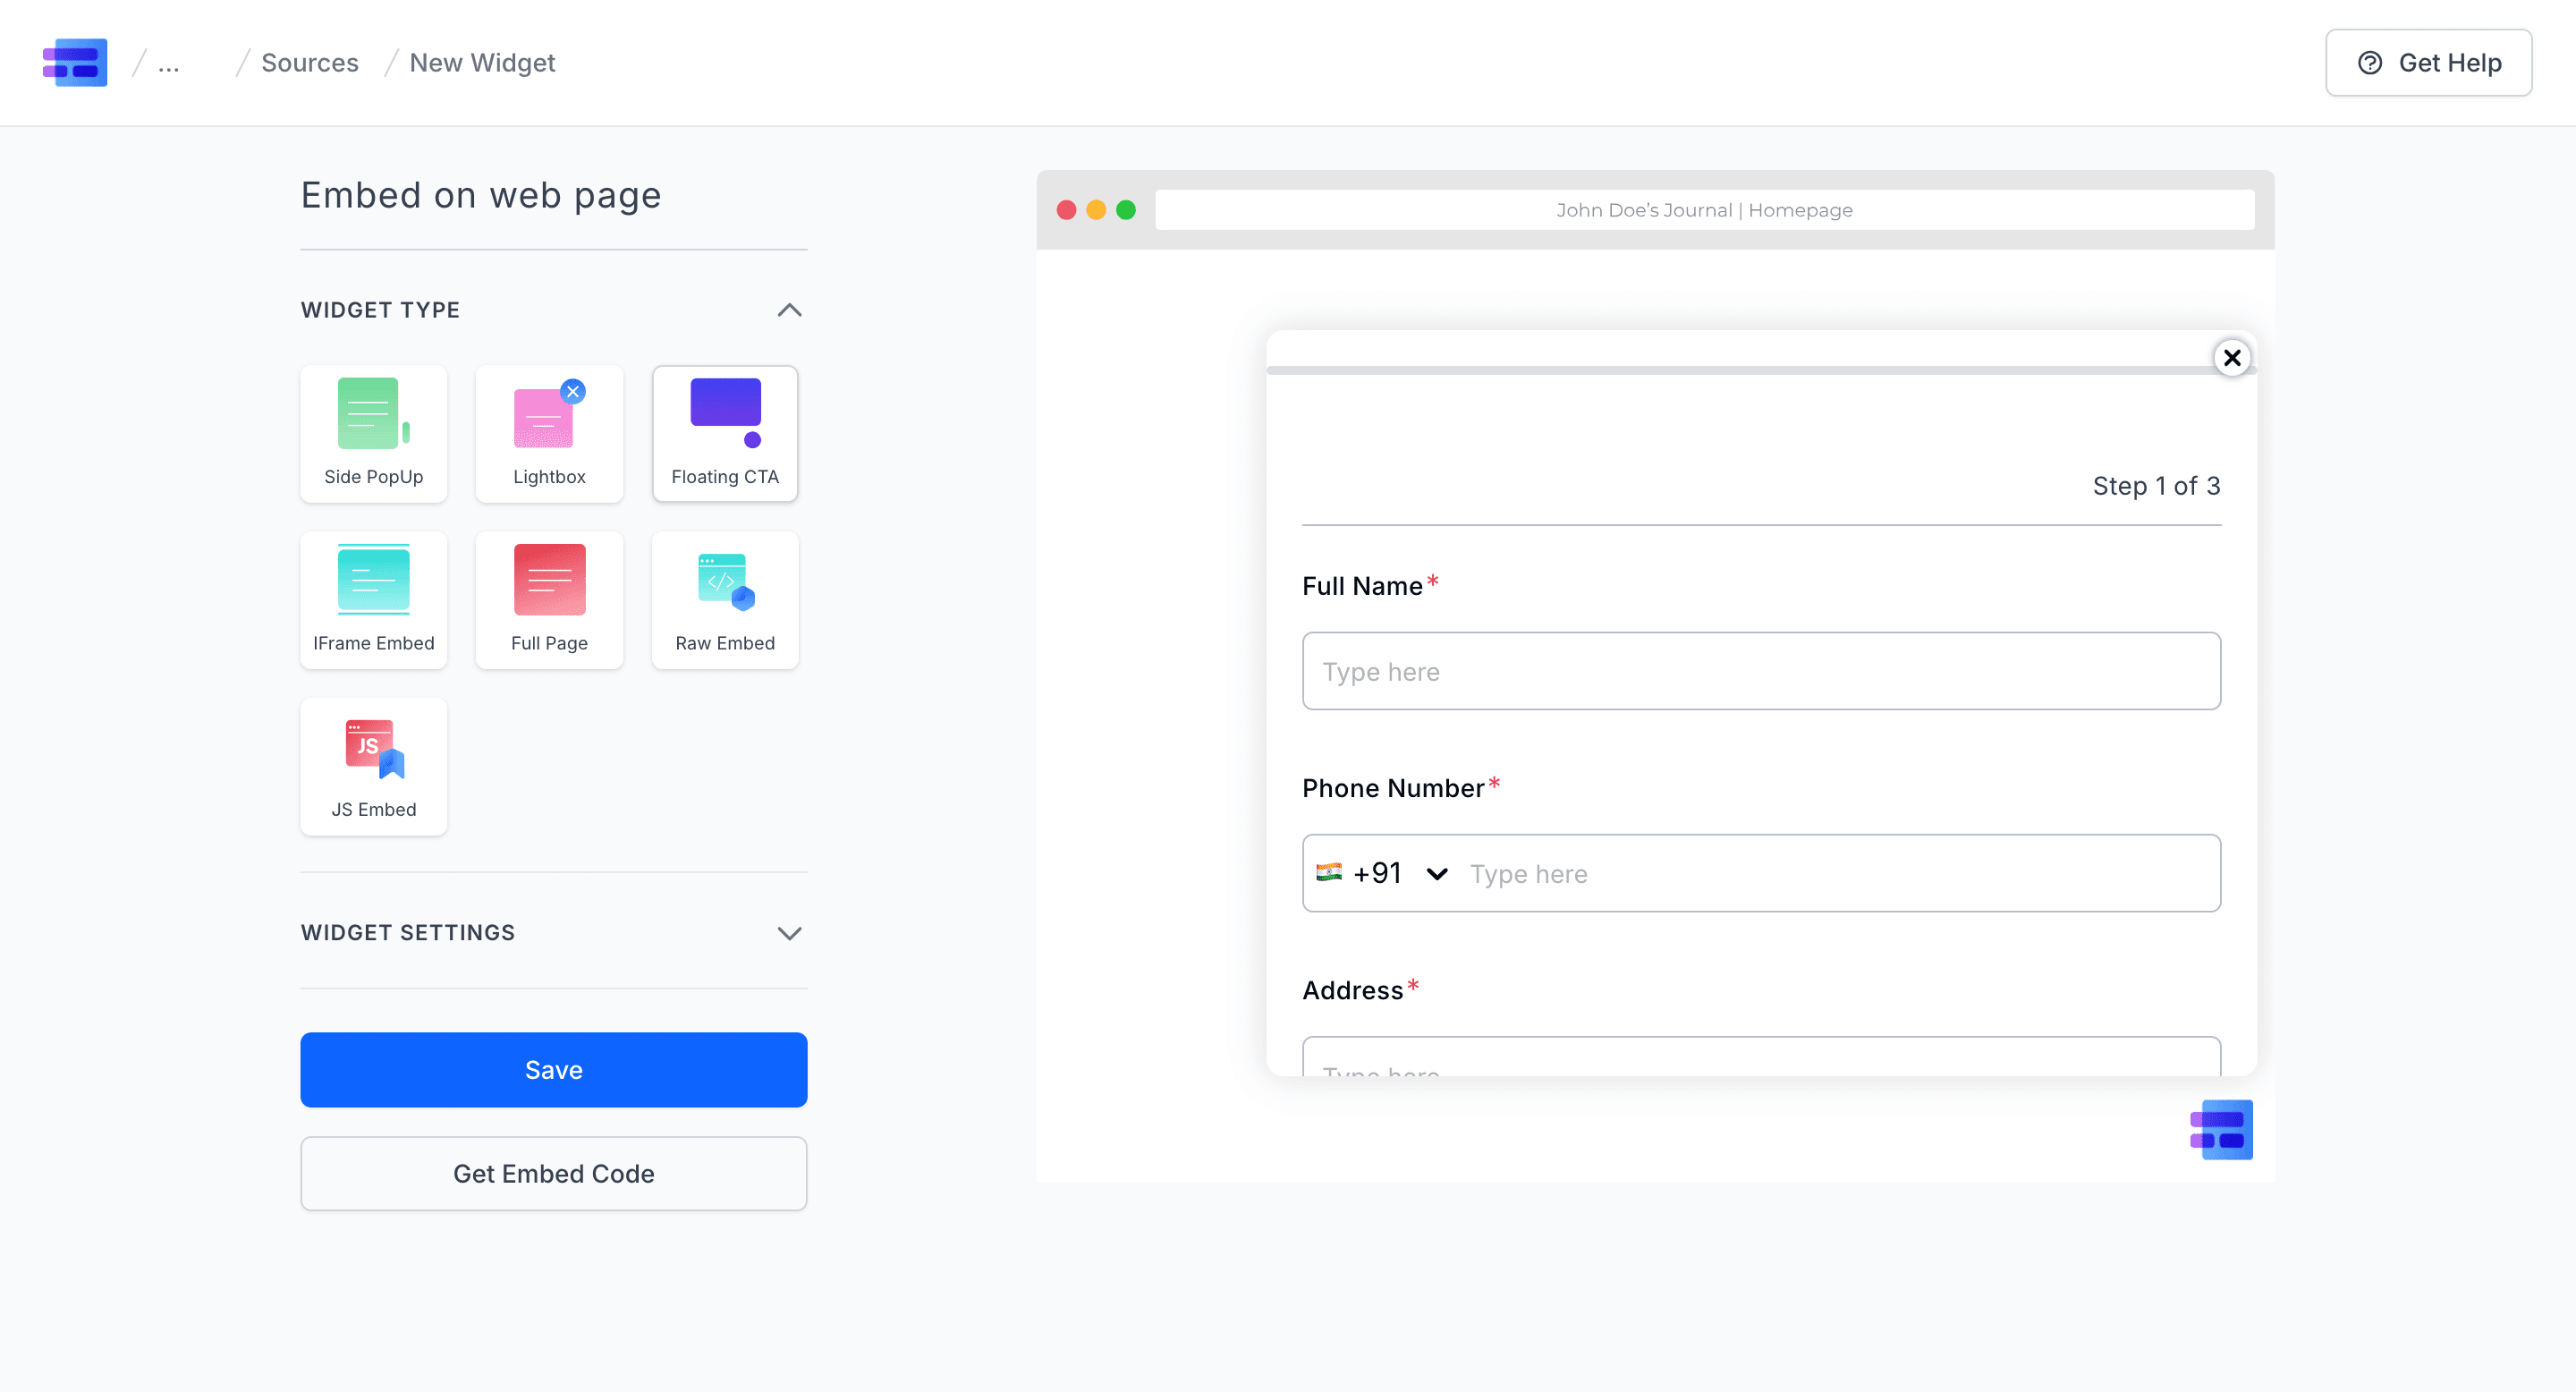
2. Light Box
It contains a button, when clicked a box will pop up.

- Choose the Light Box option
- Change the Widget Setting as per requirements, which are pretty much similar to the Slide Pop Up
- Click on Save and click on Get Embed Code
- Copy the code. Since this a button, choose where exactly you need to place it in your website's HTML code
3. Floating CTA
It’s like a chatbot. It can be placed on the top left, top right, bottom left or bottom right.
- Choose the Floating CTA option
- Add Widget Name
- Choose the CTA position
- Change the Widget Icon if you wish to
- Click on Save Click on Get EMbed Code
- Paste the code in the footer of your webpage’s HTML page
4. iframe Embed
It can be used if you wish to embed your form as an iframe.
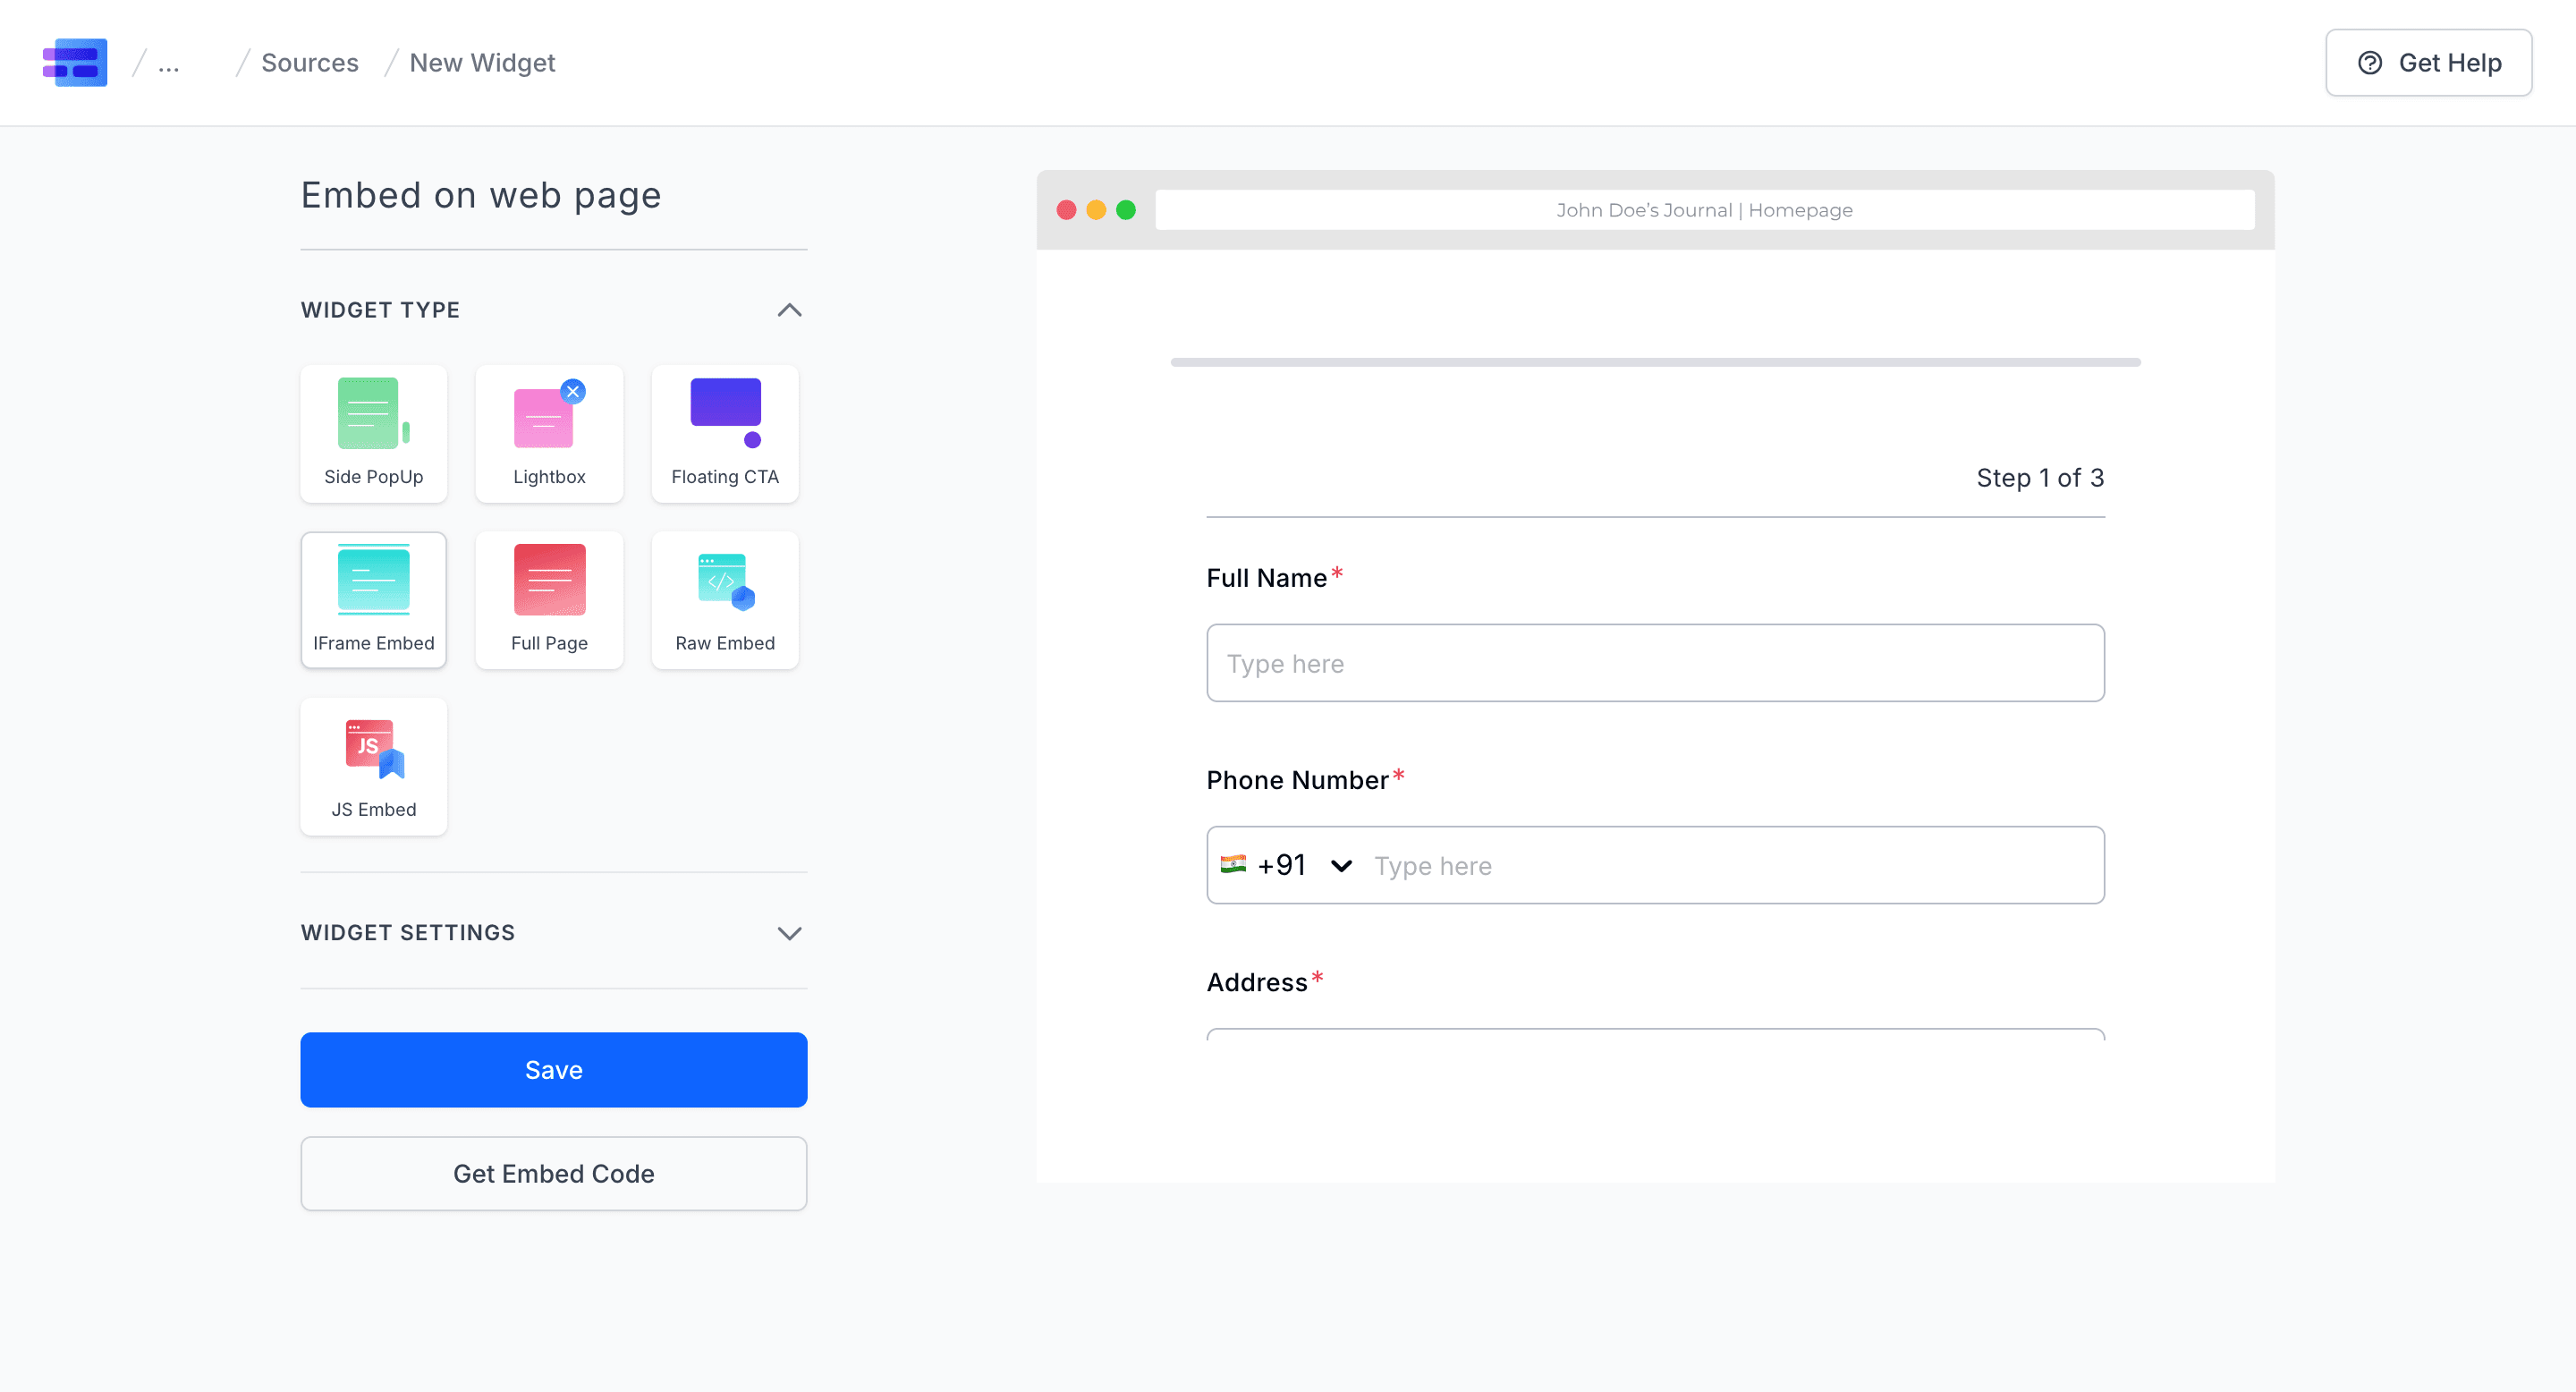
- Choose the iframe Embed option
- Add Widget Name
- Click on Get Embed Code
- Copy the code and paste it
If you ever encounter usability issues with the iframe, MakeForms provides options to tweak the embed code for better functionality.
5. JS Embed
Loads your form as a native form on your website. It makes the form appear as a part of the website.
Choose JS Embed Code from the pop up Add Widget Name Turn on the 'Only Form' option Get the Embed Code and paste in your Header
6. Full Page

- Choose the Full Page Option
- Click on Save
- Click on Get Embed Code
- Copy the code
- Paste it on the footer of your HTML page
Embedding forms into emails, websites, and blog posts enhances your ability to gather and manage data effectively. Whether you're using Google Forms or exploring robust alternatives like MakeForm, these techniques allow you to reach your audience where they are and make it easy for them to respond. We hope we’ve equipped you with the tools to embed forms with confidence and efficiency!