API Action Field
It allows your form to connect directly to your backend system and retrieve live data in real time. Instead of relying on static files, your form calls an API while the user is filling it out, verifies the information instantly, and auto-populates fields before submission.
This guide explains how to configure API Vault and use it inside a form.
Example Scenario: Policy Verification
Consider a health insurance verification workflow. A user enters a policy number into a form. Instead of manually checking an internal system, the form calls your backend API. The backend responds with customer details such as name, plan type, policy status, and expiration date. The form automatically displays this information to the user.
This entire process happens instantly, without leaving the form.
Creating an API Vault
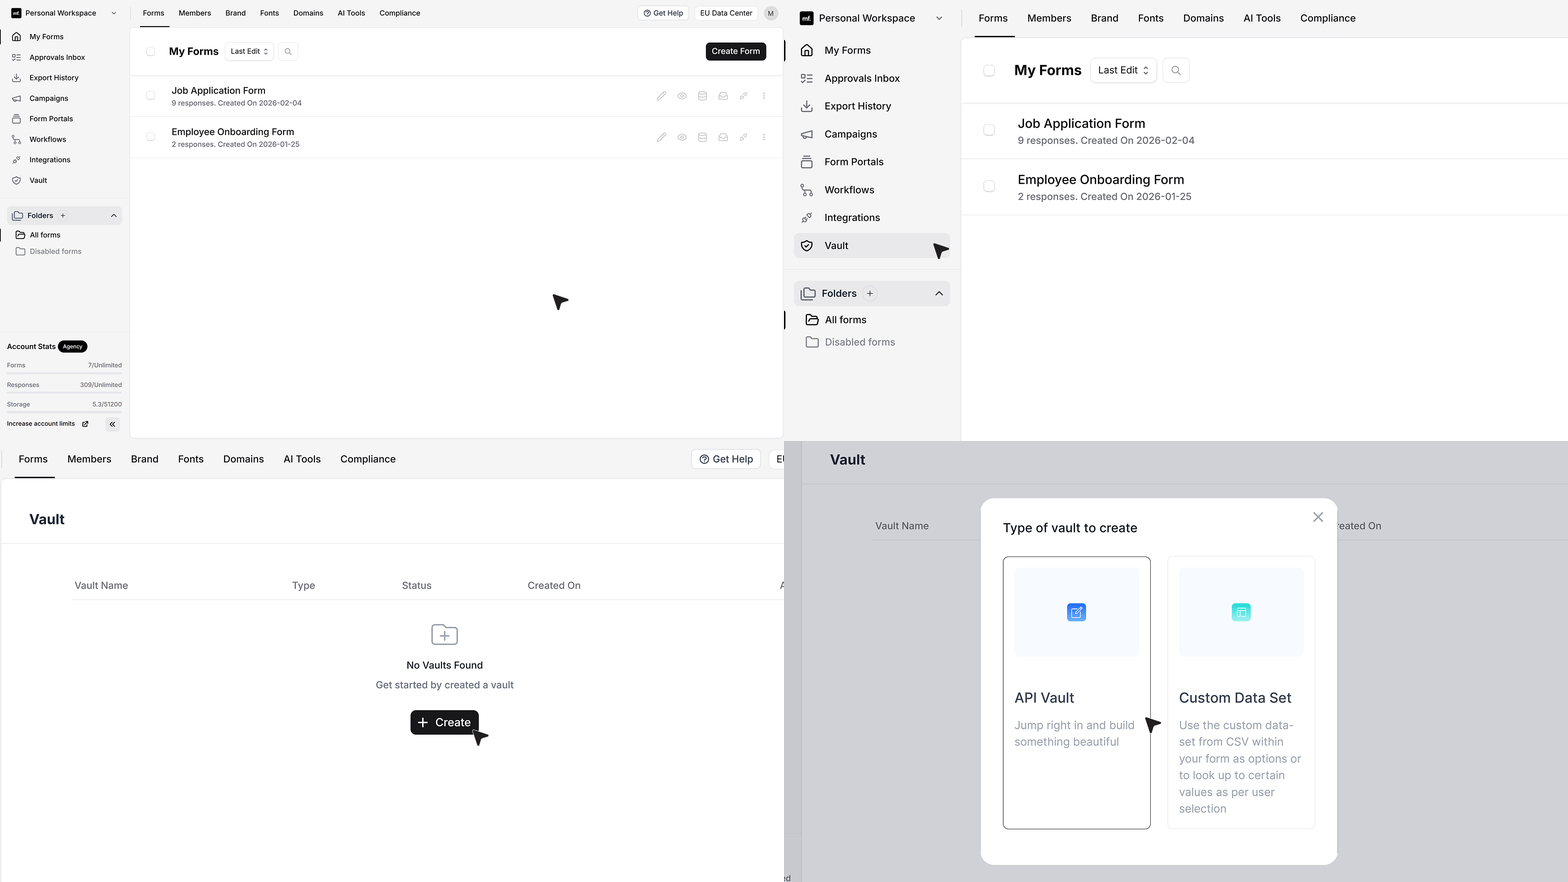
- From the Make Forms dashboard, navigate to Vault, then select Create Vault and choose API Vault.
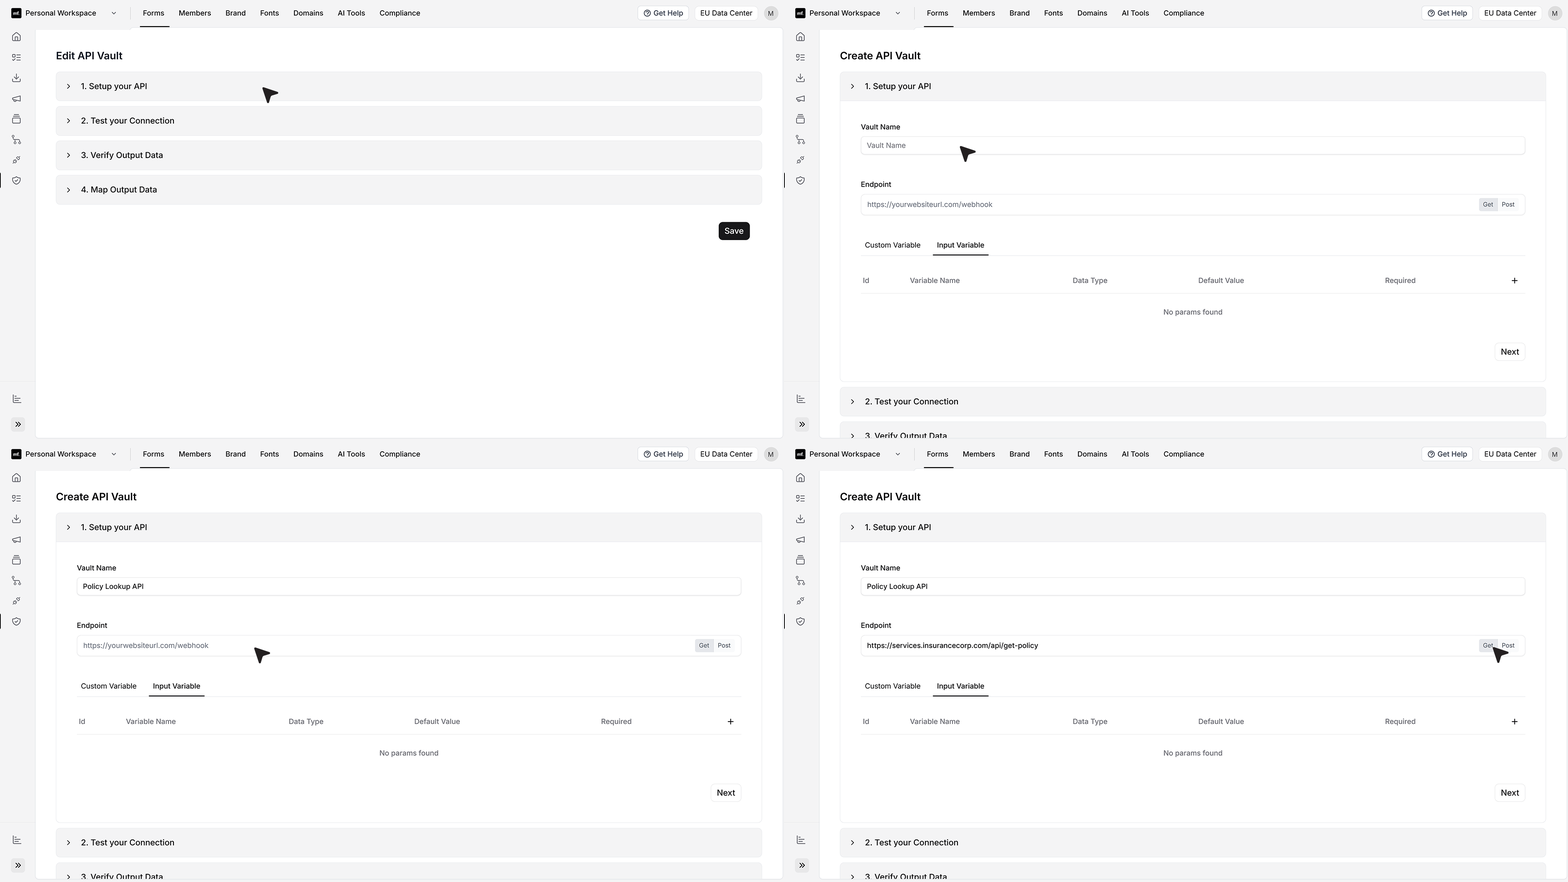
- In the first step, assign a clear name to your endpoint, such as “Policy Lookup API.” Enter the URL of your backend service that returns policy information. Select the appropriate request method, such as GET or POST.
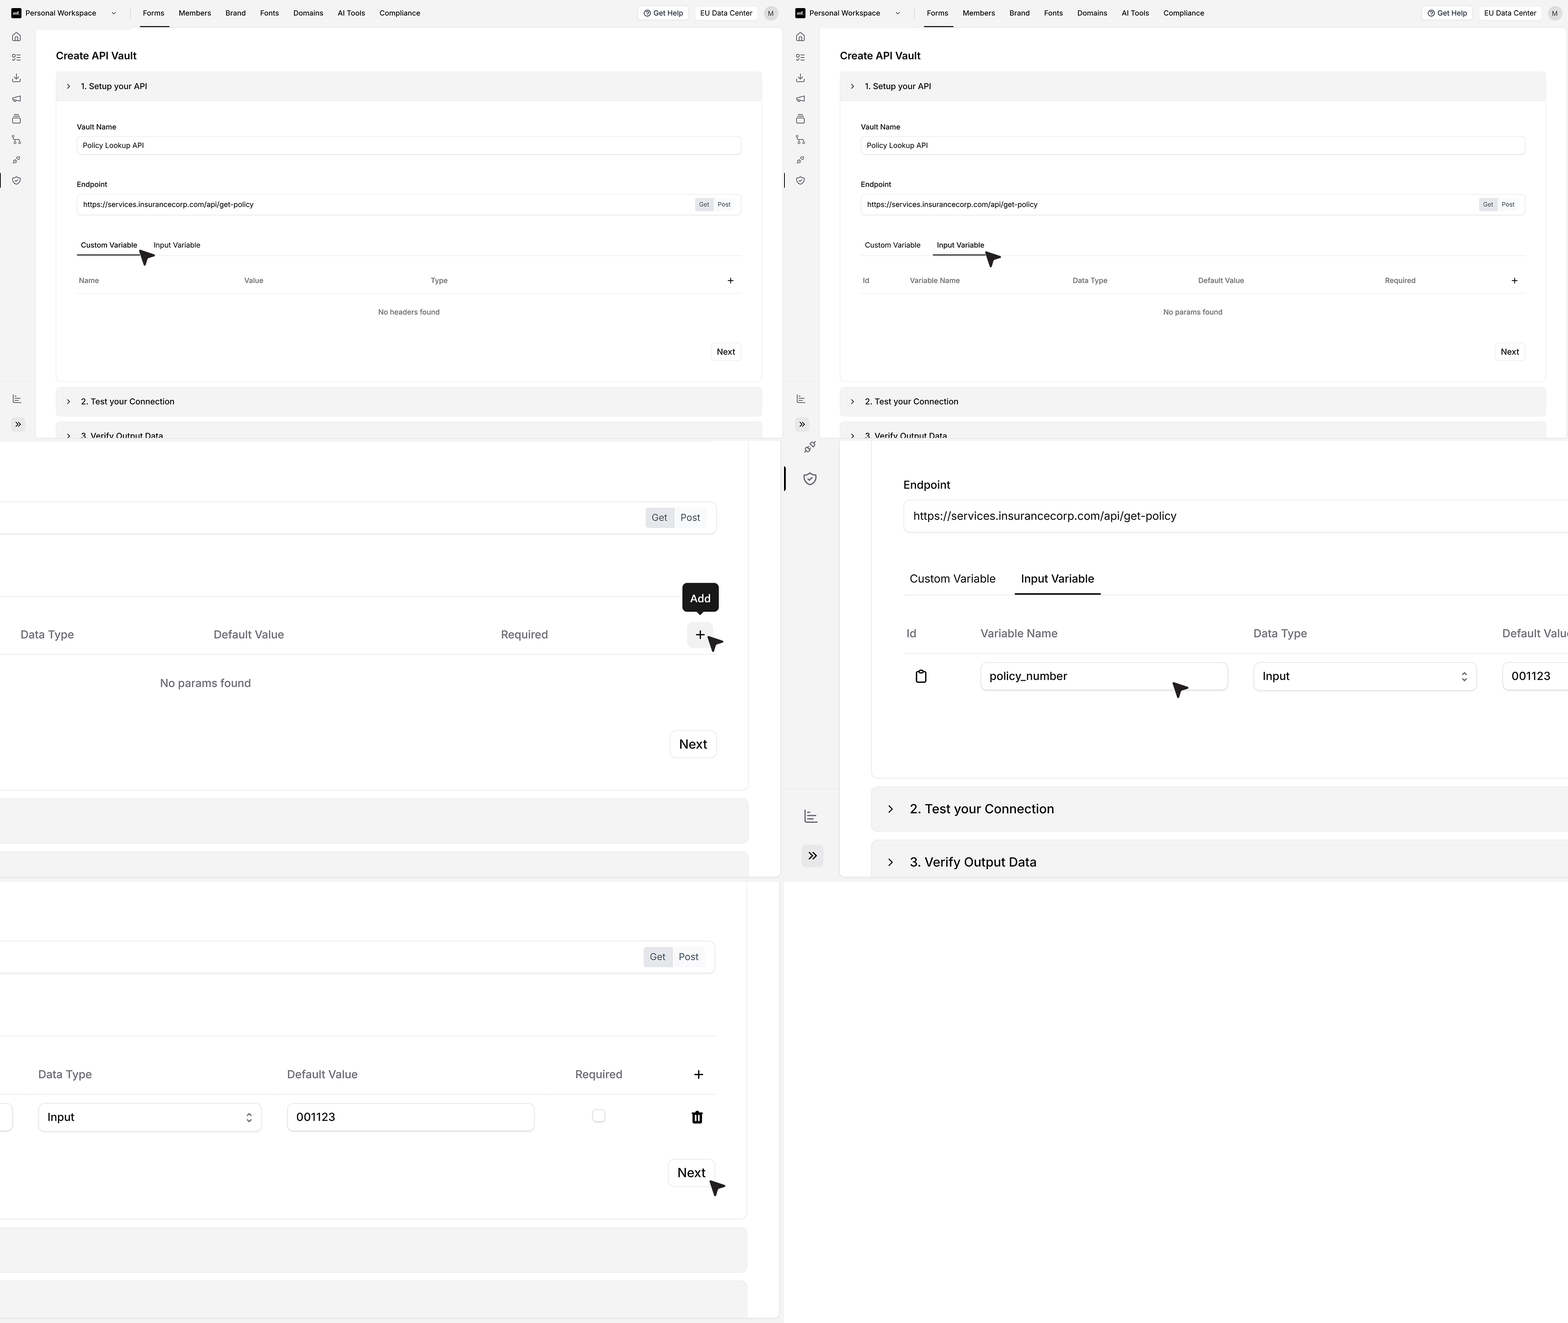
- Next, configure variables. Custom variables are fixed values sent with every request, such as API keys or tenant identifiers. Input variables are dynamic values that come from the form while the user is filling it out.
For this example, create an input variable named policy_number. You may assign a default value to simplify testing.
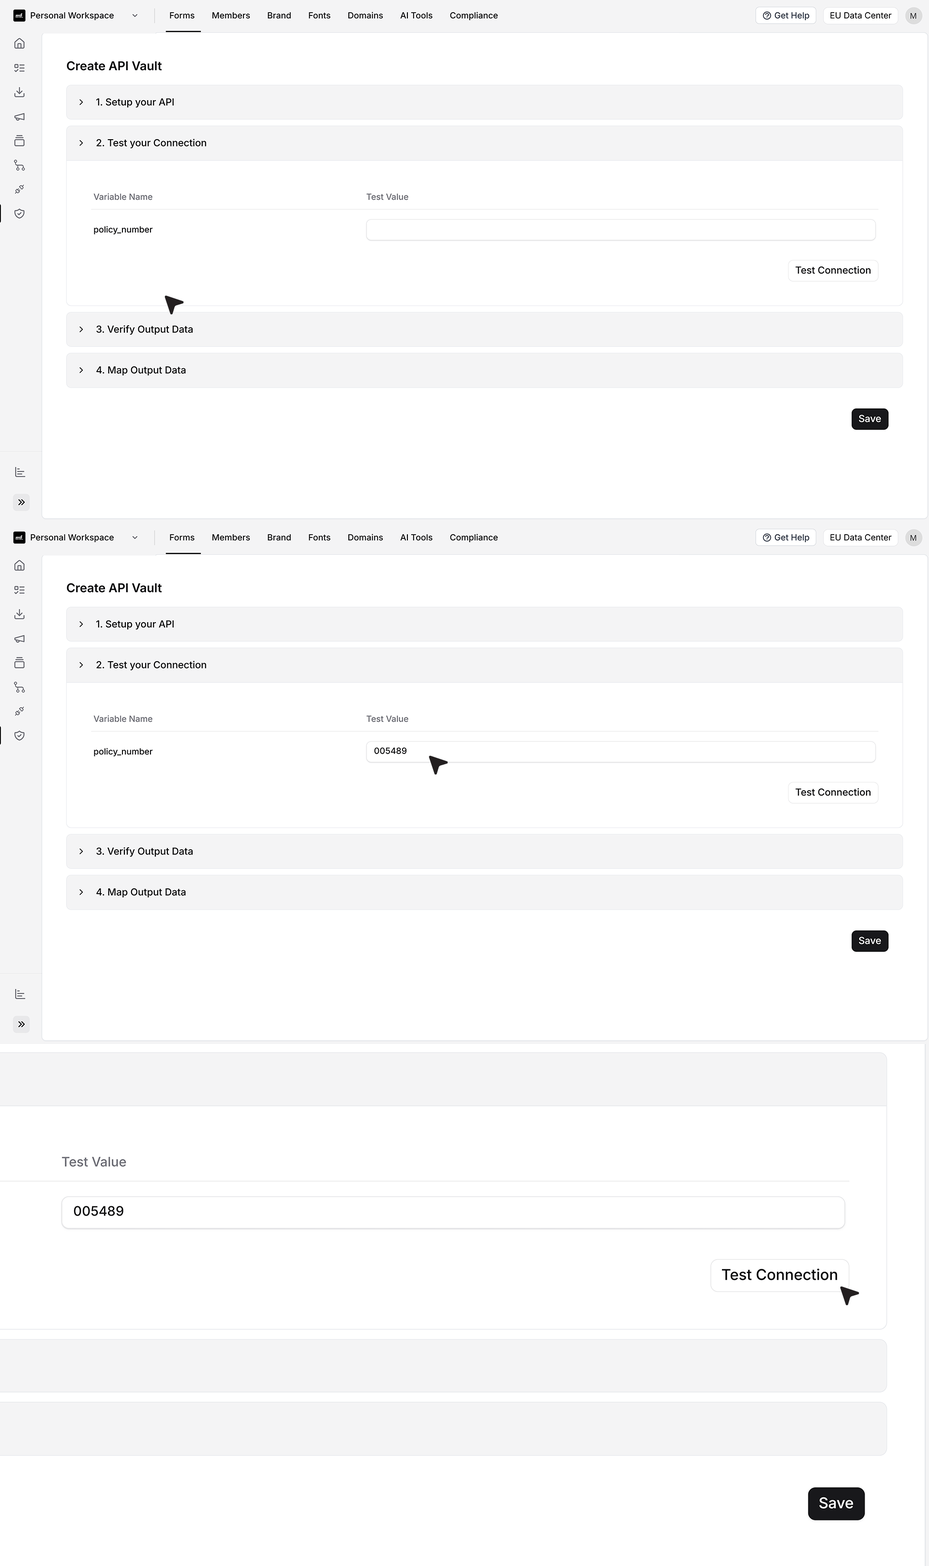
- Provide a sample policy number and run a test request. Make Forms sends the API call using the provided input values. If the endpoint is reachable and properly configured, the system will return a response.
If errors occur, adjust the URL or variable configuration before proceeding.
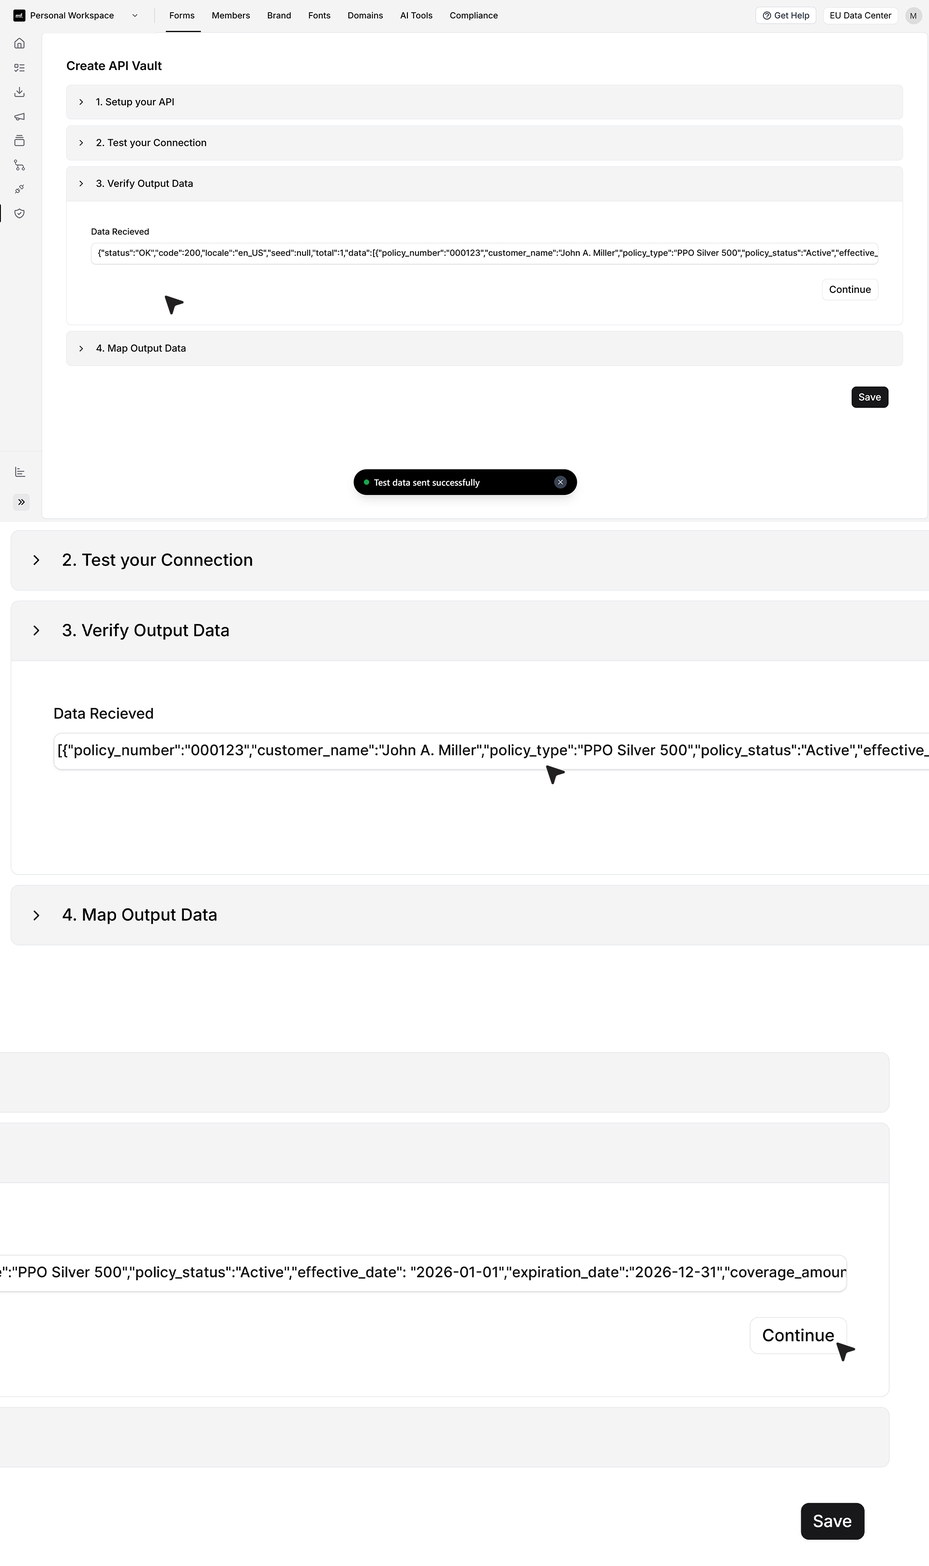
- After a successful test, you will see the raw JSON response returned by your backend. This response defines the structure of the data that can be used inside your form. For example, the response may include fields such as customer_name, policy_type, policy_status, and expiration_date.
Carefully review the structure to determine whether the data is returned as a single object or inside an array. Understanding the response format ensures accurate mapping in the next step.
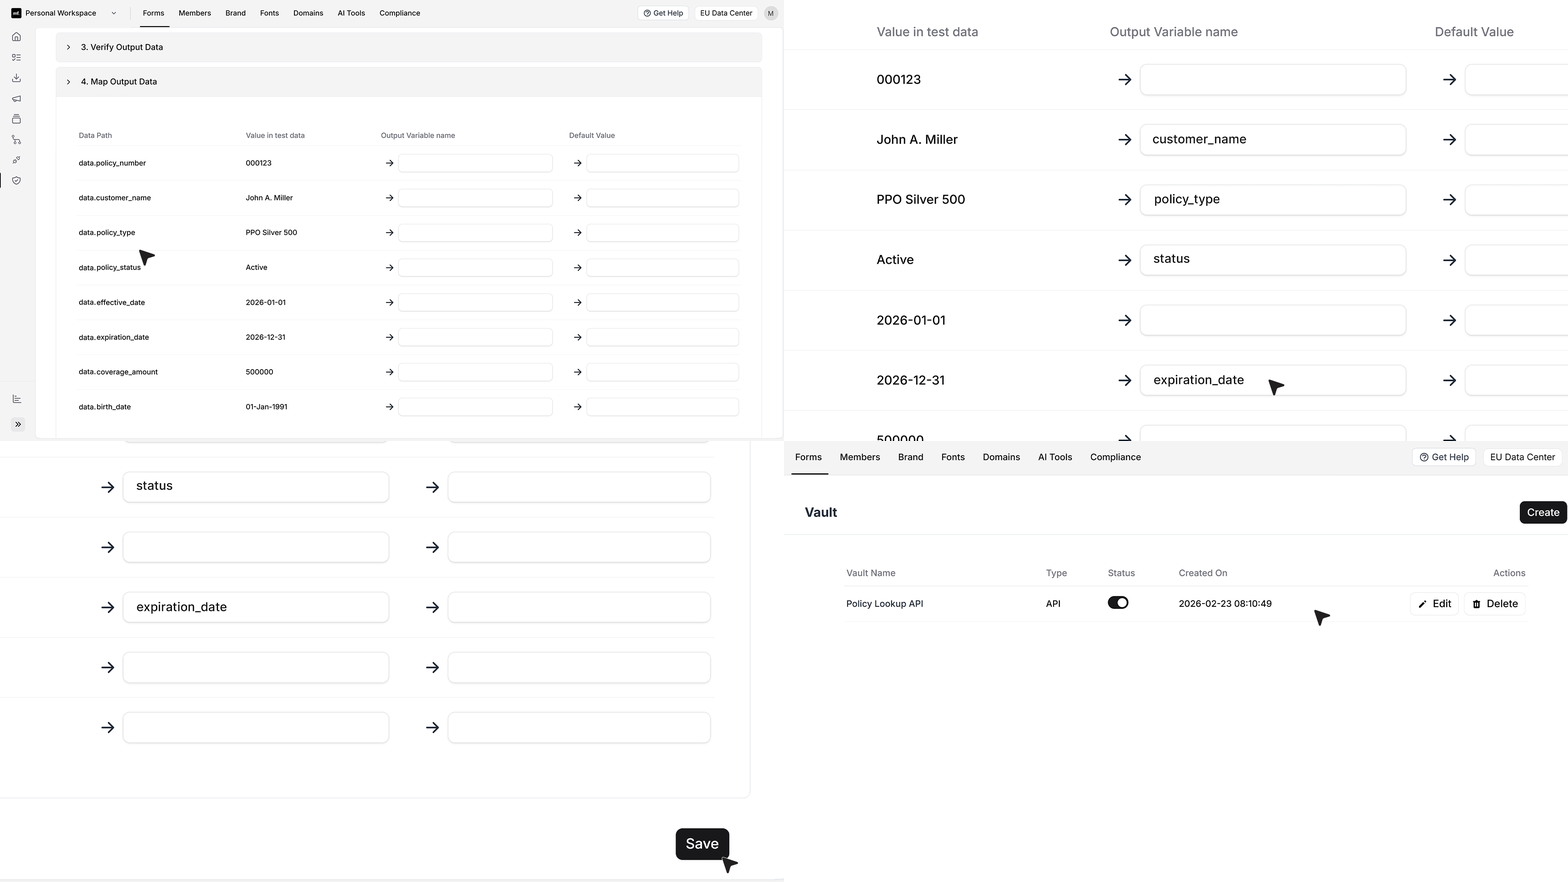
- In this step, you convert the raw API response into usable output variables. Create clear and readable variable names such as customer_name, policy_type, policy_status, and expiration_date. Map each variable to its corresponding JSON path from the response.
Once mapped, these output variables become available when building your form. They can populate input fields, display inside paragraph elements, or be stored directly in submission records.
Save the endpoint to complete the API Vault configuration.
Using API Vault Inside a Form
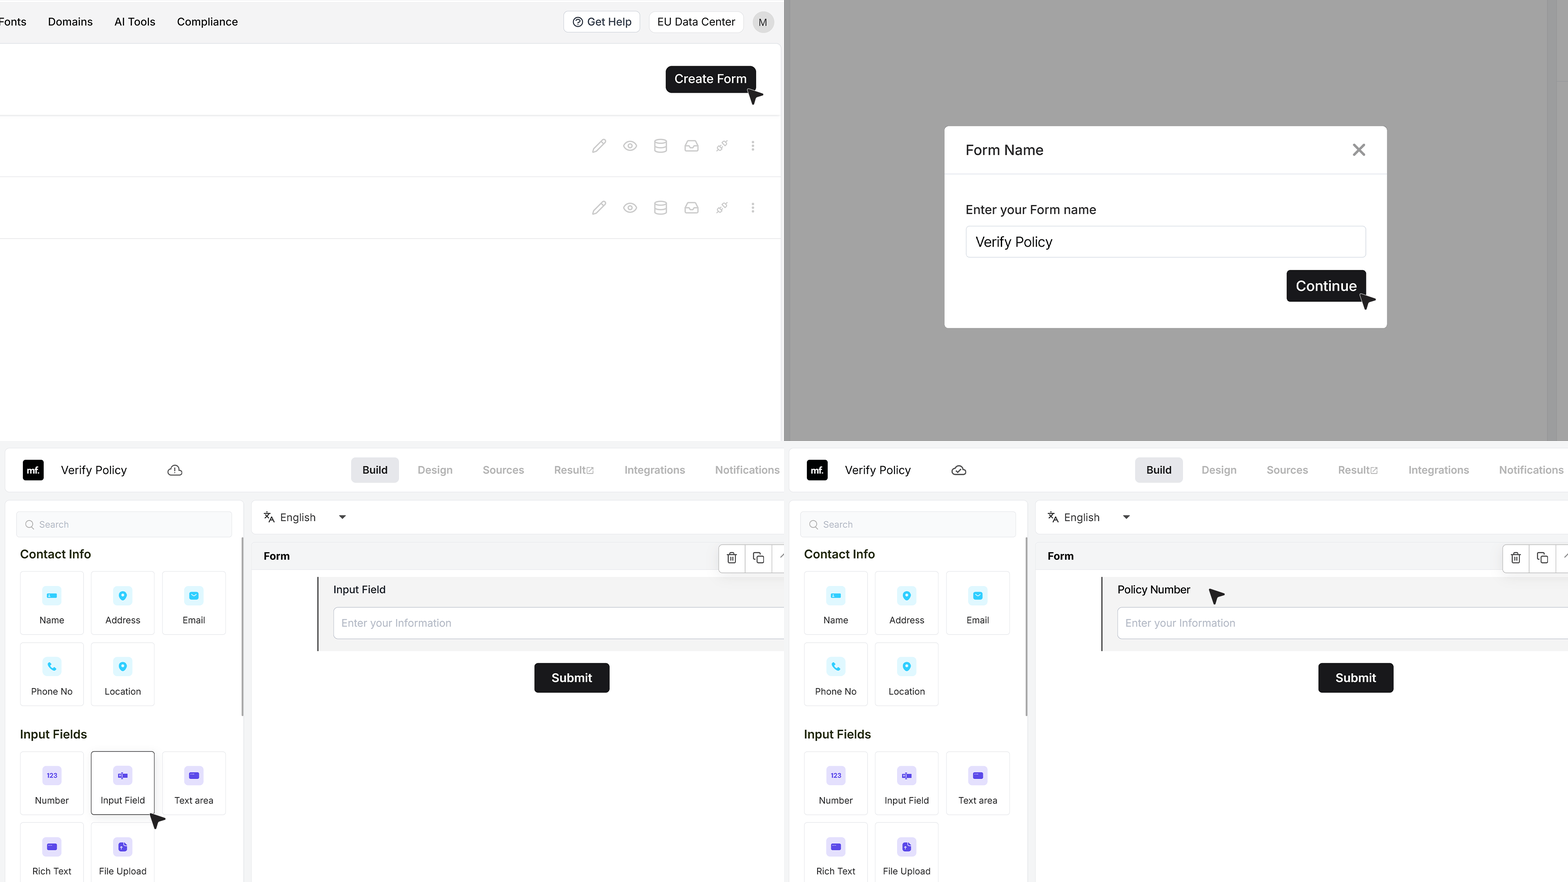
- Create a new form and name it “Verify Policy.” Add an input field labeled “Policy Number.” This field captures the value that will be sent to your backend.
- Next, add an API Action field. This field functions as the trigger that sends the API request. Name it “Check Policy,” and select the Policy Lookup API you previously created.
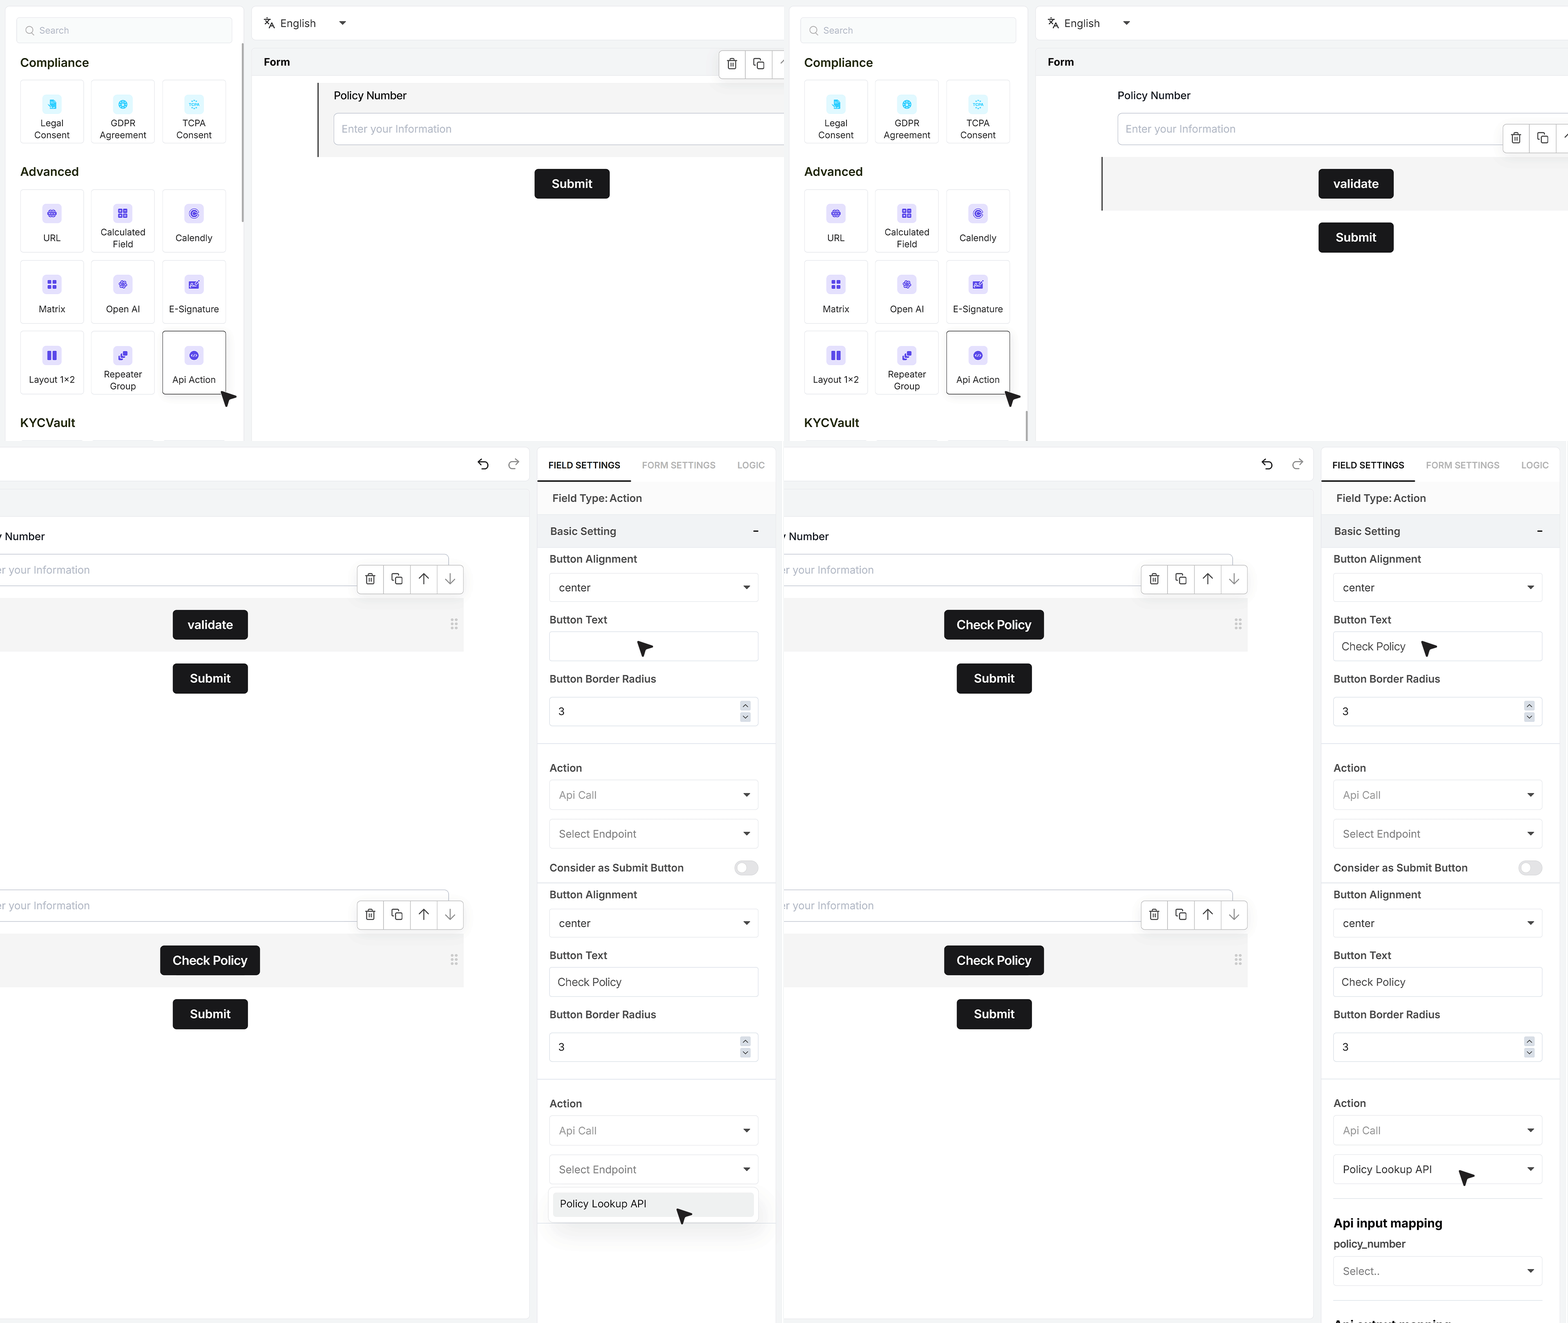
- Under the input mapping section, connect the form’s Policy Number field to the policy_number variable defined in your API Vault. This ensures that when the user clicks the button, the entered value is passed to the backend.
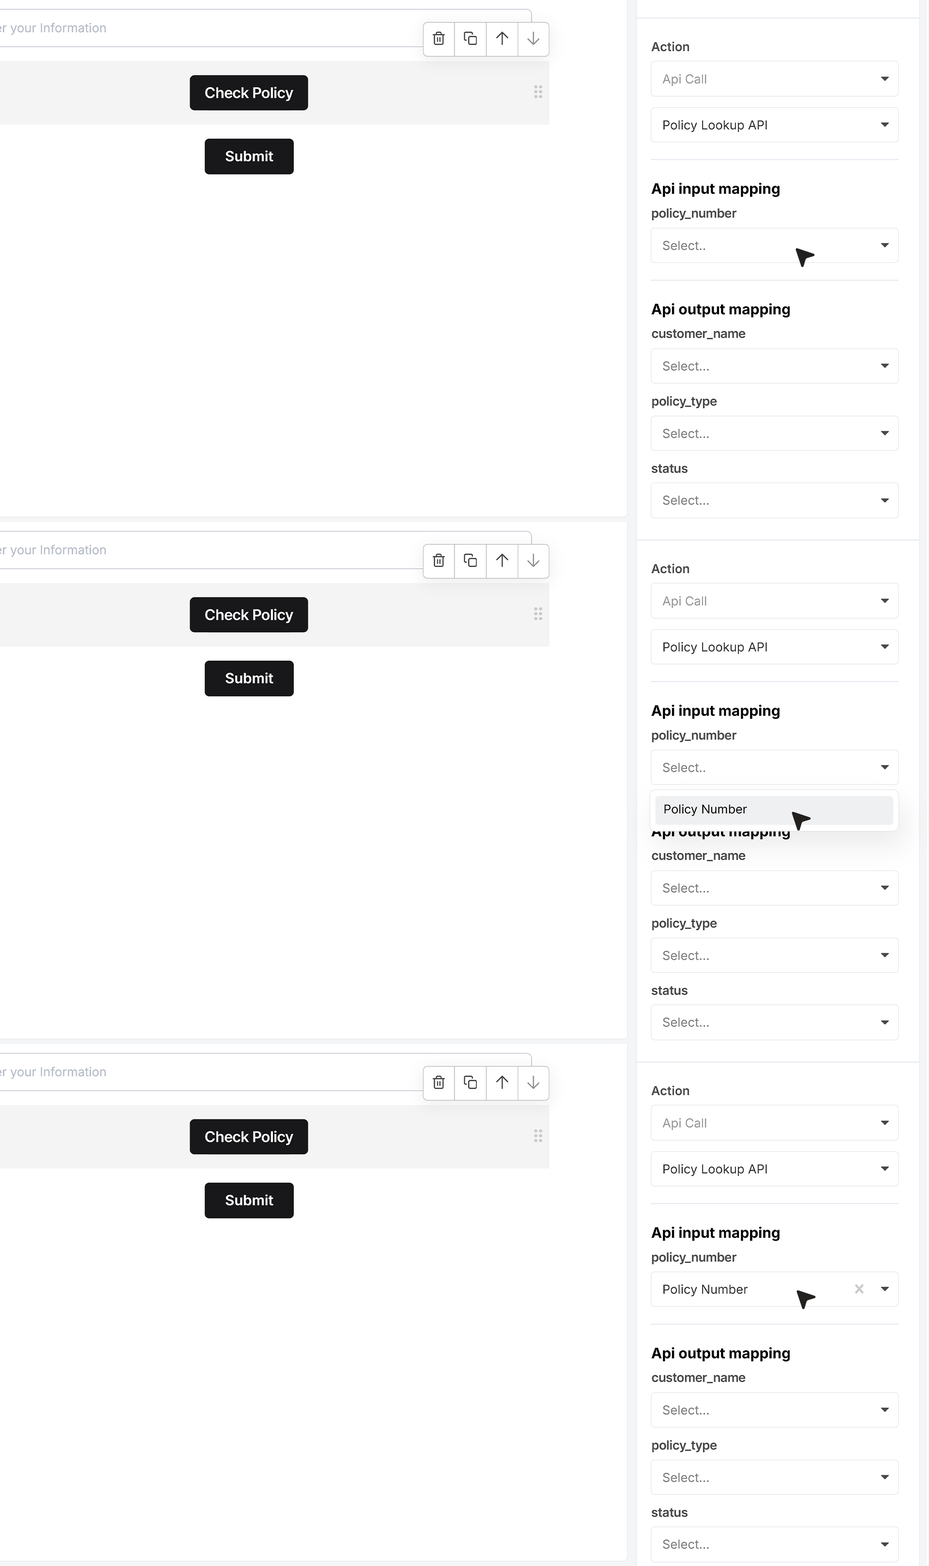
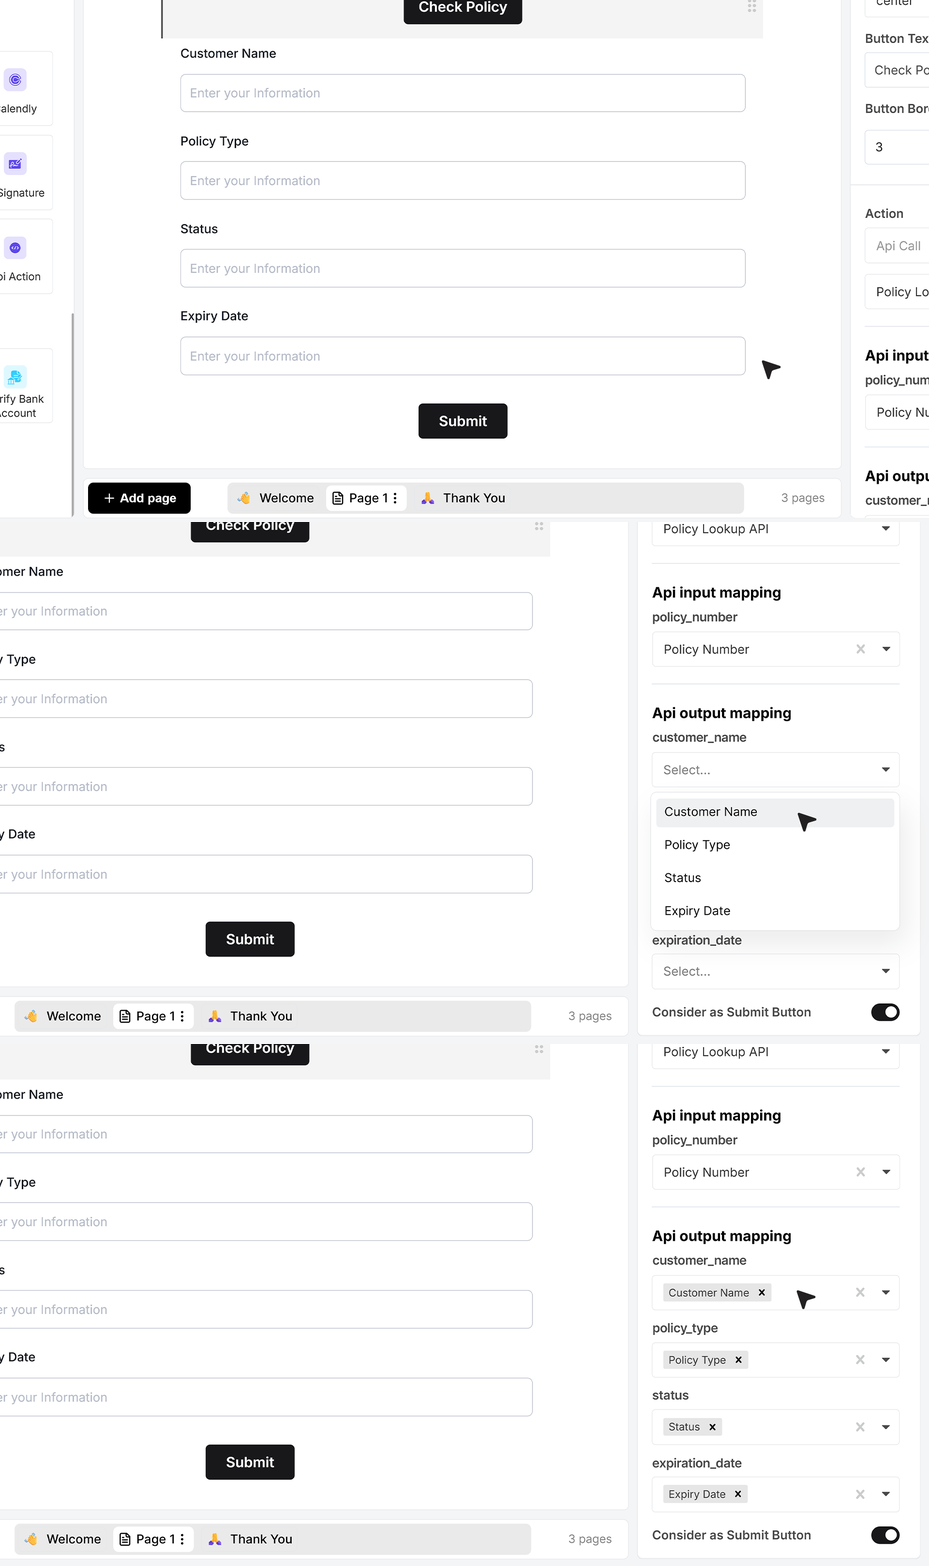
- Under the output mapping section, add fields such as Customer Name, Policy Type, Status, and Expiry Date. Map each of these fields to the corresponding output variables from the API. When the API returns data, these fields are automatically populated.
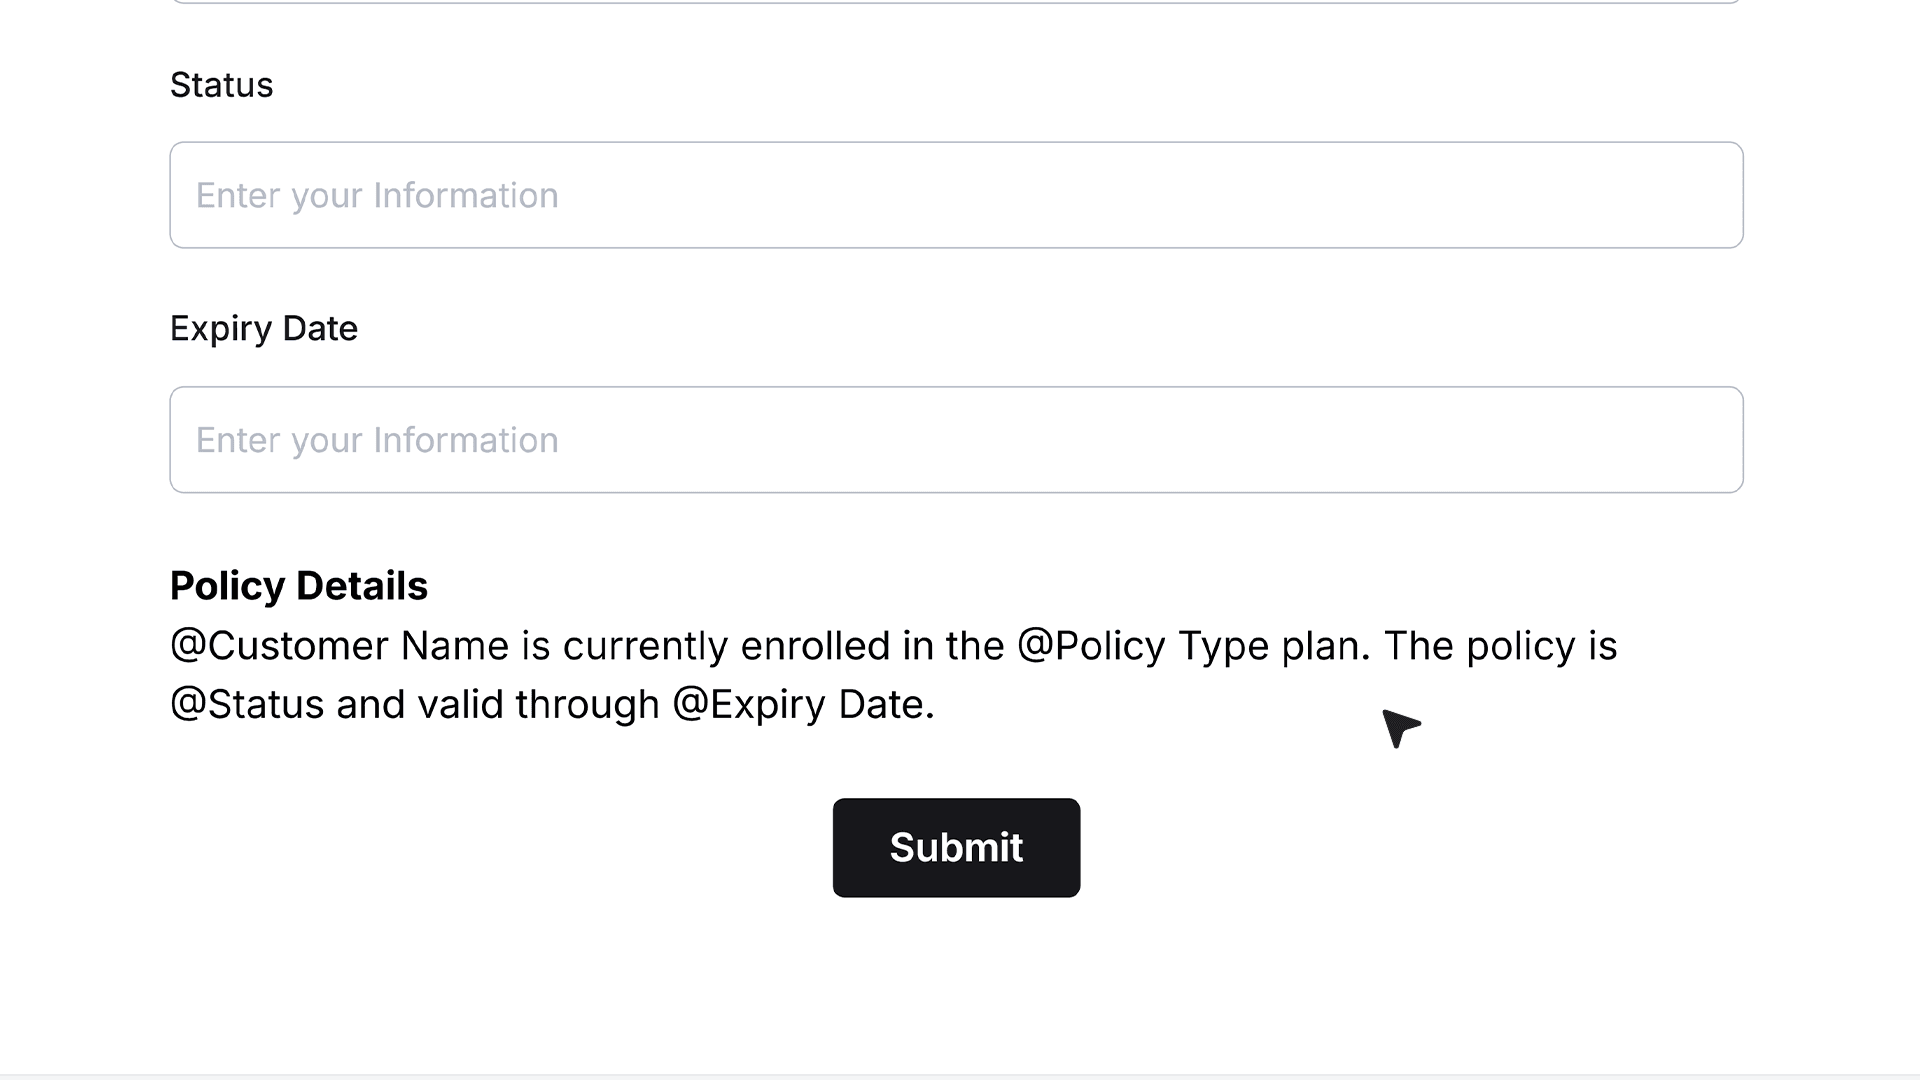
- You may also map outputs to paragraph elements for display-only summaries or store them directly in the submission record for future reference.
Testing the Workflow
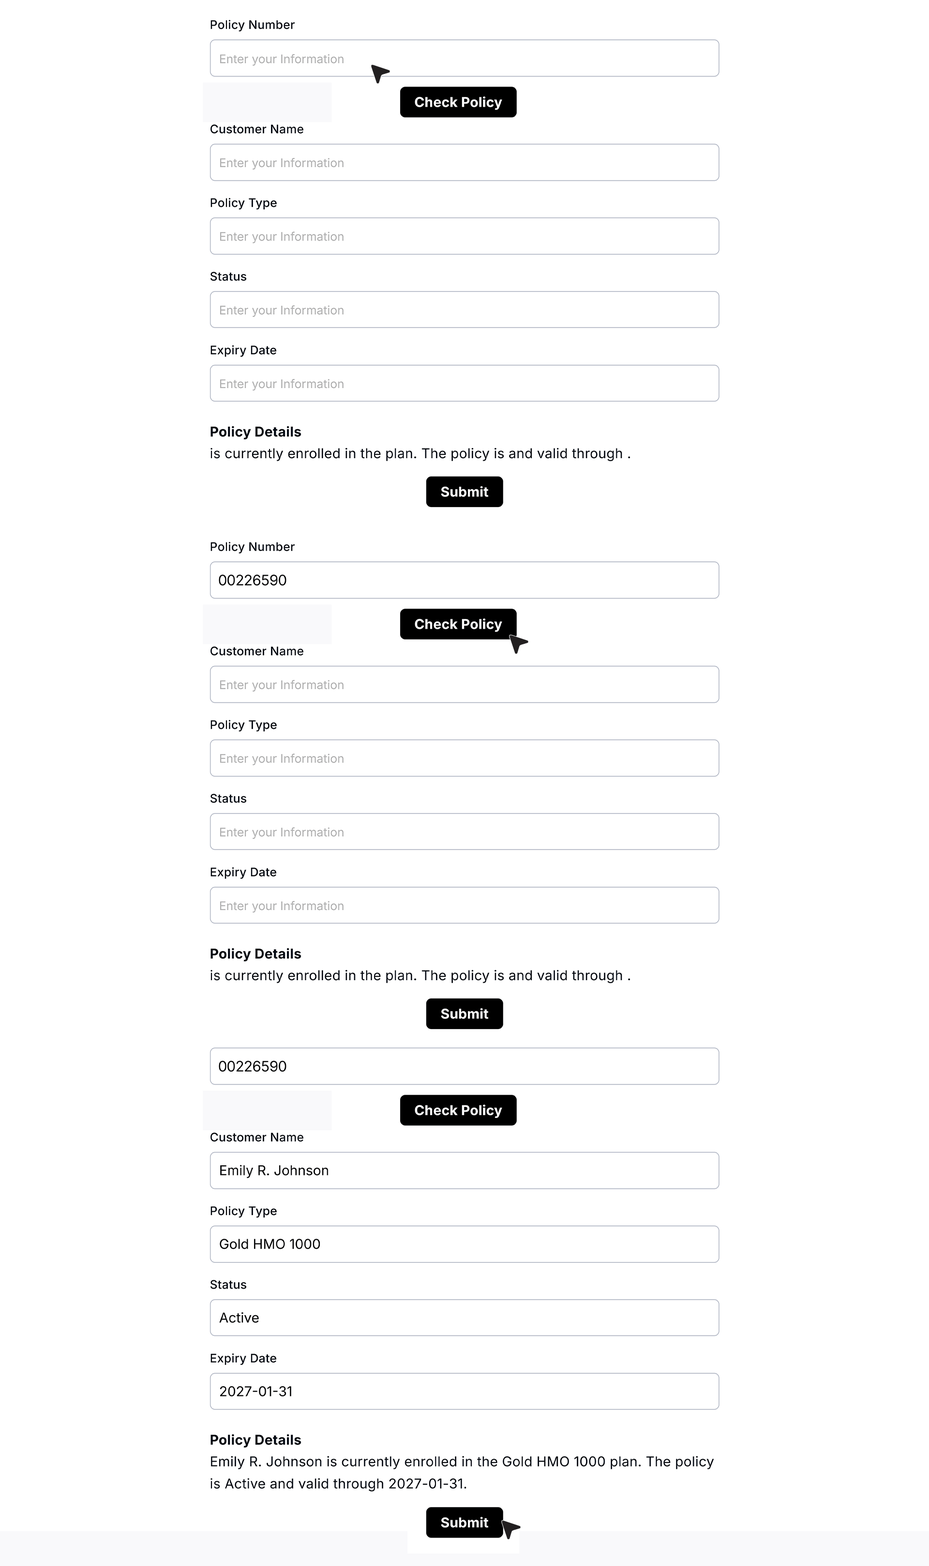
Publish the form and open it in preview mode. Enter a valid policy number and click “Check Policy.” The form sends the request through API Vault, retrieves the response from your backend, and fills in the related fields automatically.
The user can review the information, provide additional details if required, and complete the submission process.
FAQ's
An API Action Field lets your form connect to an external API and fetch data in real time. When a user enters a value like an ID or policy number, the form sends a request to your backend and fills in the related fields automatically.
MakeForms uses API Vault to store your API setup. When a user interacts with the form, the API Action Field triggers a request using the input data. The response is then mapped to form fields and shown instantly.
Yes. You can map API response data to form fields. Once the API returns data, fields like name, status, or plan type can be filled automatically without user input.
You can connect to any REST API that supports GET or POST requests. This includes internal systems, CRMs, verification services, or any backend that returns JSON data.
Input variables are values sent from the form to the API, like a policy number.
Output variables are values received from the API response, like customer name or status, which can be mapped to form fields.
No. You only need basic understanding of your API endpoint and JSON response. The setup is done through a simple interface where you map inputs and outputs.
Yes. API Vault allows you to send test requests using sample values. You can check the response and fix issues before using it in your form.
After testing your API, you define output variables and link them to JSON paths. These variables can then be connected to form fields for auto filling or display.
Yes. The API Action Field fetches data instantly when triggered. Users can see verified or updated data without leaving the form.
Yes. It is ideal for use cases like policy verification, KYC checks, order lookup, or customer validation. The form can fetch and show verified data instantly.
If the API fails, the form will not populate the fields. You can check errors during testing and adjust your endpoint, variables, or request method.
Yes. You can store API response data directly in submission records for future use, reporting, or audits.
Yes. You can map output variables to display elements like paragraphs. This lets users view data without storing it.
Yes. You can use custom variables in API Vault to send fixed values like API keys securely with every request.
Common use cases include customer lookup, policy verification, order tracking, lead enrichment, and auto filling user data from backend systems.