Email Field
The Email field in MakeForms is designed to capture valid and reliable email IDs from your respondents. It provides full control over verification, domain validation, and advanced configuration, ensuring that every email collected is accurate and genuine.
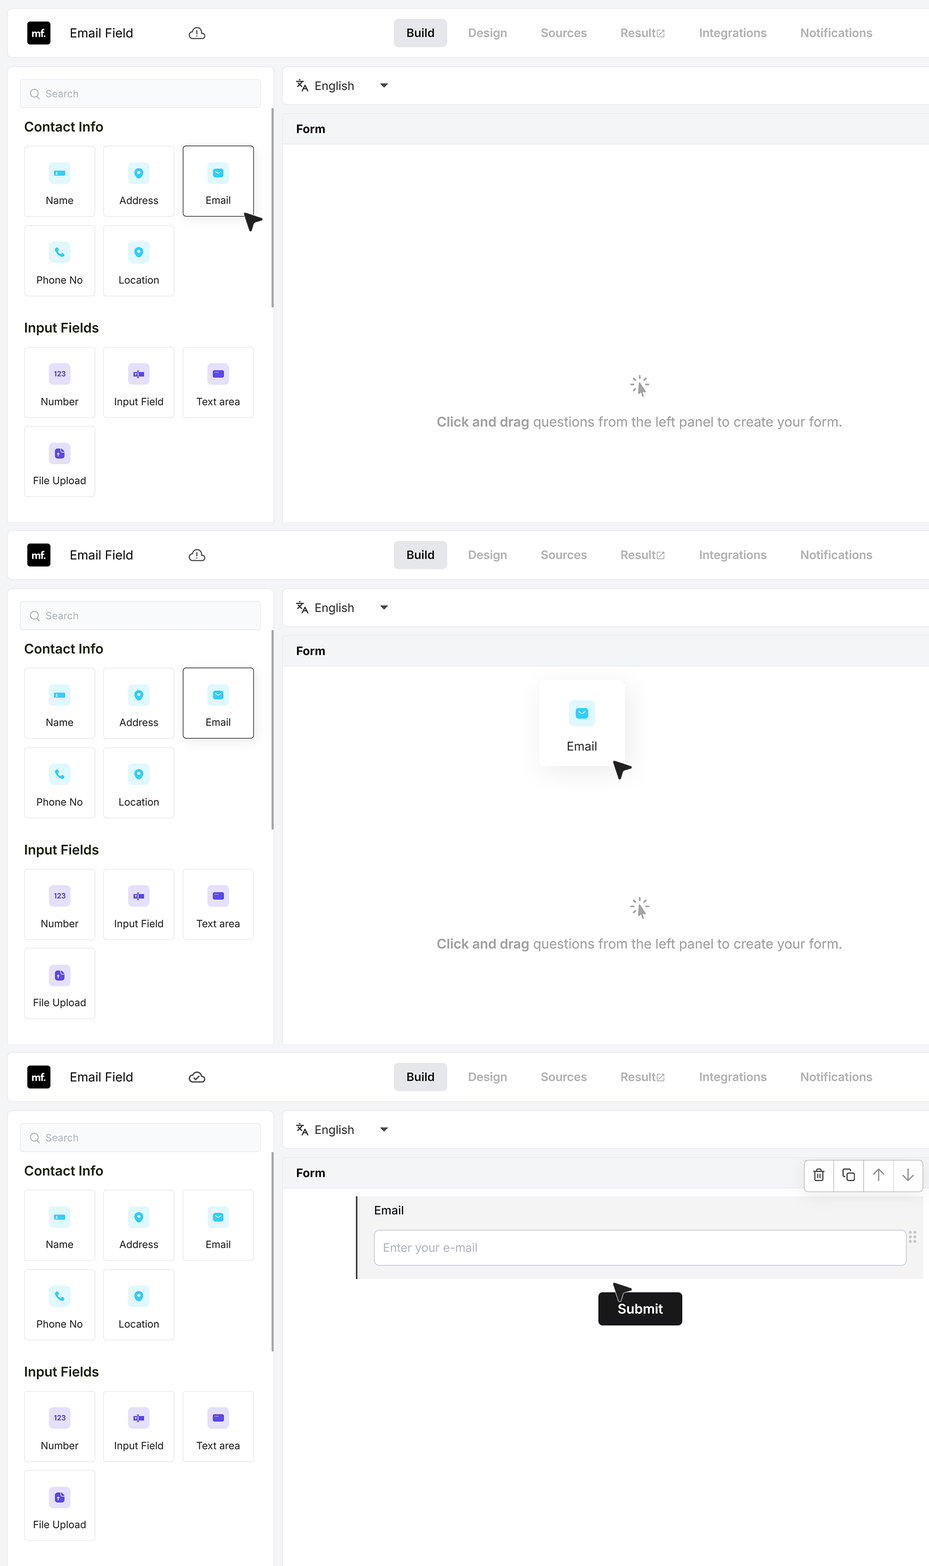
To get started, add an email field to your form. You can drag it from the field list or click to insert it.
Basic Settings
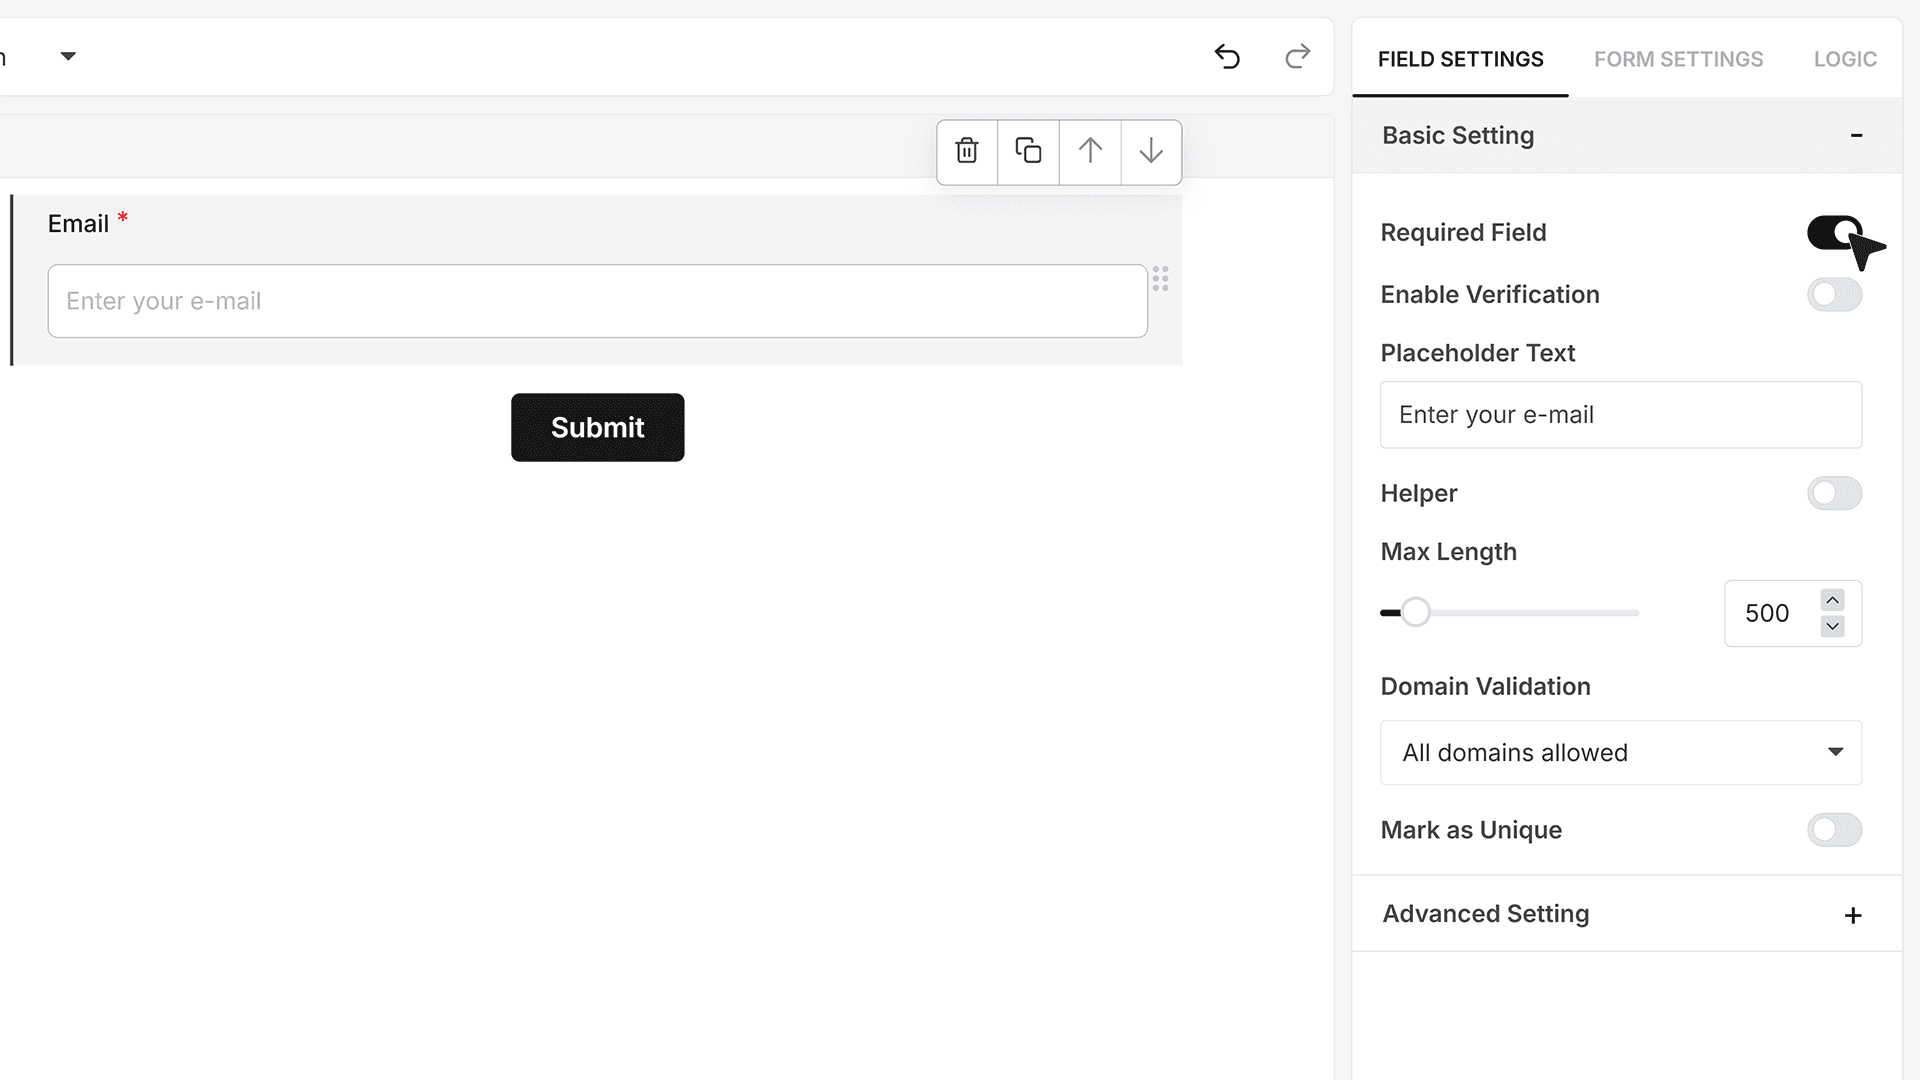
Required Field
When the Required Field toggle is enabled, the user must enter a valid email before submitting the form. If the email format is empty, the form displays an error message and prevents submission.
Email Verification
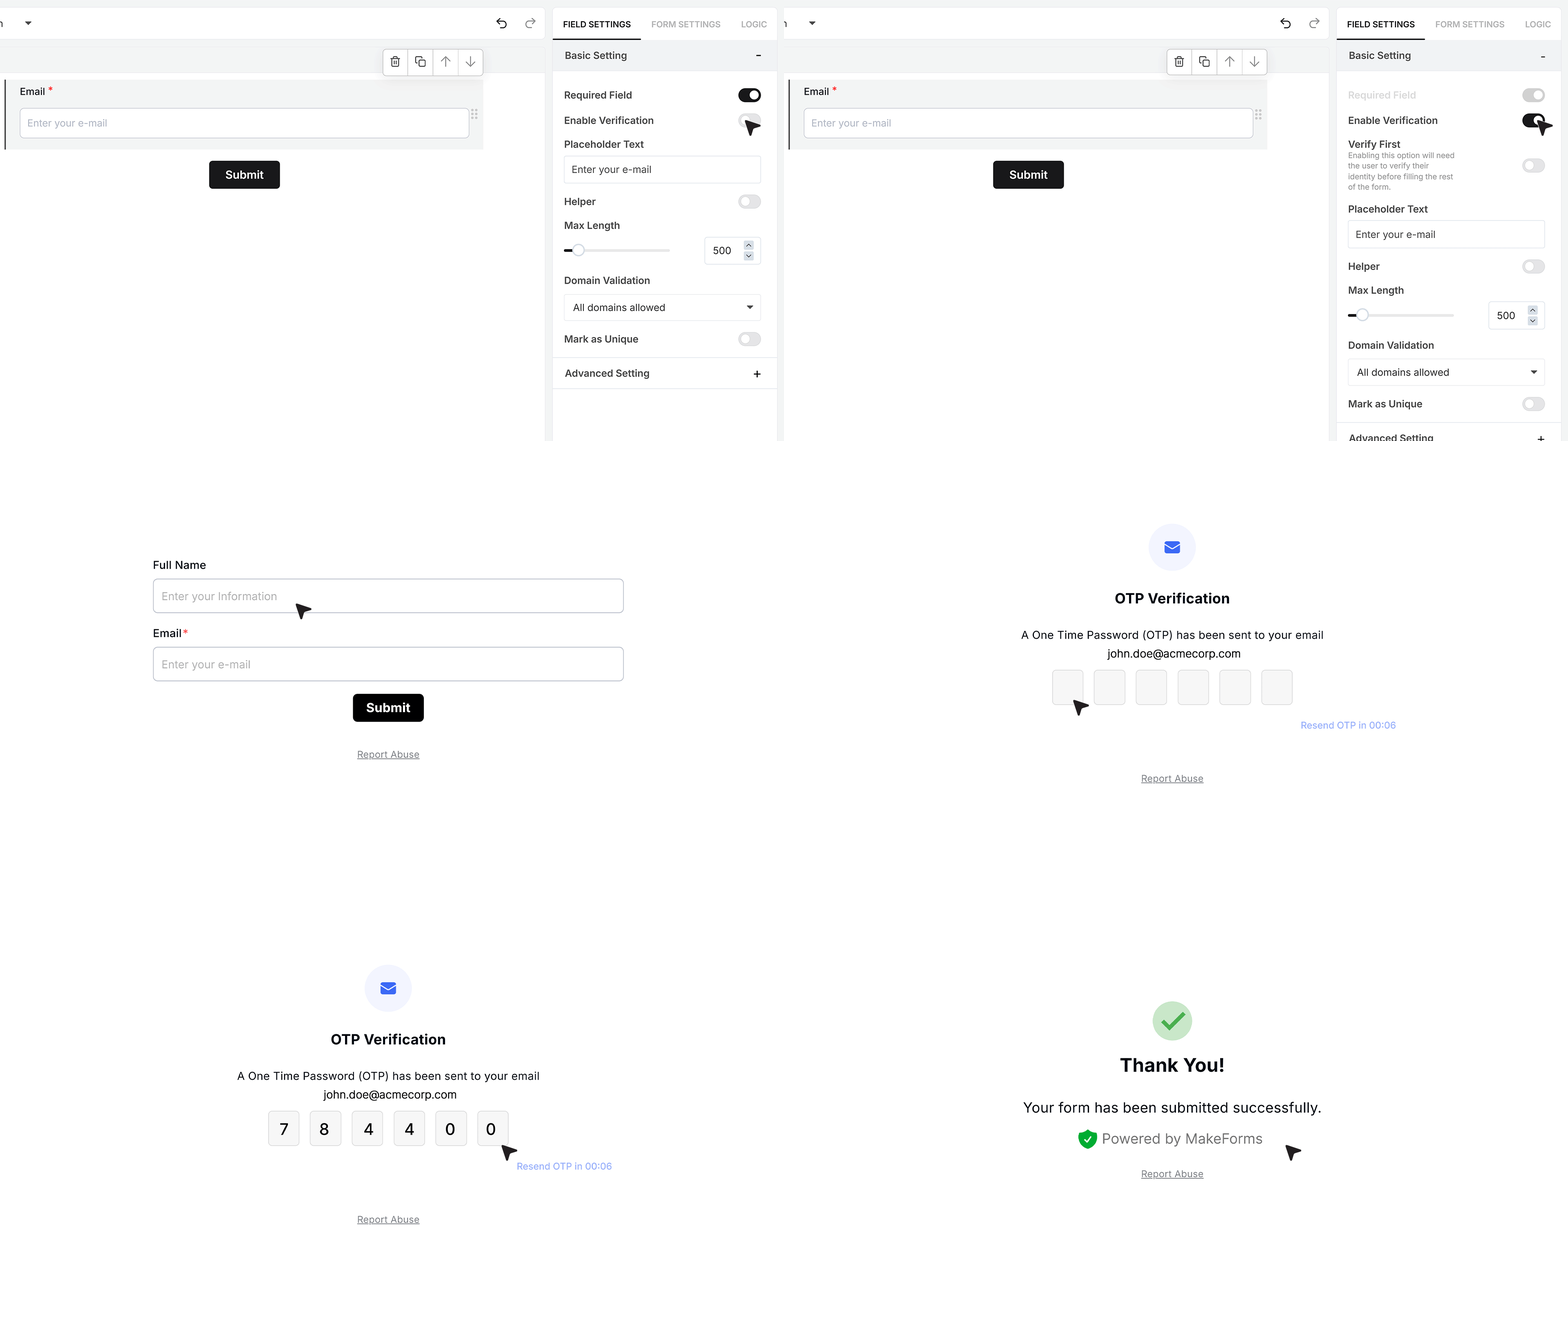
Enable Verification requires the user to confirm their email address before the form can be submitted. When this option is turned on, the user enters their email and a verification code is sent to that address. The user must enter the code in the form to verify the email. The form is submitted only after the email has been successfully verified.
Verify First
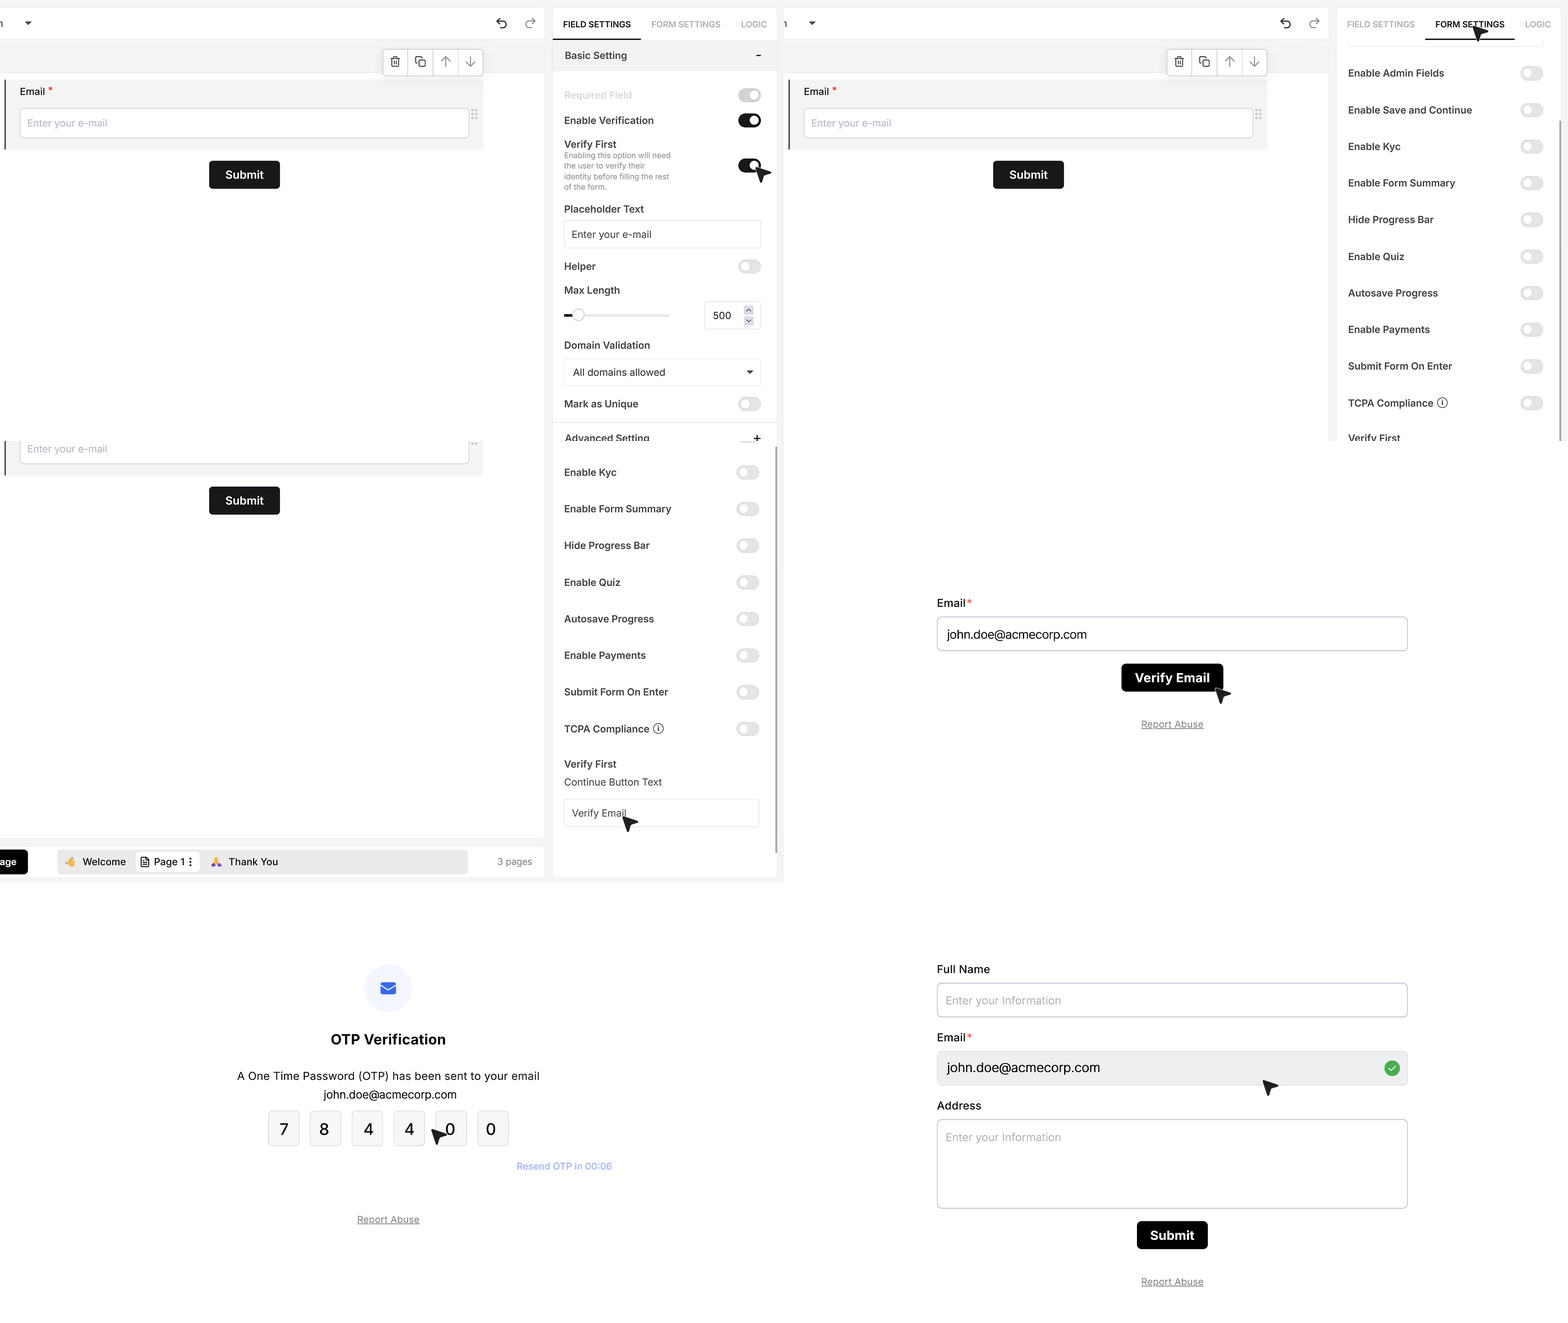
The Verify First option is useful when you want only verified users to see or fill the full form. When this setting is enabled, all other fields remain hidden until the user successfully completes email verification. You can also customize the button label during this step, such as replacing “Continue” with “Verify Email,” to match your form’s tone.
After the user enters their email address, a verification code is sent automatically. Once the correct code is submitted, the Email field displays a green confirmation indicator and becomes non-editable. At that point, the full form becomes visible, allowing the user to continue filling in the remaining fields.
Placeholder Text
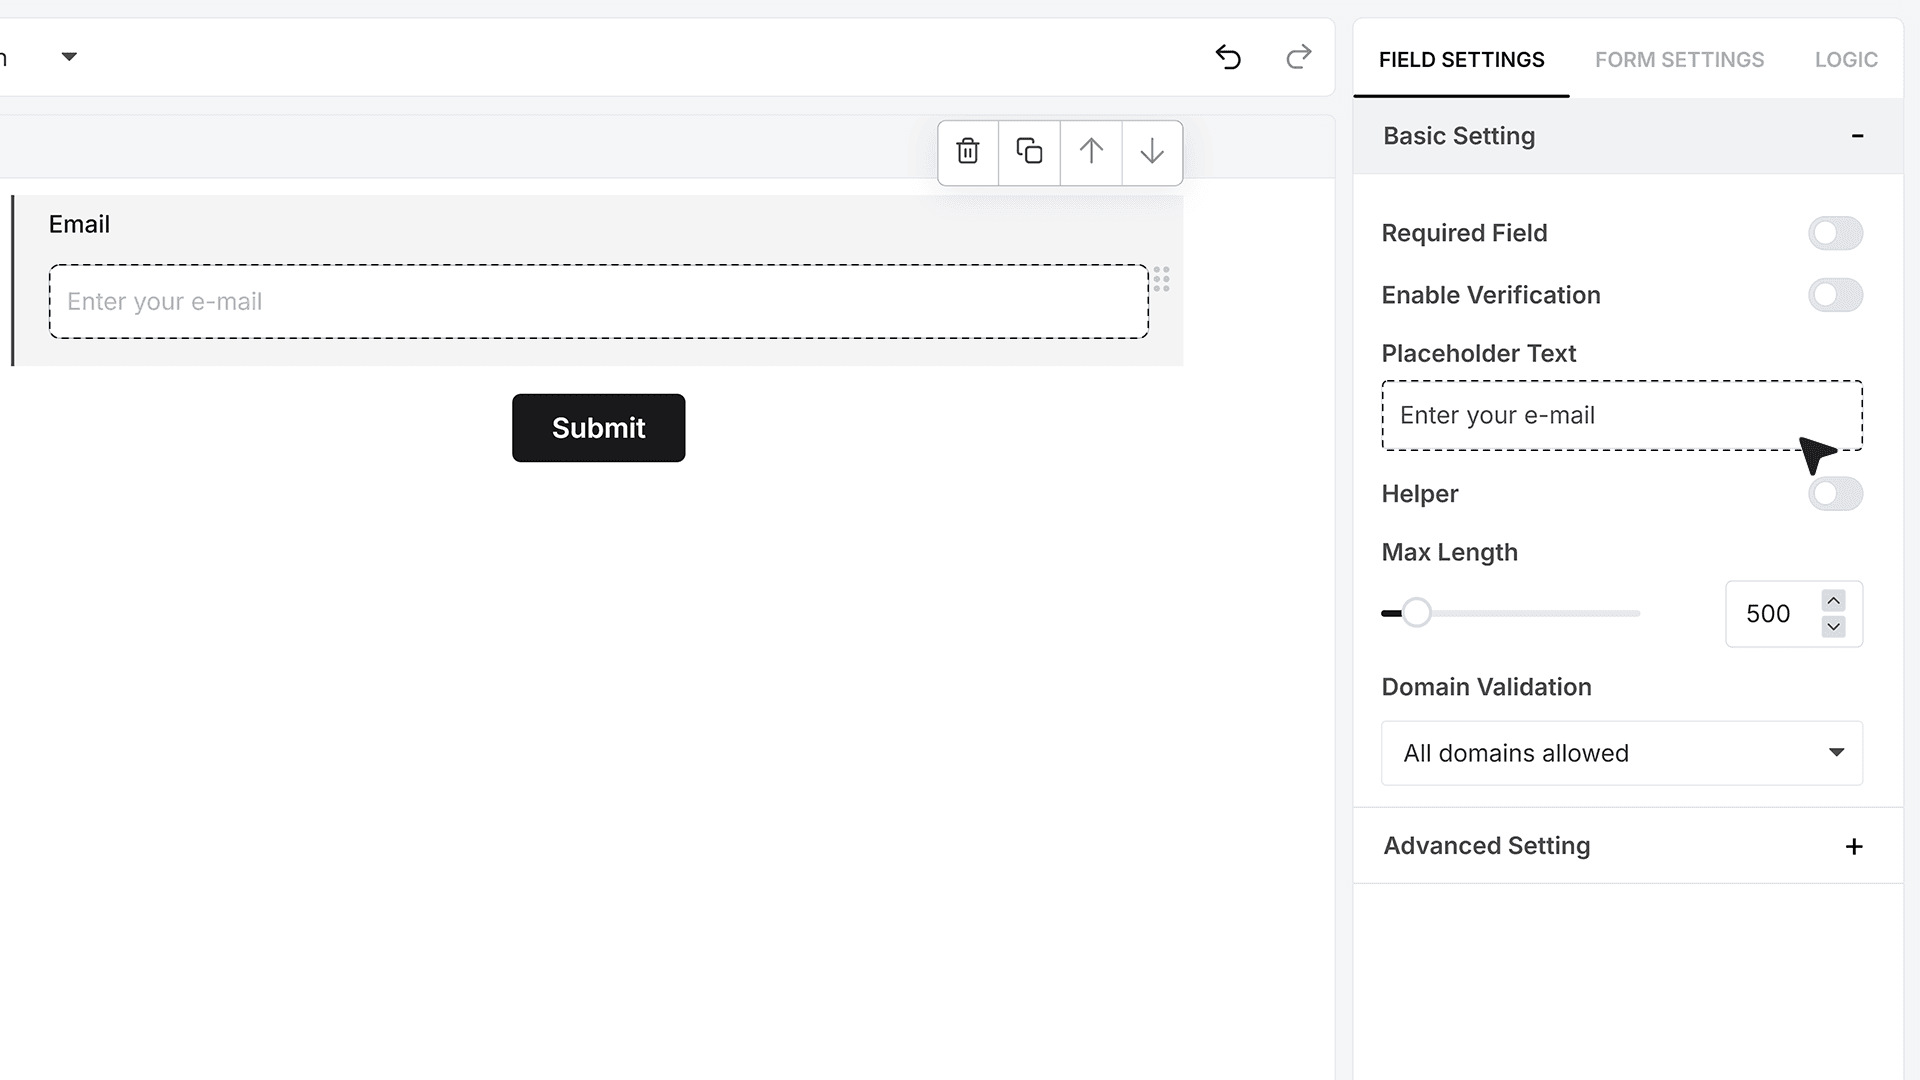
The Placeholder Text setting lets you show a short hint inside the Email field before the user begins typing. It guides respondents on the expected input and disappears automatically when they start entering their email.
Helper Text
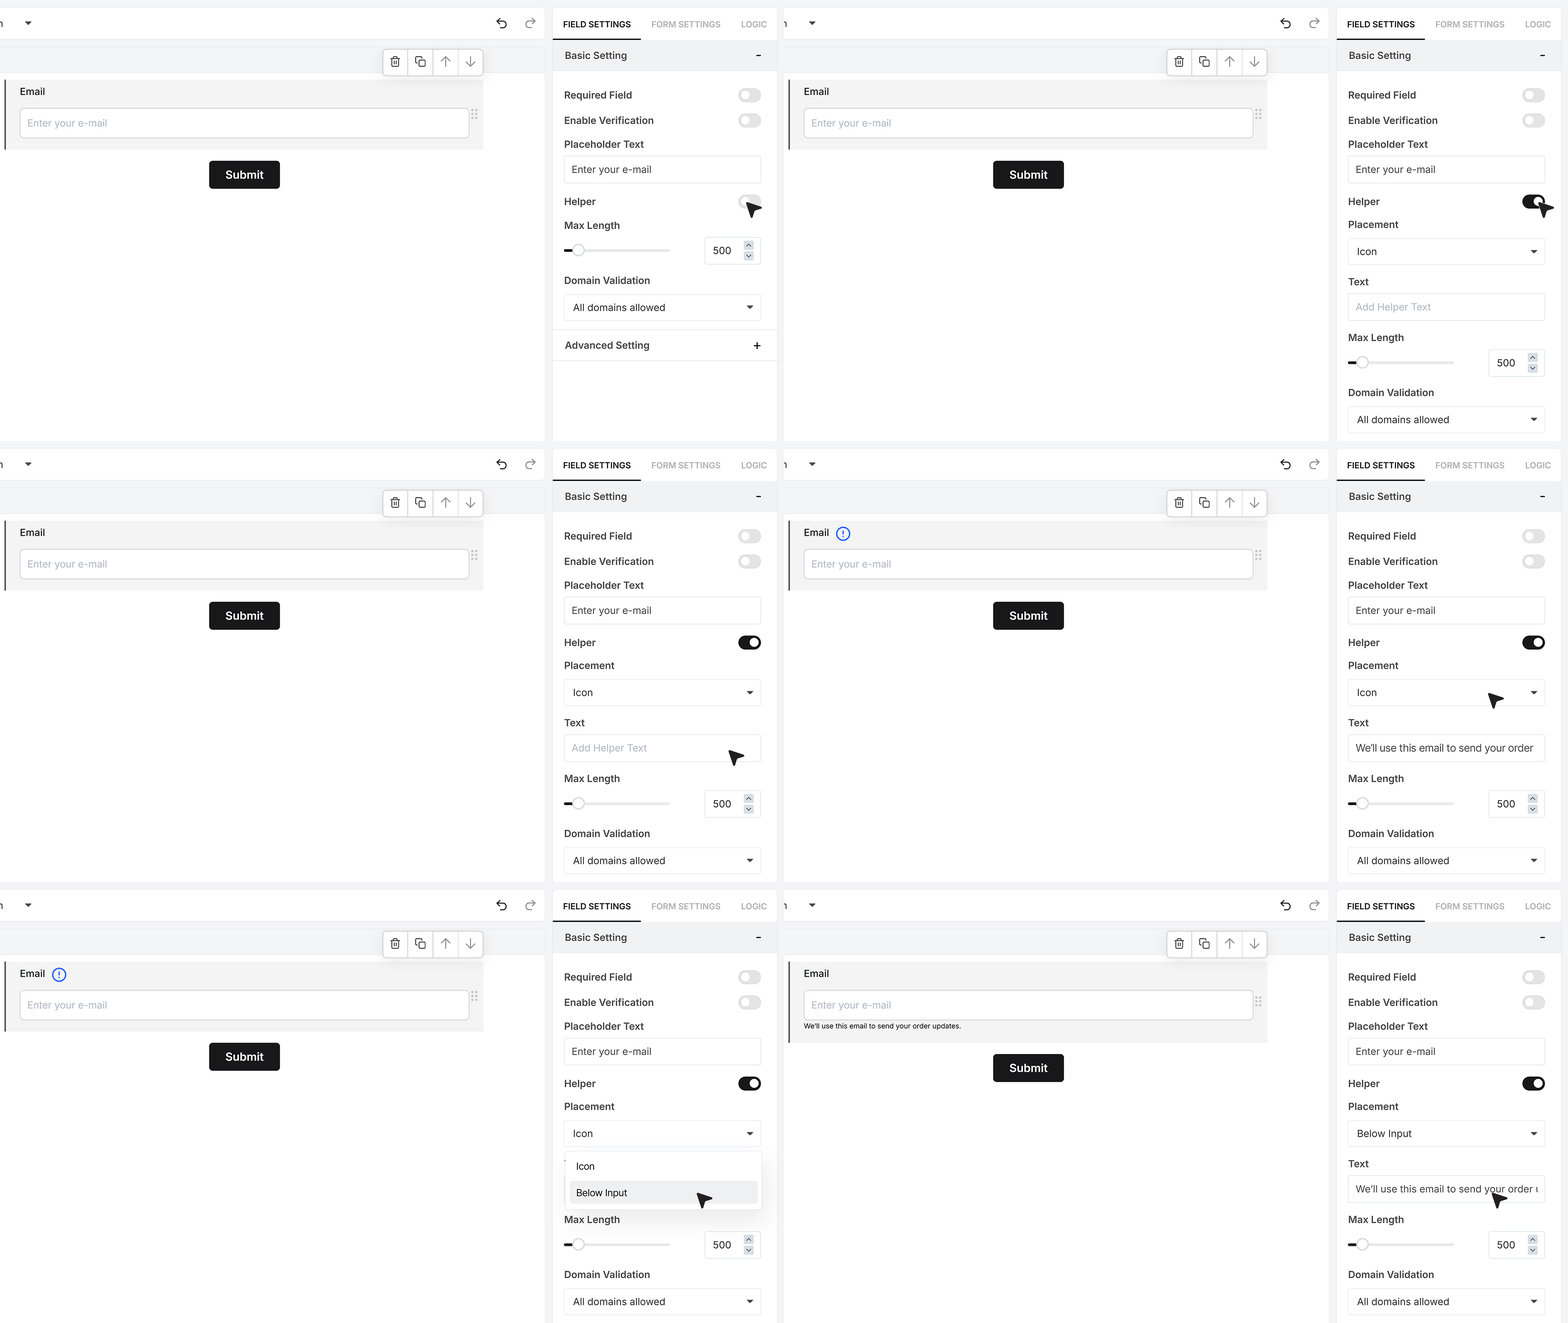
The Helper Text toggle lets you provide additional guidance for users. Once you enable it, you’ll see two options — Placement and Text. You can add your helper message in the text box, for example, “We’ll use this email to send your order updates.” Under Placement, you can choose whether to show the helper text as an icon beside it or below the input field.
Maximum Length
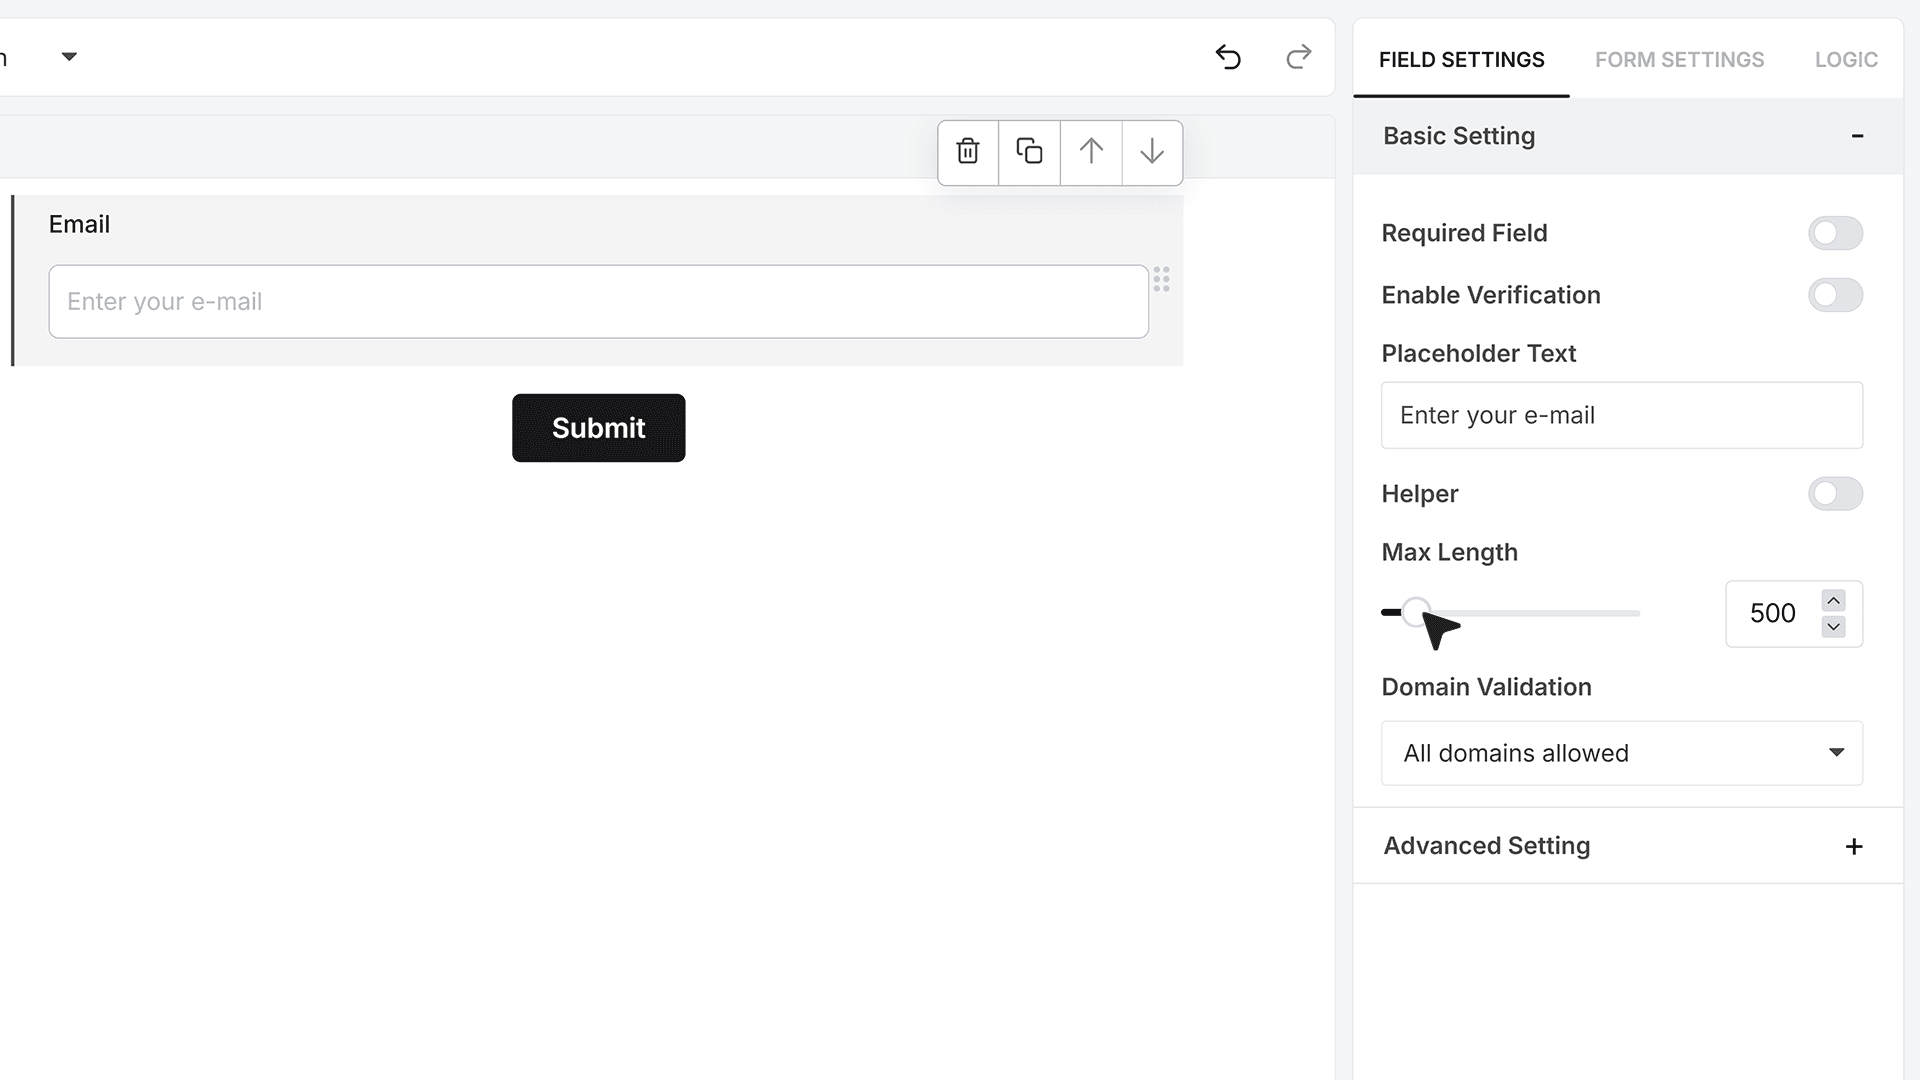
The Maximum Length setting lets you define the maximum number of characters allowed in the email input. Once the limit is reached, the user cannot type further.
Domain Validation
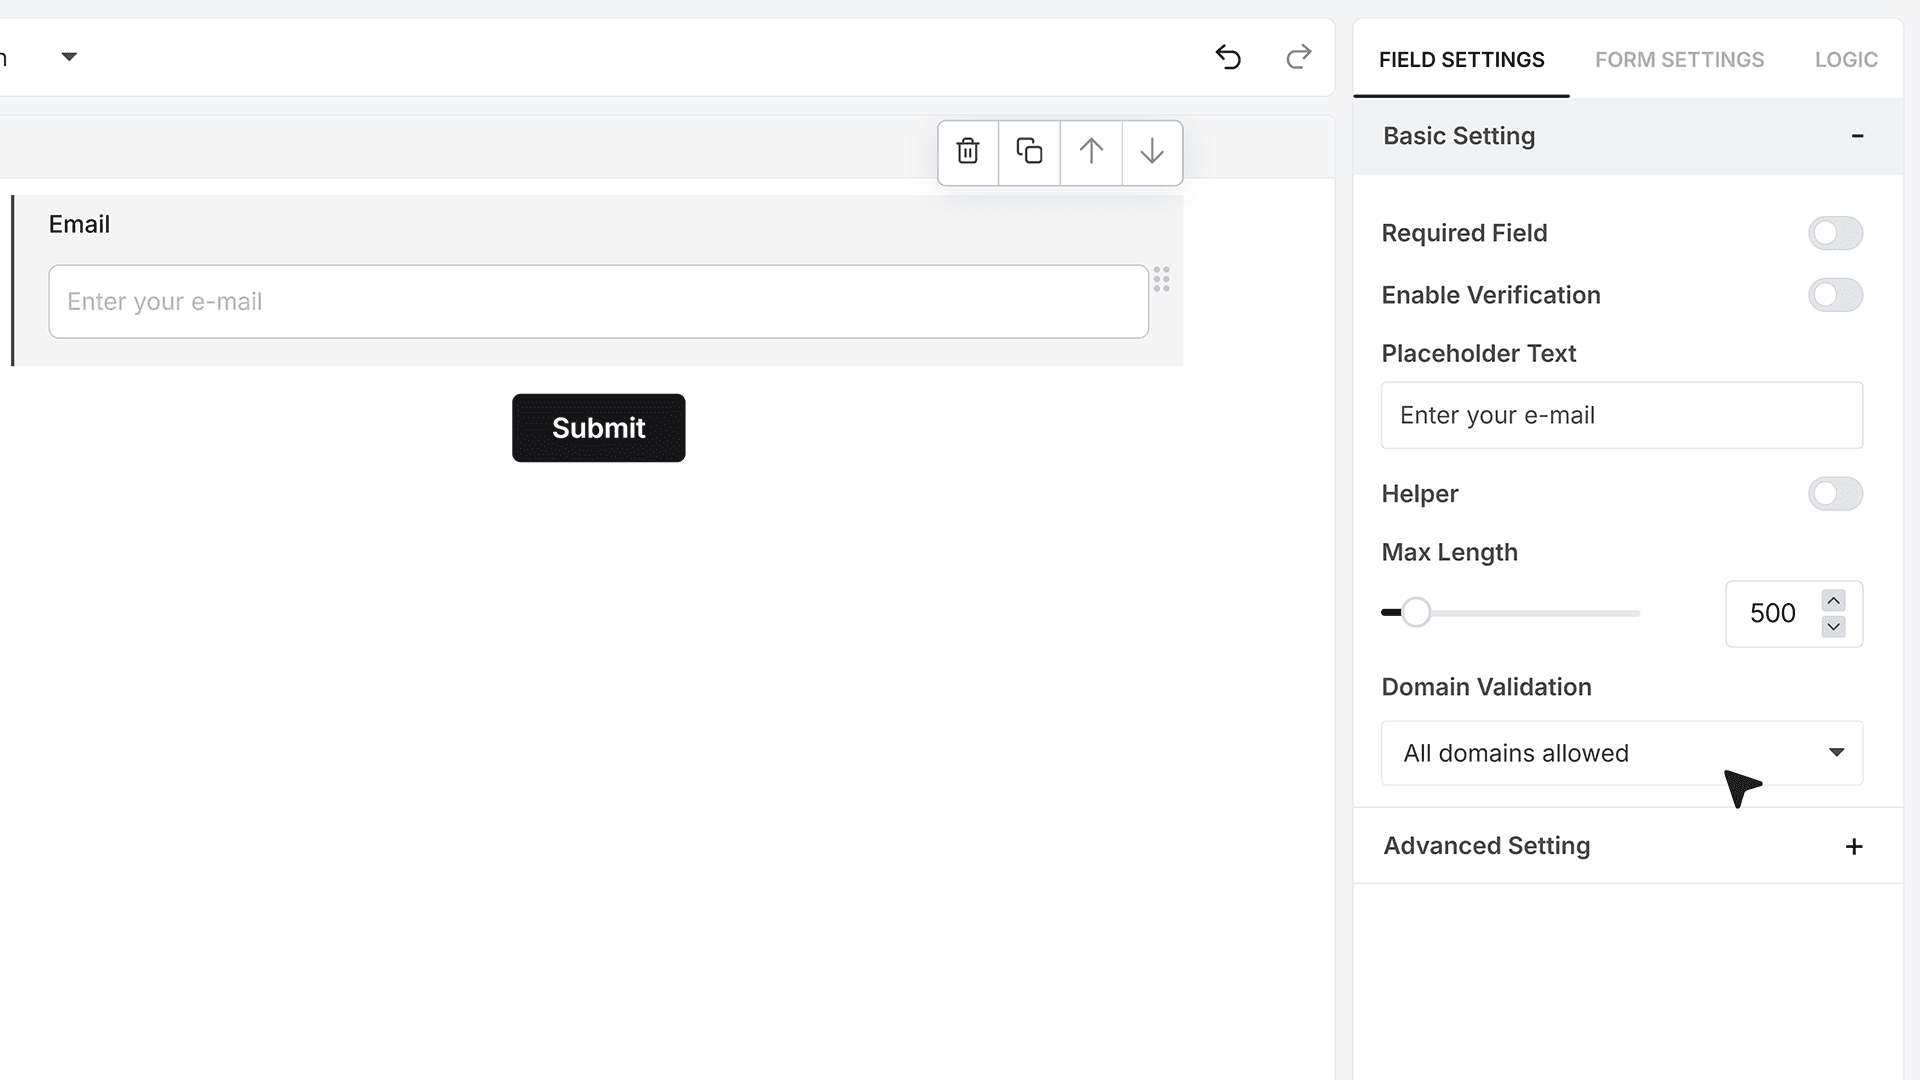
Domain Validation gives you control over which email domains can or cannot be used in the form.
- Allow All Domains accepts every valid email address and is the best choice for general public forms.
- Disallow Free Domains blocks emails from common free providers such as gmail.com or yahoo.com, ensuring users enter organization-based or business email addresses.
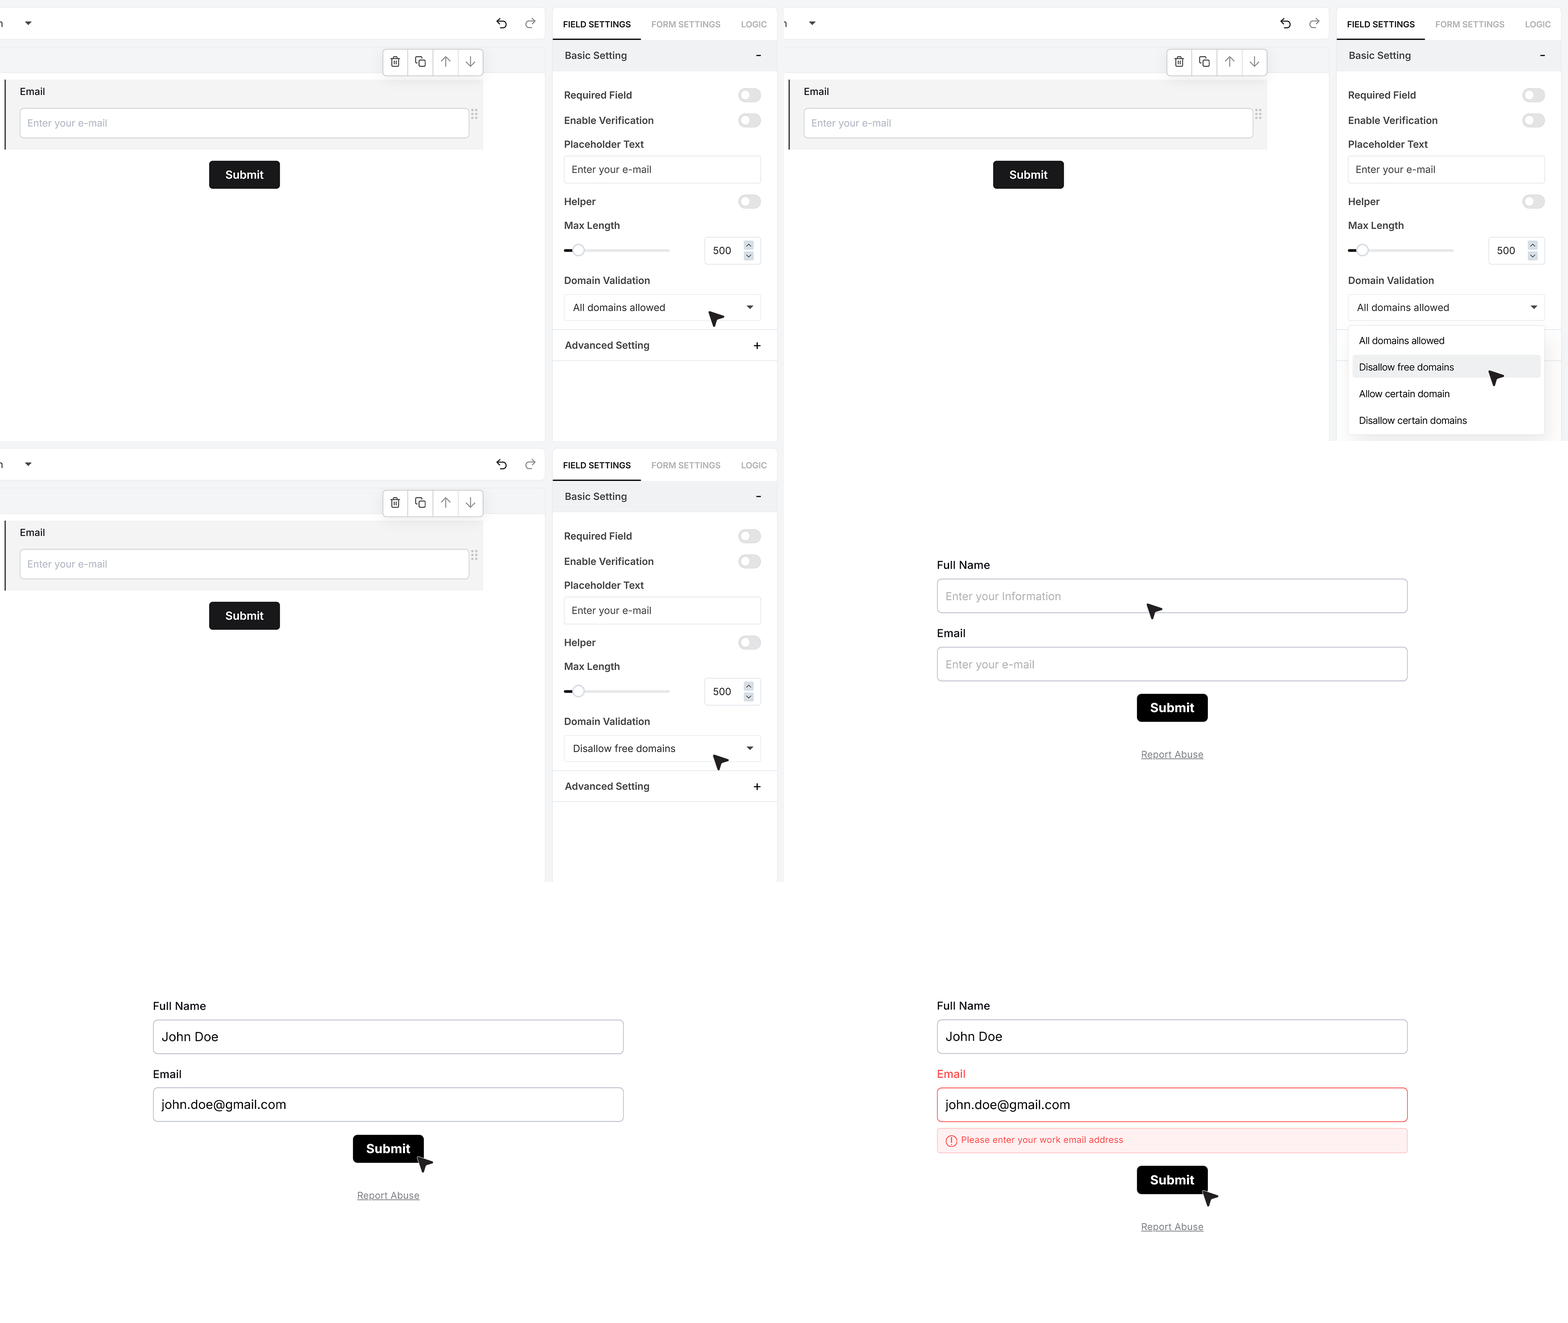
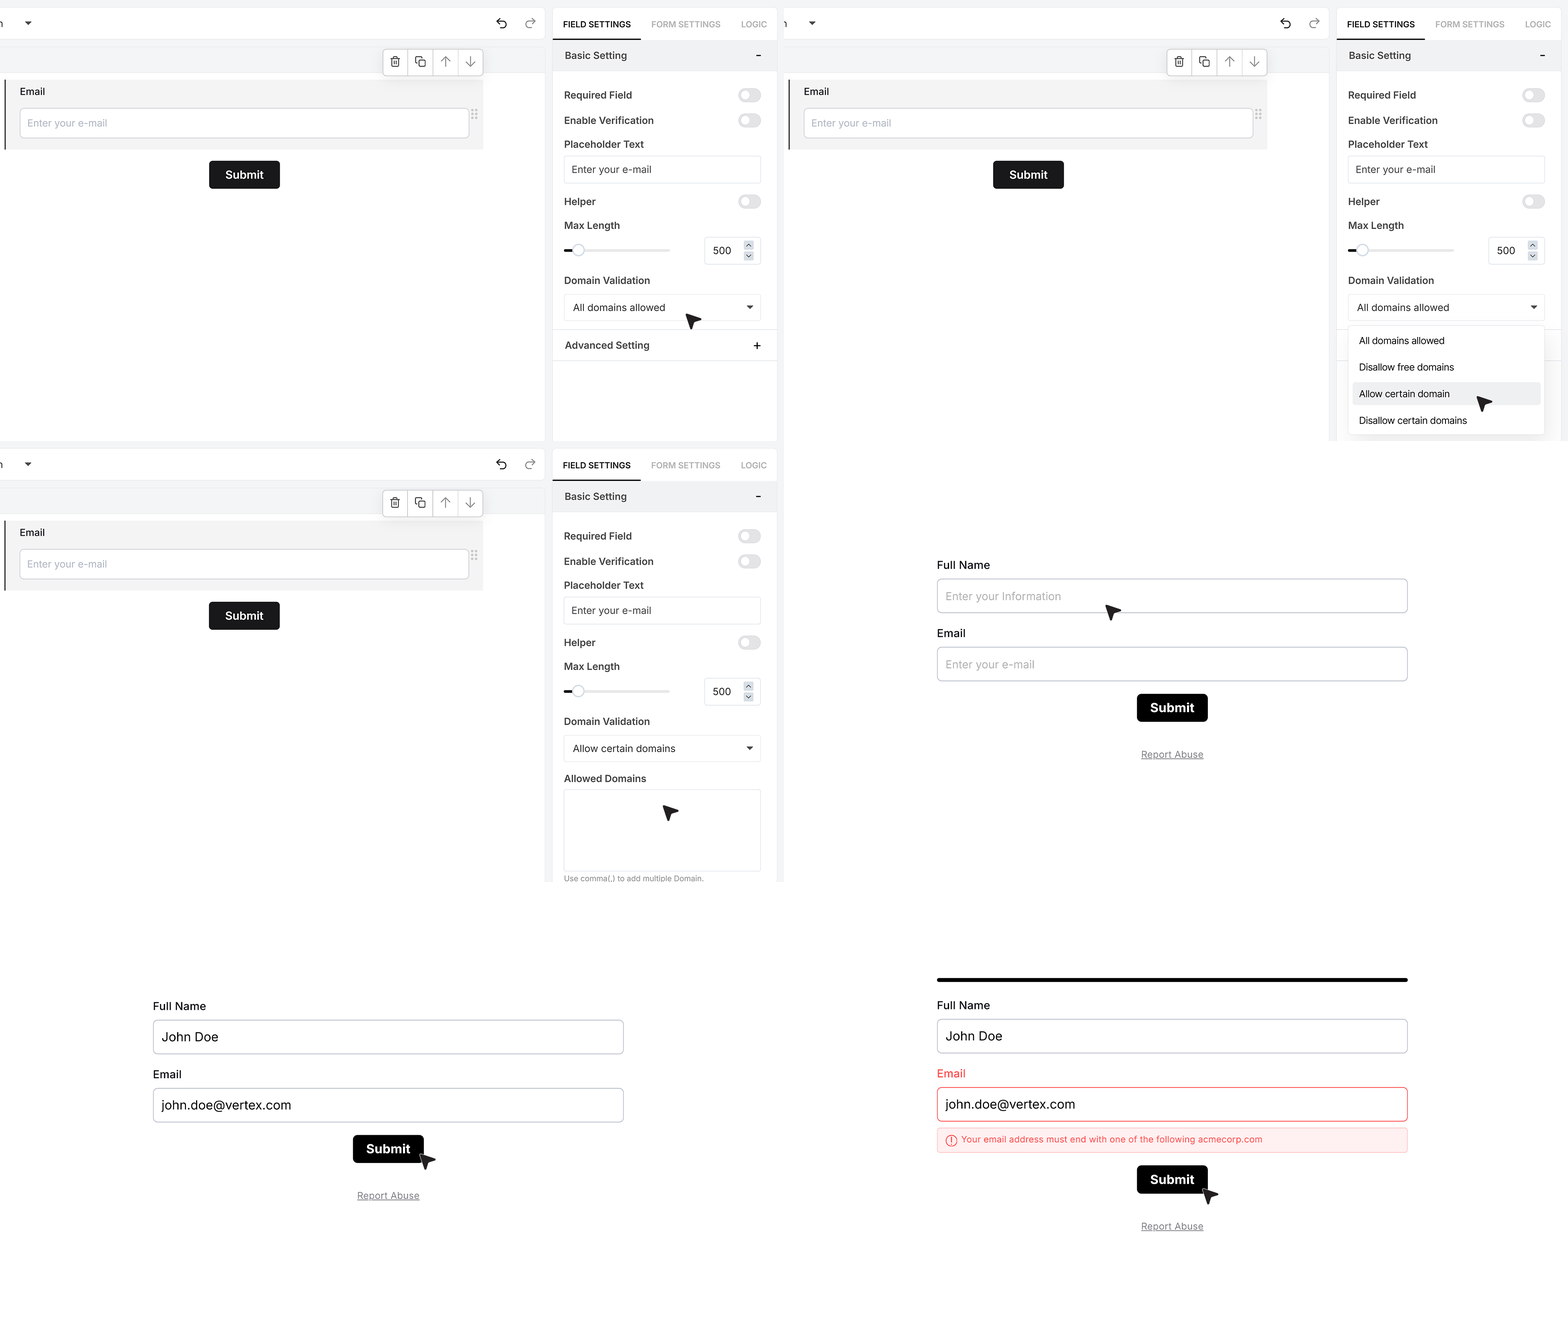
- Allow Certain Domains restricts the field to only the domains you enter. When users type an email outside this list, the field displays an error and prevents submission.
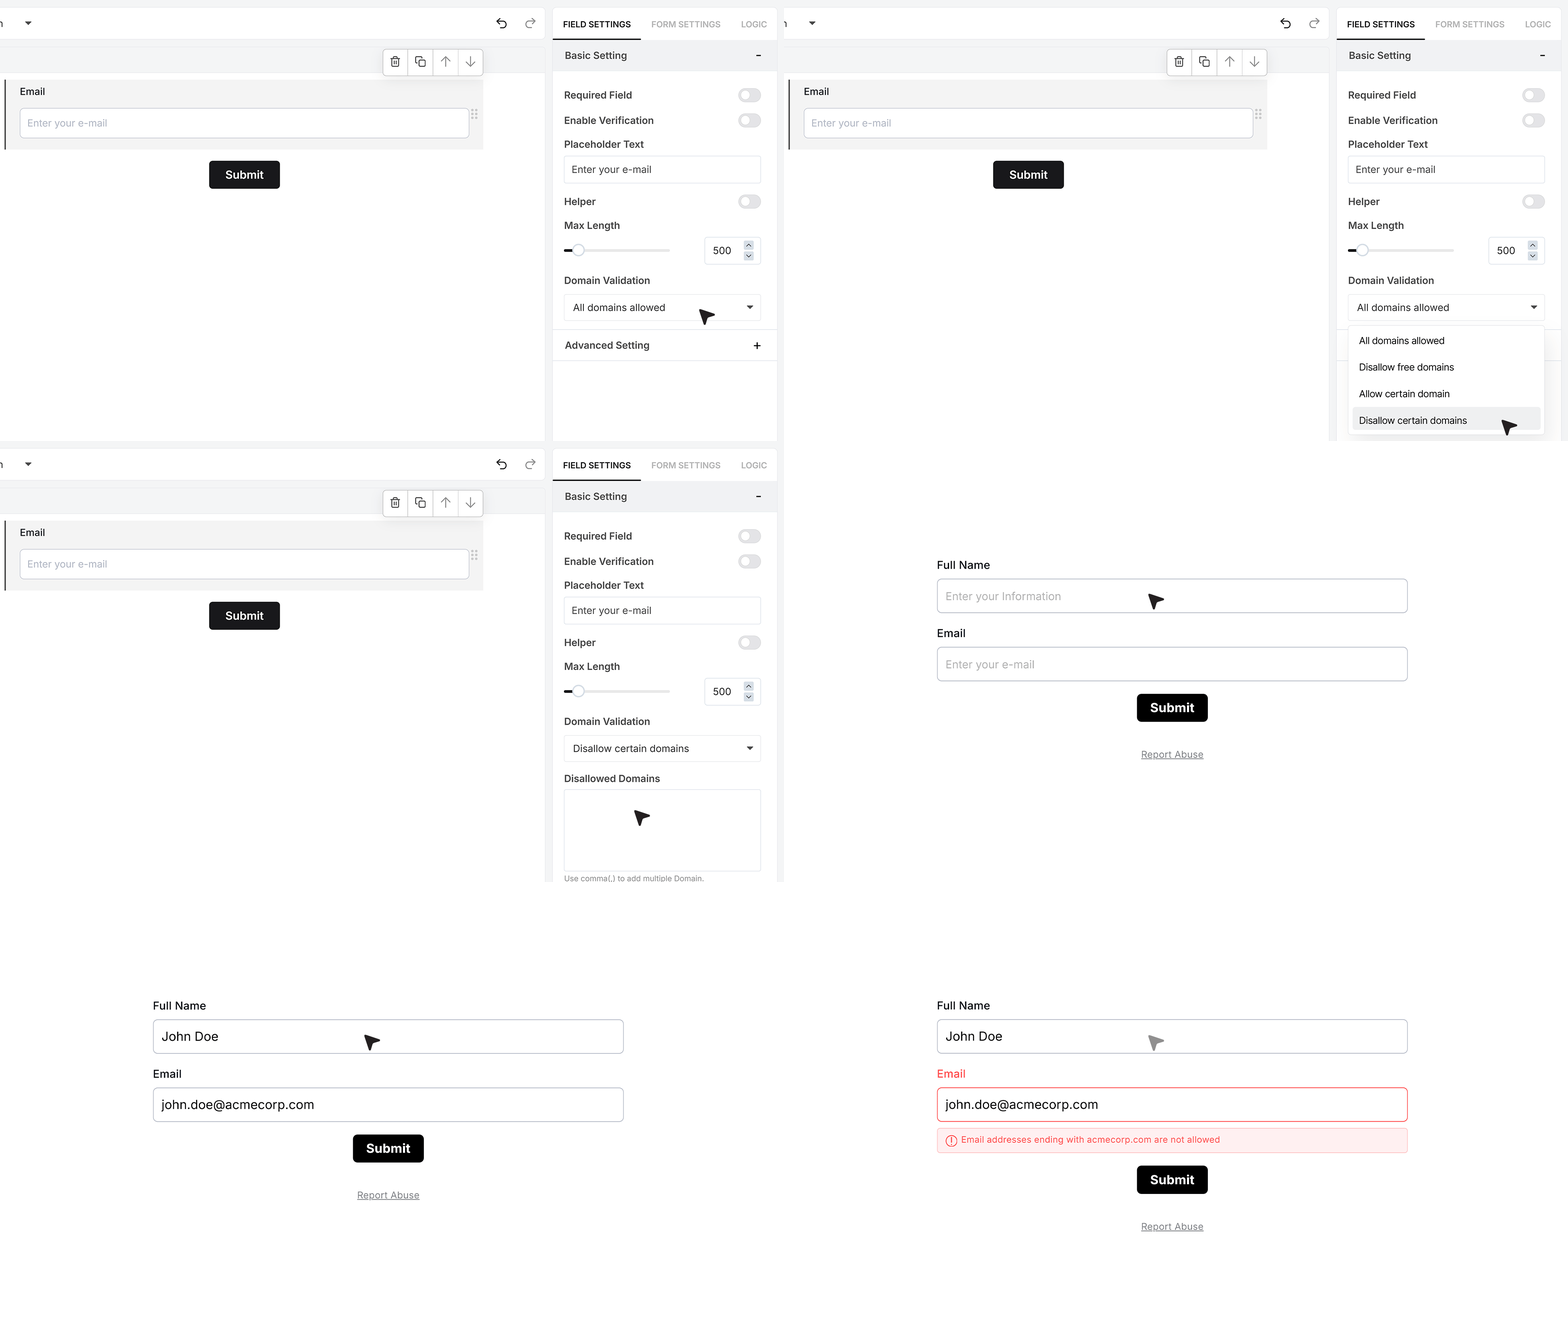
- Disallow Certain Domains blocks the specific domains you list. Emails ending with these domains are rejected, giving you control over who can submit the form.
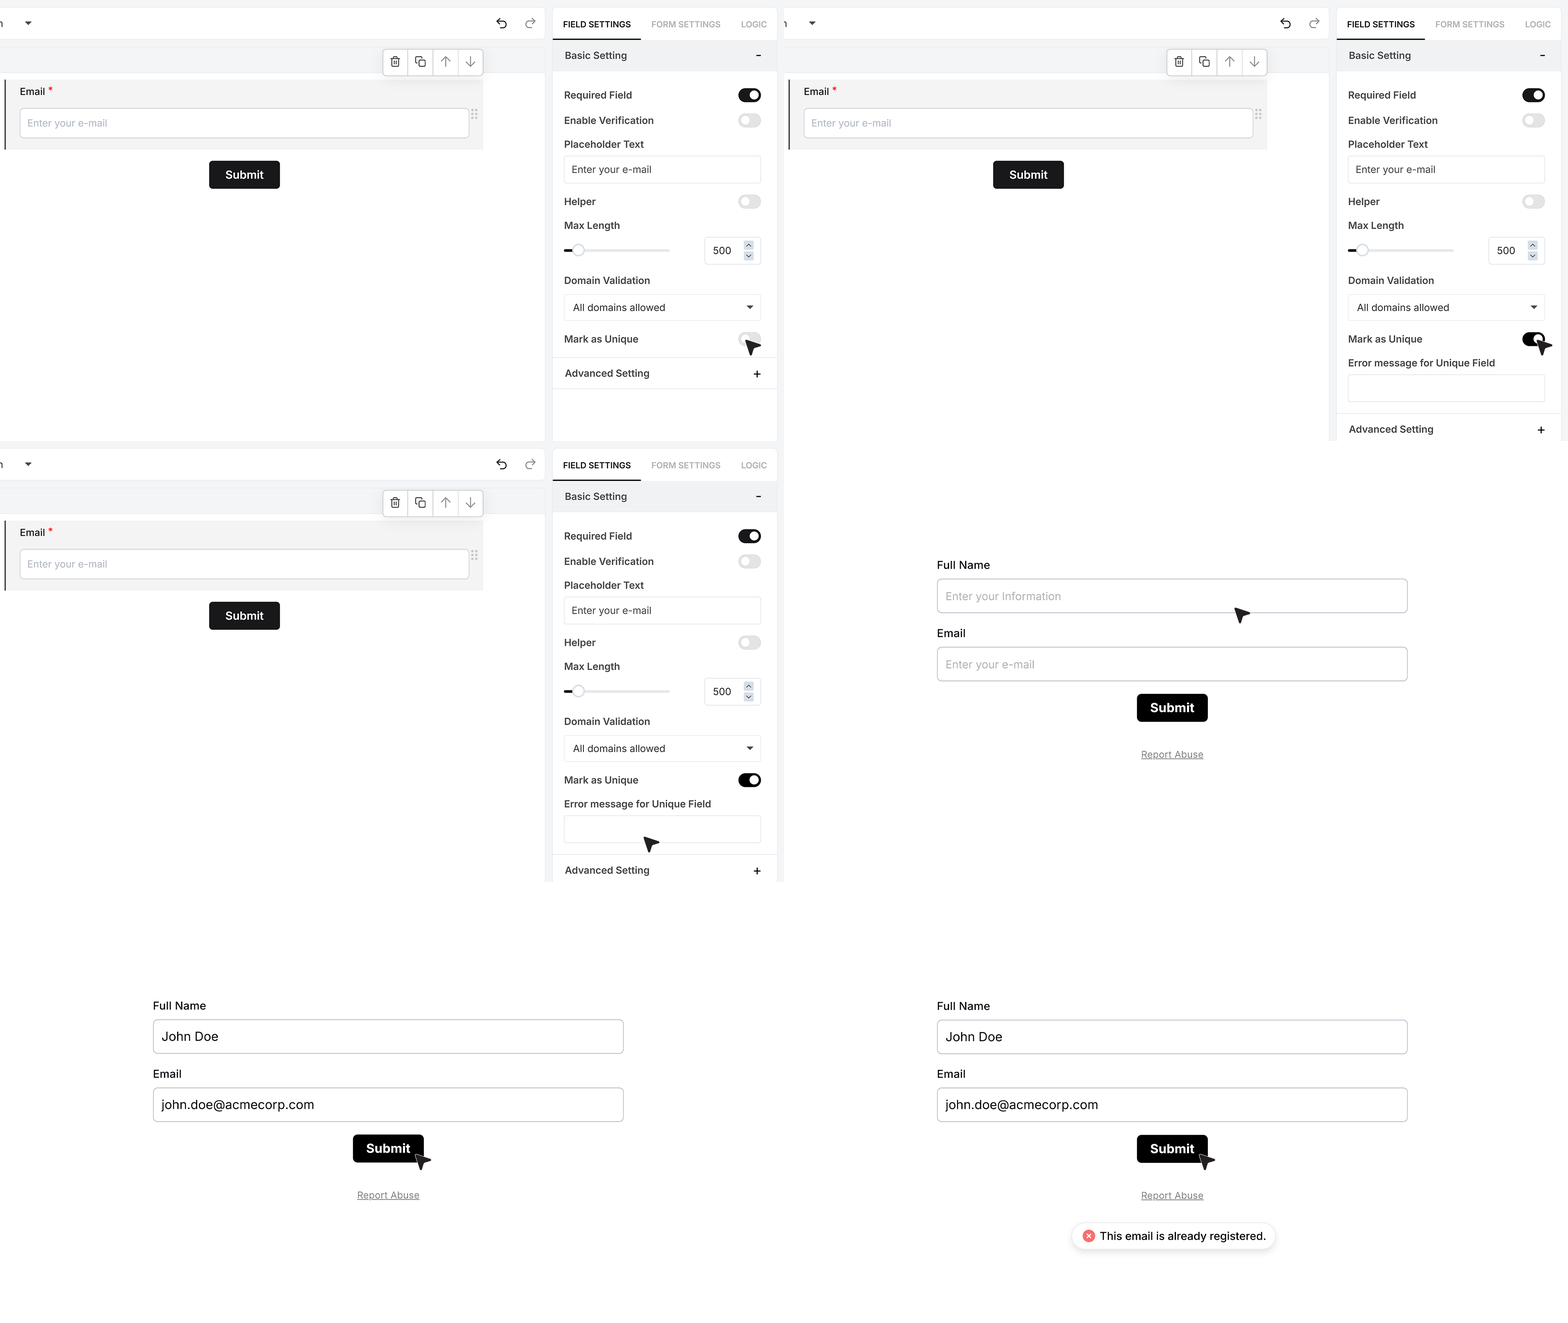
Mark as Unique Field
The Mark as Unique Field option ensures that each submission contains a distinct email address. This setting appears when the field is marked as required. Once enabled, an additional box labeled Error Message for Unique Field allows you to define the message shown when a duplicate email is detected.
Advanced Settings
Repeat This Field
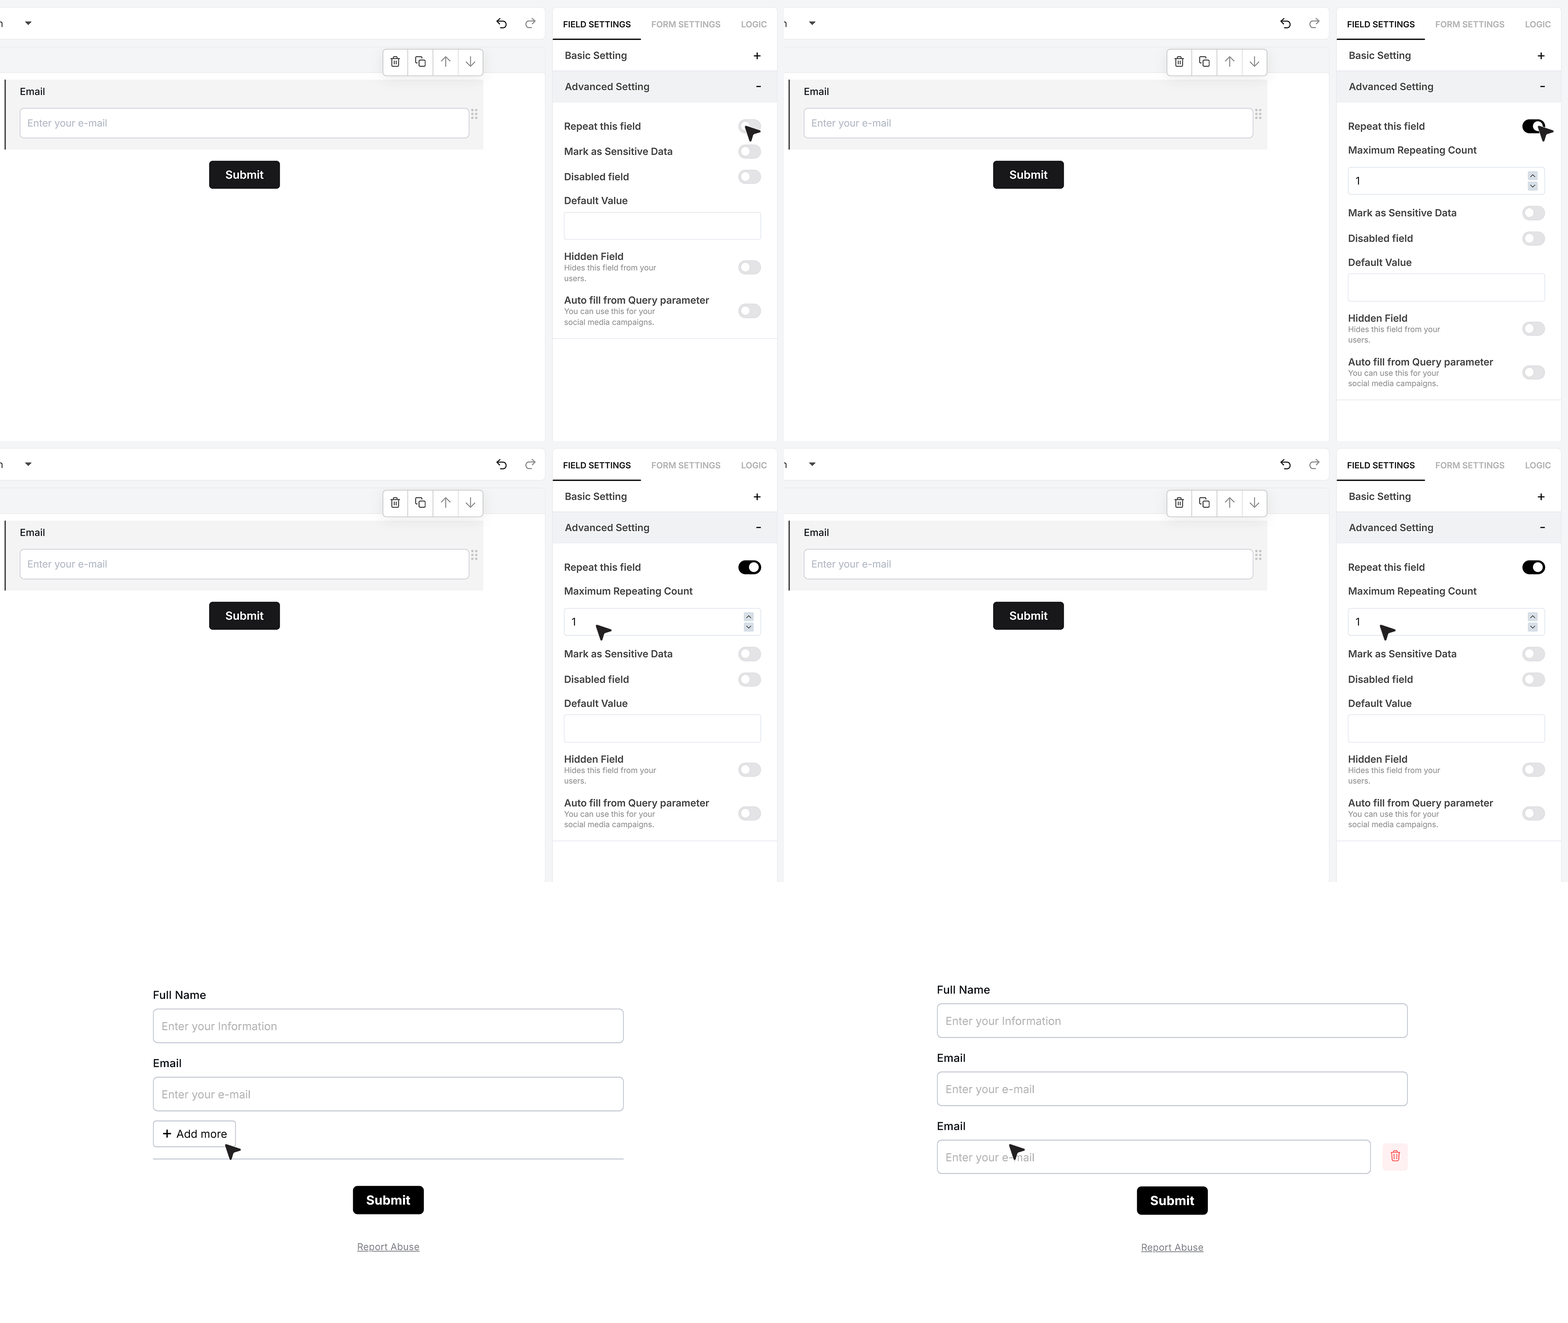
In the Advanced Settings, the Repeat This Field option allows users to submit multiple email entries within the same field. After enabling it, you can define the maximum number of entries allowed. When the form is live, an Add More button appears below the field, letting users add additional email inputs or remove any they no longer need. This is useful for scenarios where more than one contact address is required.
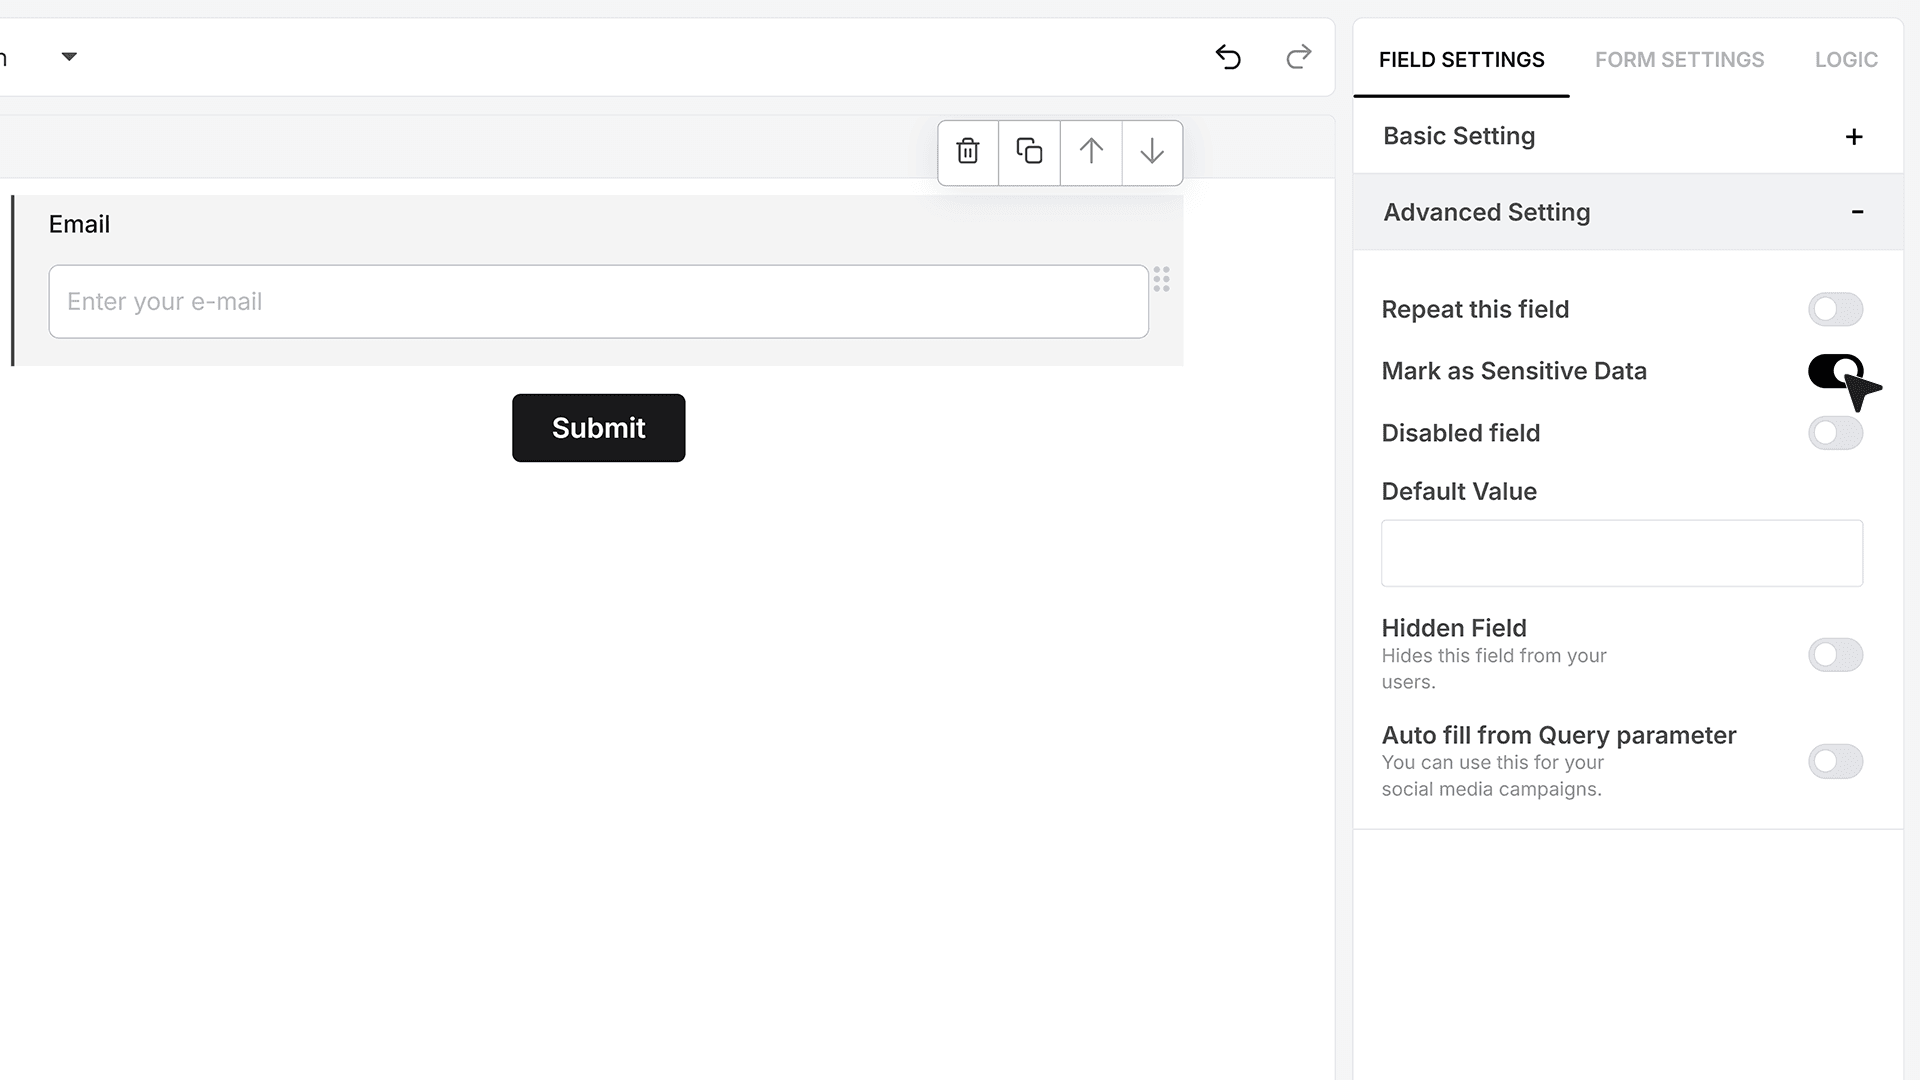
Mark as Sensitive Data
Marking the field as sensitive ensures the email is treated as protected information. Only team members with the required permissions will be able to view it in the responses section, adding an extra layer of privacy and security.
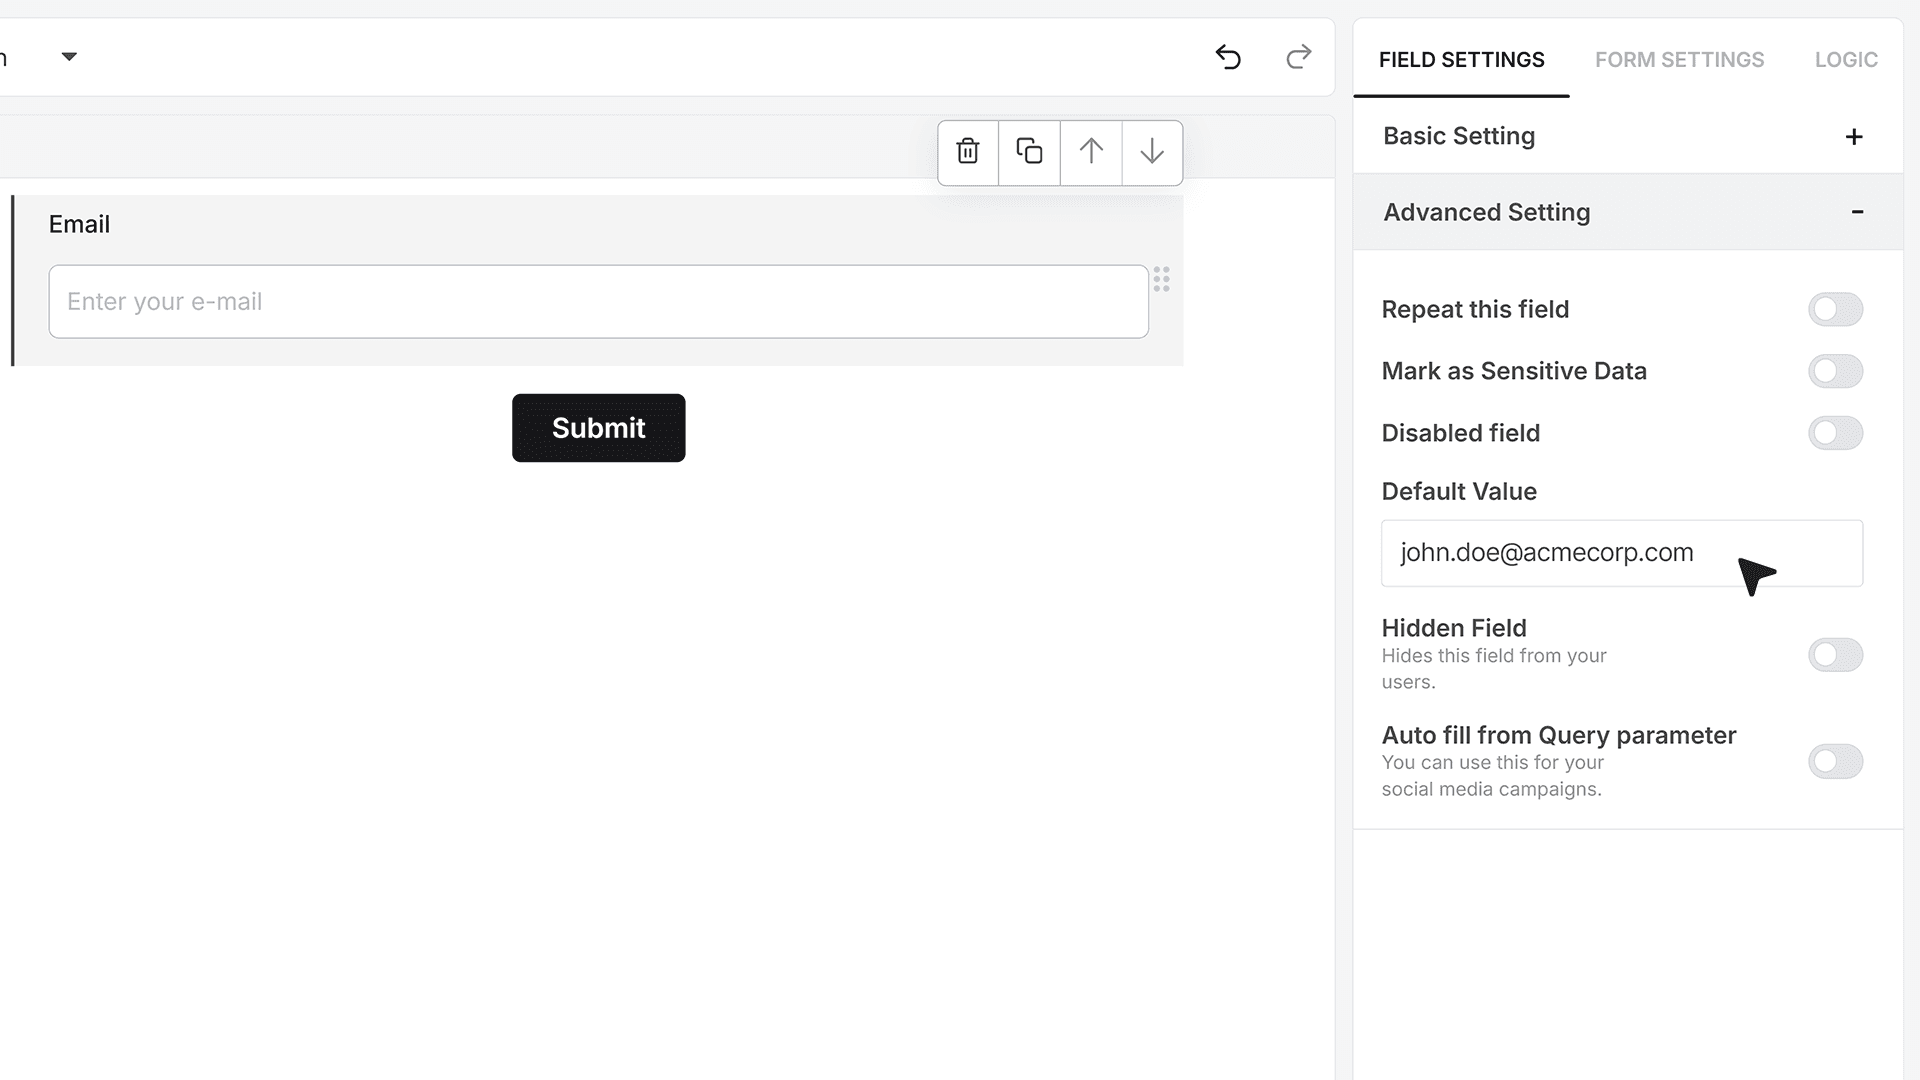
Default Value
Default Value lets you pre-fill the Email field when the form loads. This is helpful for internal workflows, pre-authenticated sessions, or personalized links where the user’s email is already known. Respondents can edit the value unless the field has been disabled.
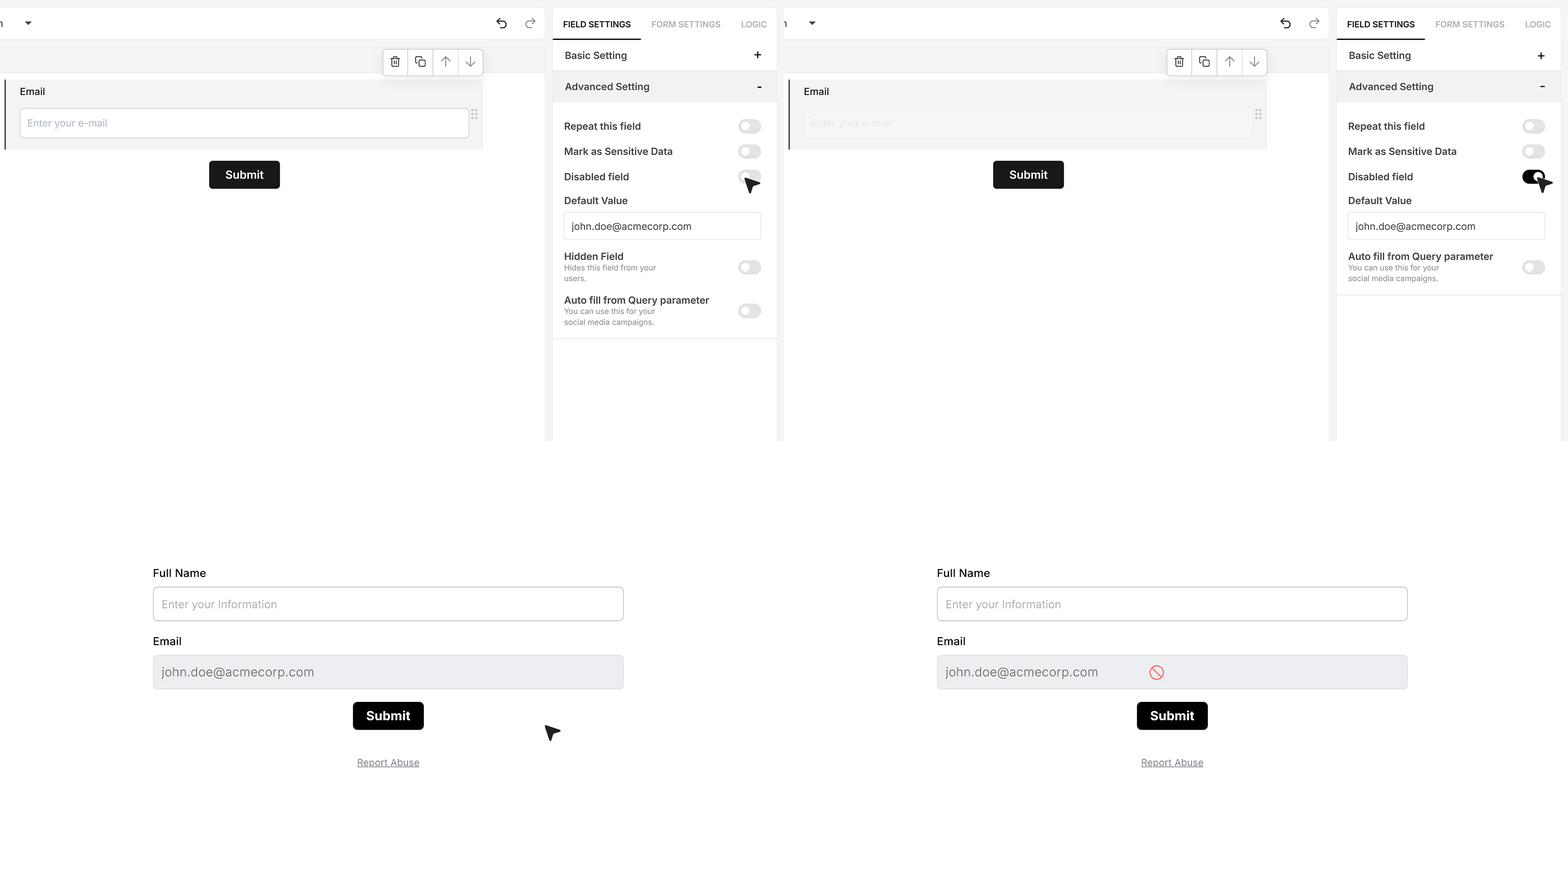
Disable Field
When you disable a field, it remains visible on the form but cannot be edited. This is useful when you want to display information that the user should see but not modify — such as data pulled from an external source, a verified email, or a value fixed by your workflow.
Hidden Field
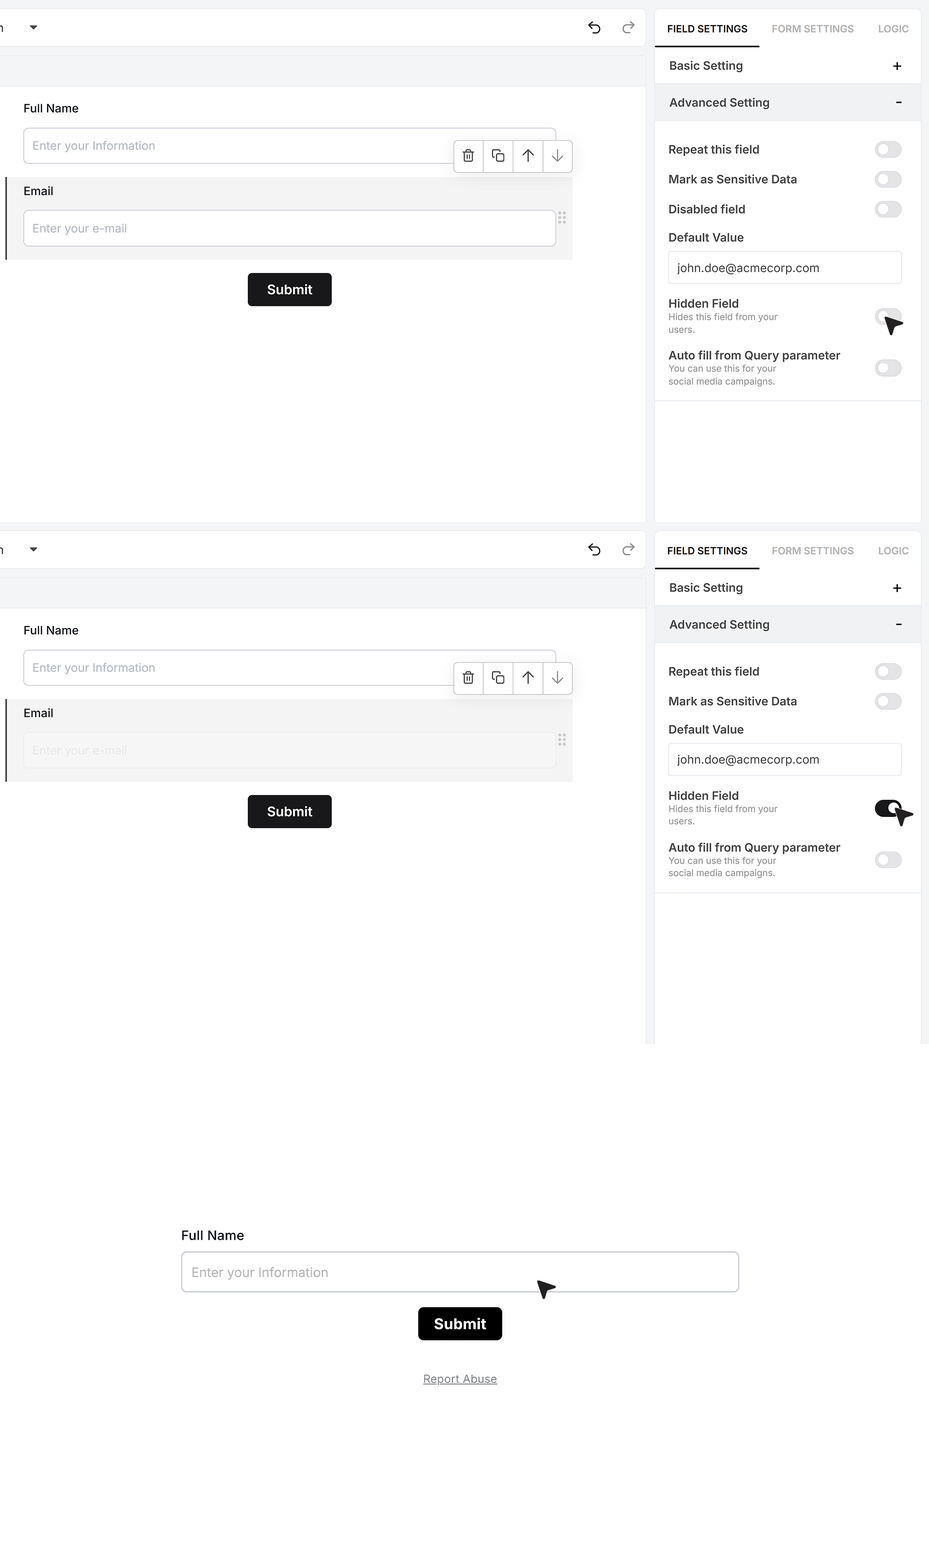
A Hidden Field does not appear in the visible form but still submits its value during response collection. This is useful for tracking information or pre-filled automation steps that should not be visible to the user.
Autofill from Query Parameter
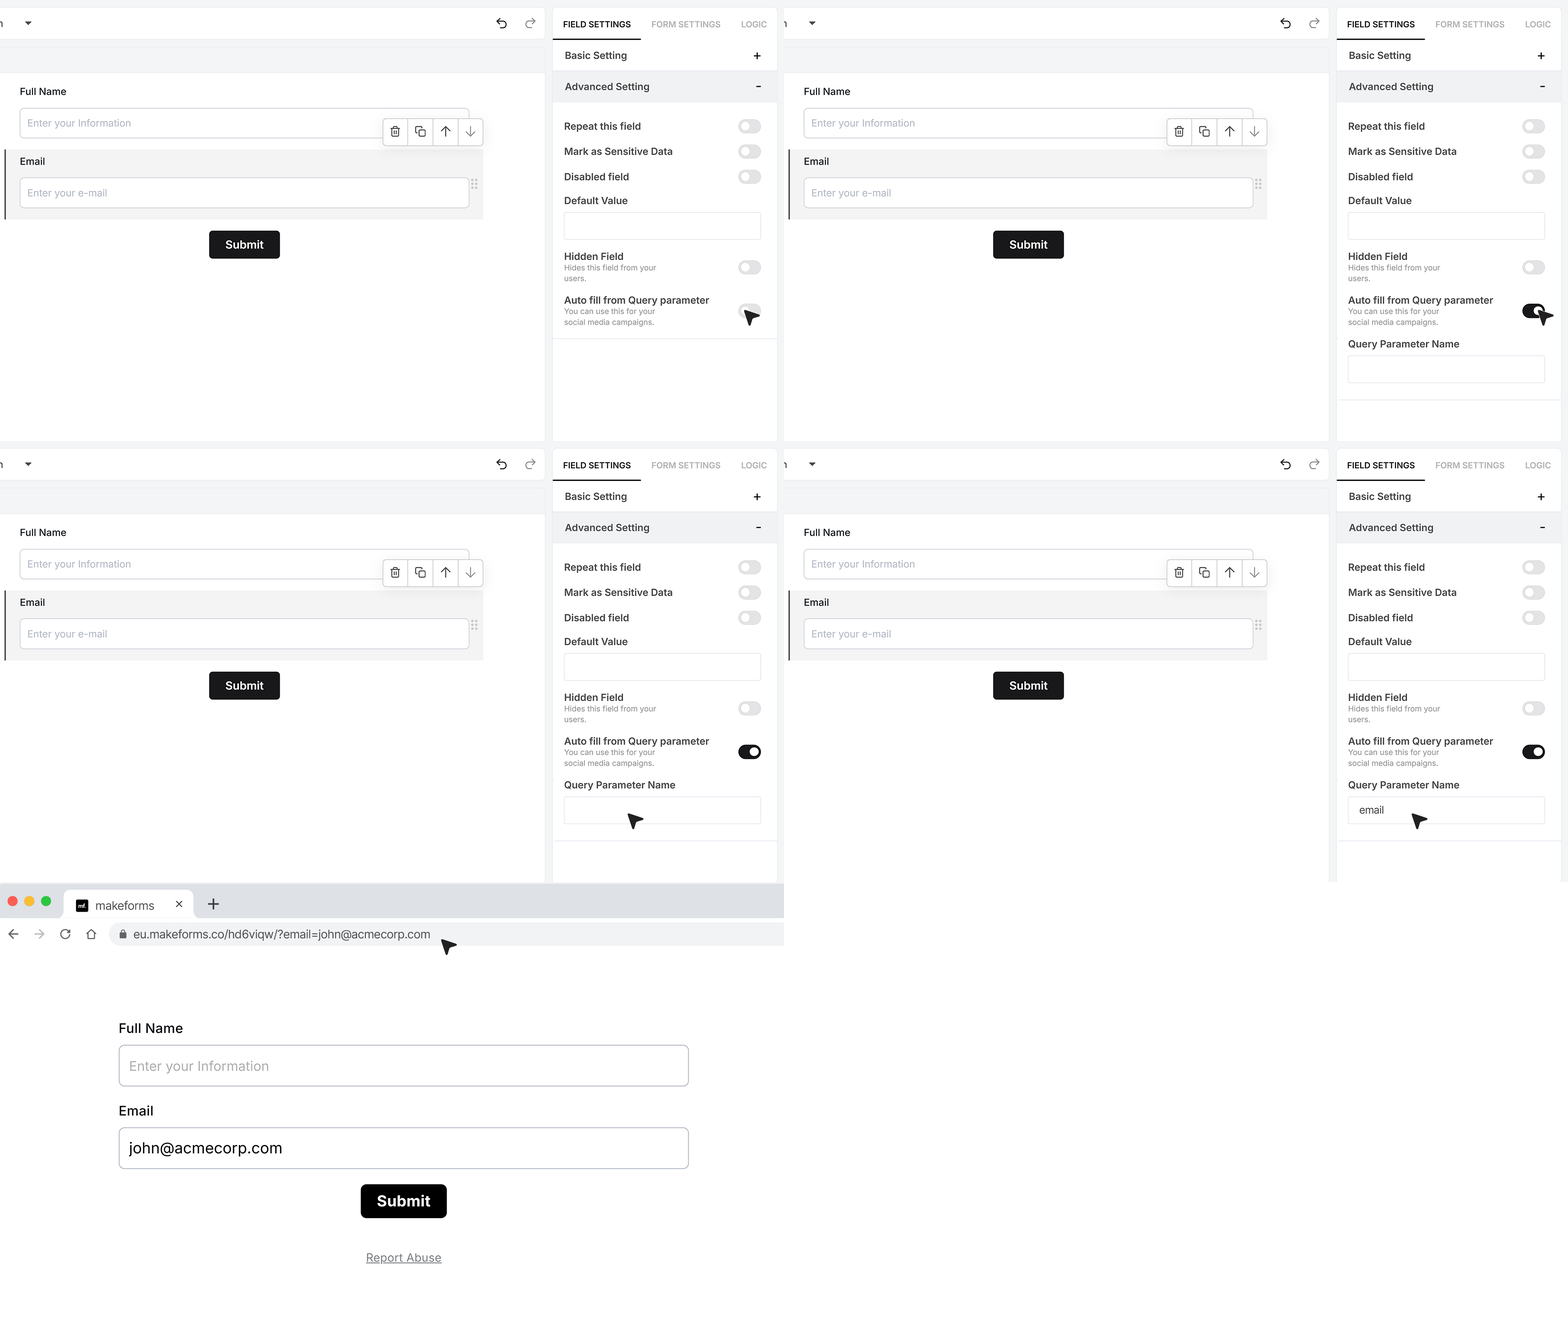
The Email field can be automatically filled using query parameters in the URL. When configured, adding a parameter like ?email=jane@acmecorp.com to the form link populates the field instantly when the form loads. This is ideal for personalized invitations, pre-filled onboarding links, or automated campaigns.
FAQ's
MakeForms offers a fully customizable Email Field. You can control required input, email verification, domain rules, max length, uniqueness, repeat inputs, default values, hidden mode, and sensitivity settings. Other platforms like Typeform and Jotform provide basic email validation, but they do not offer the same level of verification flow and domain control as MakeForms.
In MakeForms, email field data can be sent to email marketing tools through native integrations, webhooks, or automation workflows. Once a form is submitted, the captured email is passed to connected tools like Mailchimp, HubSpot, or custom APIs for list sync and campaign triggers.
MakeForms allows you to apply logic rules on the Email Field. You can show or hide other fields, sections, or entire steps based on whether the email is verified, matches a domain rule, or is filled. The Verify First option can also restrict access to the rest of the form until the email is verified.
MakeForms includes built-in email verification using one-time codes, domain validation rules, and unique email enforcement. These controls help prevent fake, duplicate, or low-quality email submissions without relying only on external CAPTCHA tools.
Yes. MakeForms supports automatic syncing of email field values to CRM systems using integrations and webhooks. The email can be mapped directly to lead or contact records in tools like Salesforce, HubSpot, or Zoho.
In MakeForms, you can test email validation by submitting invalid formats, blocked domains, or duplicate emails. The form will show inline errors and block submission based on the Email Field rules you have configured.
MakeForms supports GDPR compliance by allowing you to mark the Email Field as sensitive data, restrict access by user role, and combine it with consent fields. Email verification and controlled visibility help reduce unauthorized data access.
Yes. MakeForms allows you to add multiple Email Fields in the same form. It also supports the Repeat This Field option, which lets users enter more than one email address within a single field.
You can create a signup form in MakeForms by adding an Email Field, marking it as required, and enabling verification if needed. The submitted email can then be sent to your newsletter tool using integrations or webhooks.
MakeForms supports automated email confirmations through notifications and workflows. Once a user submits a form with a valid email, a confirmation email can be sent automatically using built-in notifications or connected email services.
MakeForms allows direct syncing of email data with email campaign tools through native integrations and automation rules. This enables real-time list updates without manual exports.
In MakeForms, double opt-in can be set up by enabling email verification and combining it with confirmation emails. Users must verify their email before submission, and then confirm again through your email campaign tool if required.
MakeForms lets you trigger auto-responder emails using the Email Field through form notifications or automation flows. Once the email is captured and verified, an automatic response can be sent based on your form settings.