Time Picker Field
The Time Picker helps your users type time in a clear, fixed format. It removes guesswork and keeps every response clean. When you add this field to your form, users can type time in the exact style you decide.
Adding the Date Picker field
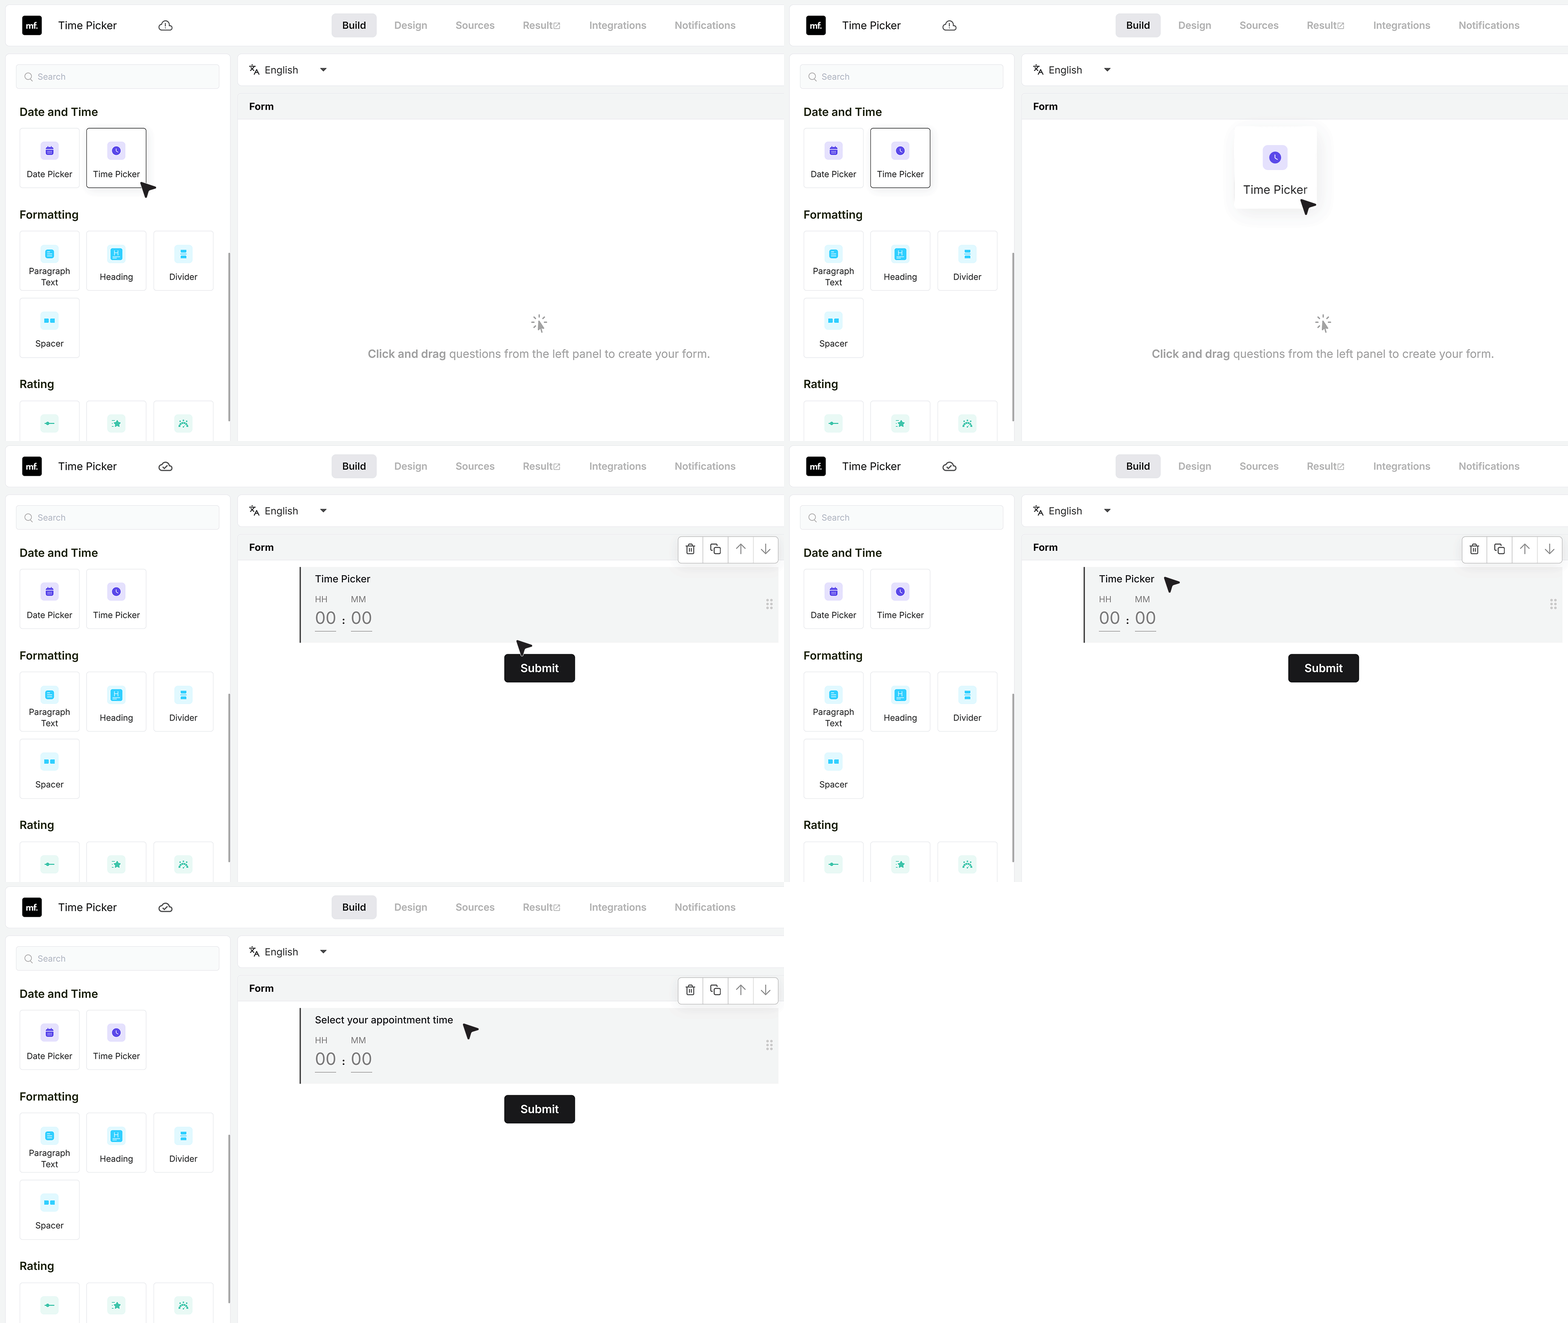
To add it, drag the Time or Time Picker field into your form. Change the label to match your question. For example, you can call it Select your appointment time.
Basic Settings
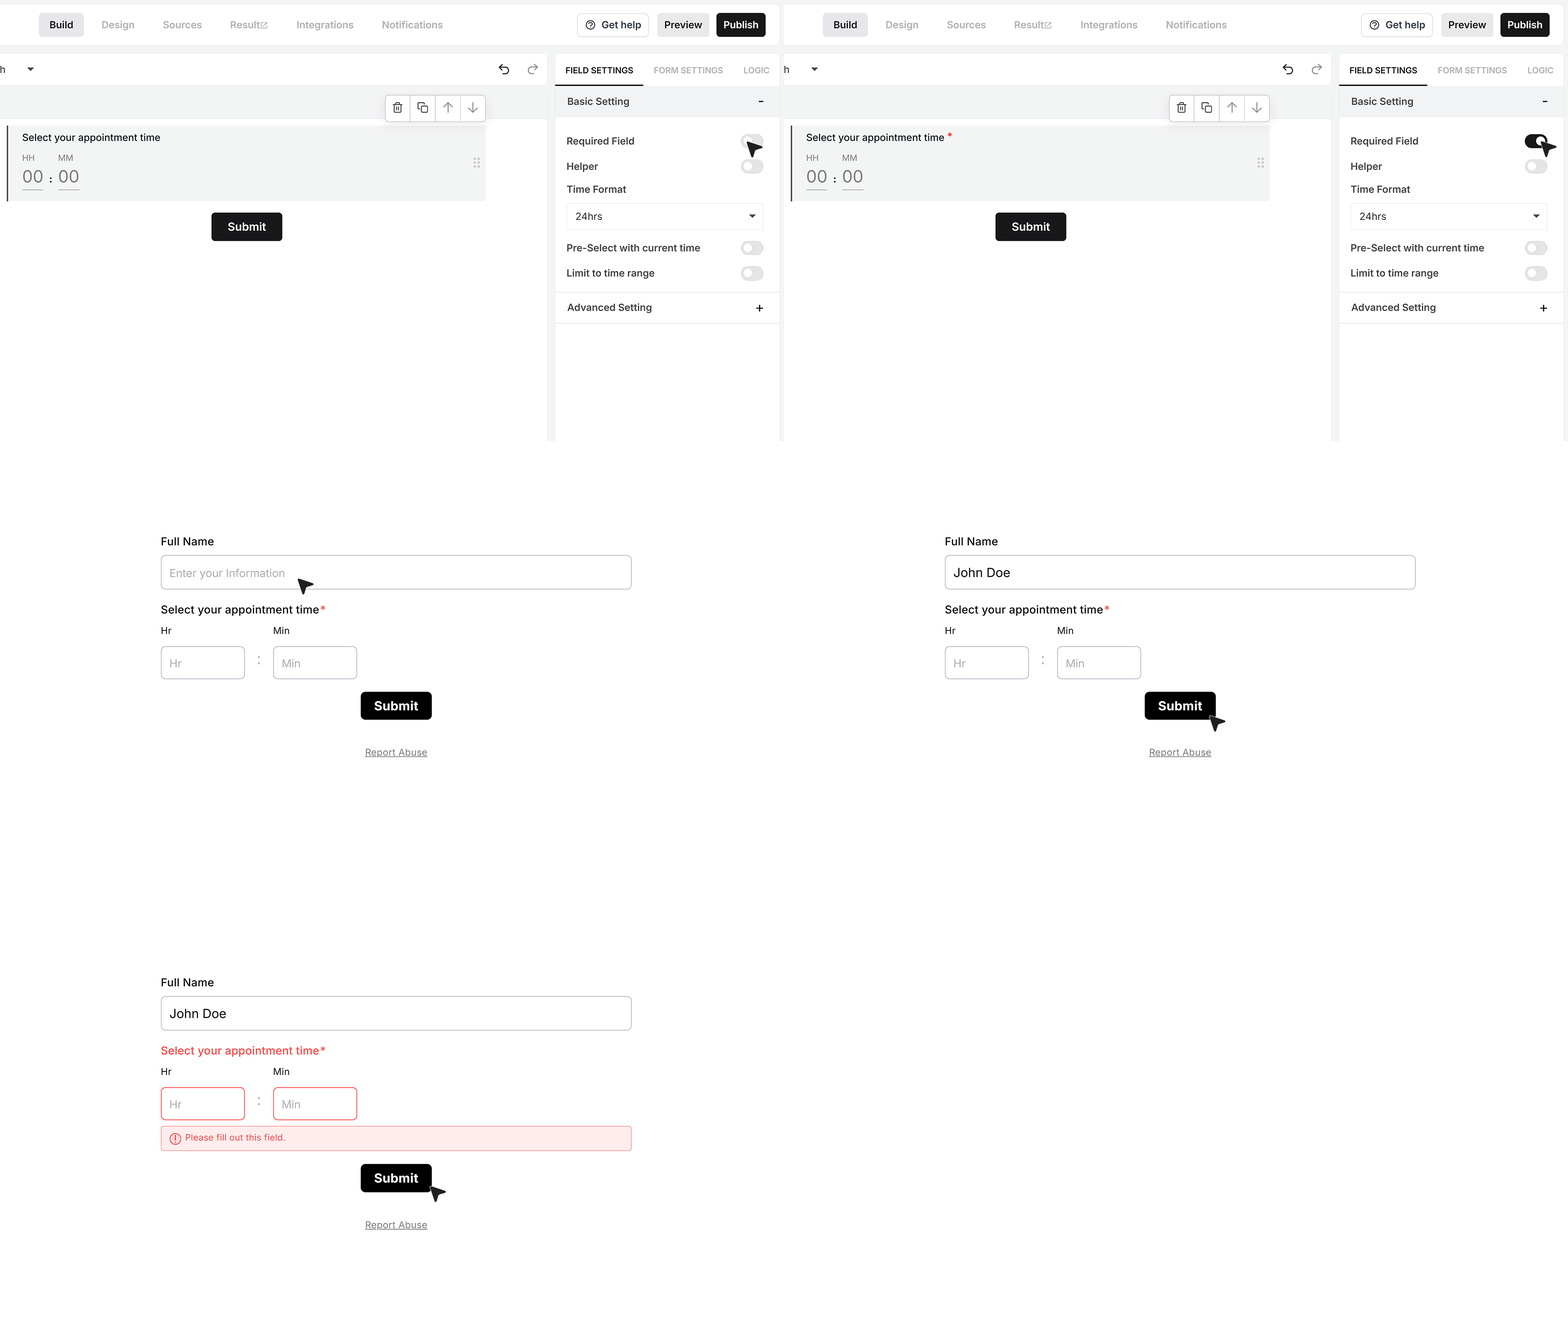
Required Field
At the top of the settings, you will see the Required Field toggle.
Turn this on when the user must enter a time before they submit the form. If the field is empty or the time is not valid, the form will show an error and will not move ahead until the user fixes it.
Helper text
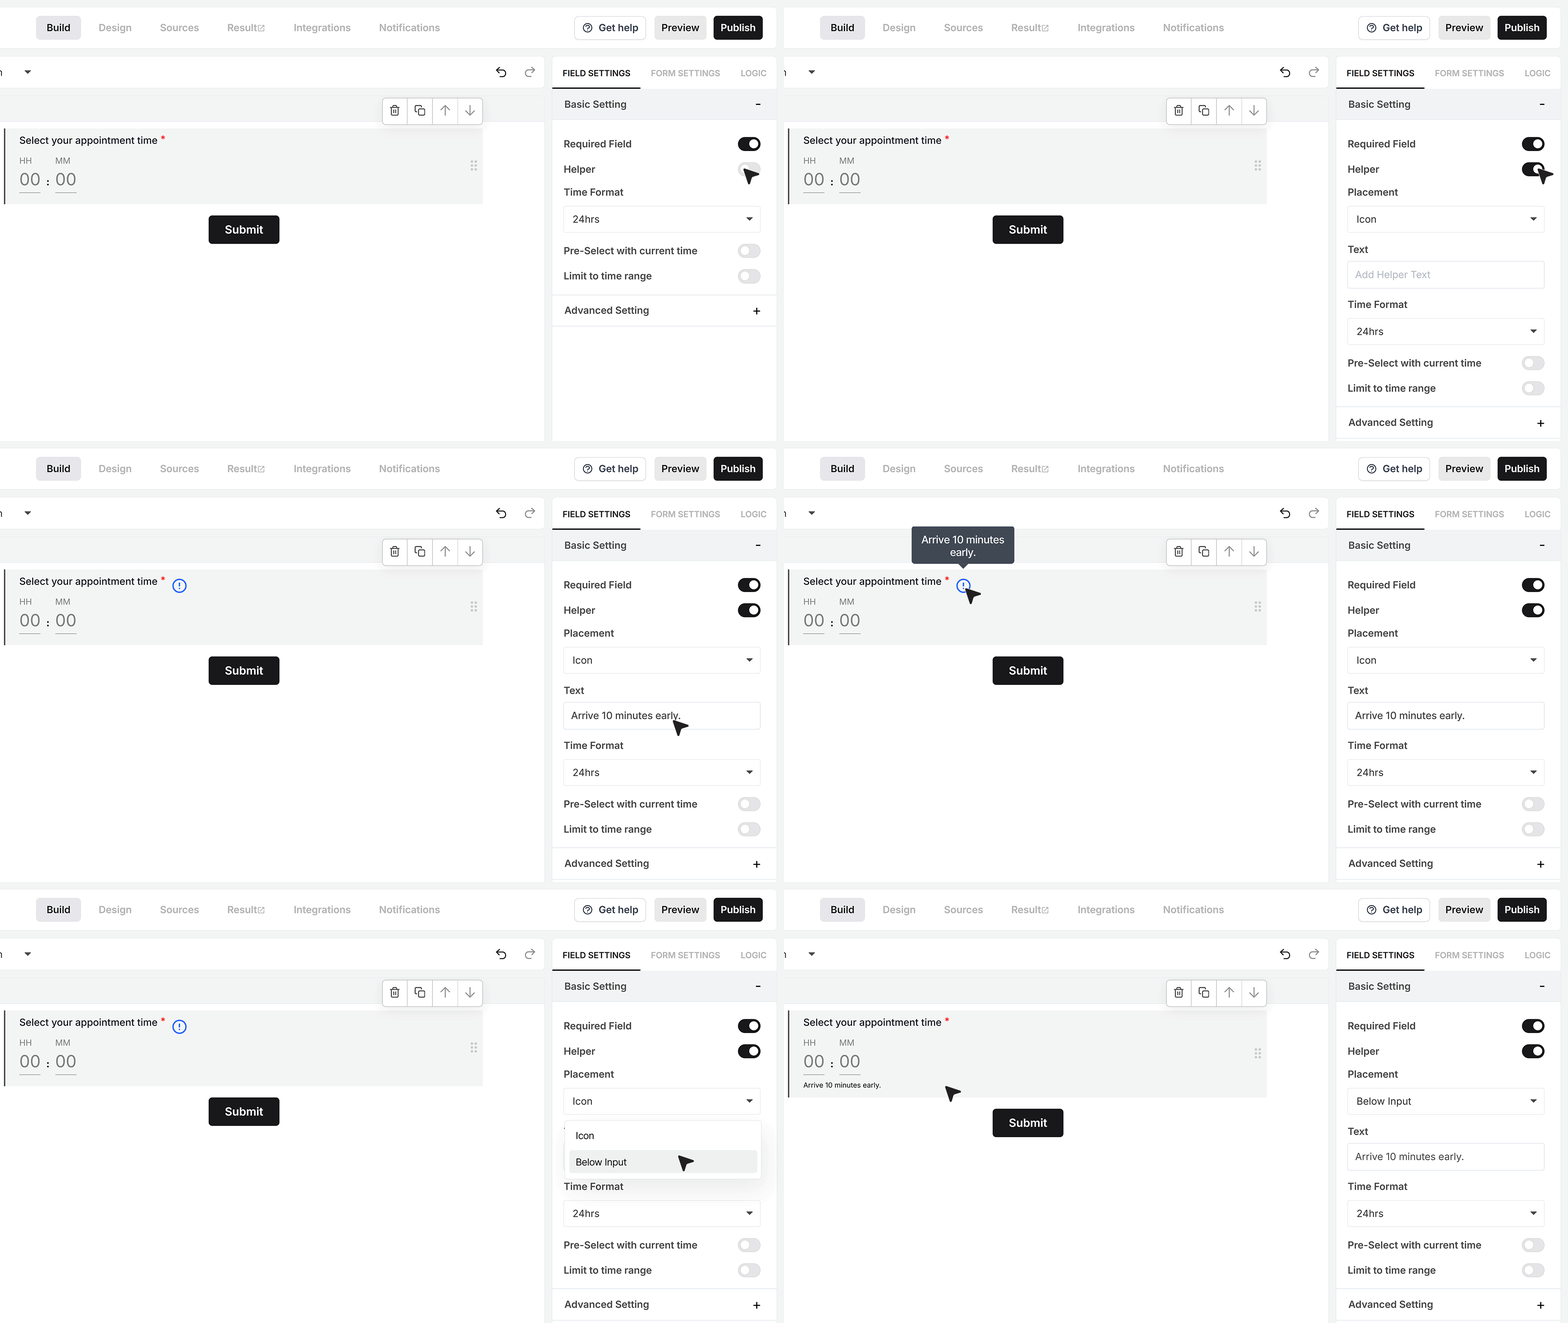
Below that, you will find the Helper Text option.
Switch this on when you want to guide the user with a short note. You can write a tip like Arrive 10 minutes early. You can show this note as a small info icon or as a line under the field, based on what fits your form better.
Time Format
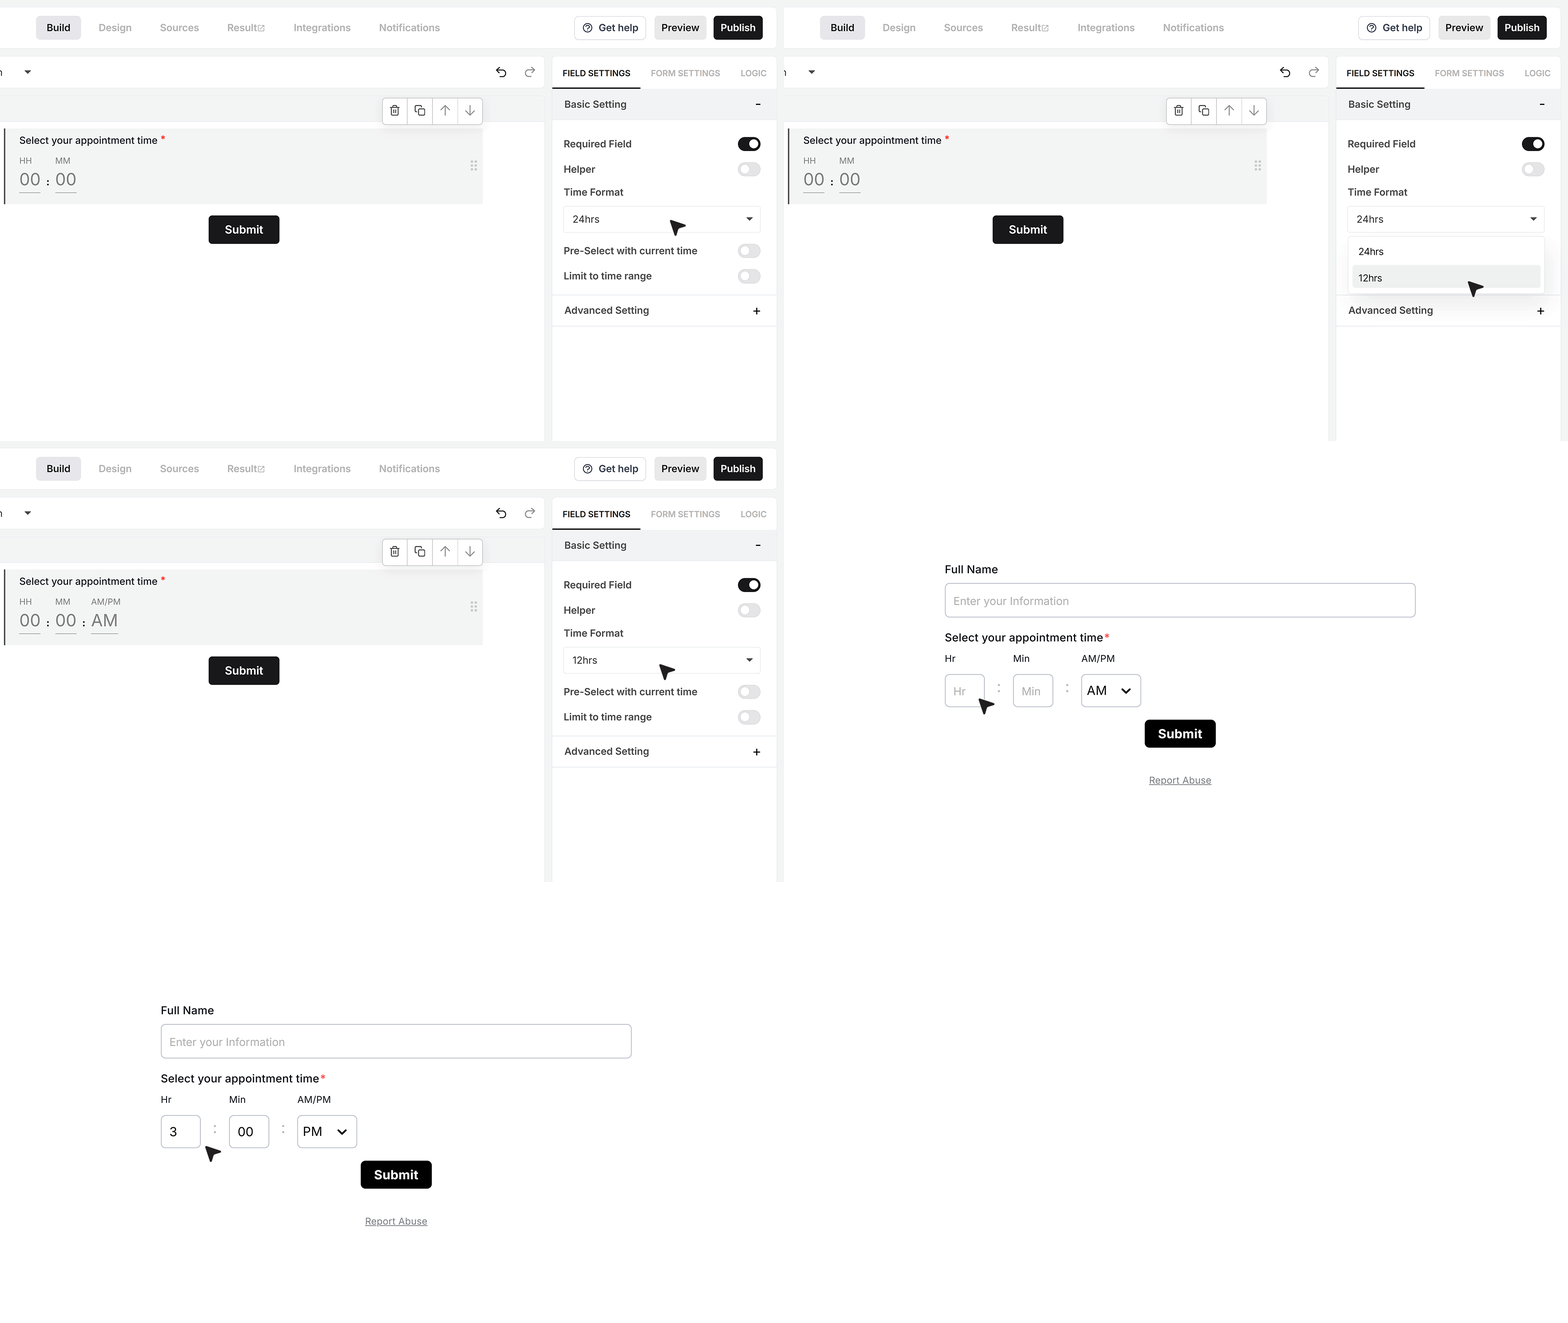
In the Time Format section, you decide how the user should type the time. You can keep it in 24-hour style or switch to 12-hour style with AM and PM. Pick the format that your users understand best.
Pre-select with current date
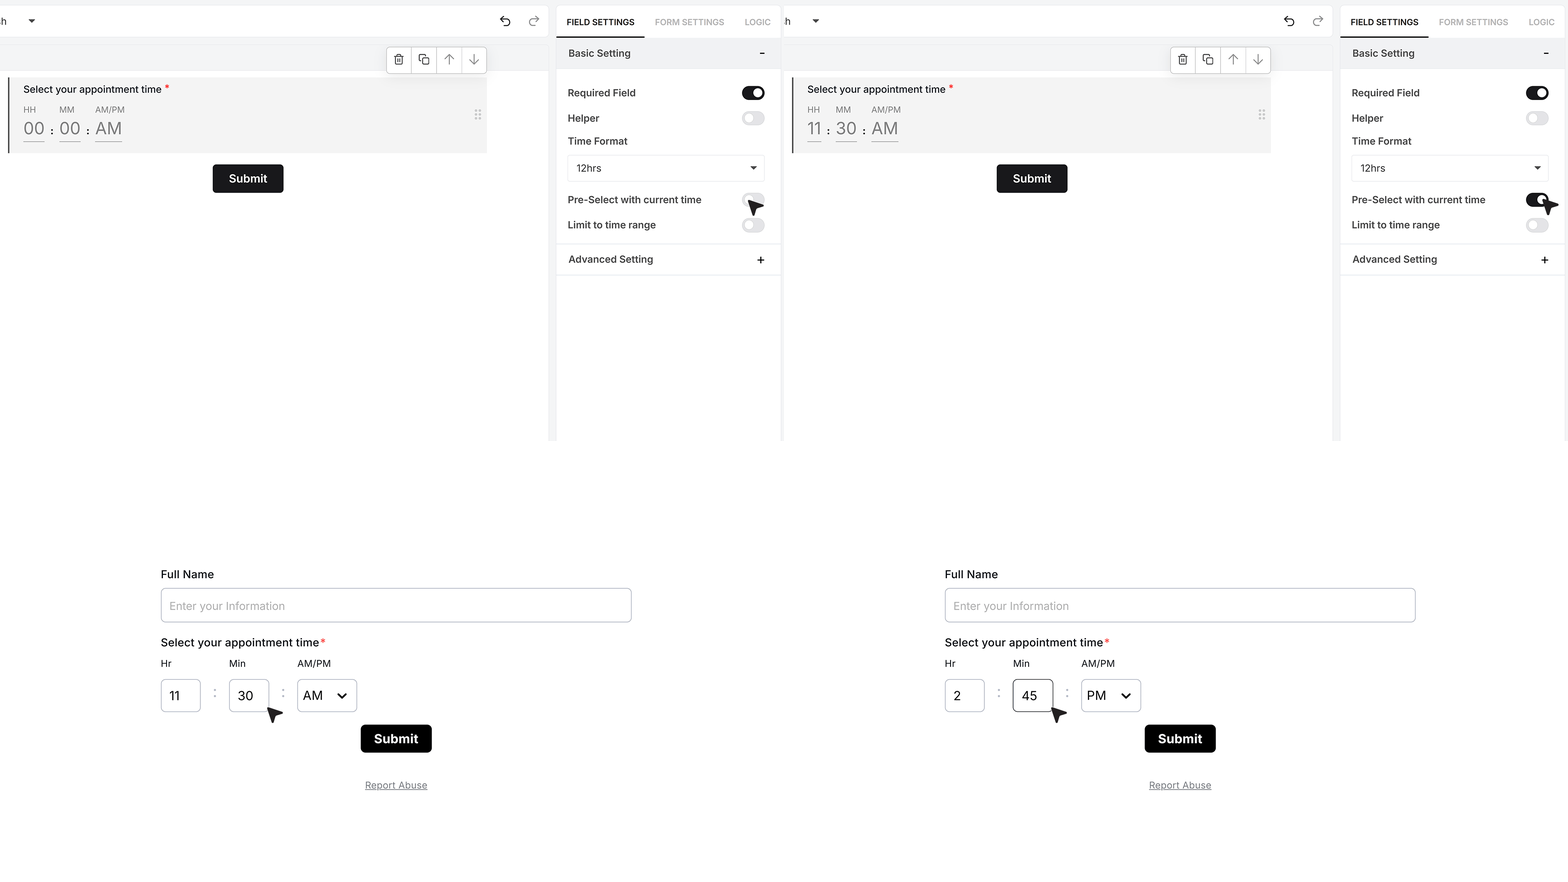
You can also ask the field to show the current time when the form loads. When you turn on Pre-select with current time, the field will already have the present time filled in. The user can change it if needed. This works well for check-ins, logs, and quick form entries.
Limit to date range
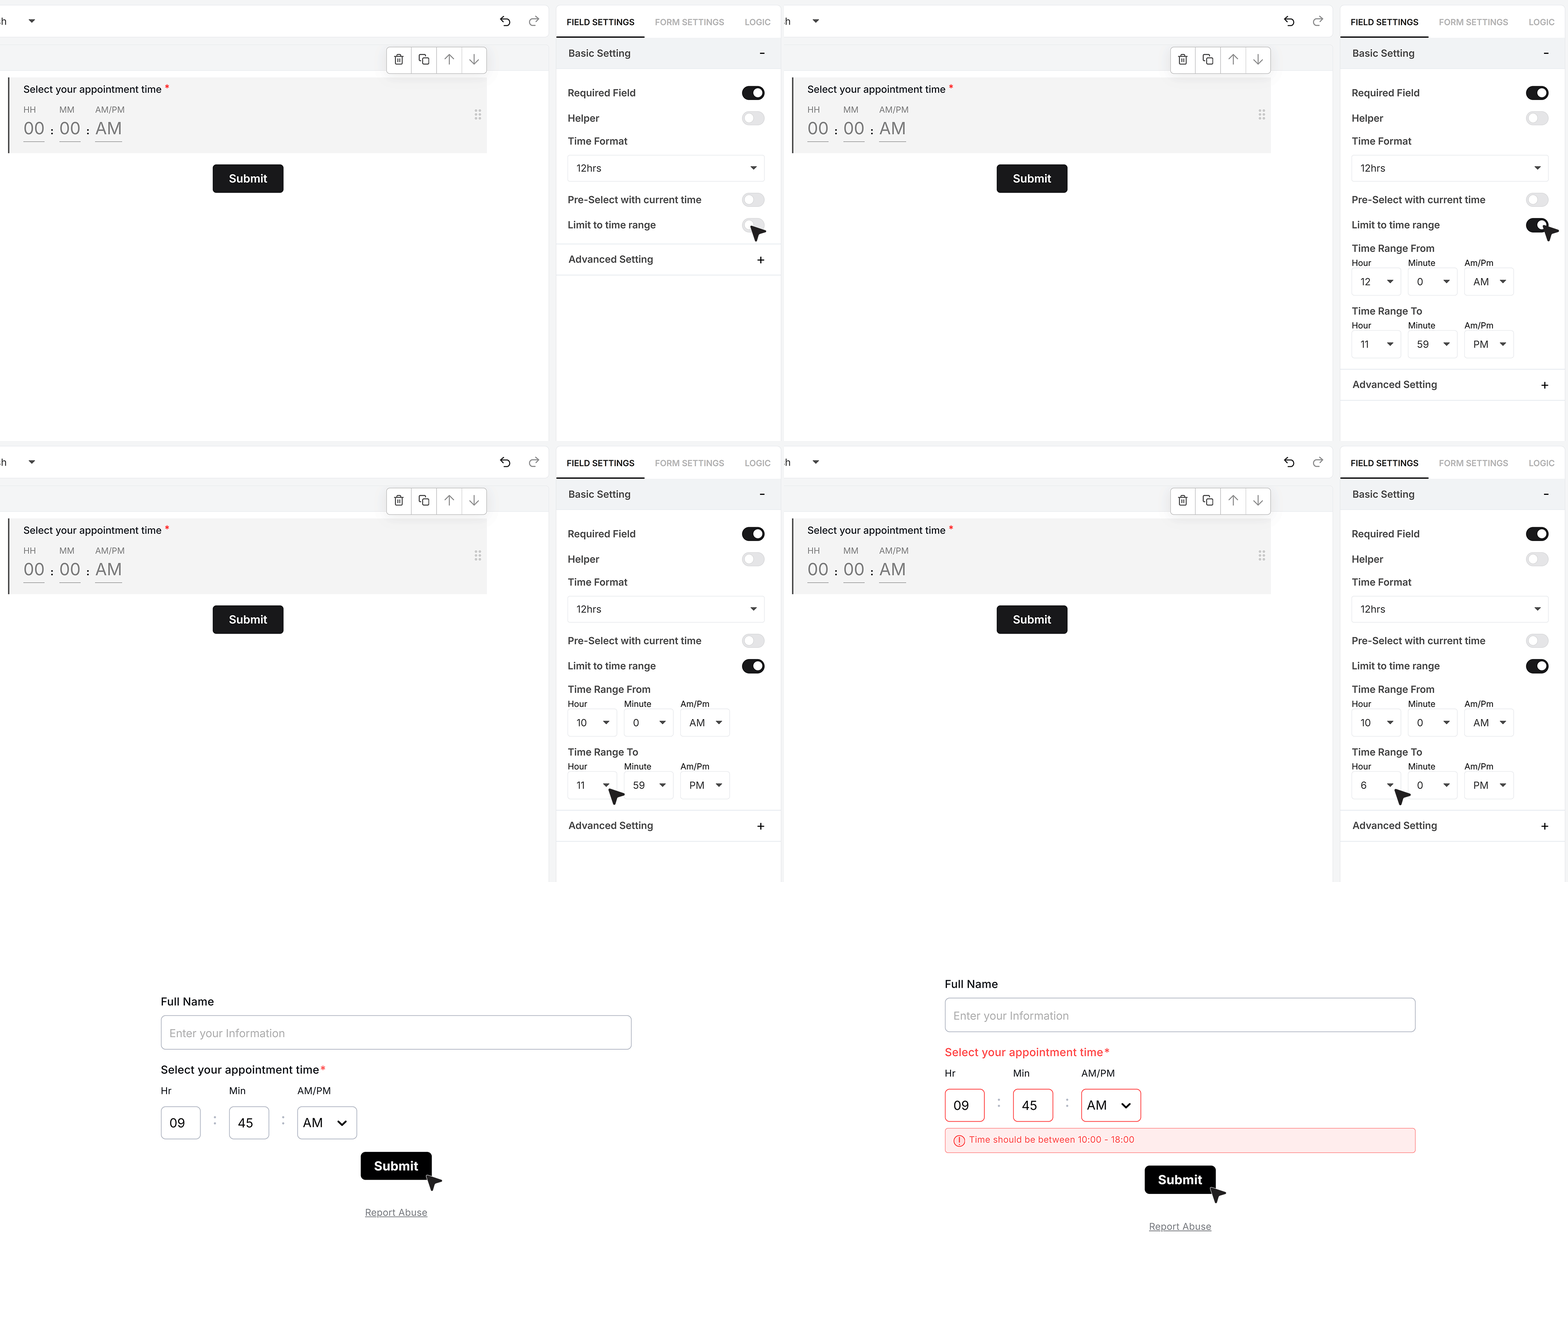
You can also limit the time range so users can only enter a time inside a set window. In the settings, choose a start time and an end time. Users will only be able to enter a time between these two.
For example, if you take bookings only between 10 AM and 06 PM, set 10:00 as the start time and 06:00 as the end time. If someone enters 09:30, the form will show an error and ask them to enter a time in the allowed range.
Advanced Settings
Repeat This Field
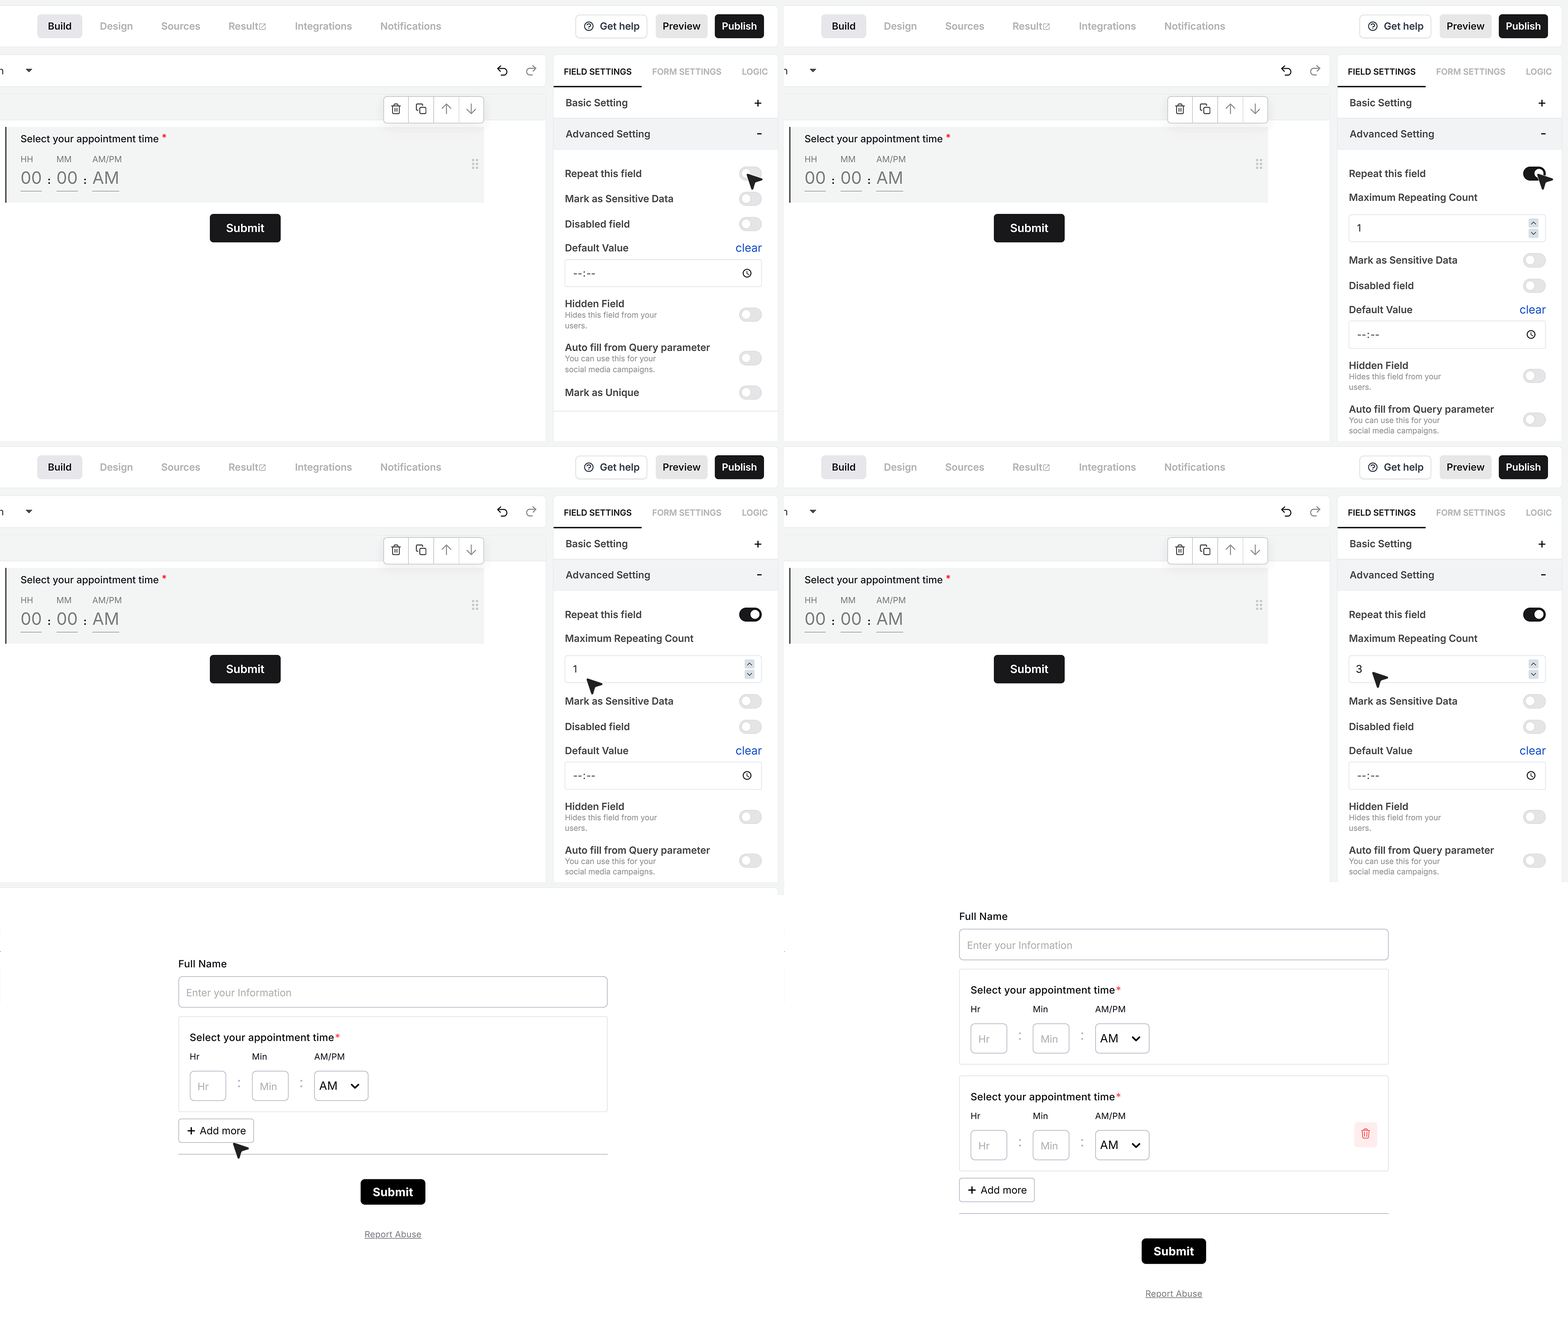
Repeat This Field allows the user to add more than one date using the same field. When you turn it on, you can choose the maximum number of times this field can repeat.
For example, if you set the limit to 3, the user will see one date field to start with and an “Add more” button below it. They can click this button to add a second date field, up to the limit you set. This is useful for multiple session times, visit slots, or backup time choices.
Mark as Sensitive Data
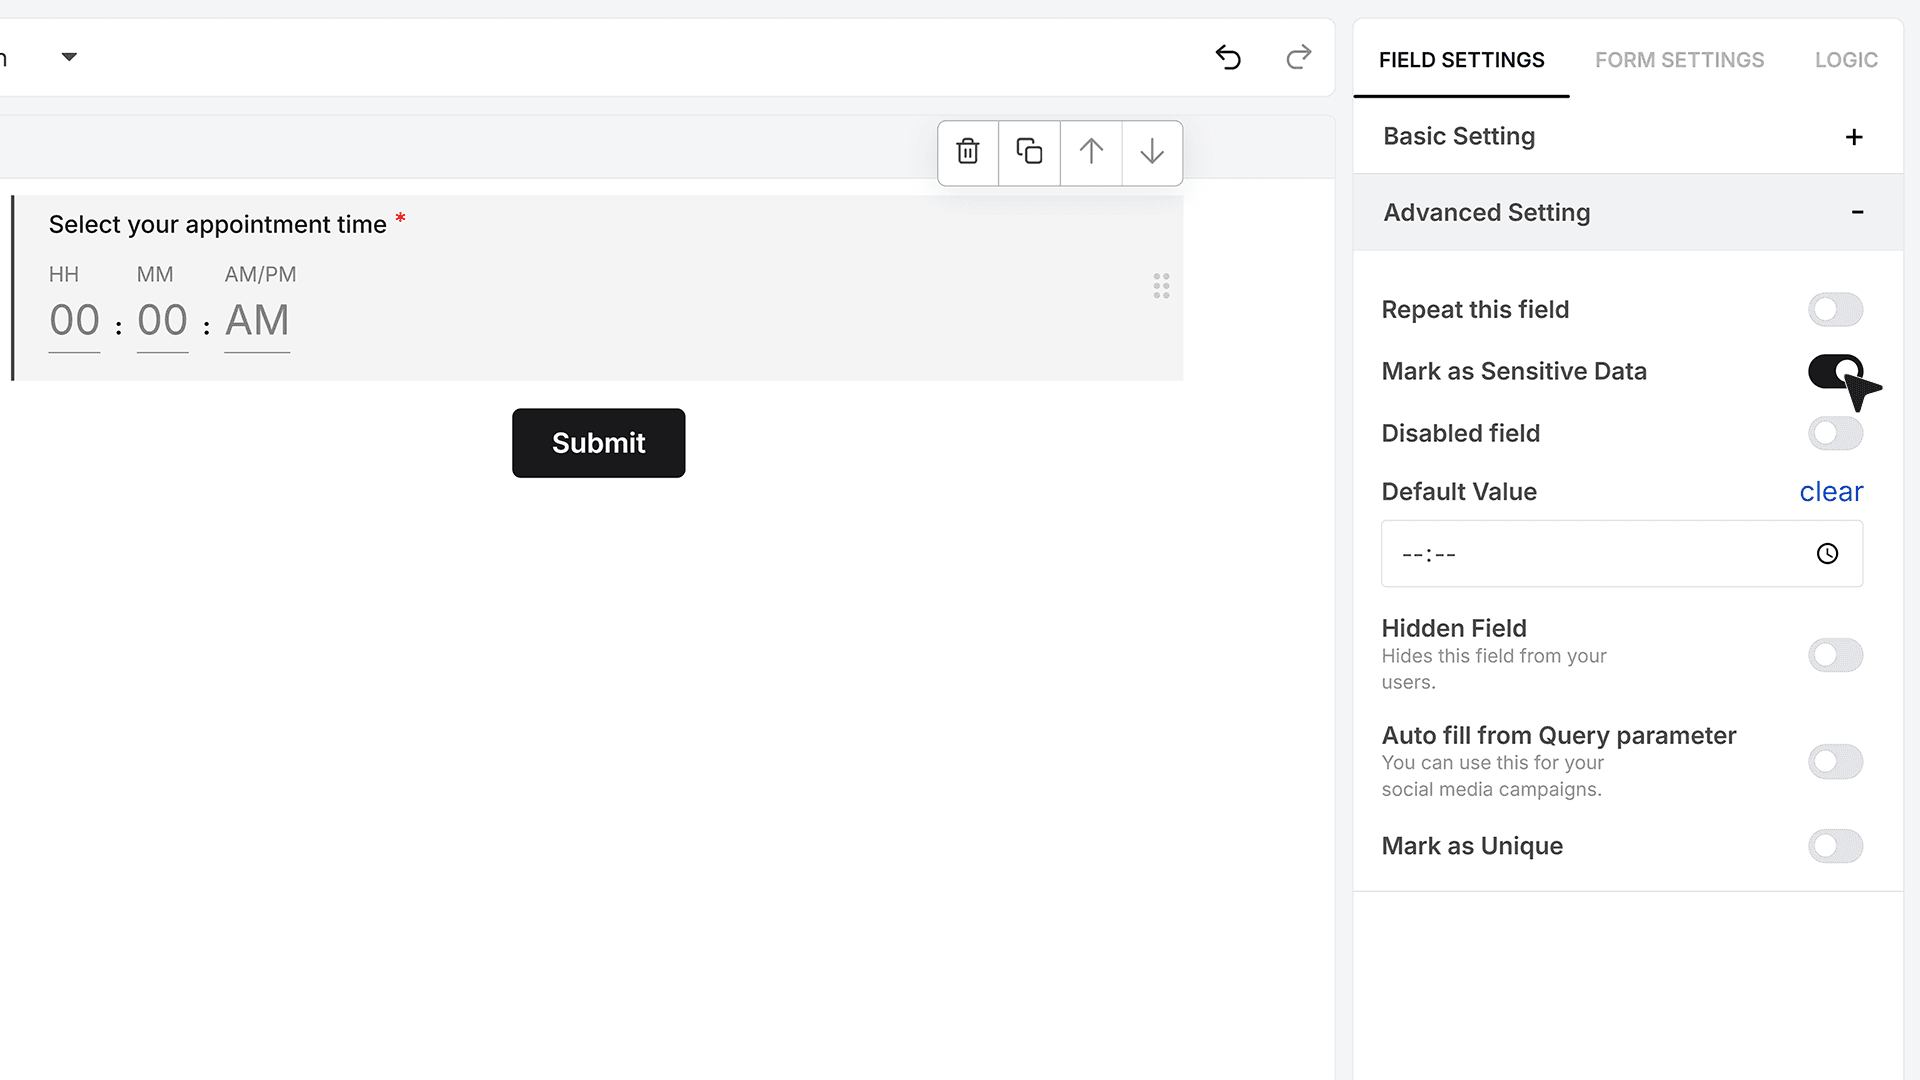
Mark as Sensitive Data should be turned on if the choices or responses should not be visible to everyone on your team.
When this is enabled, only team members with the right permissions inside MakeForms will be able to see the selected values in the responses.
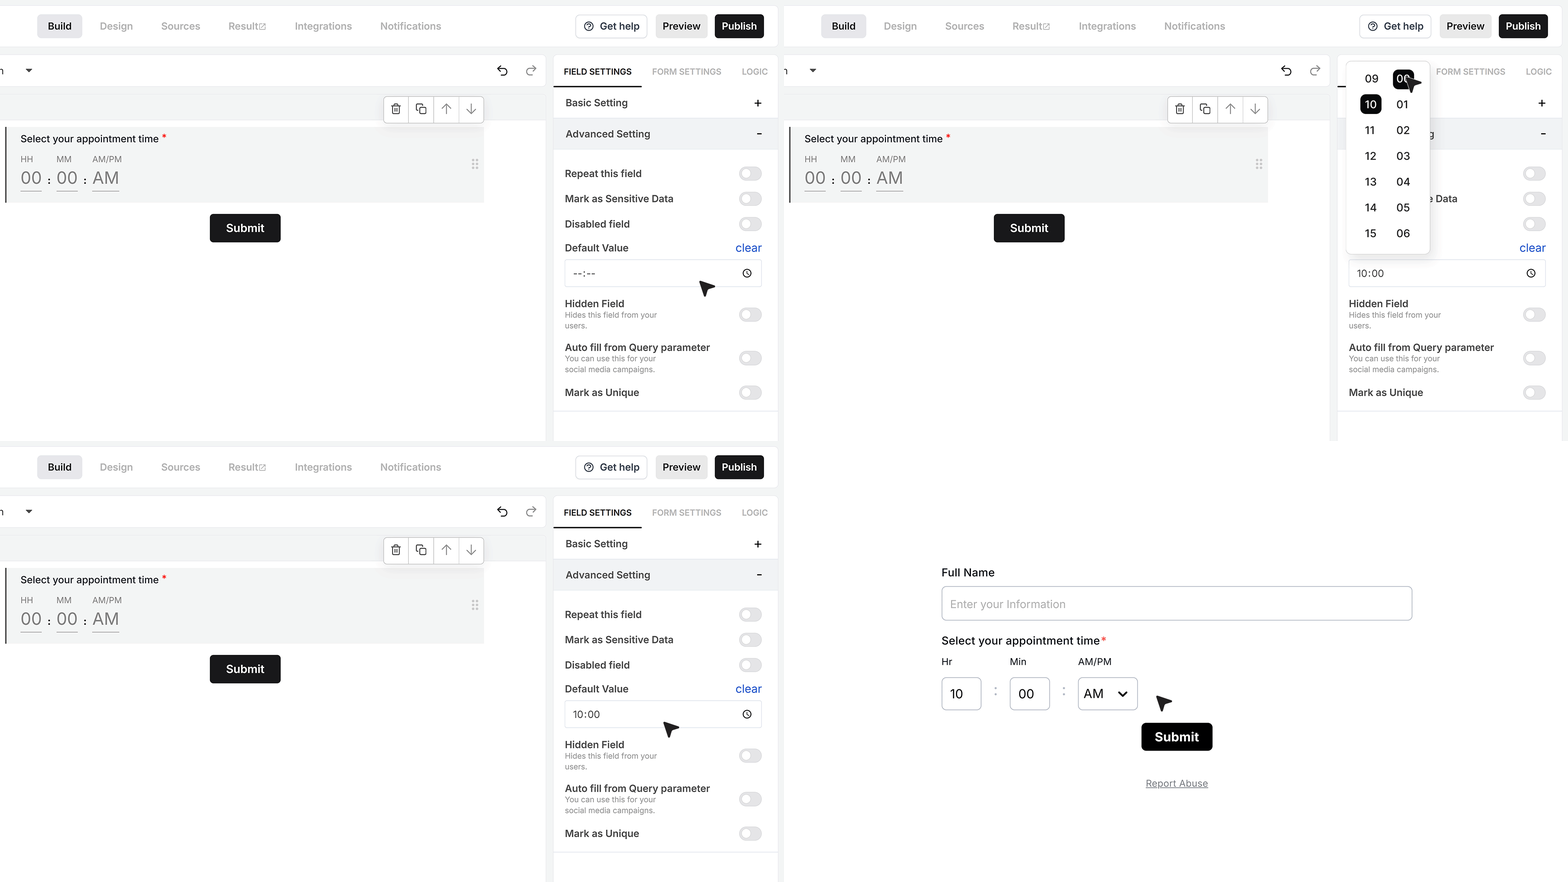
Default Value
With Default Value, you can fill the field with a fixed time before the user sees the form. This helps when the time is usually the same, like a daily start time or a fixed session slot.
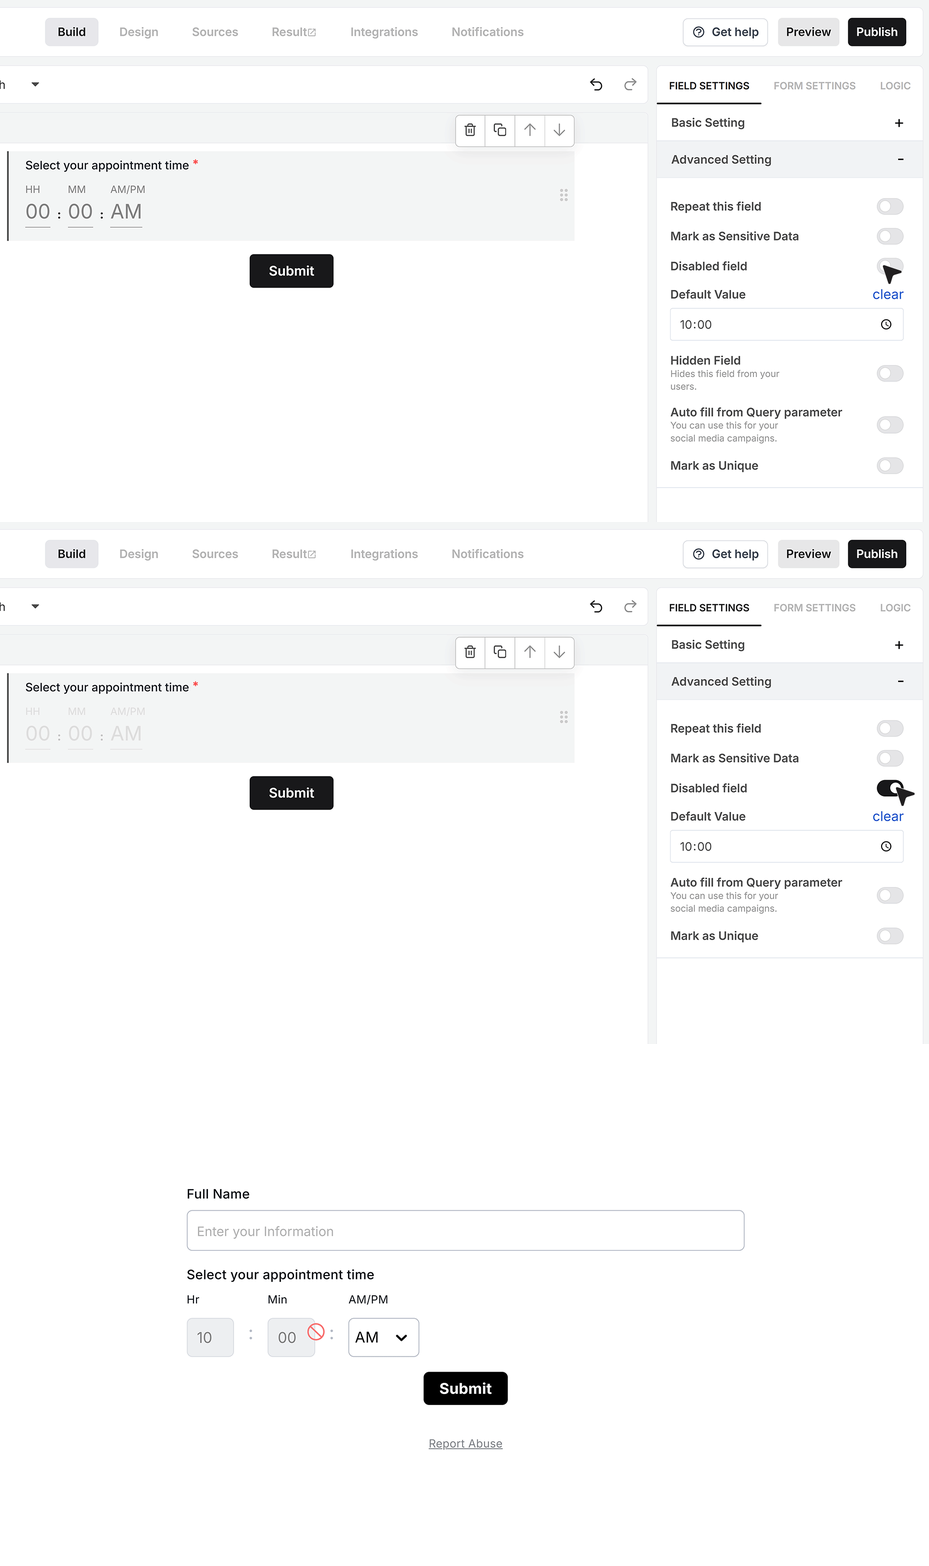
Disable Field
Disable Field turns the time Picker into a read only field. When you enable this, the user can see the time but cannot change it. This is useful when you want to show a fixed, system-controlled time that should stay as it is..
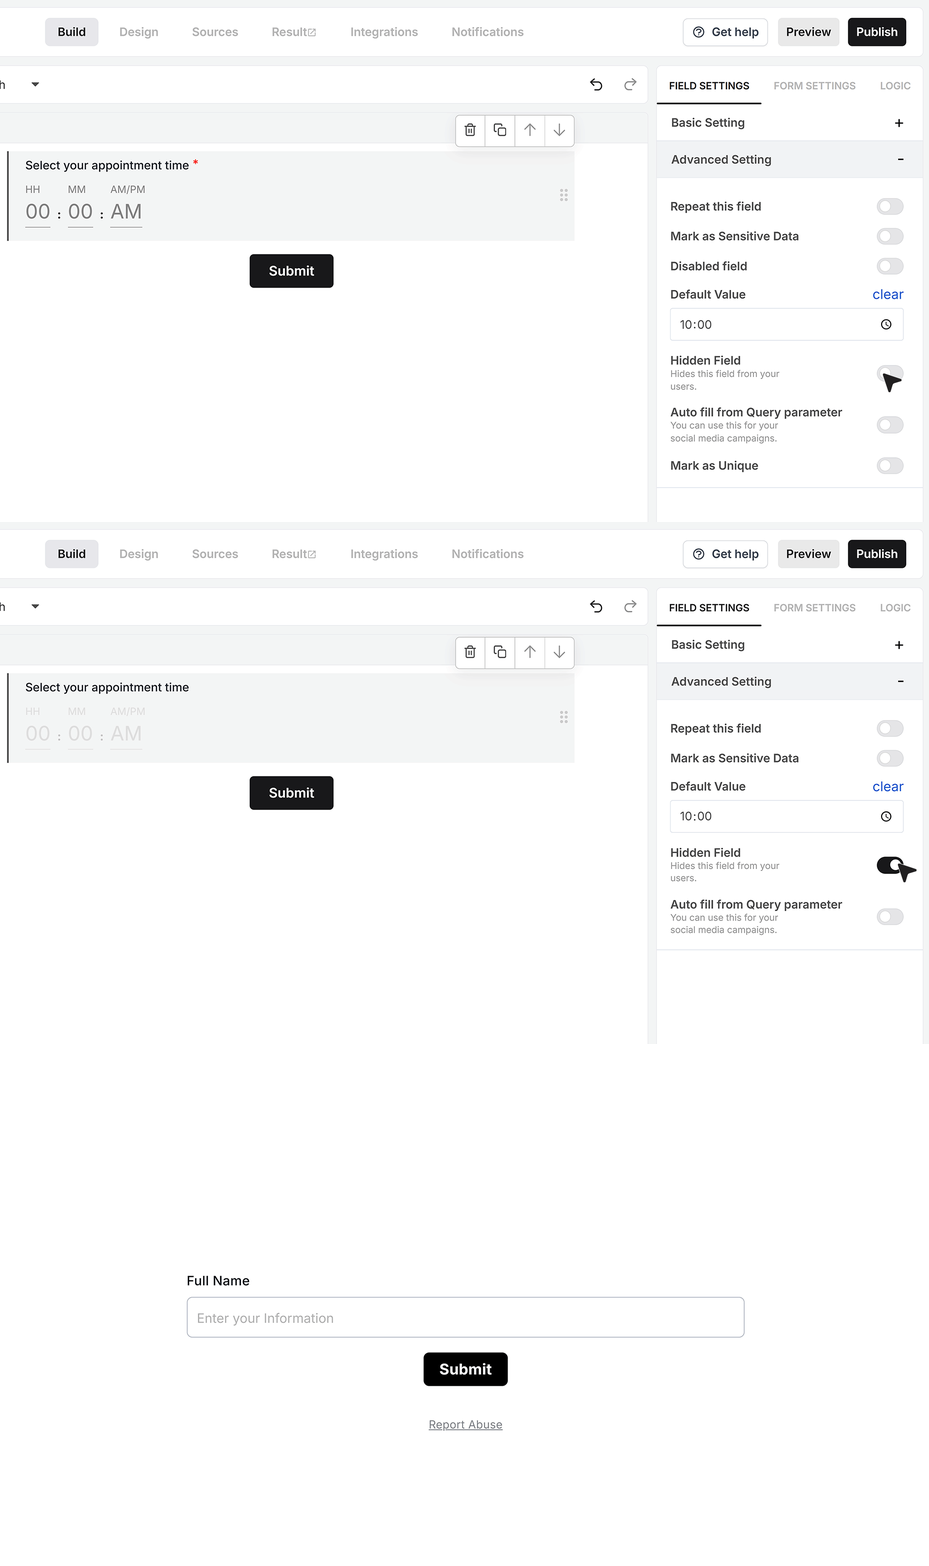
Hidden Field
If you enable Hidden Field, the user will not see the Time Picker at all, but the value will still be submitted with the form. This helps when you want to store a time for your own logic without showing it to the user.
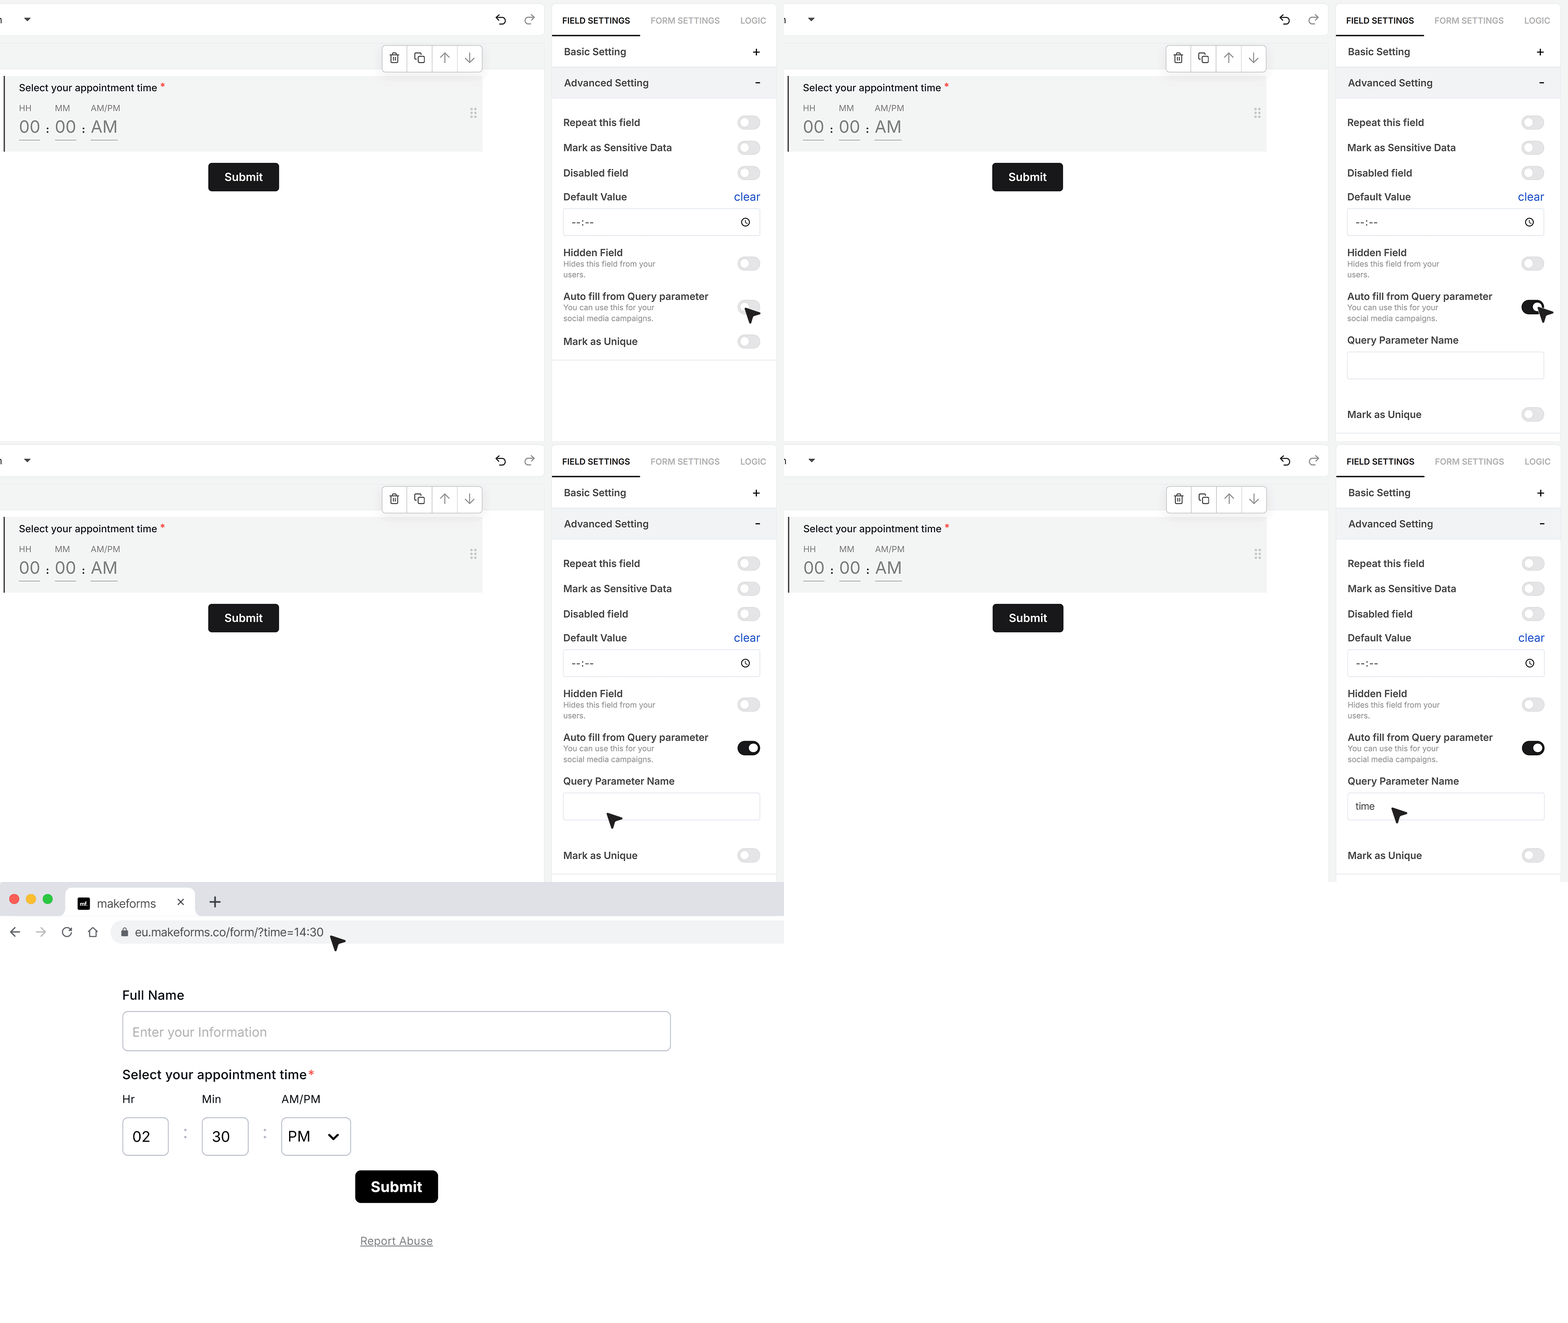
Autofill from Query Parameter
You can also use Autofill from the Query Parameter. This lets you fill the Time Picker using a value passed in the form link. In the Advanced Settings, enter a parameter name, for example "time". When you share the form, add this parameter to the URL and pass a time value in 24-hour format. For example, if your parameter name is "time", your link might look like:
https://your-form-url?time=14:30
When someone opens the form using this link, the Time Picker will automatically fill with that time. If your Time Picker is set to a 12-hour format, it will show this as 02:30 PM.
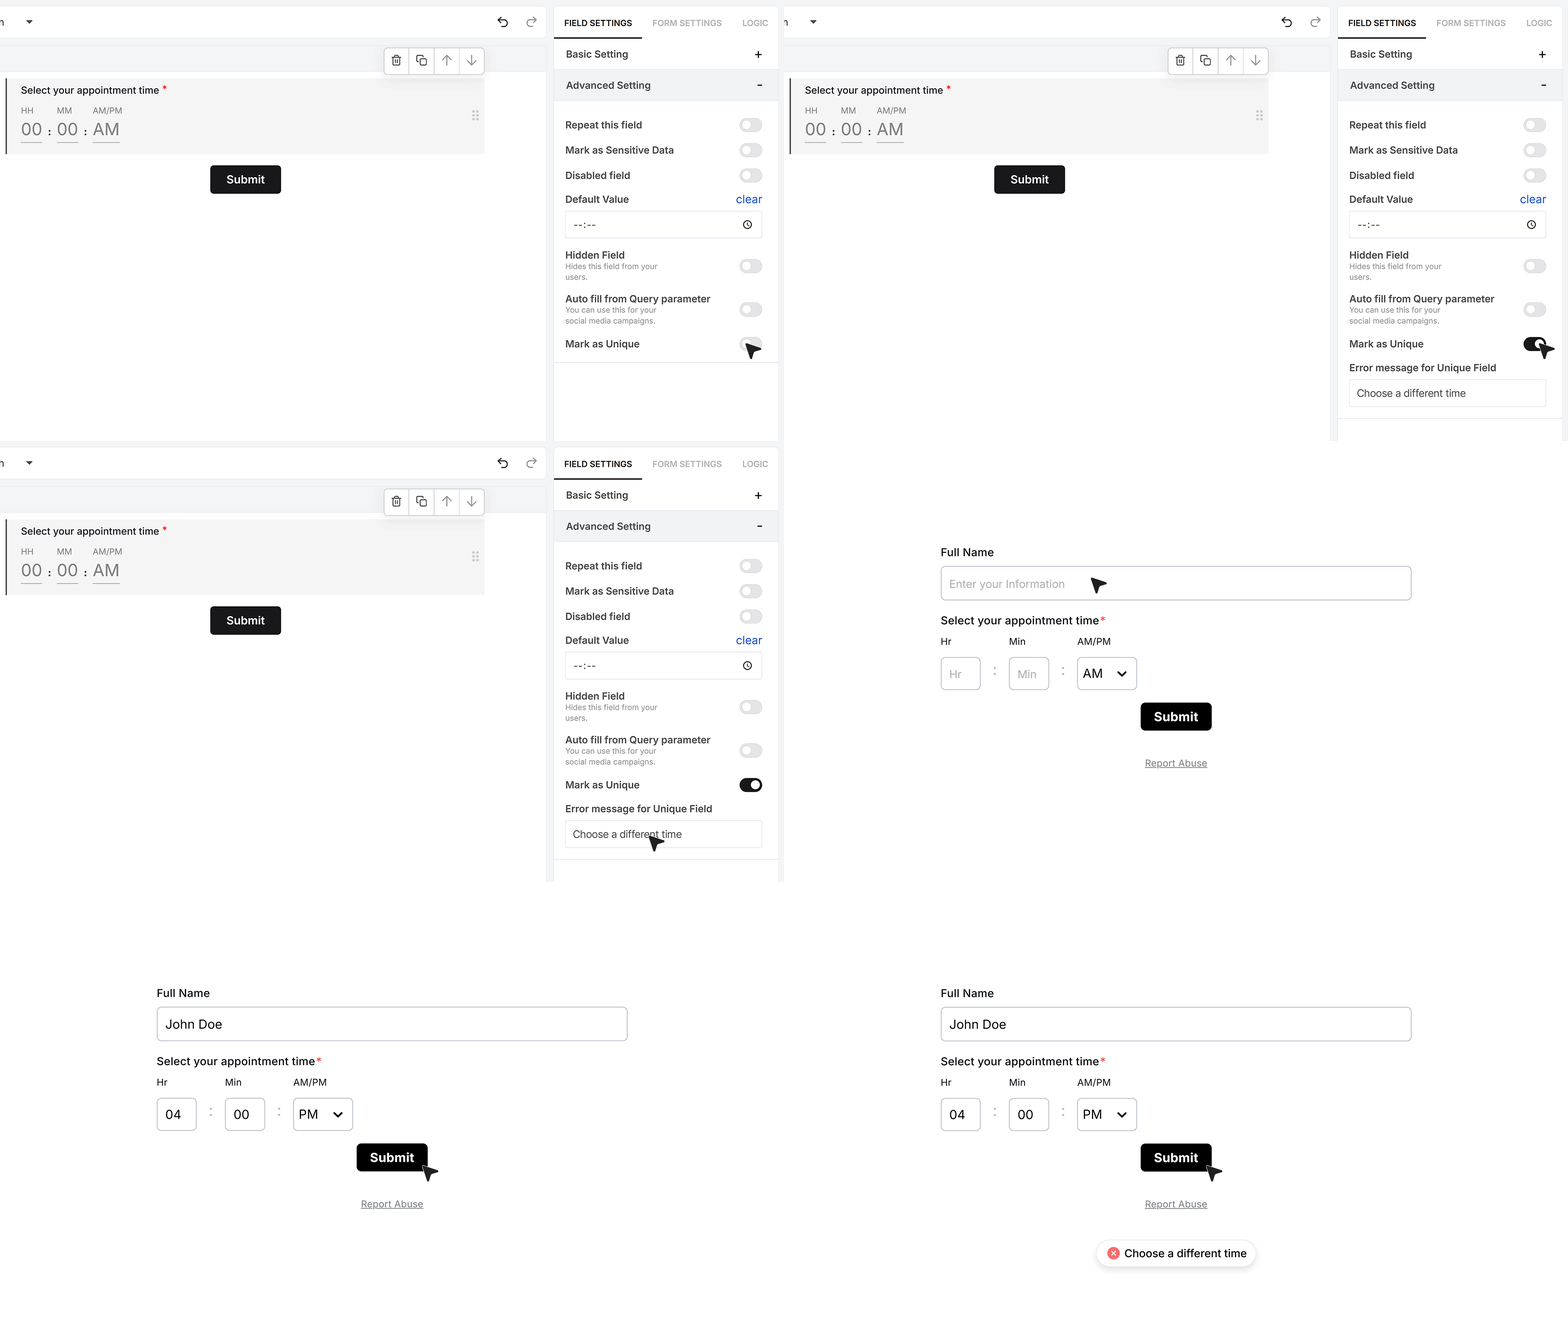
Mark as Unique
Mark as Unique stops users from entering a time that has already been used in another response. When someone tries to submit a time that already exists, they will see your custom error message. This is useful for single-slot bookings or times where only one entry is allowed.
FAQ's
MakeForms includes a built-in field that you can drag into your form and configure for format, defaults, limits, and validation.
In the MakeForms field settings shown in the PDF, there is no option mentioned for plugging in a third-party time widget inside this field. The field is a native field with built-in settings like time format, prefill, range limits, and URL autofill.
In MakeForms, drag the field into your form and set the label.
Then configure it in Field Settings: set Required Field if time must be entered, set Time Format (24hrs or 12hrs with AM/PM), optionally pre-select the current time, and optionally limit entries to a start and end time range.
Yes, MakeForms supports adding the field by dragging the Time or field into the form.
From the provided content, MakeForms supports scheduling-style controls like limiting time to a defined window, allowing multiple time entries via Repeat This Field, and preventing duplicate time bookings with Mark as Unique.
In MakeForms, enable the time range limit and set a start time and end time. Users can only enter a time within that window, and the form shows an error if the value is outside the allowed range.
In MakeForms, test the validation paths described in the PDF:
- If Required Field is on, submit with the field empty or an invalid time and confirm the form blocks submission with an error.
- If a time range limit is set, try a value outside the window and confirm you get the range error.
- If Mark as Unique is on, submit a time once, then submit the same time again and confirm it blocks with your custom error message.
The PDF does not describe a specific conditional-logic rule setup for values from this field. What it does show is that you can store time for internal logic using Hidden Field, and you can prefill a time using a URL query parameter, which can then be used by your logic system if your platform supports conditions on that value.