Single Choice Field
The Single Choice field lets the user pick one clear answer from a list. It is meant for questions where only one response should count, such as a preferred option, one main choice, or a single selection among many..
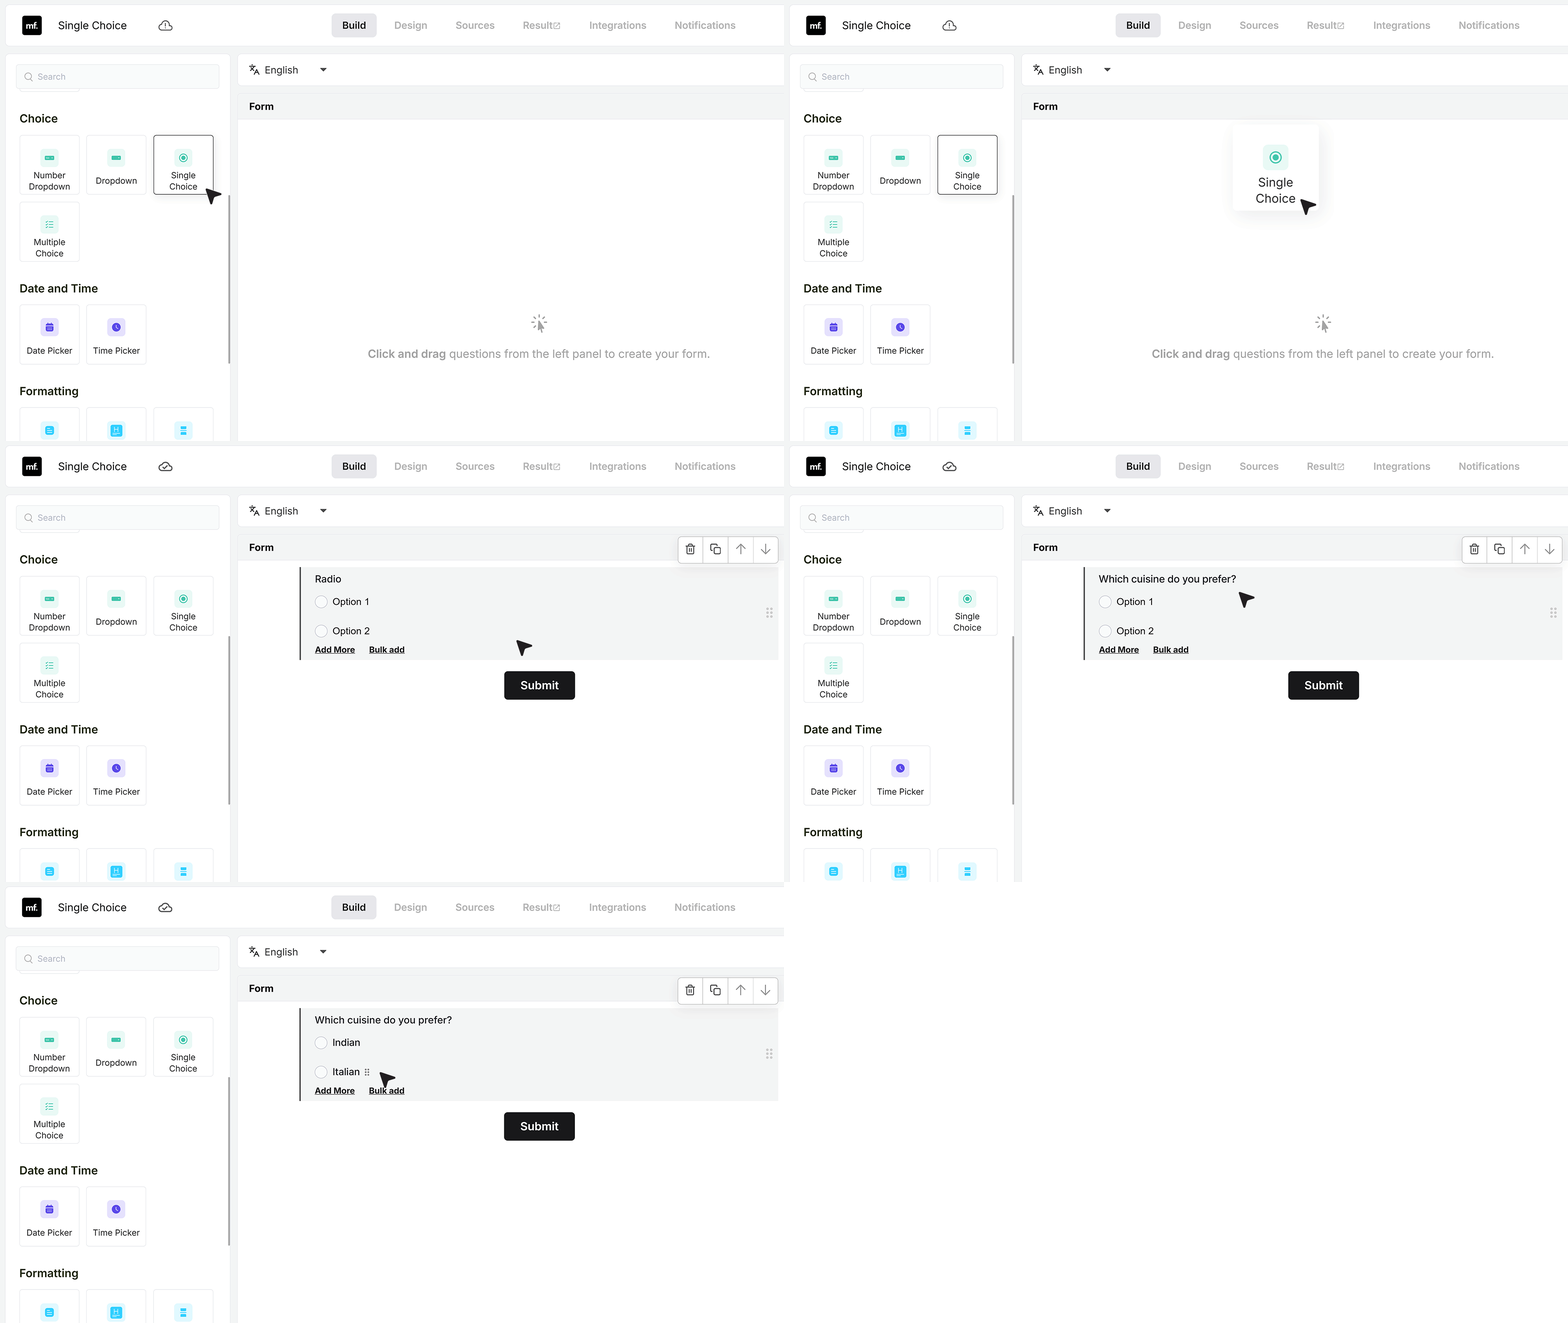
Add a Single Choice field from the field list into your form. Change the field label so it matches your question. For this example, you can name it “Which cuisine do you prefer?”
When you add the field, you will see two default options. You can click on them and rename them right away, for example to Indian and Italian.
Add Choices
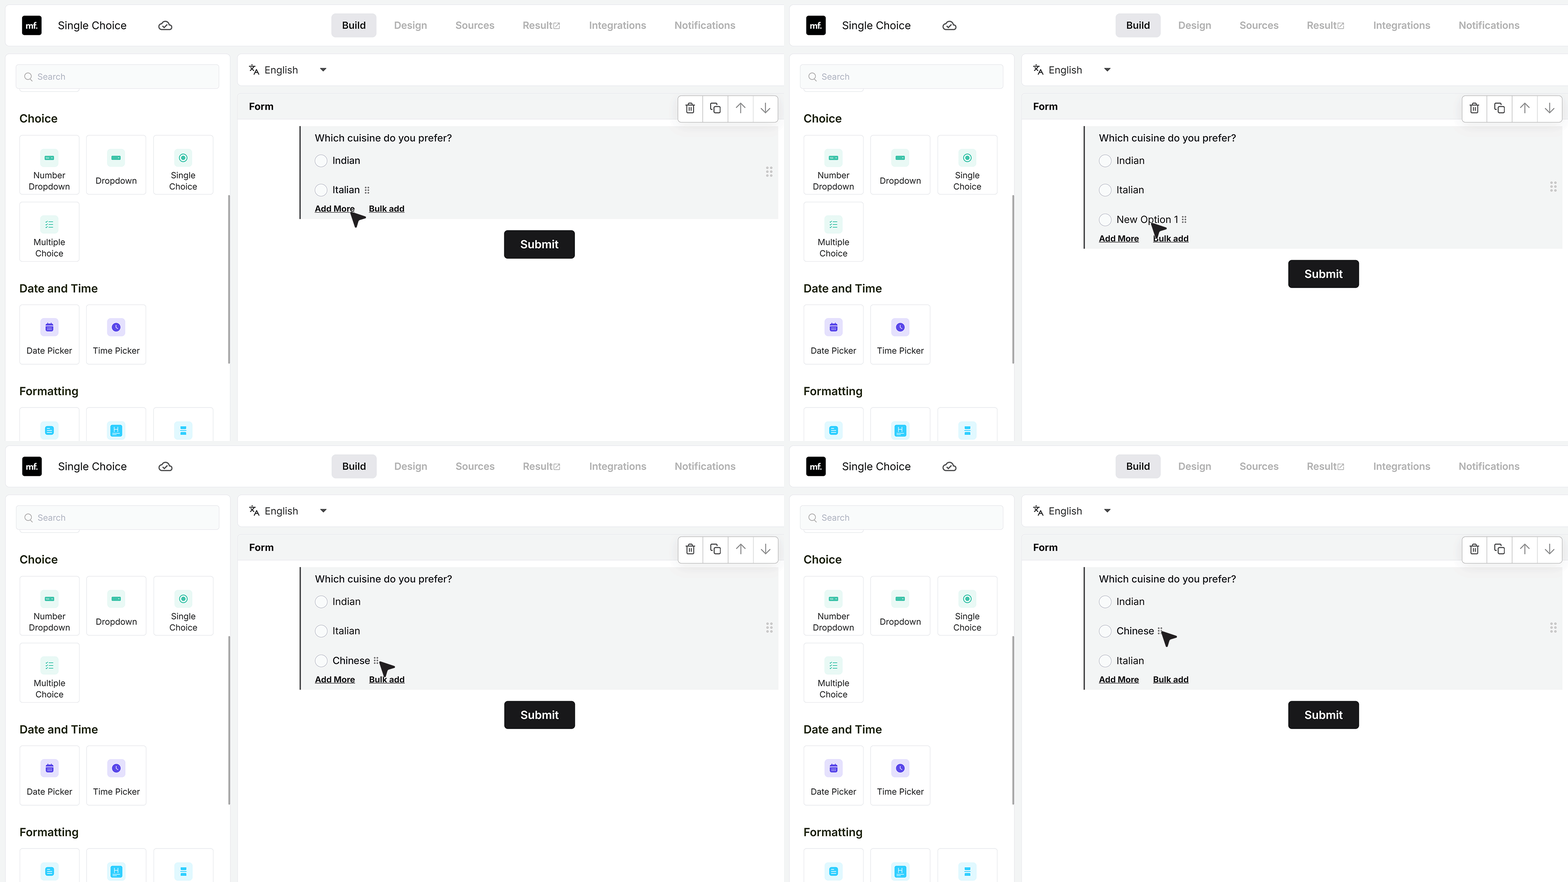
- If you want to add items one by one directly inside the field, use the Add option button and type the name. You can drag any item up or down to arrange the choices in the order you like.
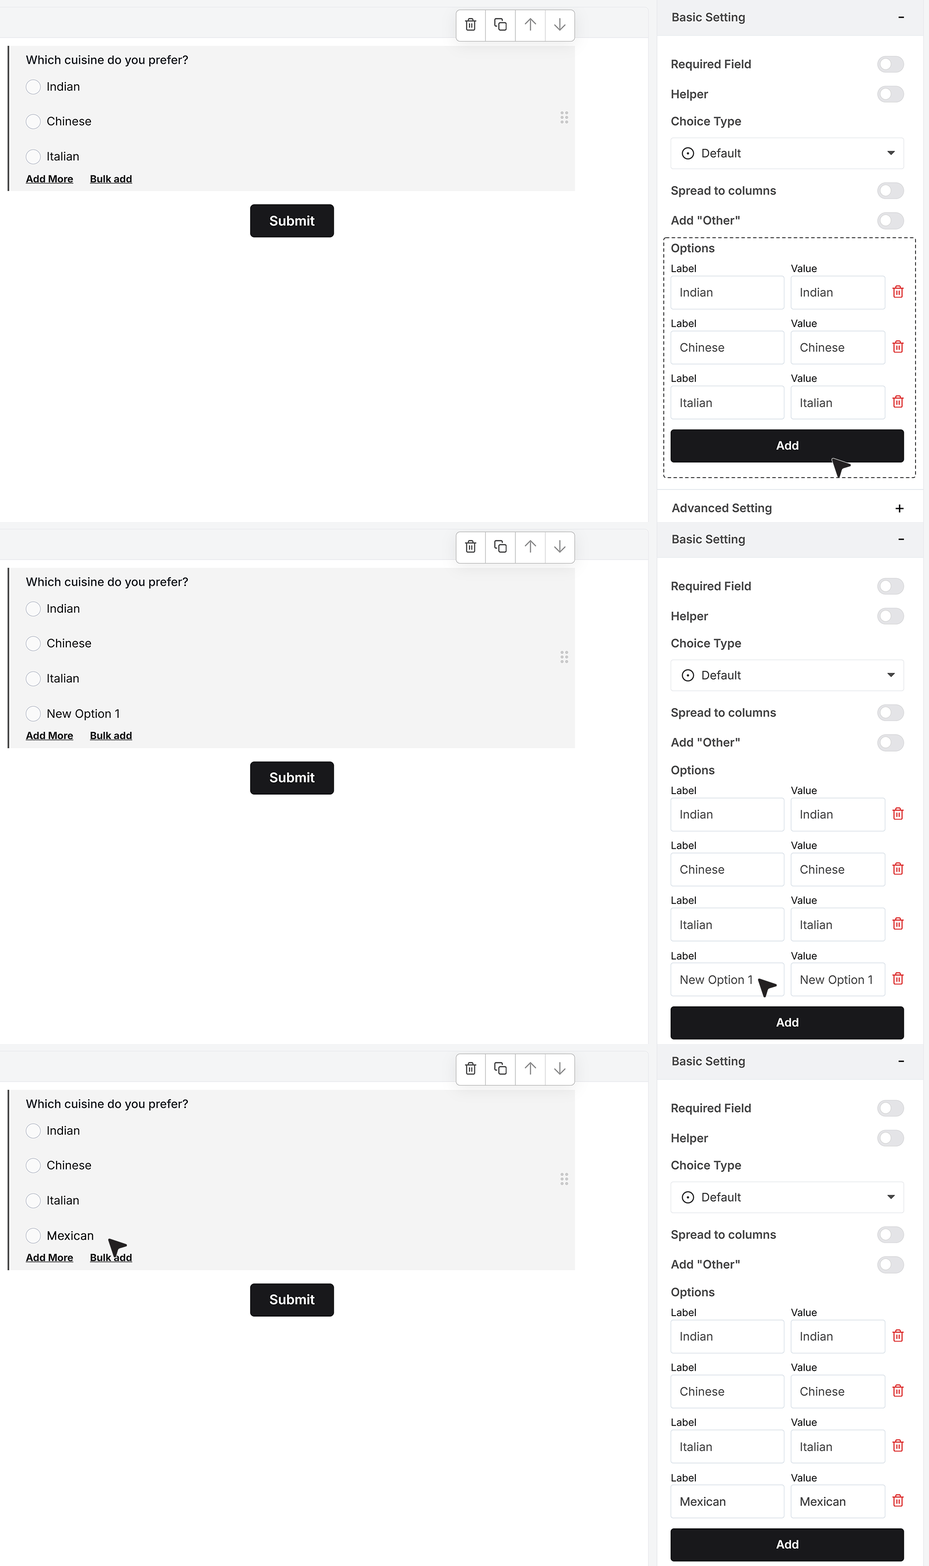
- You can also add options from the Basic Settings panel. In the options area, click Add, then type the option title. As soon as you add it there, it appears in the options list for that field.
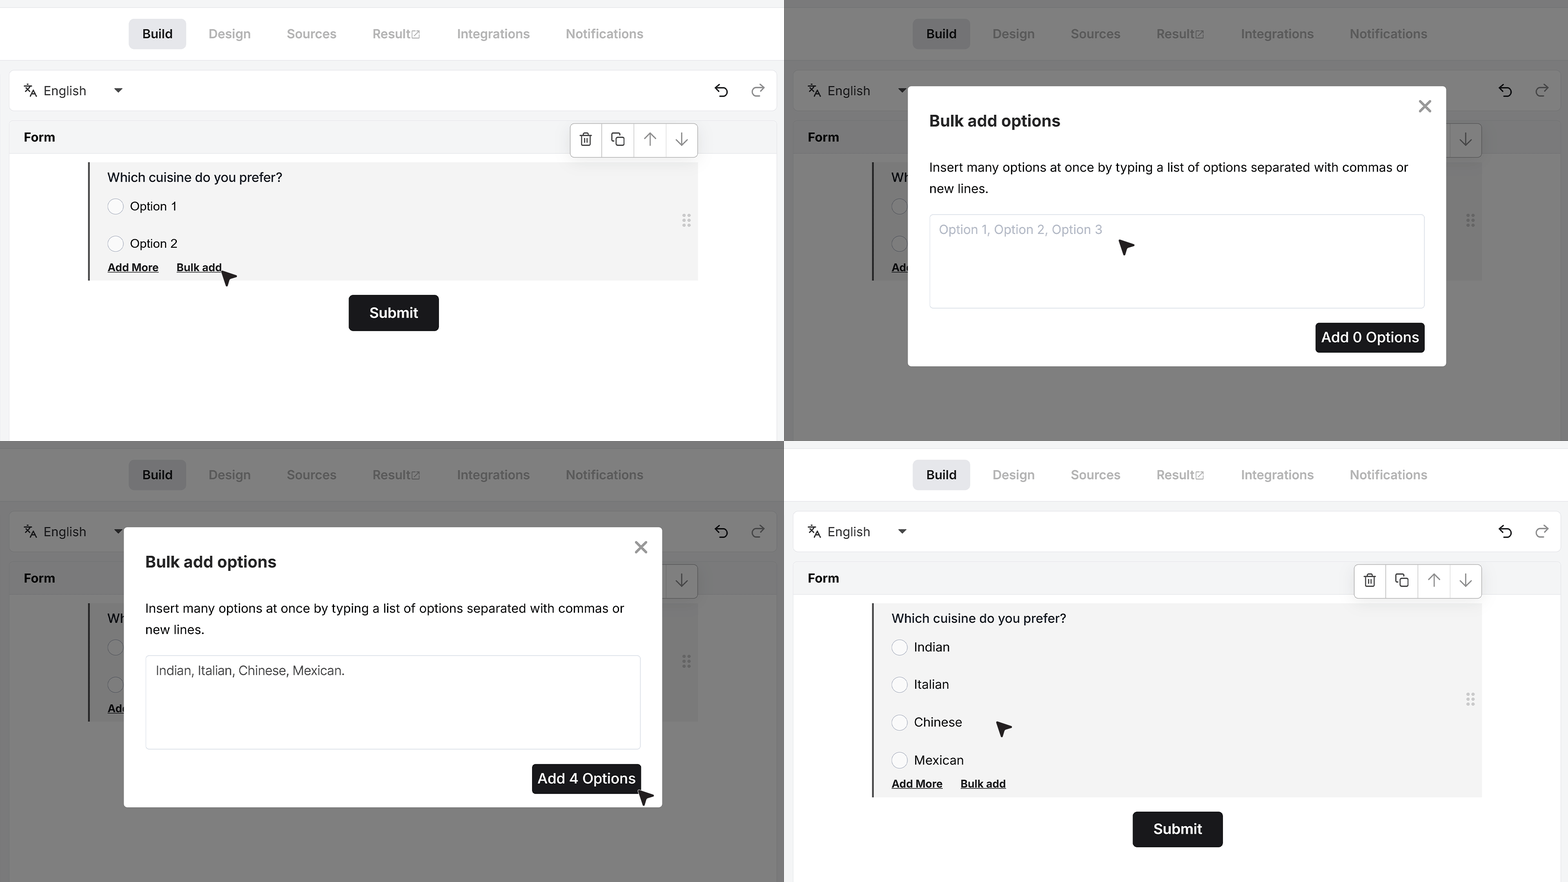
- If you already have your full list prepared, Bulk Add is the fastest way to set it up. Click Bulk Add under the choices to open a text box. Paste your list there, either separated by commas or placed on separate lines. When you save, each entry becomes its own Single Choice option in the same order you entered.
Once your options look correct, you can start adjusting the field settings.
Basic Settings
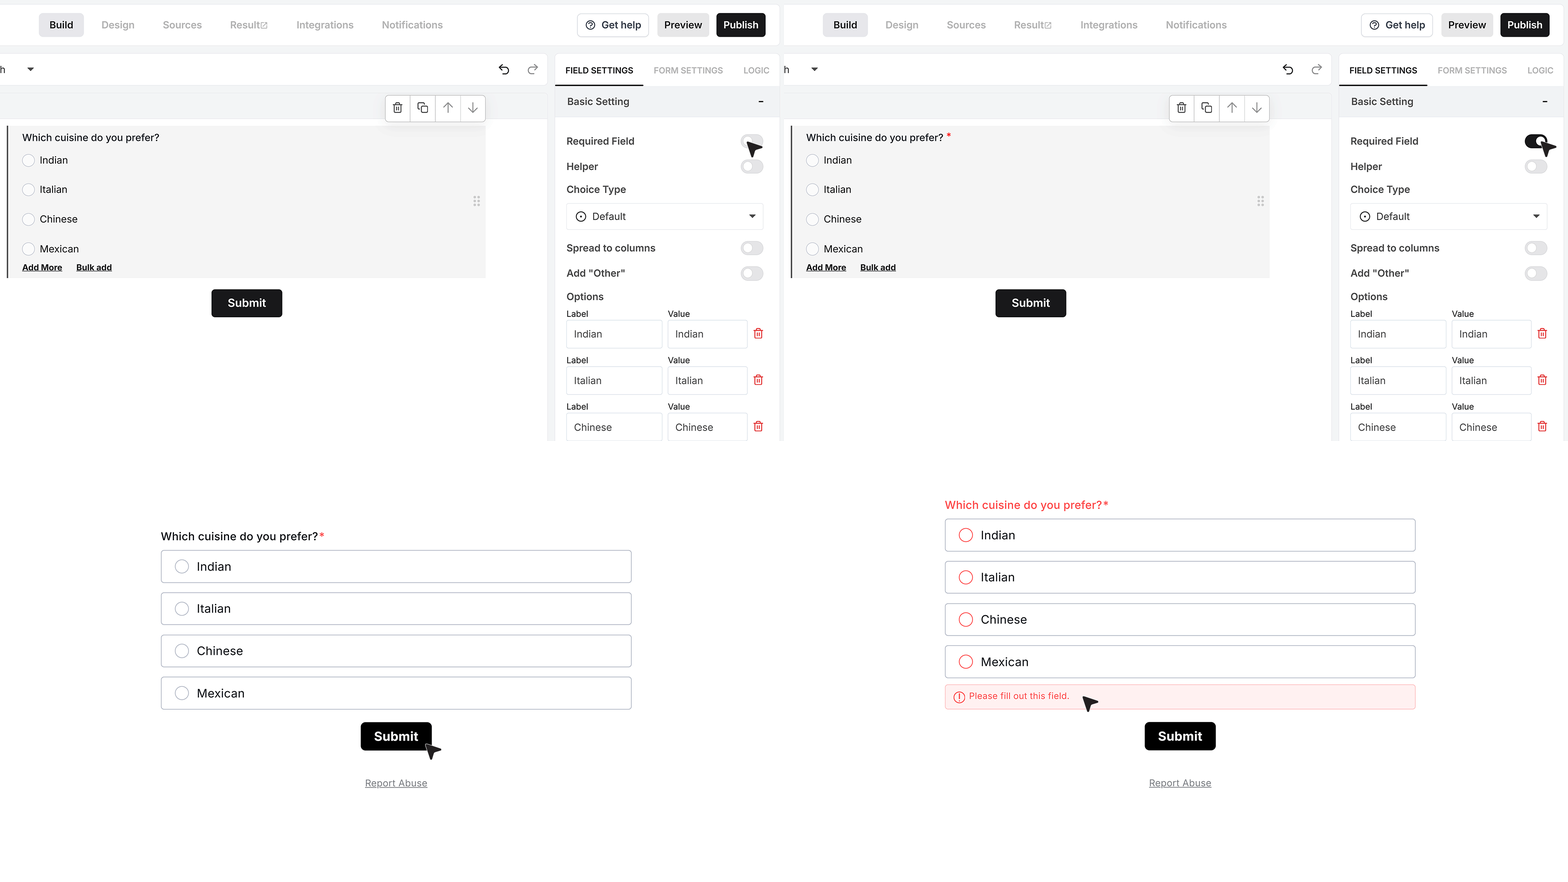
Required Field
Turn this on if you want to make sure the user selects one option before submitting the form. If they try to submit without making a choice, MakeForms will show an error and block the submission until they pick an answer.
Helper text
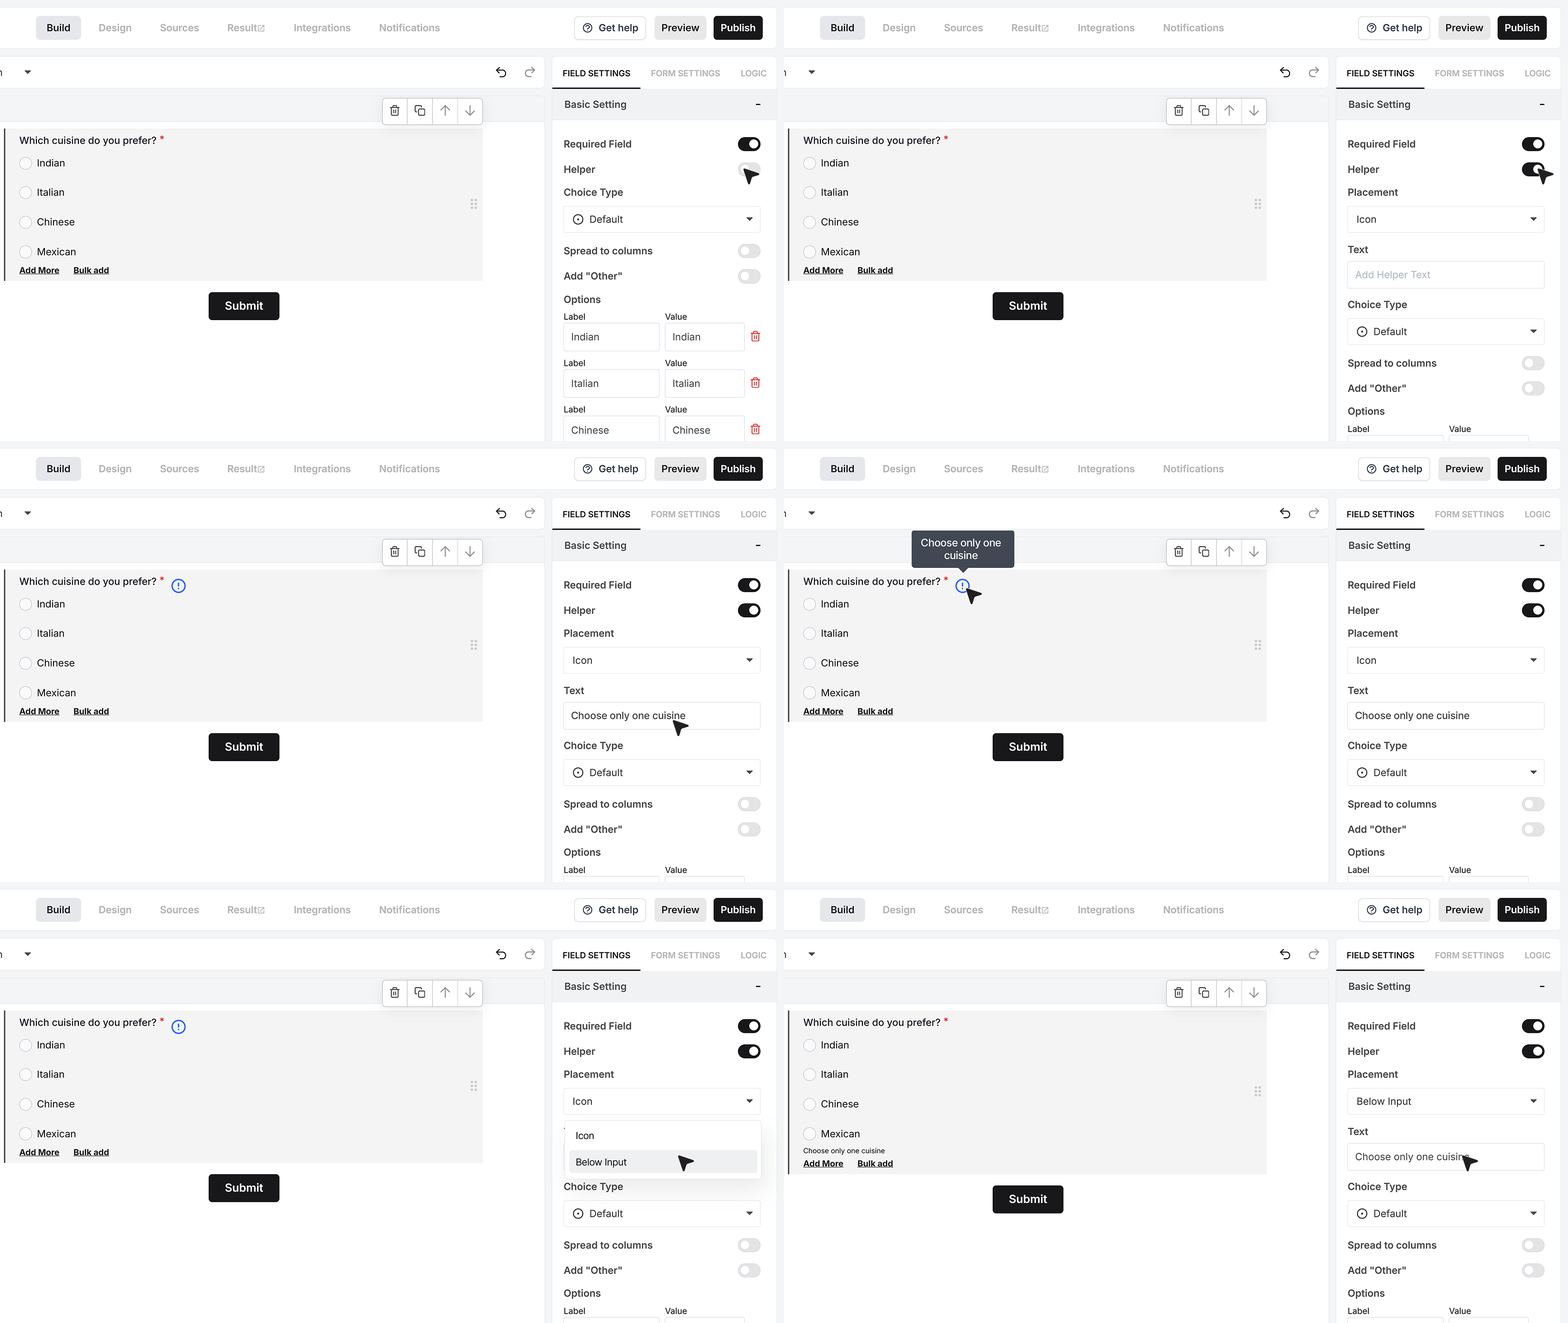
Below that, you will see the Helper Text setting.
Turn this on if your question needs a bit more explanation. You can type a short line such as “Choose only one cuisine”. You can also decide how this helper text appears. It can show as a small info icon that reveals the message when the user hovers over it, or it can appear as visible text below the field. Use whichever style feels clearer for your form.
Choice type
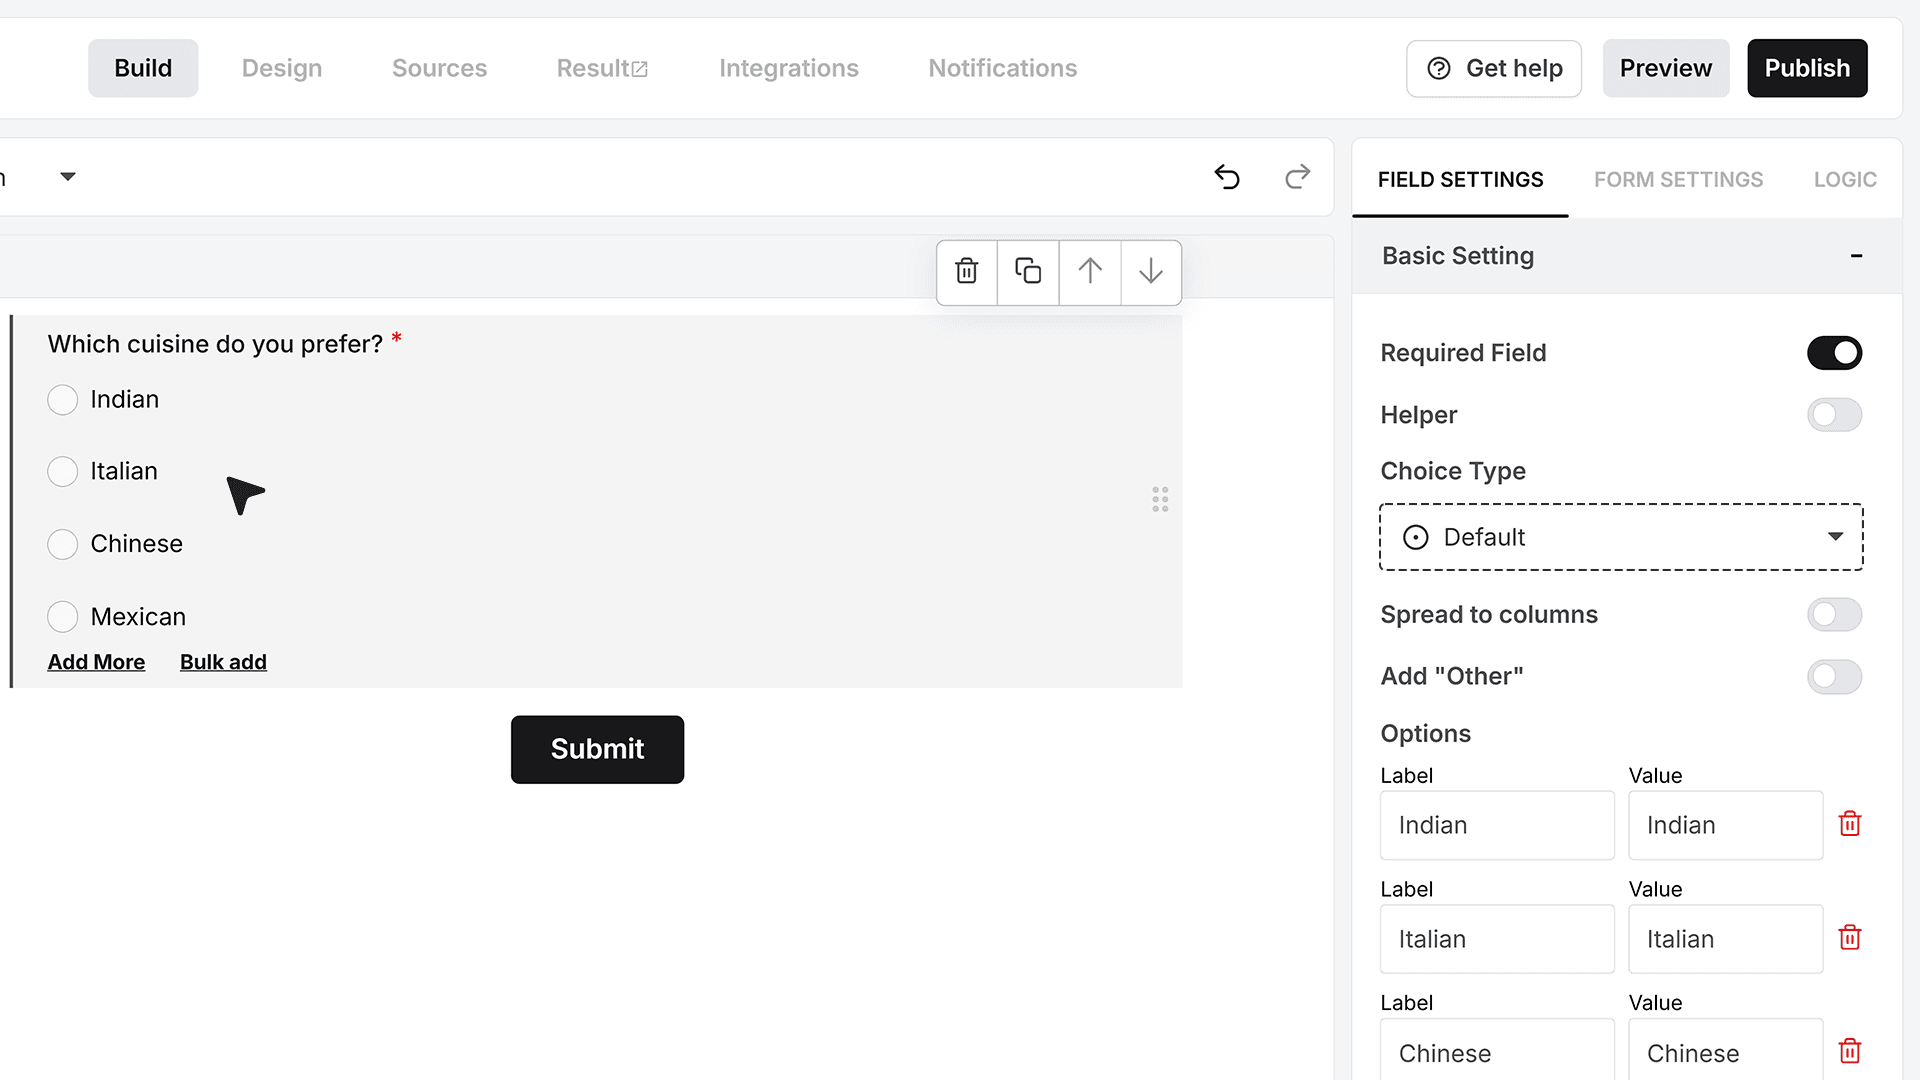
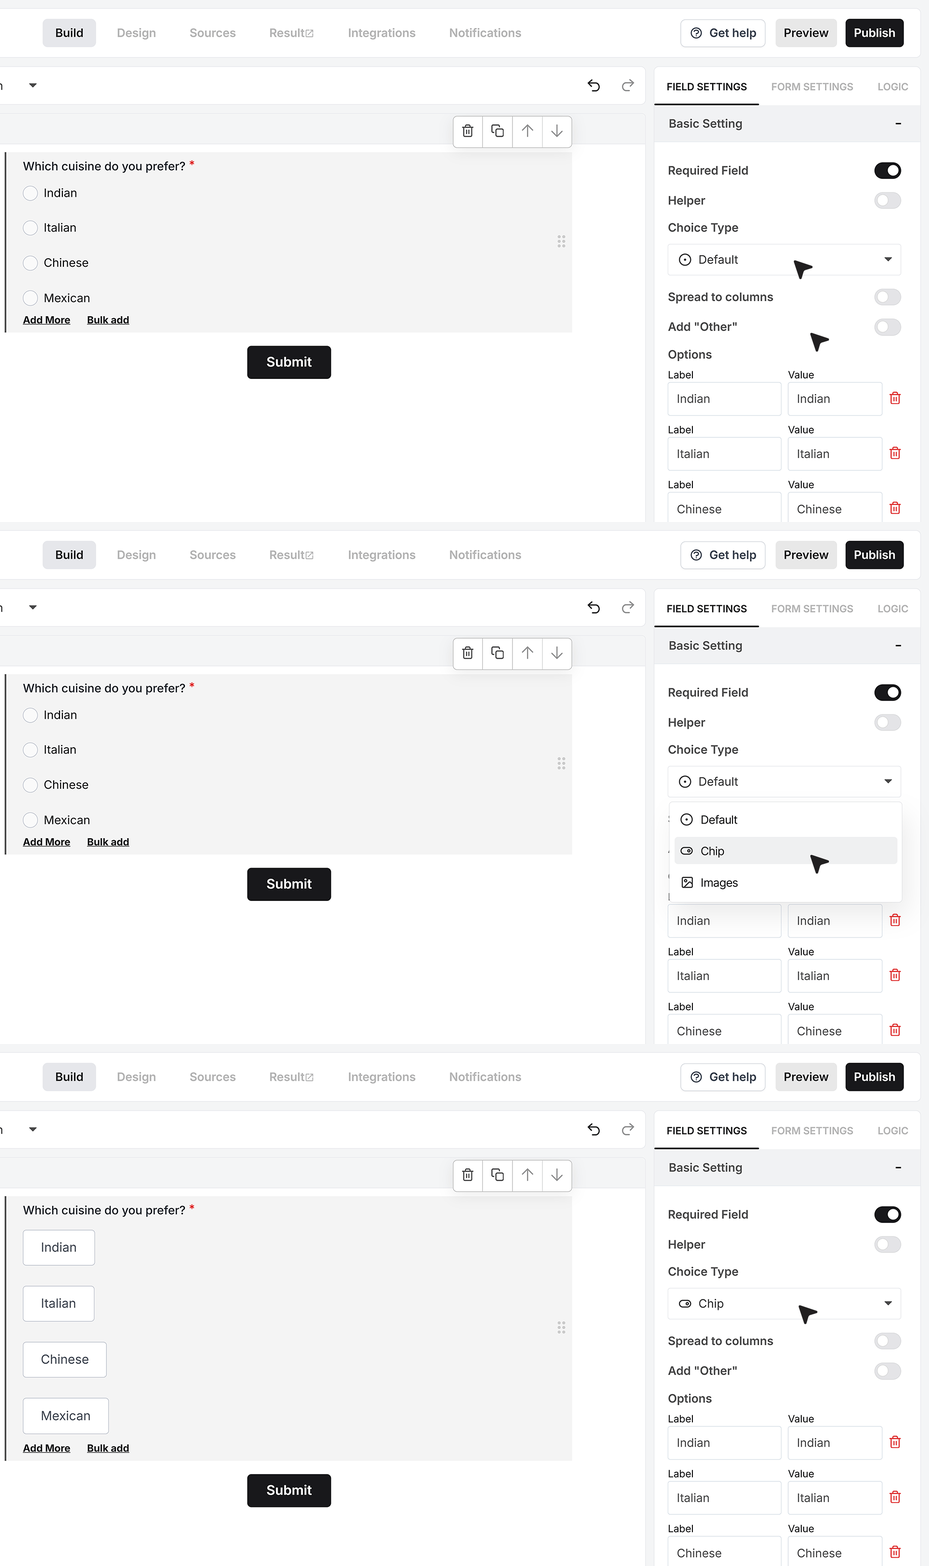
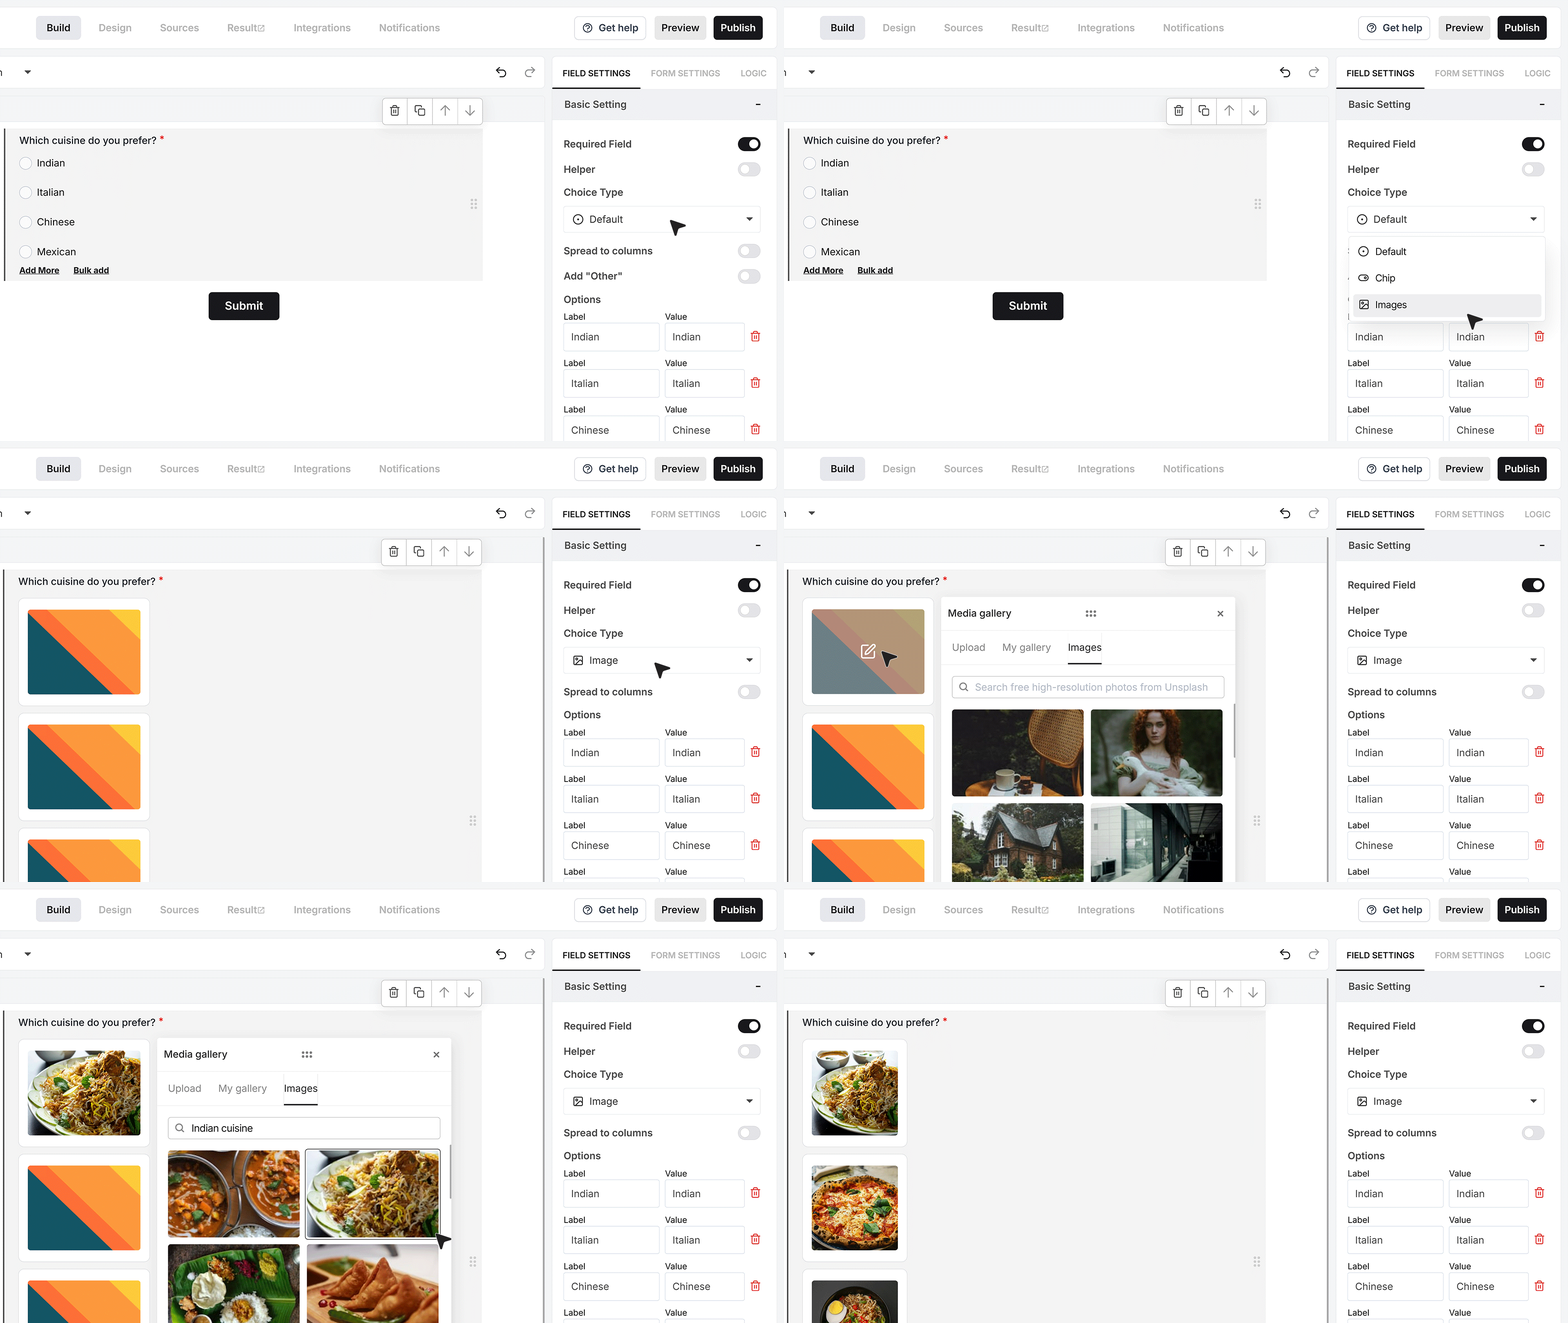
- The Choice Type setting controls how the options look, not how they behave. In the default mode, the Single Choice field appears as classic radio buttons with text labels.
- If you switch to Chip mode, each option turns into a pill-style button. The user can click one chip, and the selected chip will stand out clearly while the others stay unselected.
- If you choose Image mode, each option can show an image instead of plain text. You can upload images that match your choices, such as food photos for each cuisine. You can then add images for the remaining options so the whole list looks consistent and visual.
Spread to columns
The Spread to Columns setting controls how your options are arranged in the form.
When spread is disabled, all options appear in a single vertical column.
When you enable spread, you can tell MakeForms how many columns to use. You can leave it on auto and let the layout adjust itself, or choose a fixed layout with 2, 3, or 4 columns. This is useful when you have several short options and want them to appear side by side instead of in one long list.
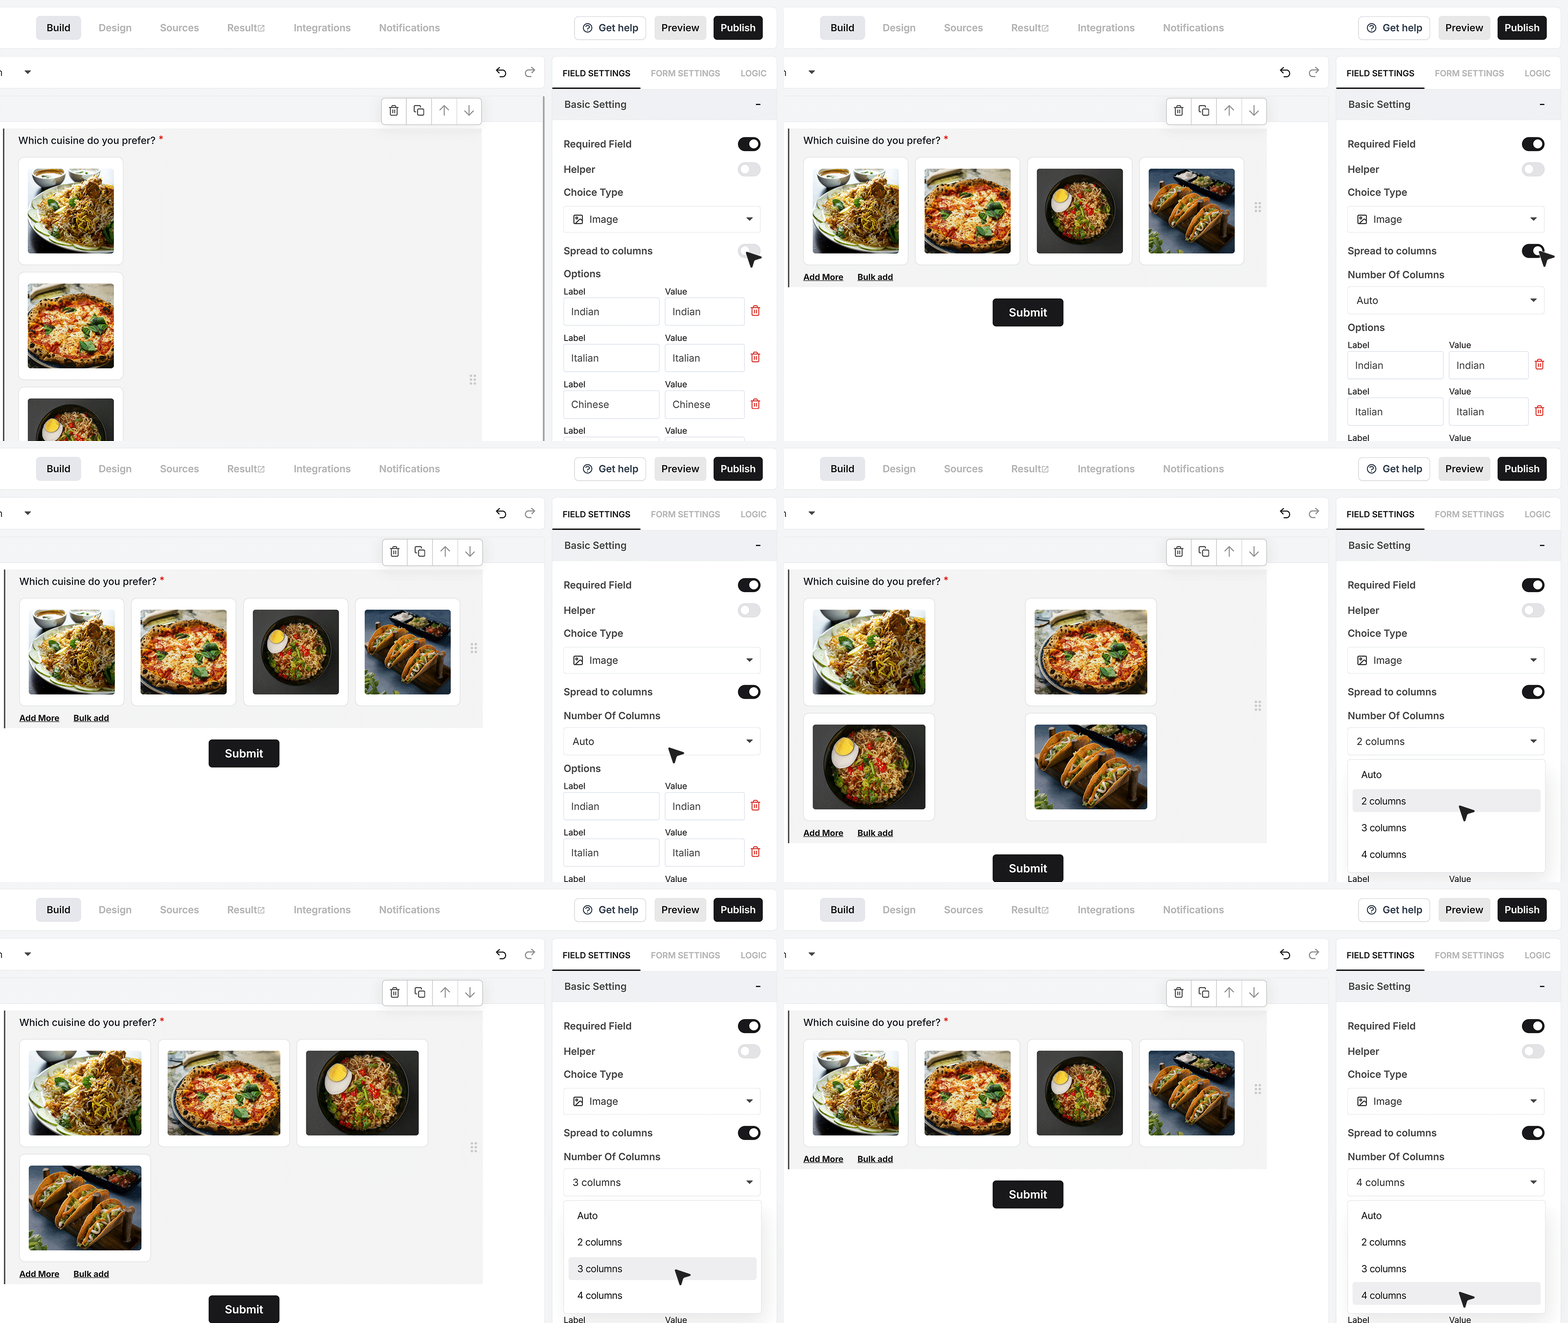
Image Mode Display Options
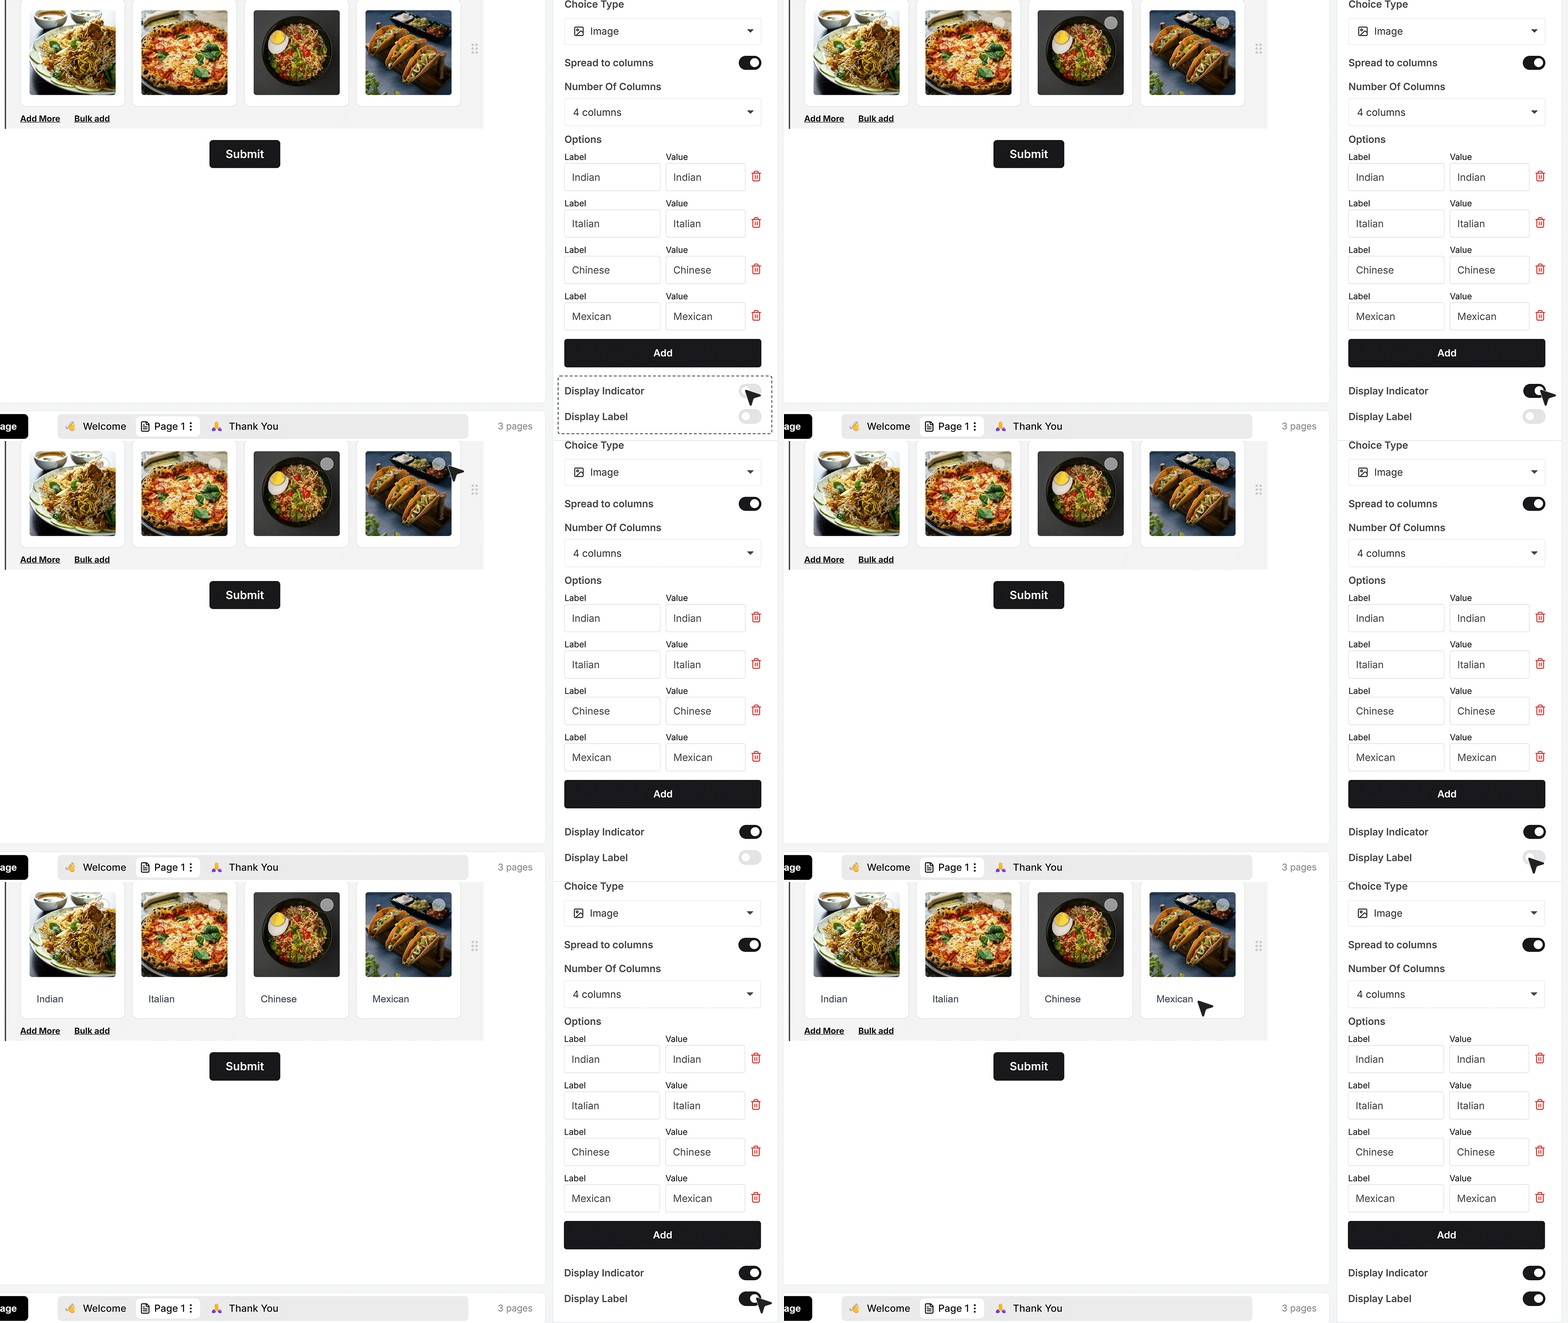
When you use Image Choice, two extra settings appear. Display Indicator adds a small tick or marker on the selected image so users clearly know which one they have chosen.
Display Label controls whether the option name appears below the image. You can keep it on if you want to show both the image and its name, or turn it off if you prefer a clean layout with only images.
Add Other
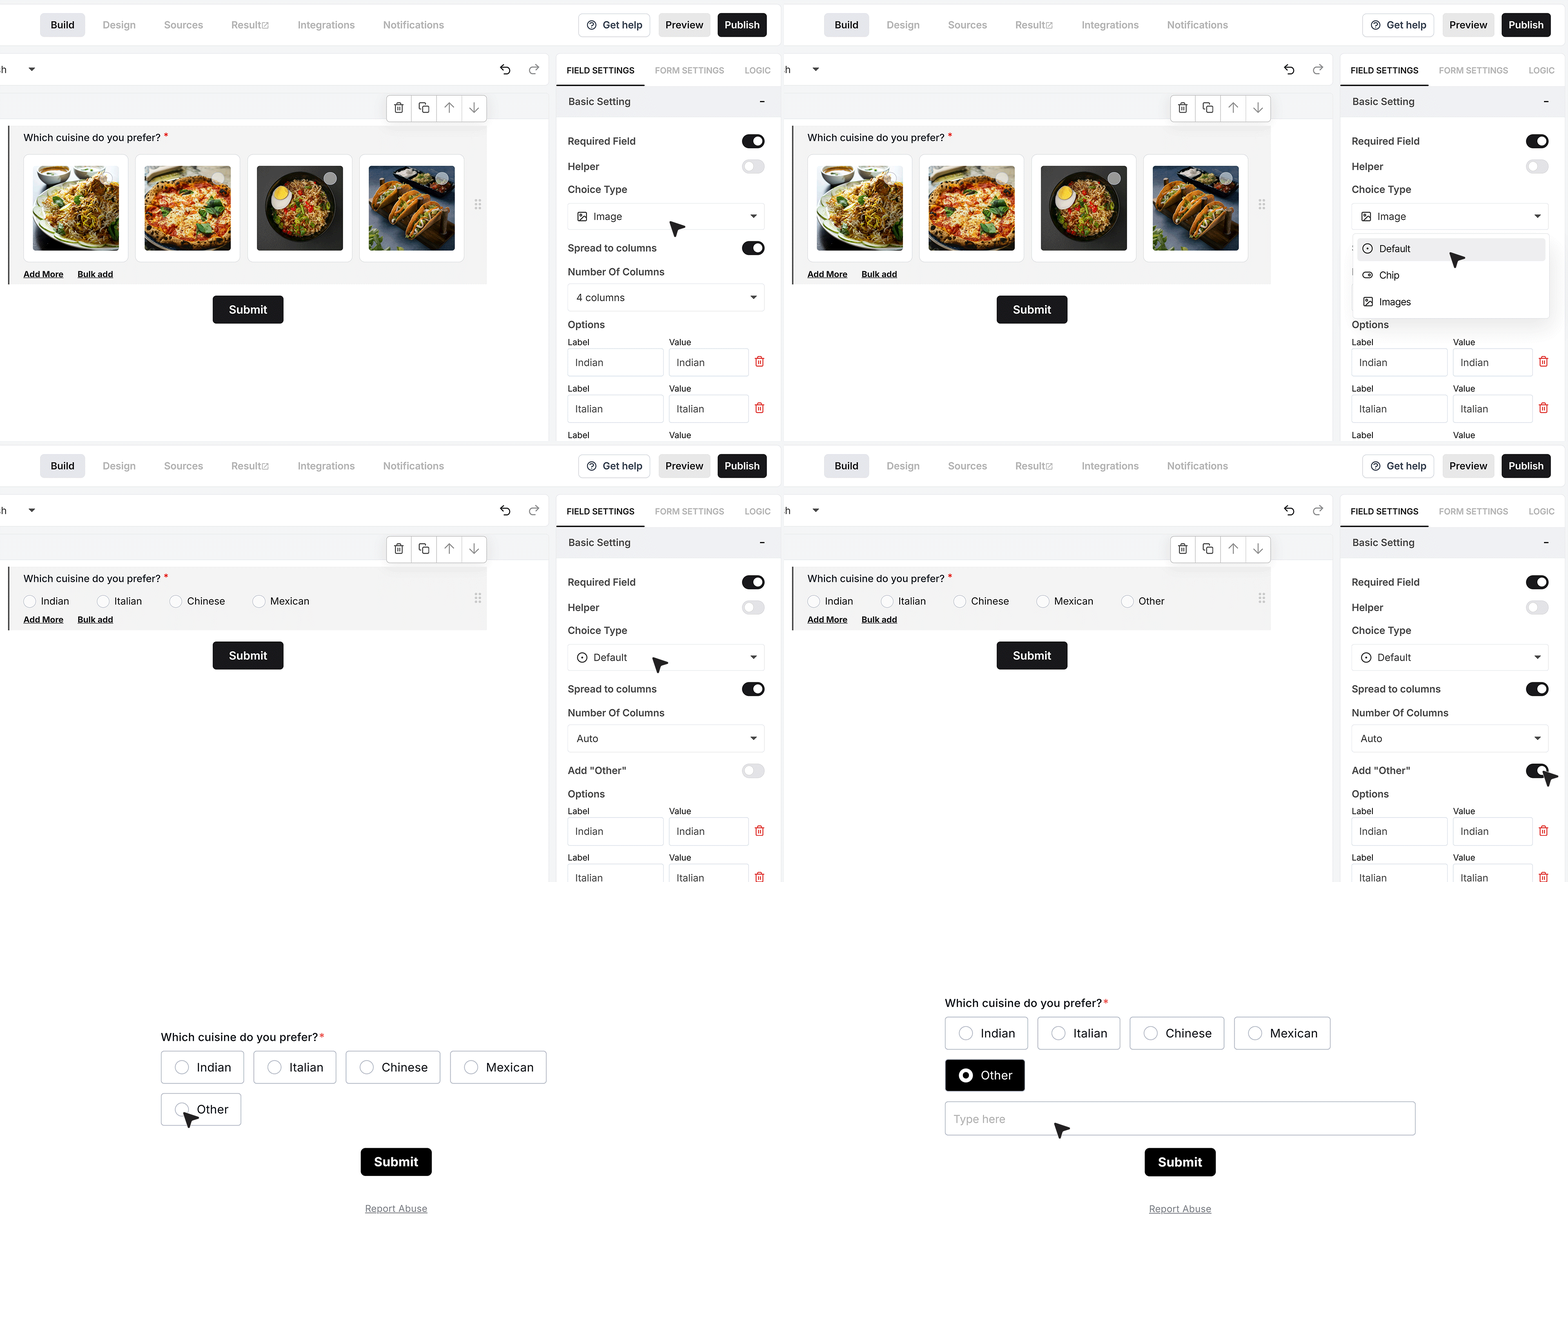
Before setting up Add Other, switch the Choice Type back to Default or Chip, because Add Other is not available in Image mode.
If you want to give users a way to enter something that is not in your list, turn on Add Other. When this is enabled, an “Other” option is added automatically. When the user selects Other, a small text box appears so they can type their own answer.
This is helpful when you know your main choices but still want to keep the field flexible.
Advanced Settings
Repeat This Field
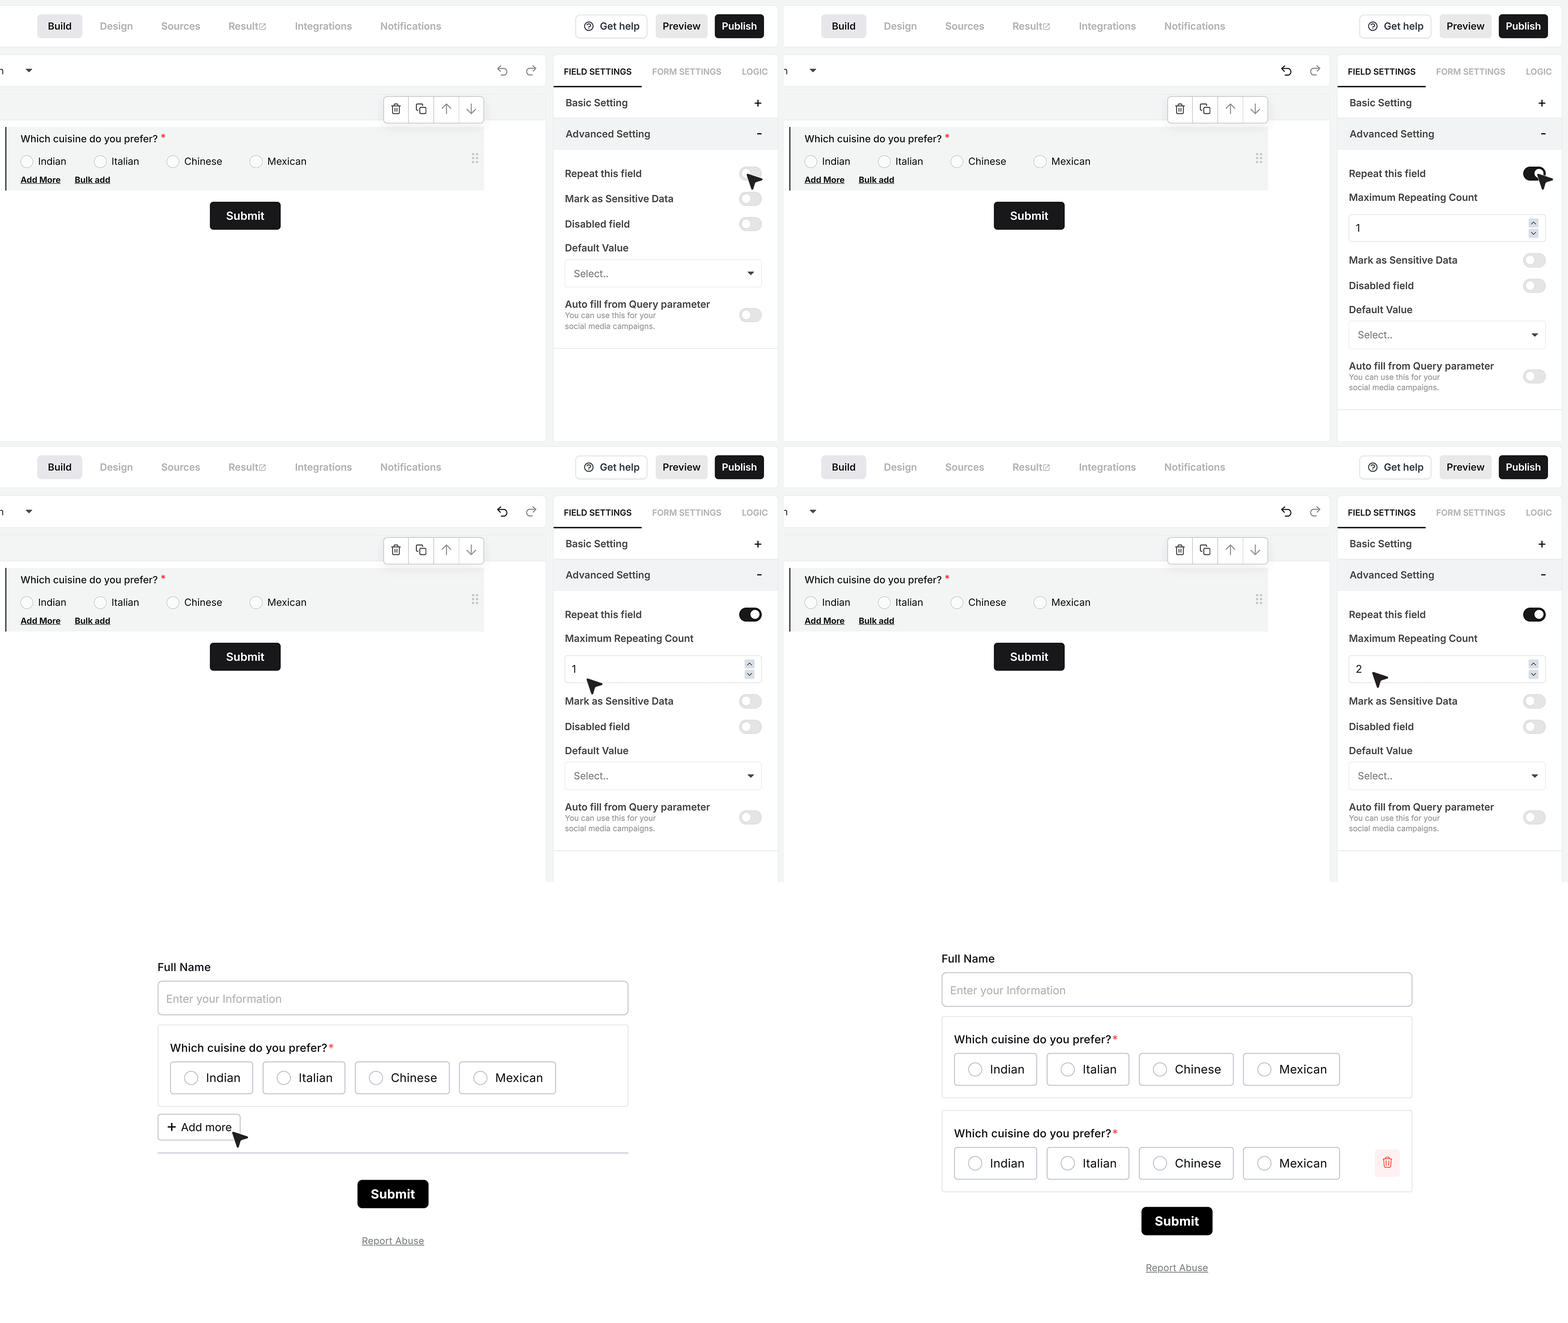
Repeat This Field is useful when you want the same Single Choice question to appear more than once in the form.
When you turn it on, you will see a box where you can enter how many times the field is allowed to repeat. If you set the limit to 2, the first row is already visible, and the user can add one more using the Add More button below the field.
Mark as Sensitive Data
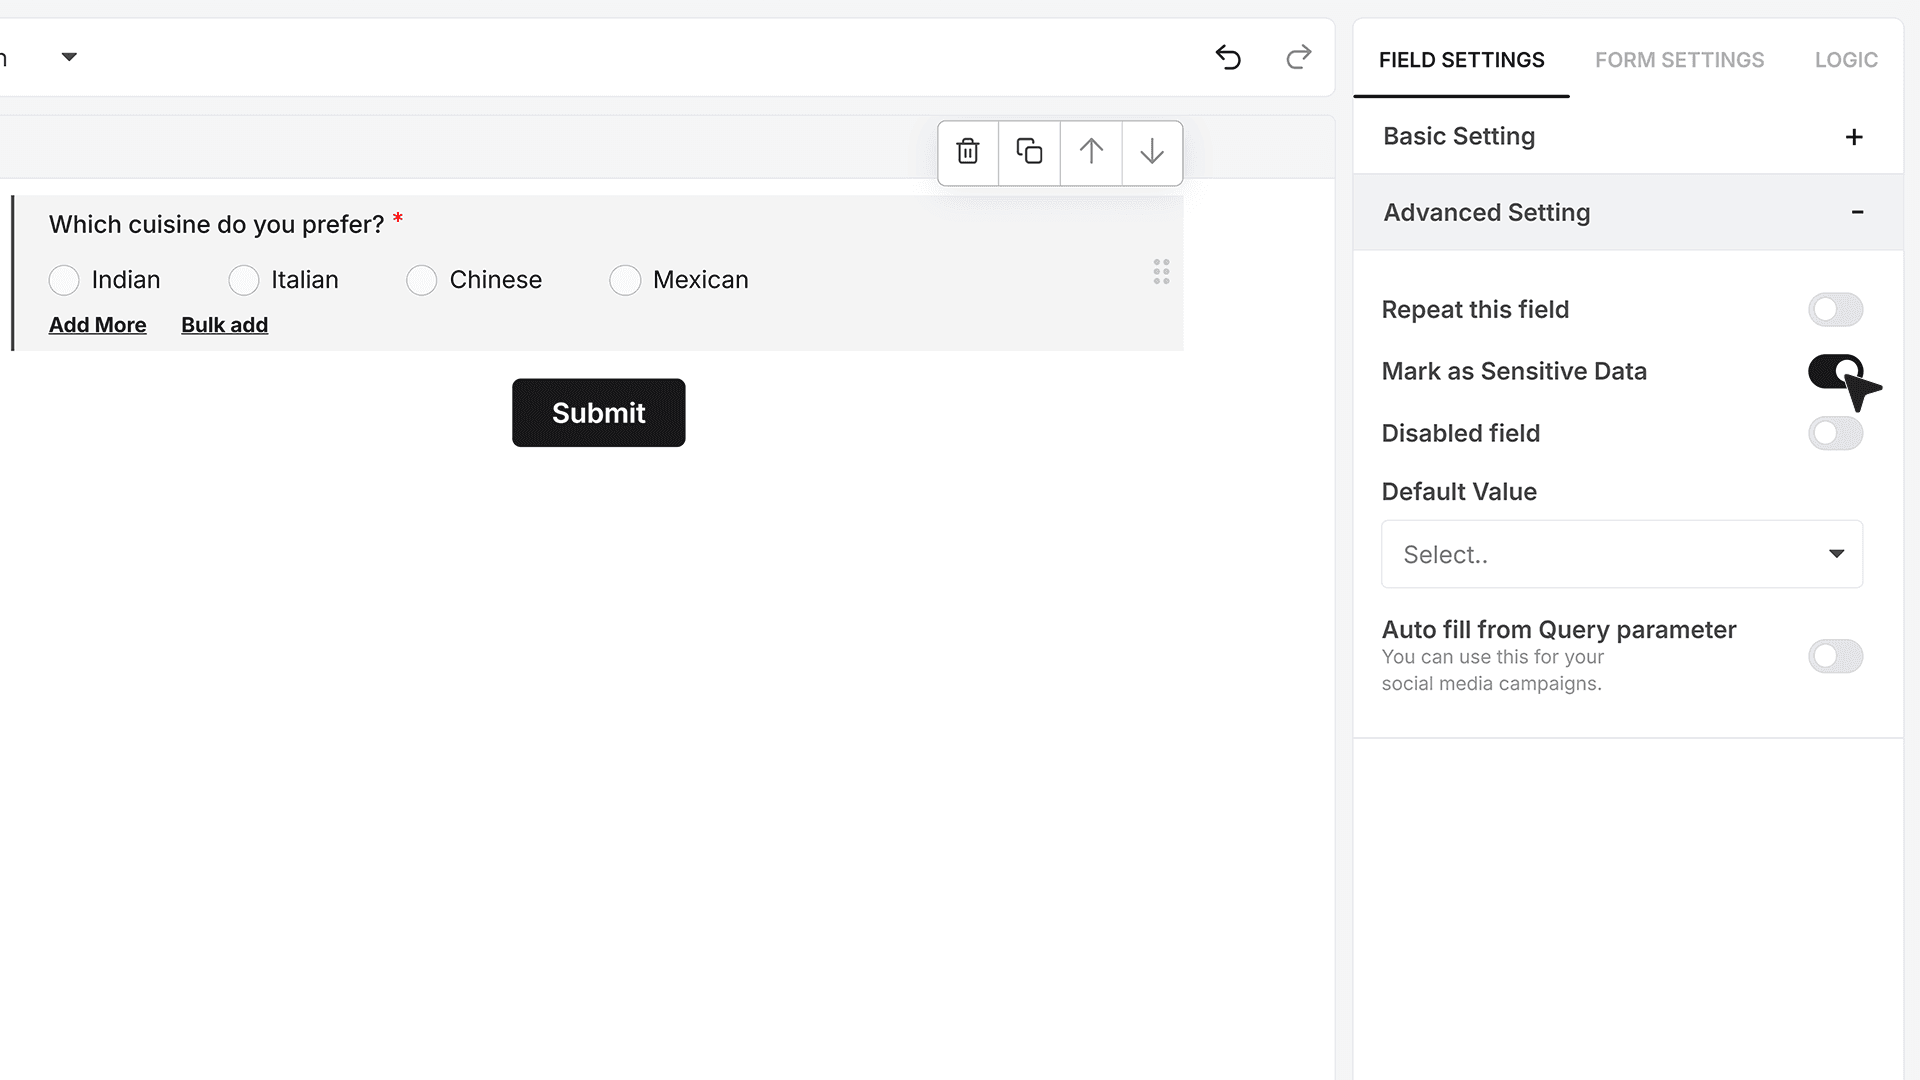
Enable Mark as Sensitive Data if the field captures information you consider sensitive or internal. When this is on, only team members with the right permissions inside MakeForms will be able to see the selected values in the Responses section.
Default Value
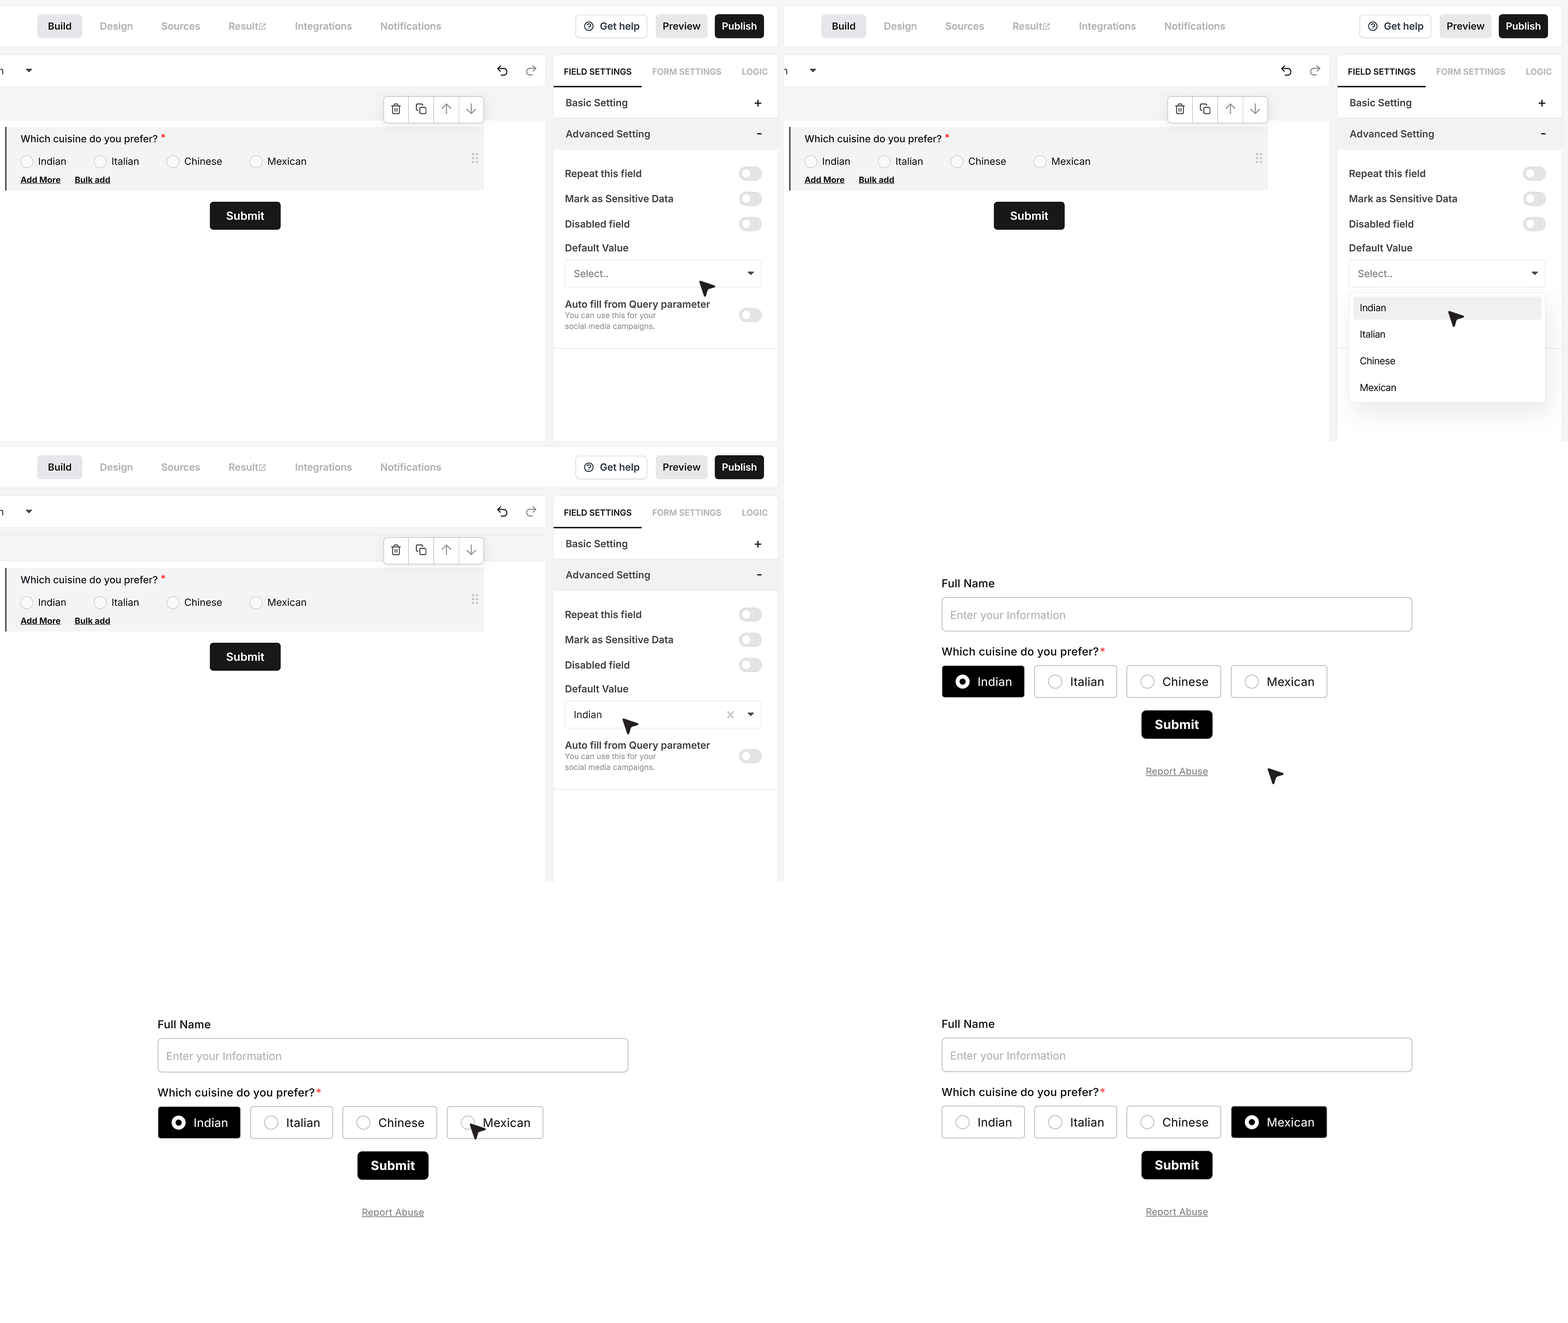
The Default Value setting lets you pre-select one of the choices before the user interacts with the field.
For the cuisine question, you might set Indian as the default option if that is the most common choice. When the form loads, Indian will already be selected. The user can still change it to another option, unless the field is disabled.
Disable Field
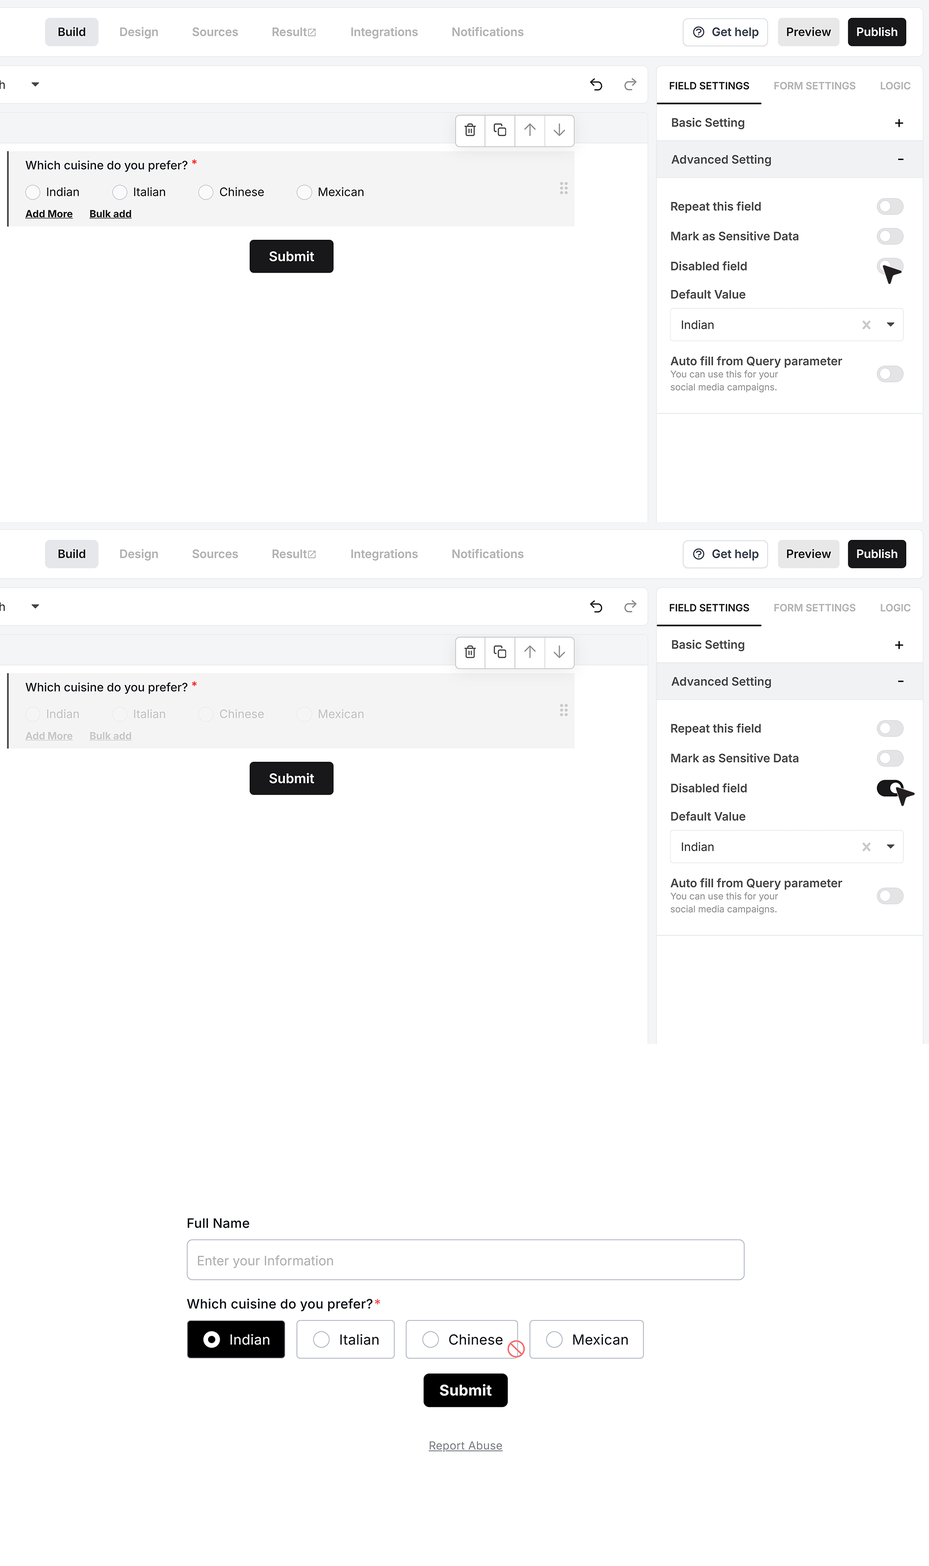
Disable Field turns the Single Choice field into a read-only field.
When you enable this, the user can see which option is selected, but they cannot change it. This is useful when you want to show a stored or system-driven value without letting the user edit it.
Autofill from Query Parameter
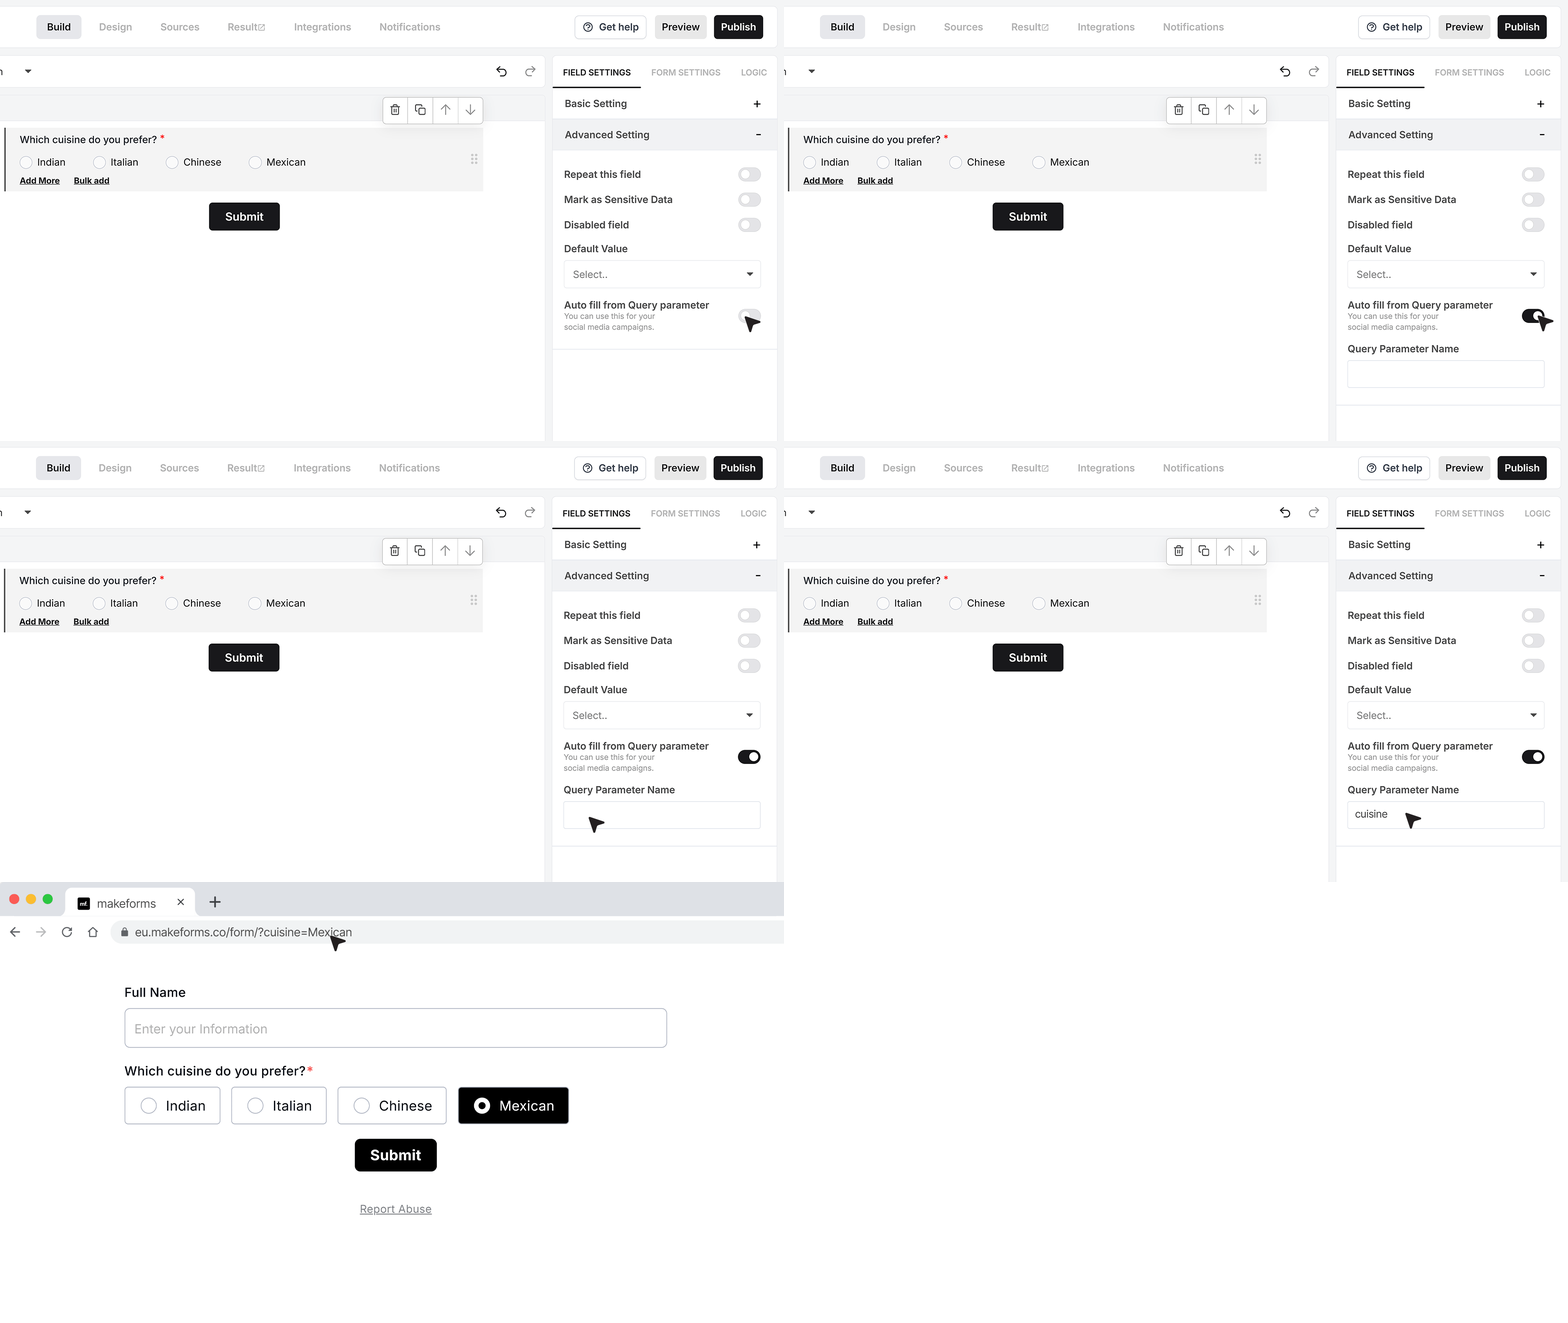
The Autofill from Query Parameter option lets the Single Choice field auto-select an option based on the form URL. In the field settings, set a parameter name, for example cuisine.
When you share the form link, add that parameter and value at the end of the URL, for example:
.../your-form-url?cuisine=Mexican
When someone opens the form with this link, the field will automatically select Mexican, as long as that value exists in your list of options.
FAQ's
MakeForms is a strong option if you want a field with radio, chip, and image styles, plus bulk option setup and layout controls. Other common tools that support single choice questions include Typeform, Google Forms, Jotform, Tally, and Forms.app.
Create your choice field and define the options first. In MakeForms you can add options one by one, or paste a list using Bulk Add.
Then add a conditional rule in your form logic: when this field equals Option A, show or hide another field, section, or step. Use exact option values so the rule matches cleanly. If you use an Other option, treat it as its own selectable value, then you can add separate rules for it.
Turn on the Required Field setting for the choice field. If the user tries to submit without selecting an option, MakeForms shows an error and blocks submission until they pick one.
Yes. In MakeForms, set the Choice Type to Image mode, then upload an image per option. You can also control whether the selected image shows an indicator, and whether labels show under the images.
Publish the form, then use the embed option from your form builder. Most builders provide an iframe embed and a direct link. If you use MakeForms URL prefill, you can also embed a link that auto-selects a choice using a query parameter, for example?cuisine=Mexican, as long as the value exists in your options list.
If you need the same question to appear multiple times for the respondent, use the Repeat This Field setting in MakeForms, set the repeat limit, and the user can add more rows using Add More.
If you mean duplicating while building the form, most builders also offer a duplicate field action in the editor, then you only change the label or options.
Look for a Save and resume later or Partial save option in your form builder. When enabled, the platform saves a draft as users fill the form, then lets them continue later from the same state. If your builder does not have save and resume, a common workaround is splitting the form into steps and saving progress via an account login or a custom session link.
The fastest approach is copy-paste the option list into the new field. In MakeForms you can use Bulk Add and paste options separated by commas or new lines, then each entry becomes its own option in the same order.
If you are moving multiple questions, export from the old tool (CSV, JSON, or form template) and recreate the fields, then reuse the option lists via Bulk Add.
Use a clear field label and add helper text when the question needs extra context. In MakeForms, helper text can show as visible text or as an info icon. If you use Image mode, keep Display Label on so screen readers have text, and keep a clear selection indicator so users can confirm what is selected.
Avoid long option text, keep the option order stable, and use a column layout only if it does not make scanning harder.