Multiple Choice Field
The Multi Choice field lets users make selections freely instead of being limited to just one answer. It’s built for real-world questions where multiple responses make sense—whether you’re collecting preferences, gathering inputs, or offering flexible choices.
Add a Multi Choice field from the field list into your form. Change the field label so it matches your question. For this example, you can name it “Which cuisines do you like?”
When you add the field, you will see two default options. You can click on them and rename them right away, for example to Indian and Italian.
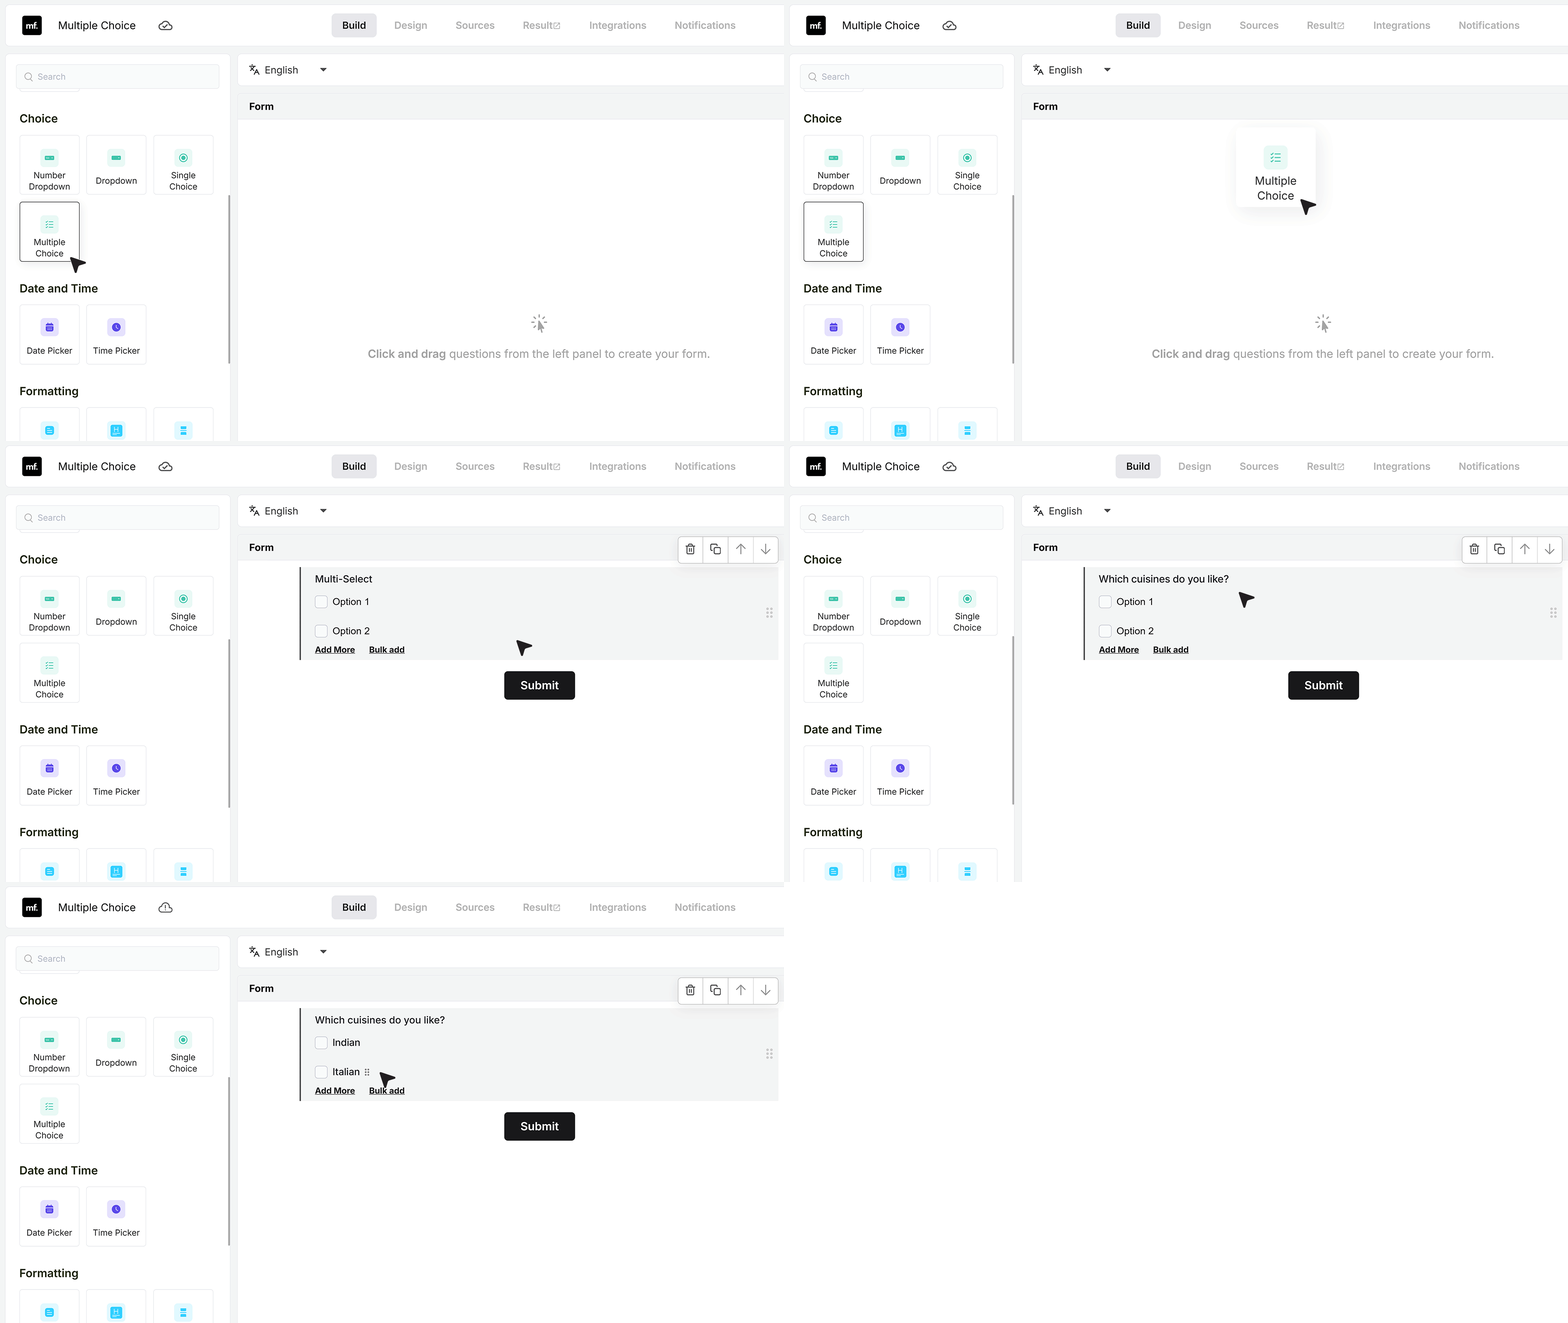
Add Choices
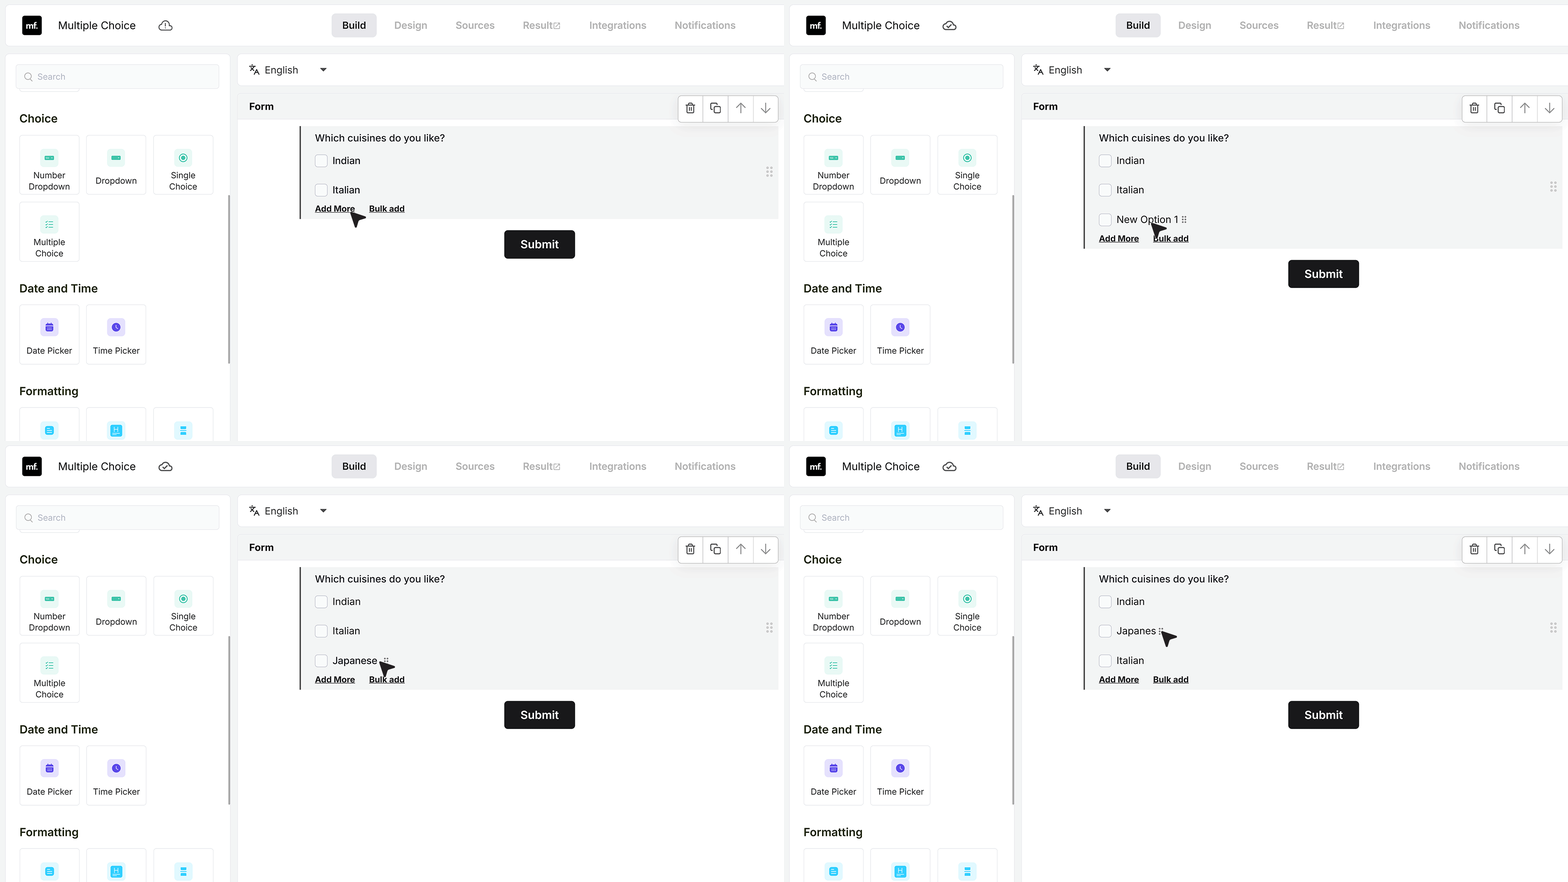
- If you want to add more items directly in the field area, use the Add option button and type the name for each new choice. You can drag any item up or down to change the order in which they appear..
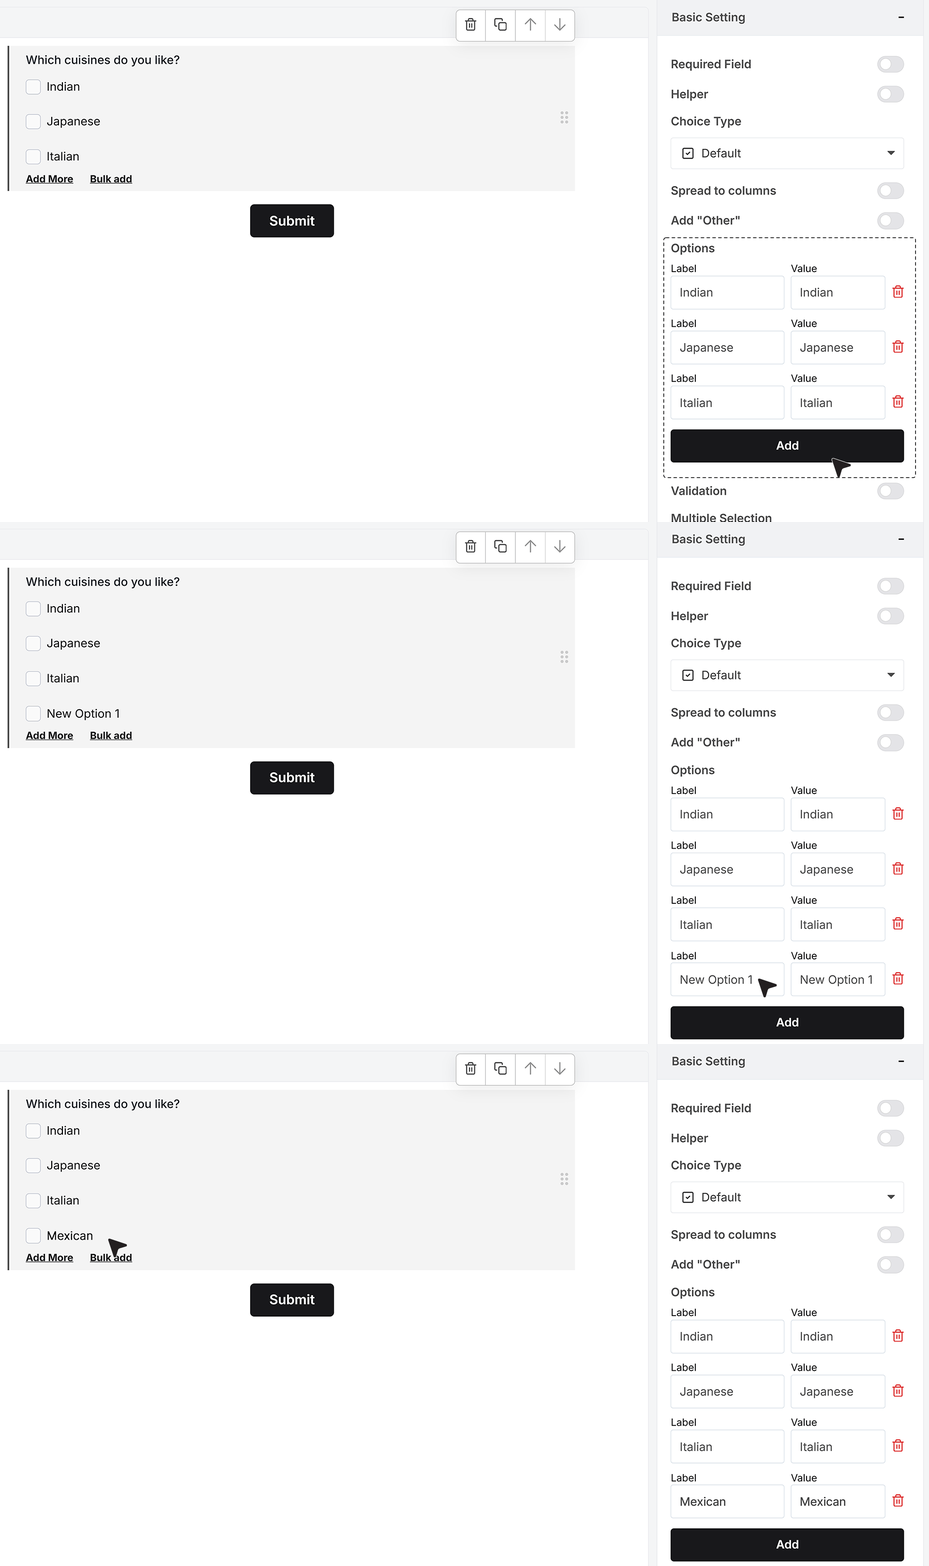
- You can also add options from the Basic Settings panel. In the options area, click Add, then type the option title. As soon as you add it there, it appears in the options list for that field.
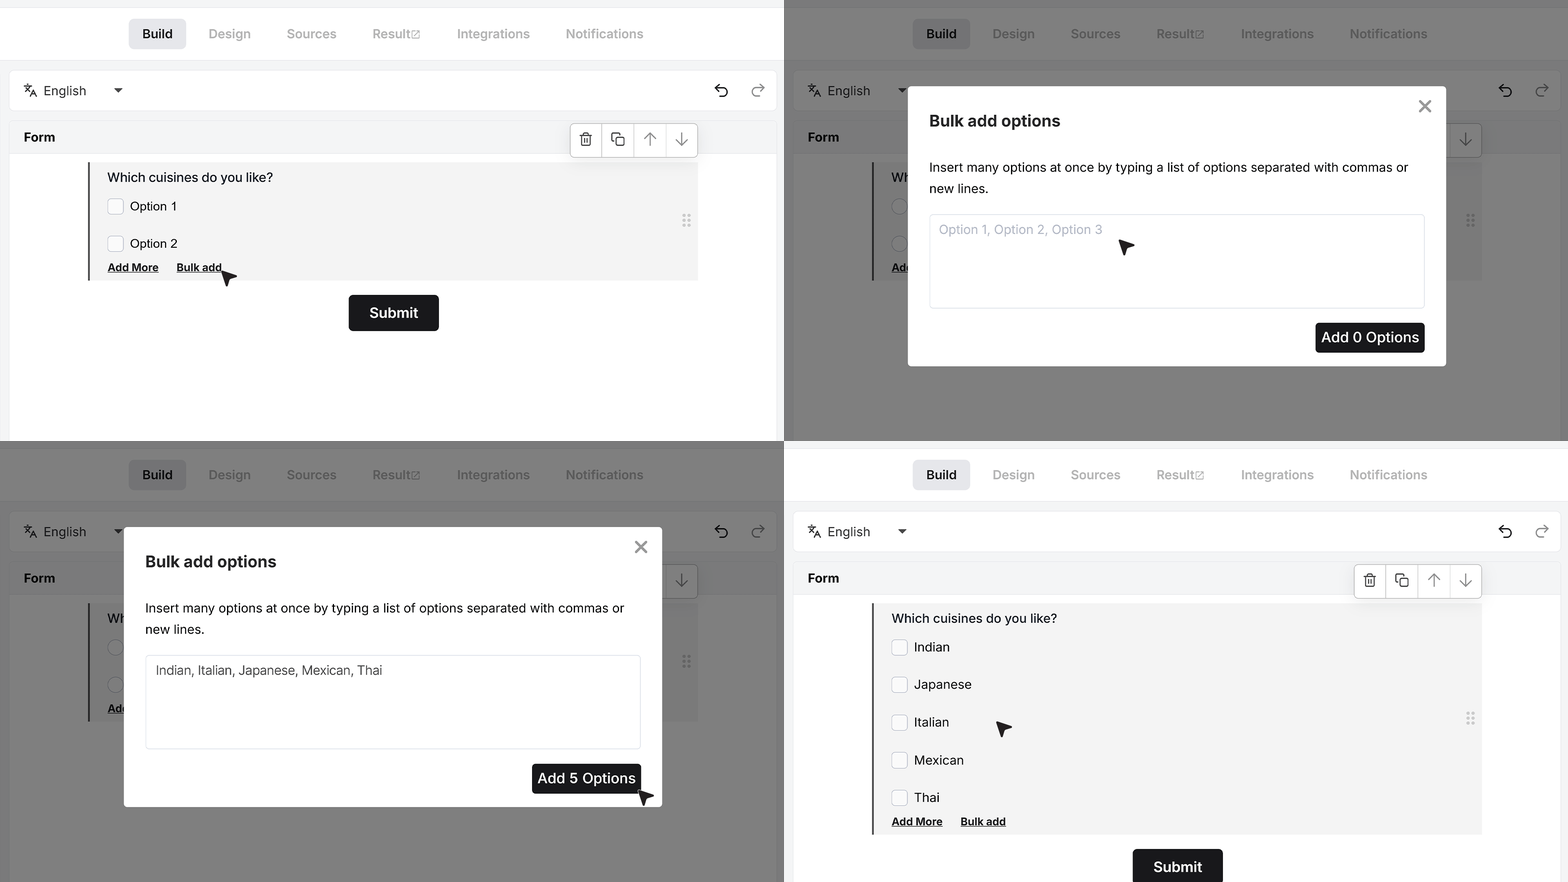
- If you already have a full list of choices ready, you can use Bulk Add to save time. Click Bulk Add below your choices and a box will open. Paste your list there, either separated by commas or on separate lines. When you confirm, MakeForms converts each entry into its own Multi Choice option in the same order you entered.
Basic Settings
Required Field
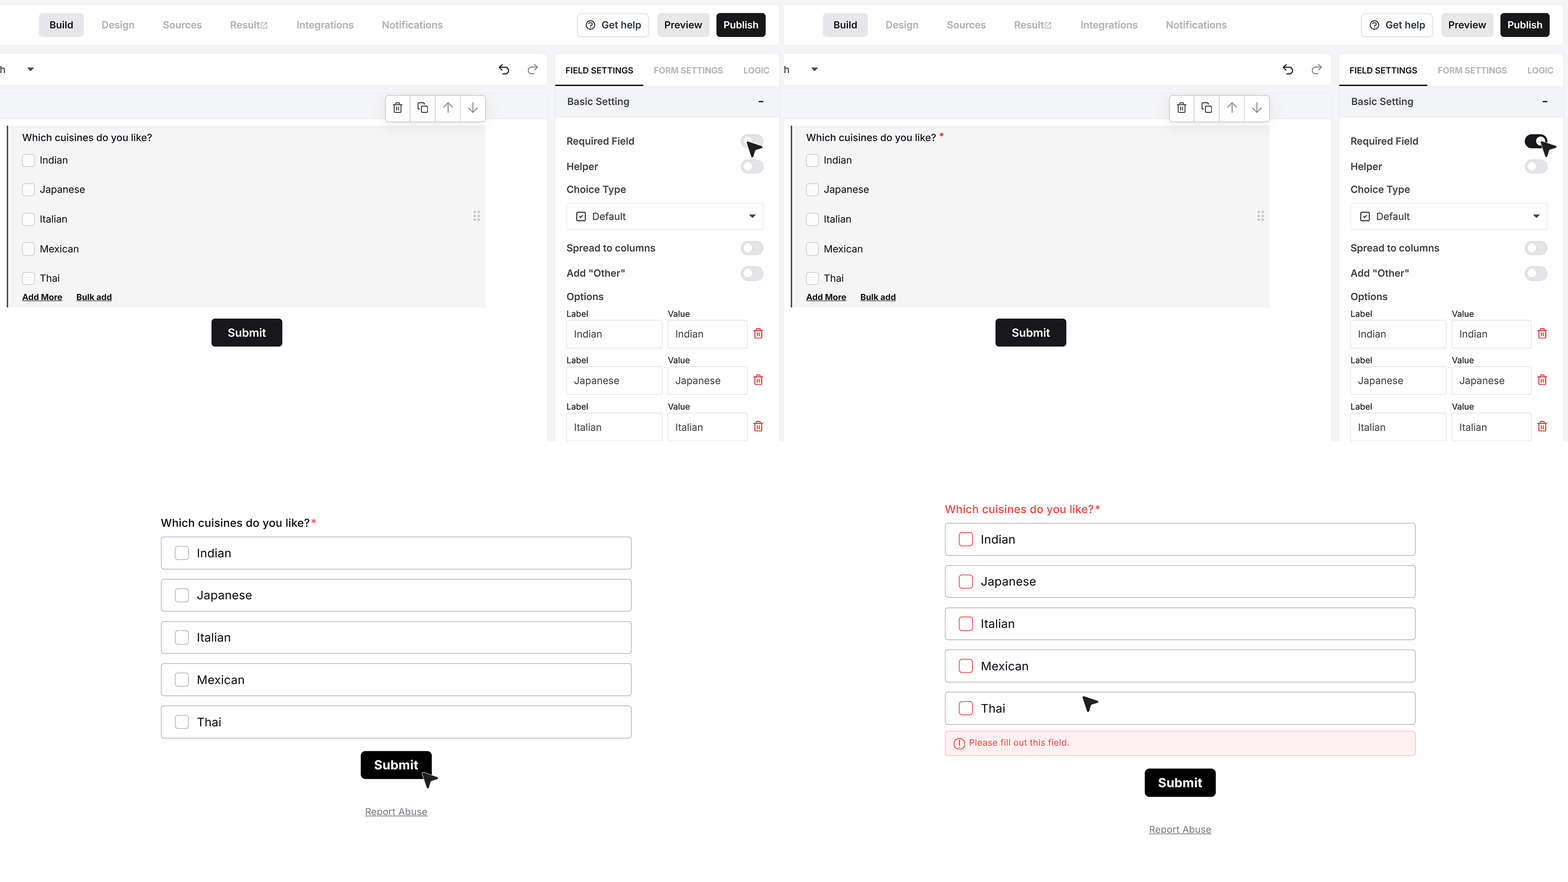
At the top of the settings panel, you will see the Required Field toggle.Turn this on if you want to make sure the user selects at least one option before submitting the form. If they try to submit without choosing anything, MakeForms will show an error message and stop the submission until they select one or more cuisines.
Helper text
Below that, you will see the Helper Text setting.
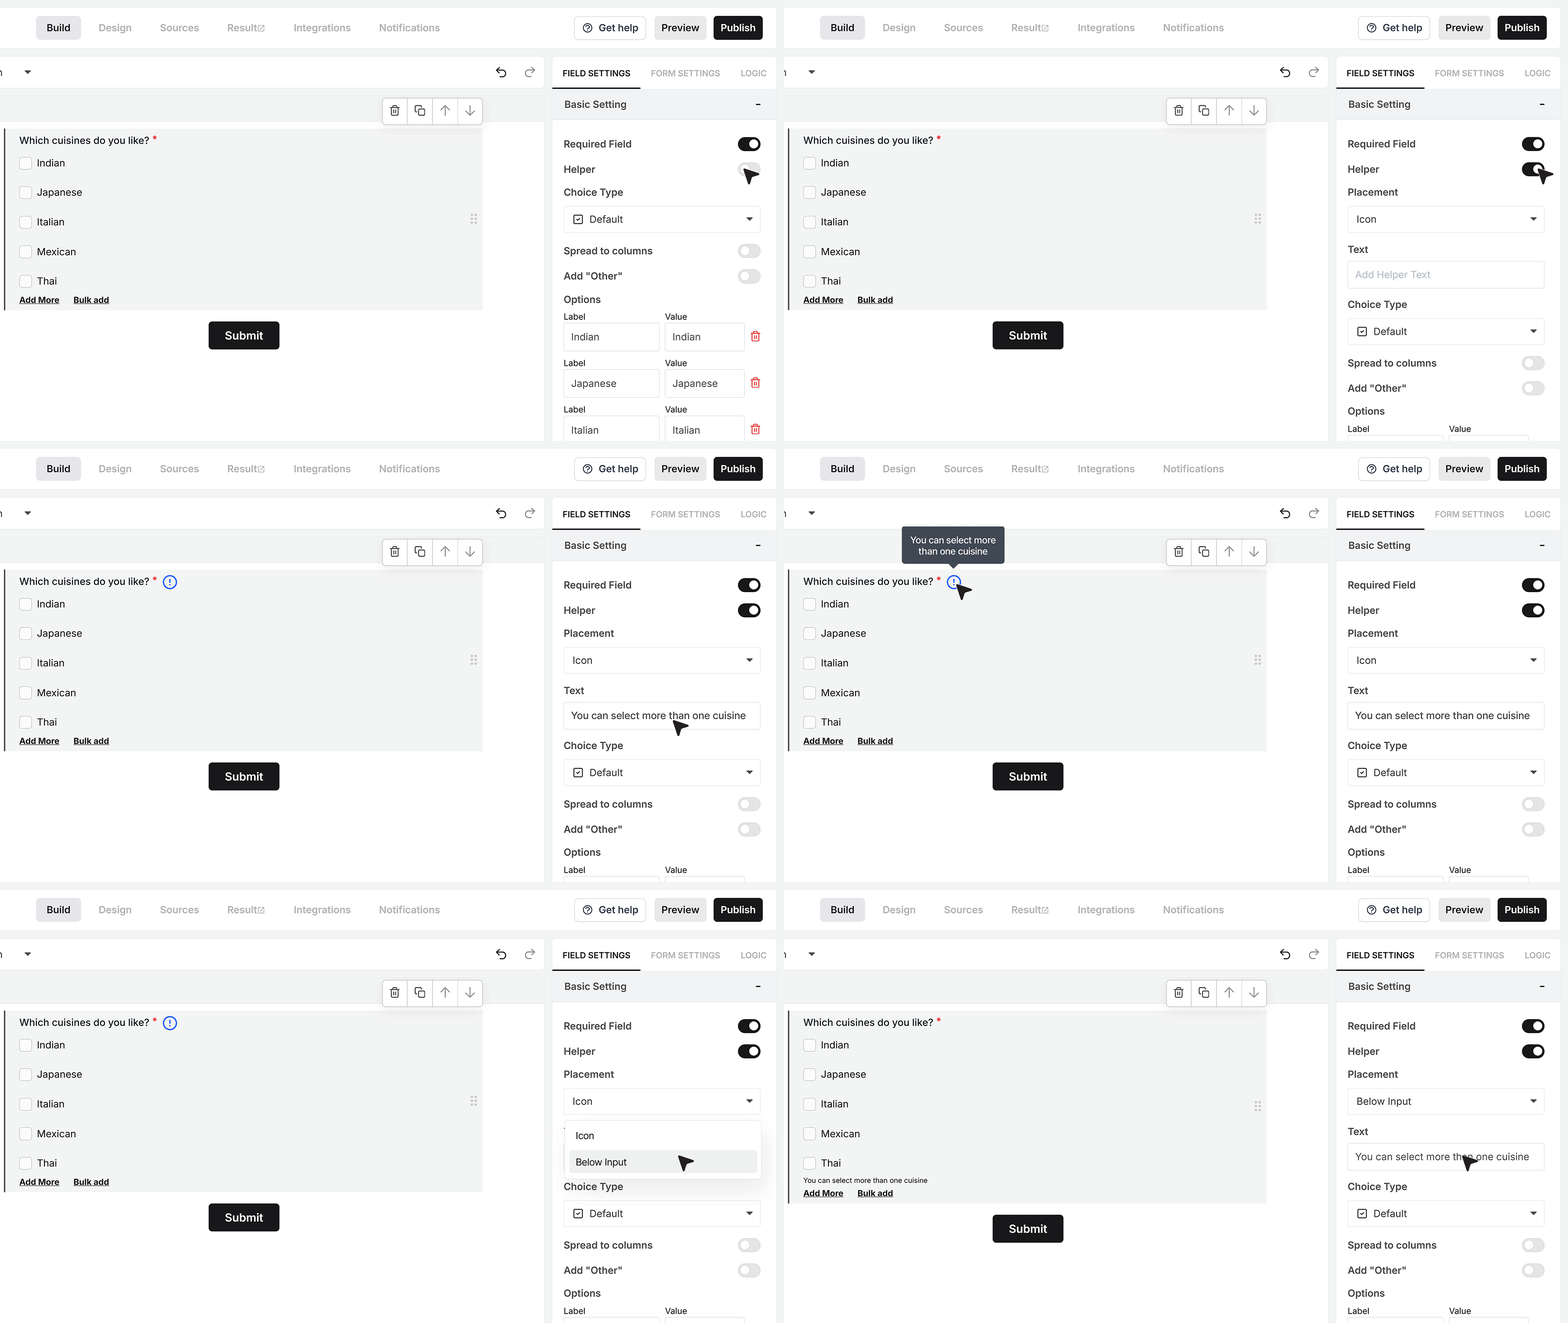
Turn this on if your question needs a bit more explanation. You can type a short line such as “Choose only one cuisine”. You can also decide how this helper text appears. It can show as a small info icon that reveals the message when the user hovers over it, or it can appear as visible text below the field. Use whichever style feels clearer for your form.
Choice type
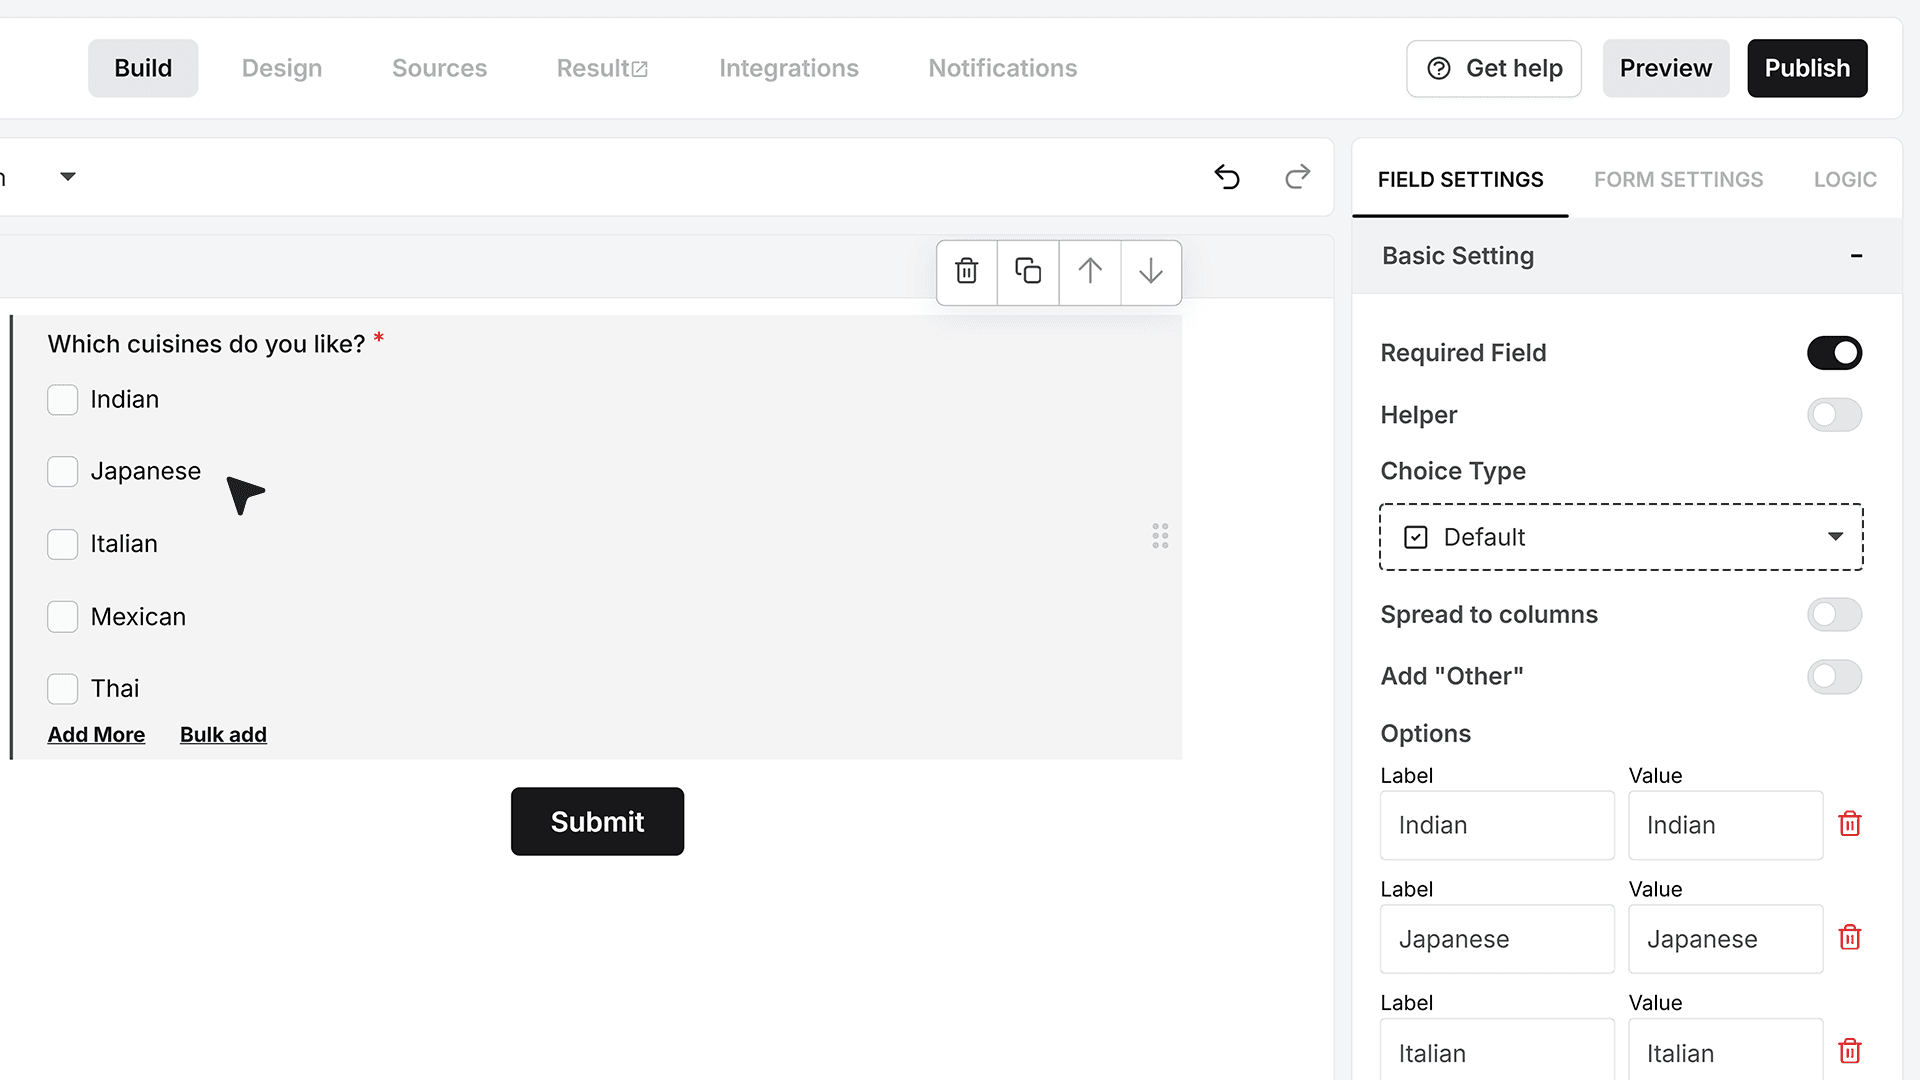
- Choice Type controls how the choices look, while the behavior stays the same. In the default mode, the Multi Choice field shows standard checkboxes with text labels. This is the classic look that most users expect.
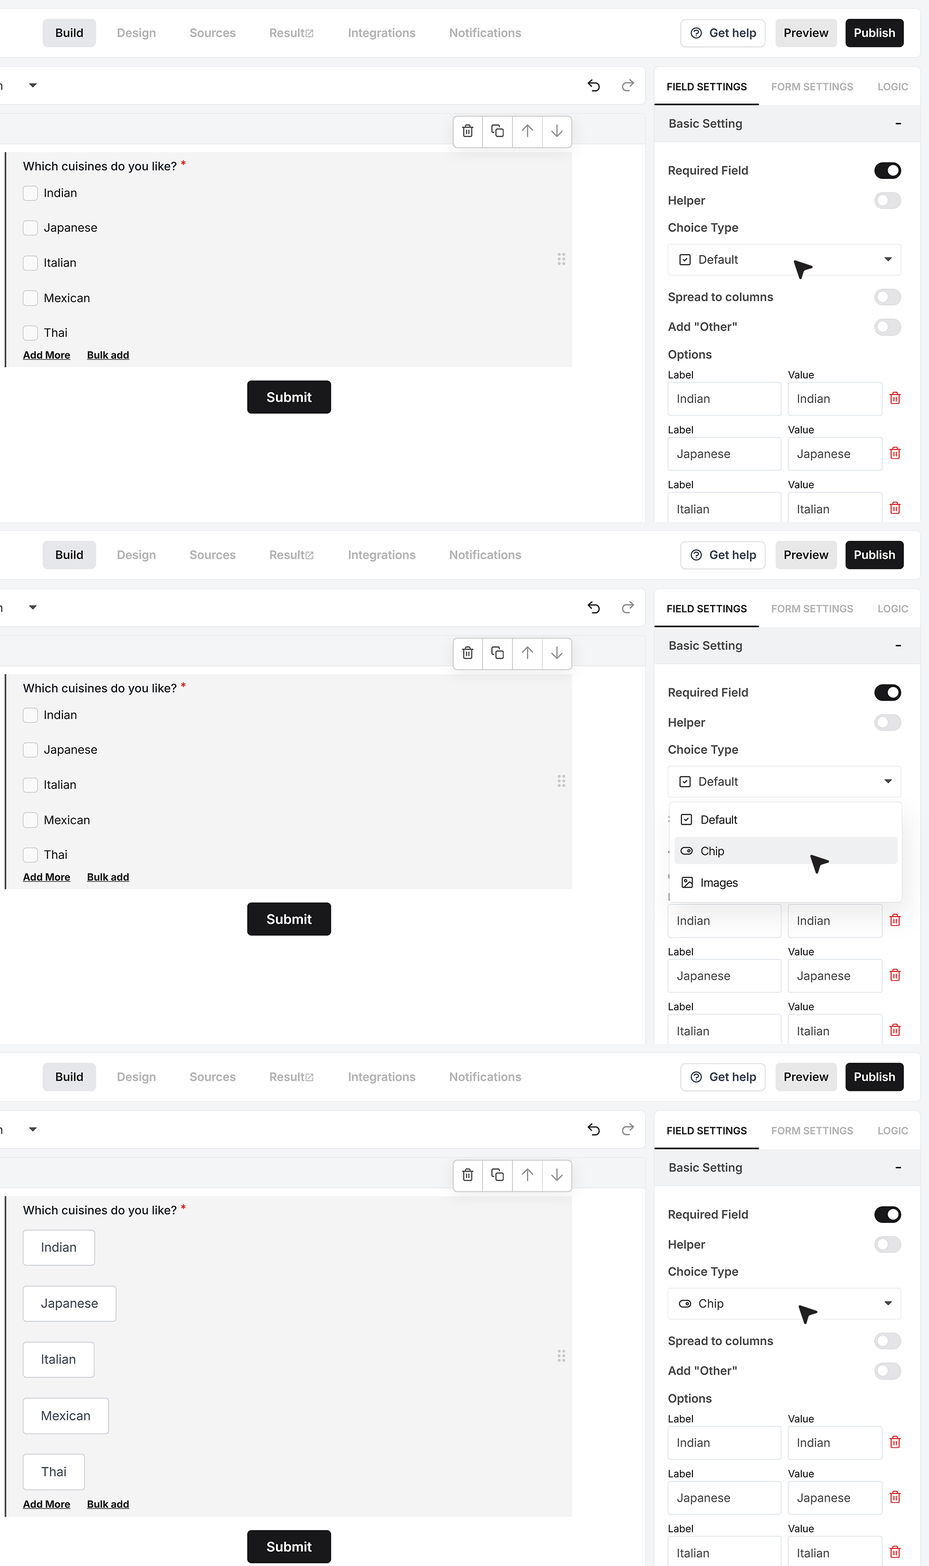
- If you switch to Chip mode, each option becomes a pill-style button. Users can click on several chips and the selected ones stay highlighted. This gives a more modern, button-like layout.
- If you select Image mode, each option can show an image instead of only text. You can upload images for each cuisine and let users answer by clicking on pictures. After you set one image, you can add images for the remaining cuisines so the whole list feels consistent.
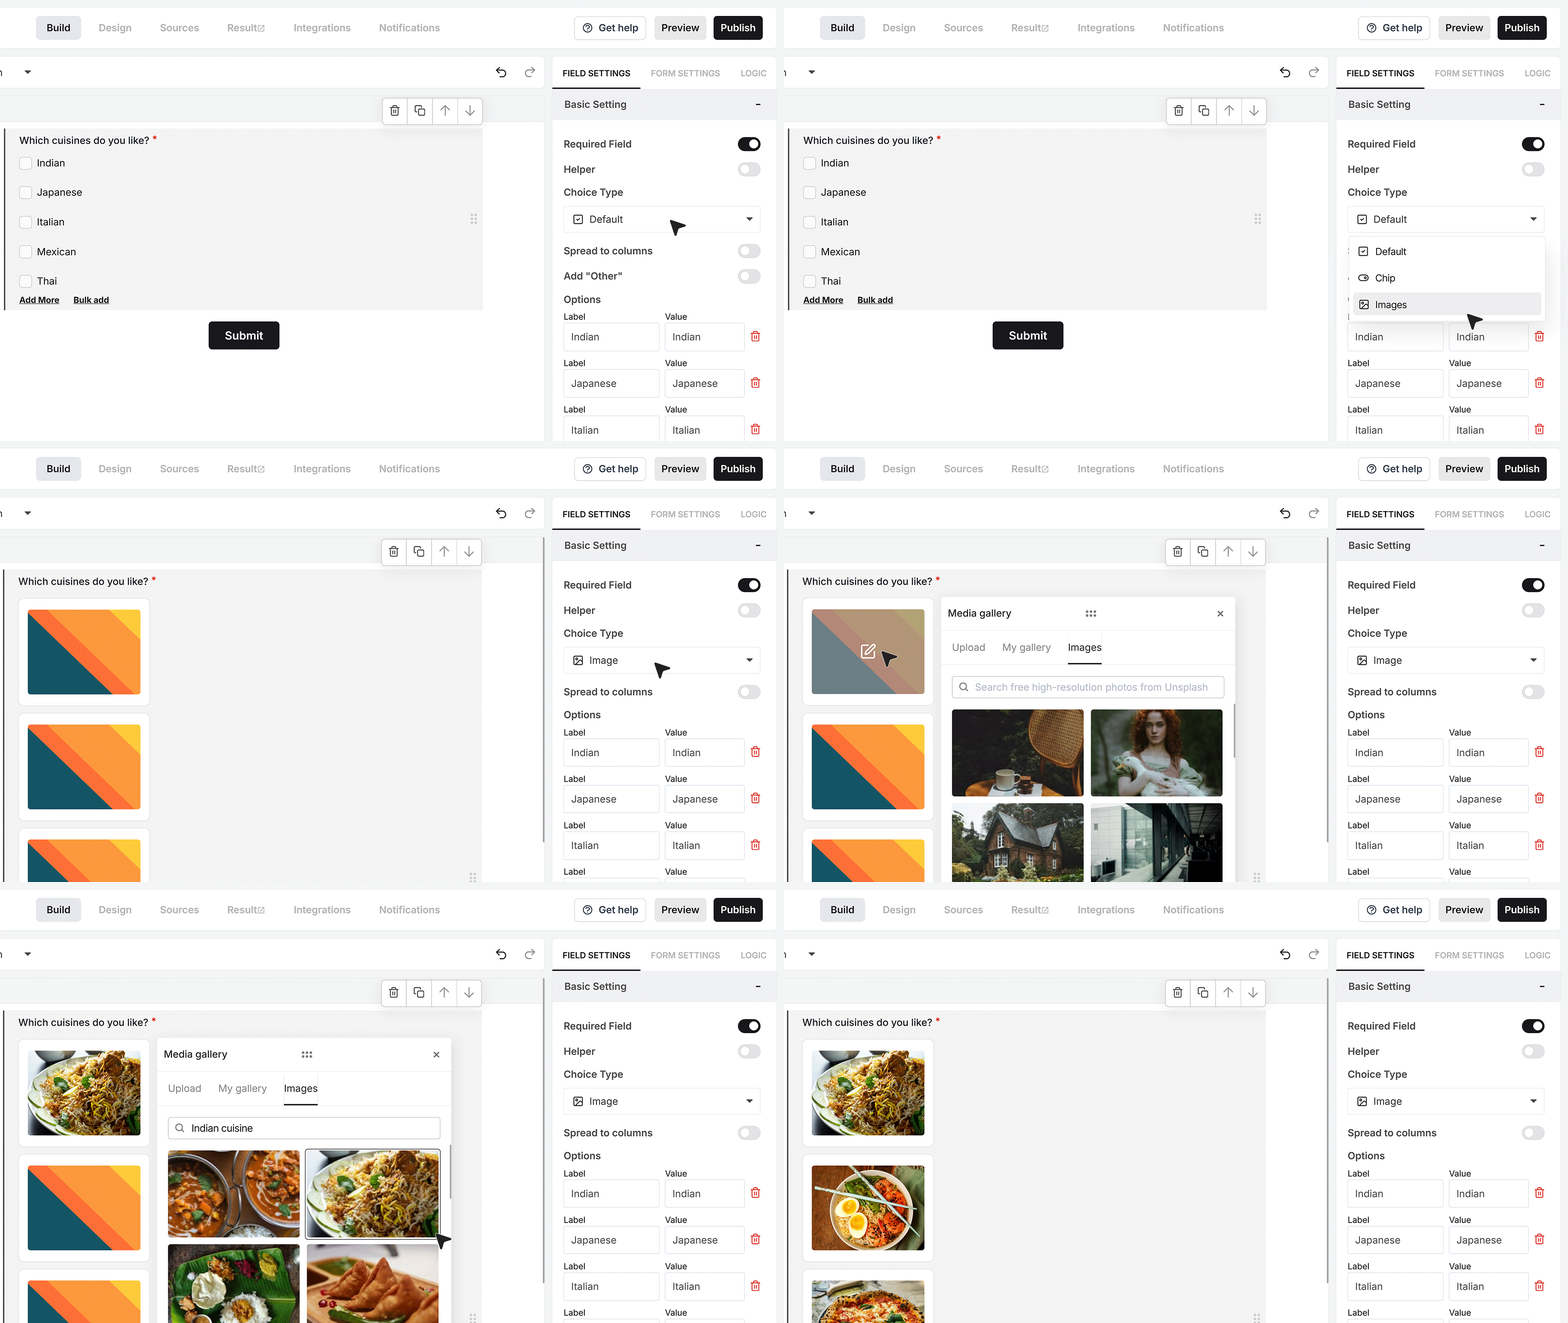
Spread to columns
Spread to Columns controls how the choices are laid out on the page.
When spread is off, all options appear in a single vertical column.
When you turn it on, you can choose how many columns to use. You can keep it on Auto so MakeForms decides based on space, or you can fix it to two, three, or four columns.
For a cuisine question with several options, arranging them in two or three columns can make the form look cleaner than a long single column, especially when using chip or image styles.
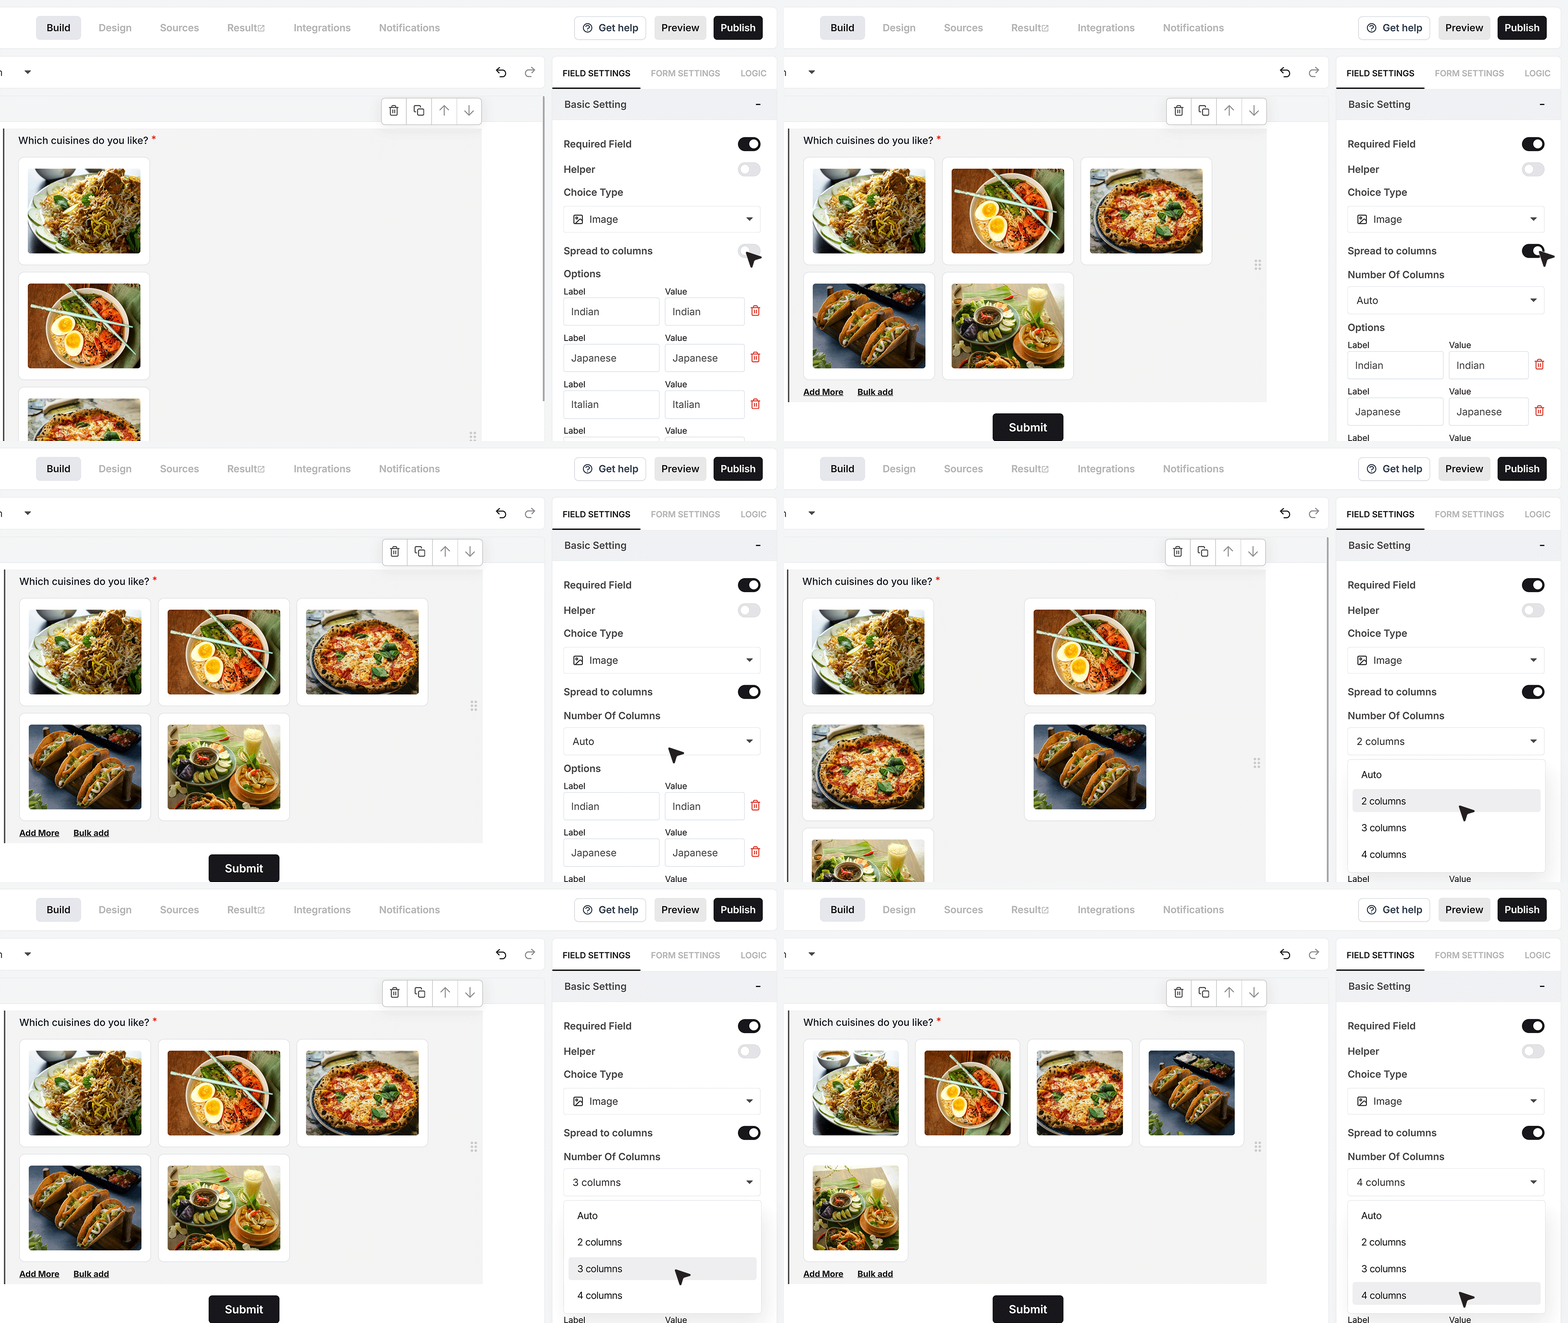
Image Mode Display Options
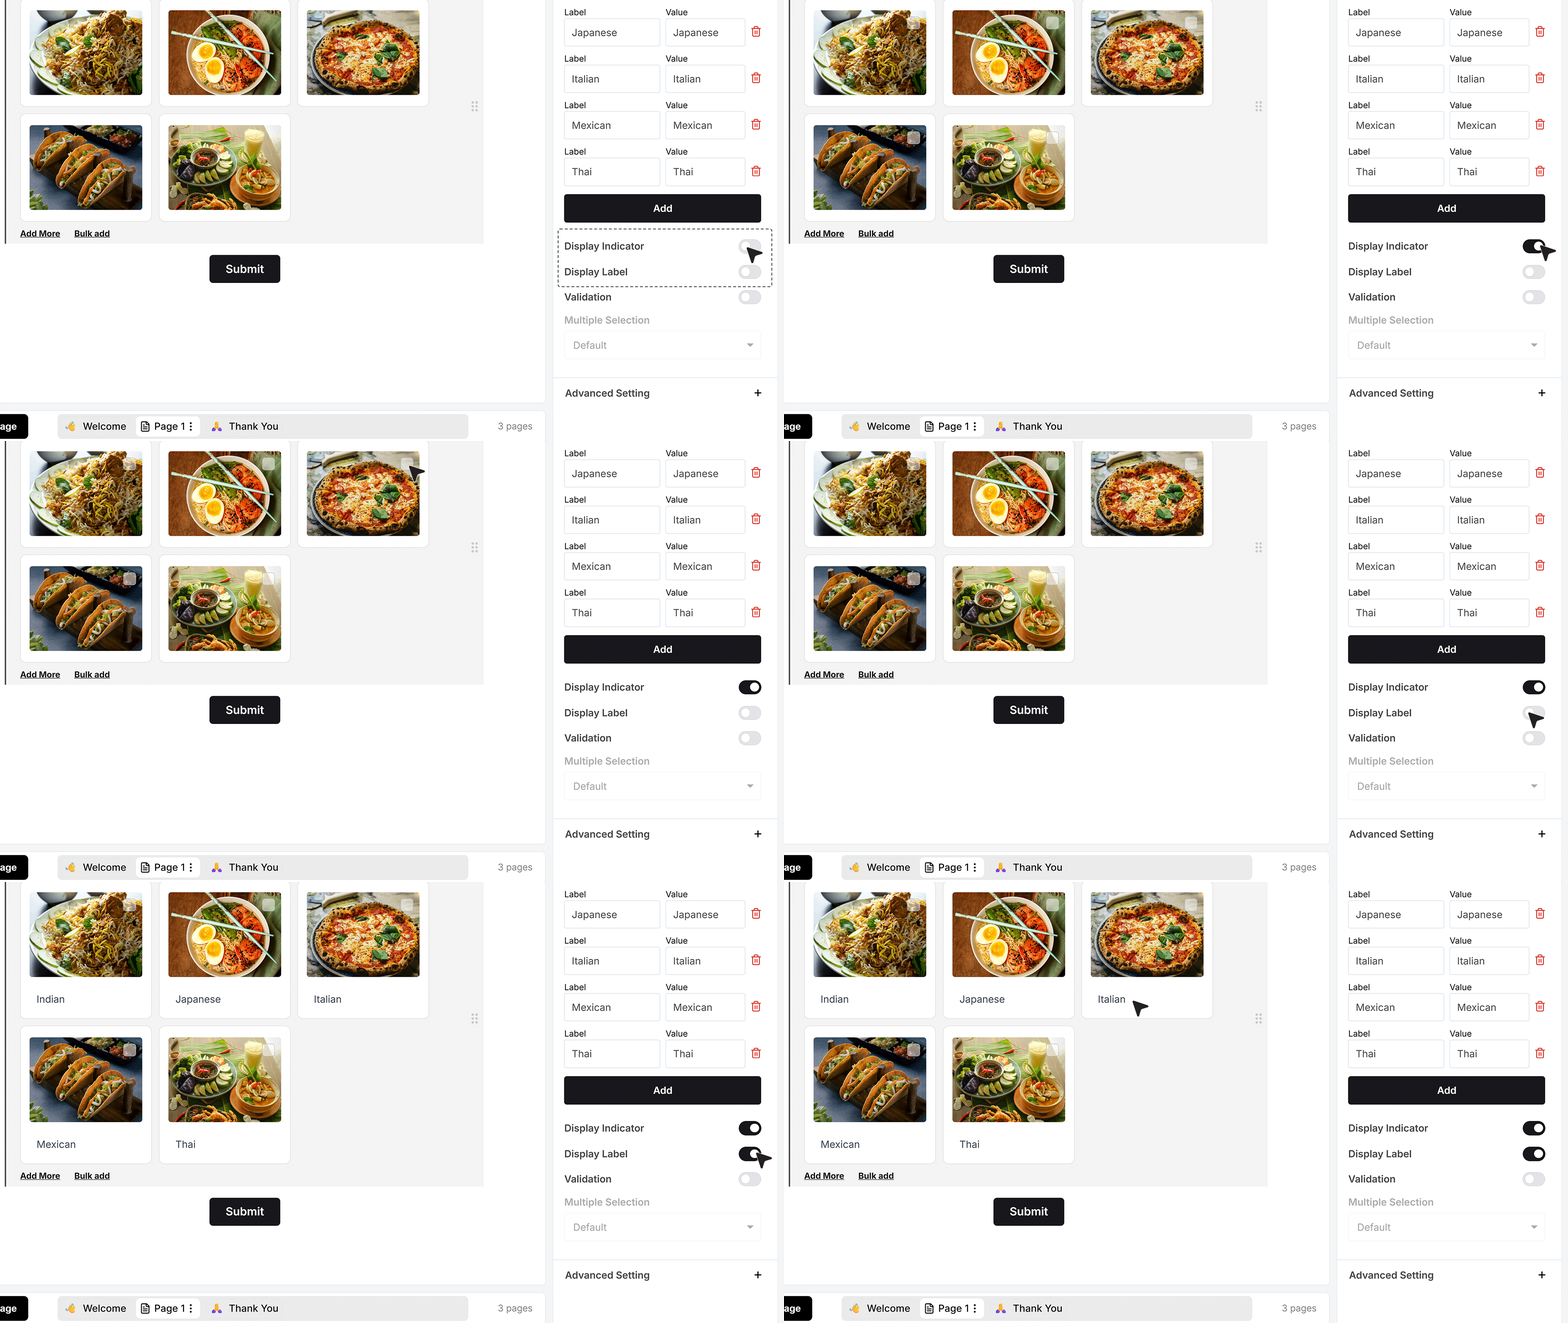
When you use Image Choice, two extra settings appear. Display Indicator adds a small tick or marker on the selected image so users clearly know which one they have chosen.
Display Label controls whether the option name appears below the image. You can keep it on if you want to show both the image and its name, or turn it off if you prefer a clean layout with only images.
Add Other
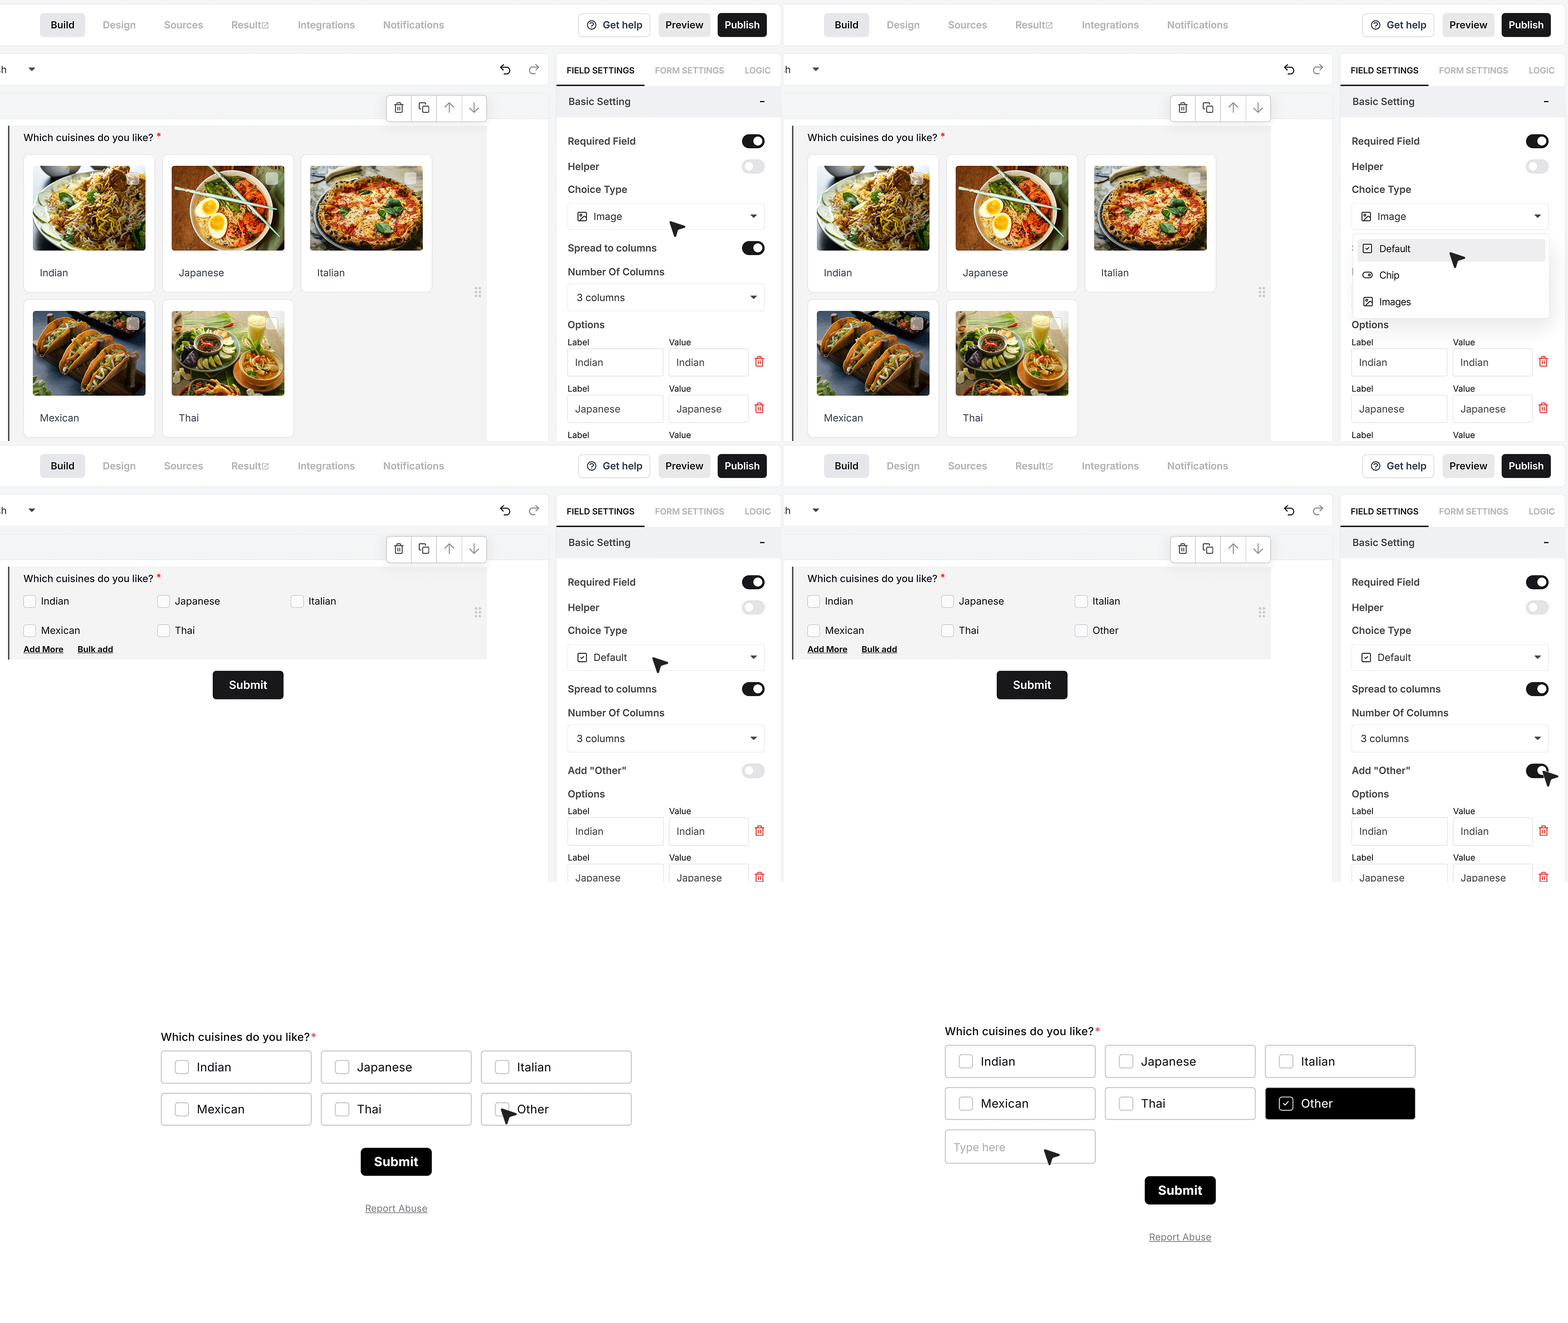
If you want to allow answers that are not already in your list, turn on Add Other. When this setting is enabled, an “Other” option appears in the field. If the user selects Other, a small text box appears where they can type their own answer, such as “Korean.”
This is useful when you cover the common options, but still want the user to tell you something that is not in your main list.
Limit how many options can be selected
- Multi Choice has a feature that lets you control how many options a user can select. To use this, first enable Validation in the field settings. Then scroll to the Multiple Selection area. By default, users can pick as many options as they want.
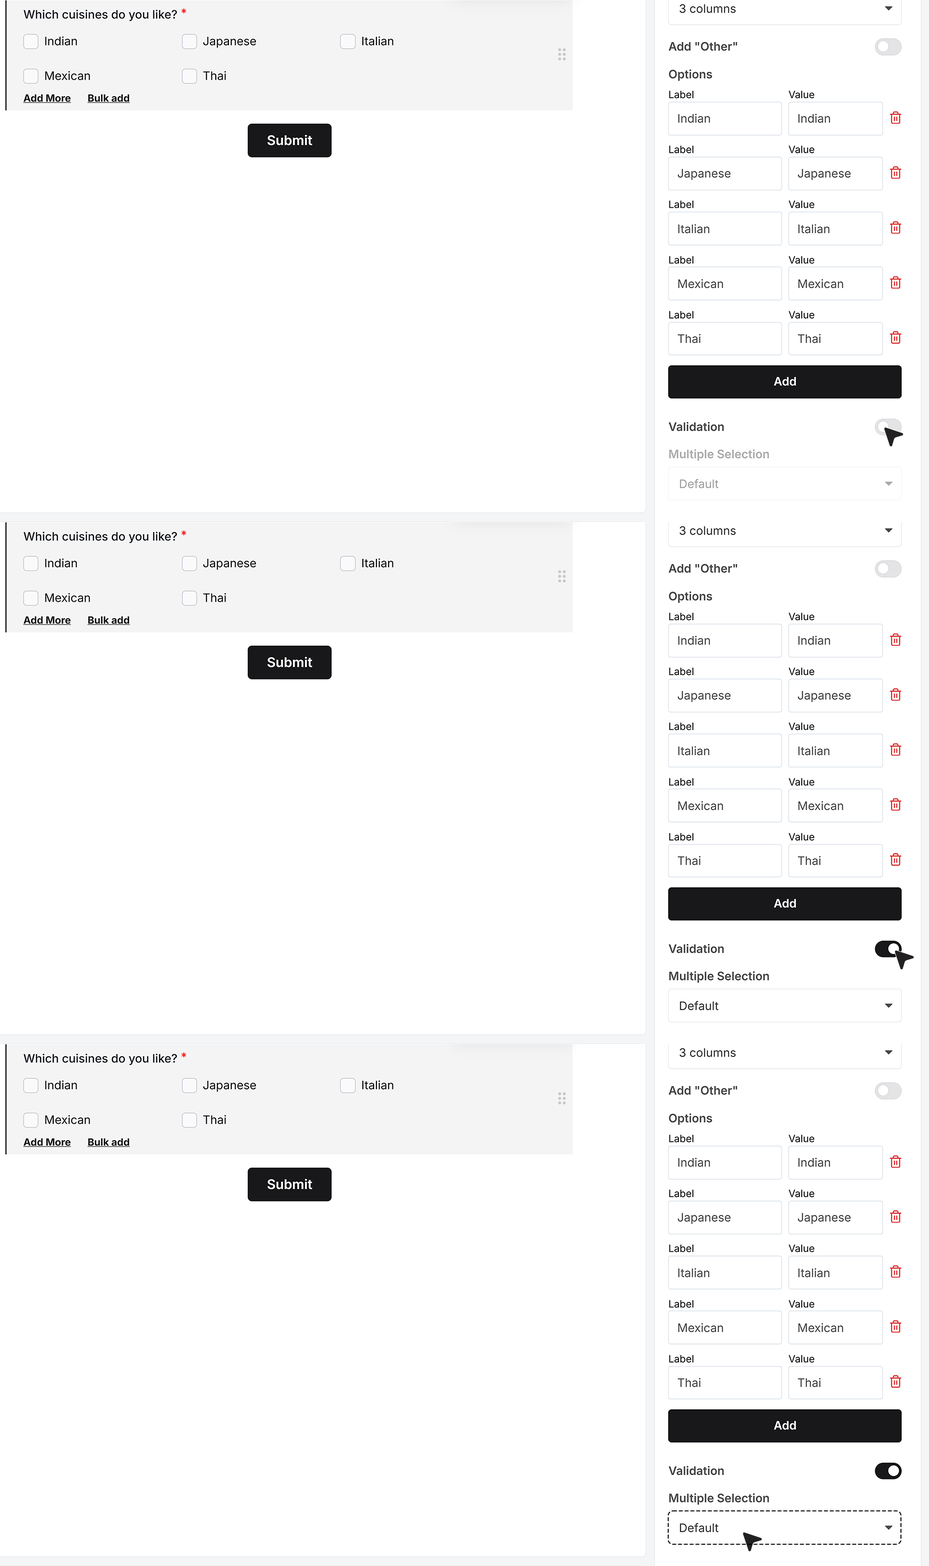
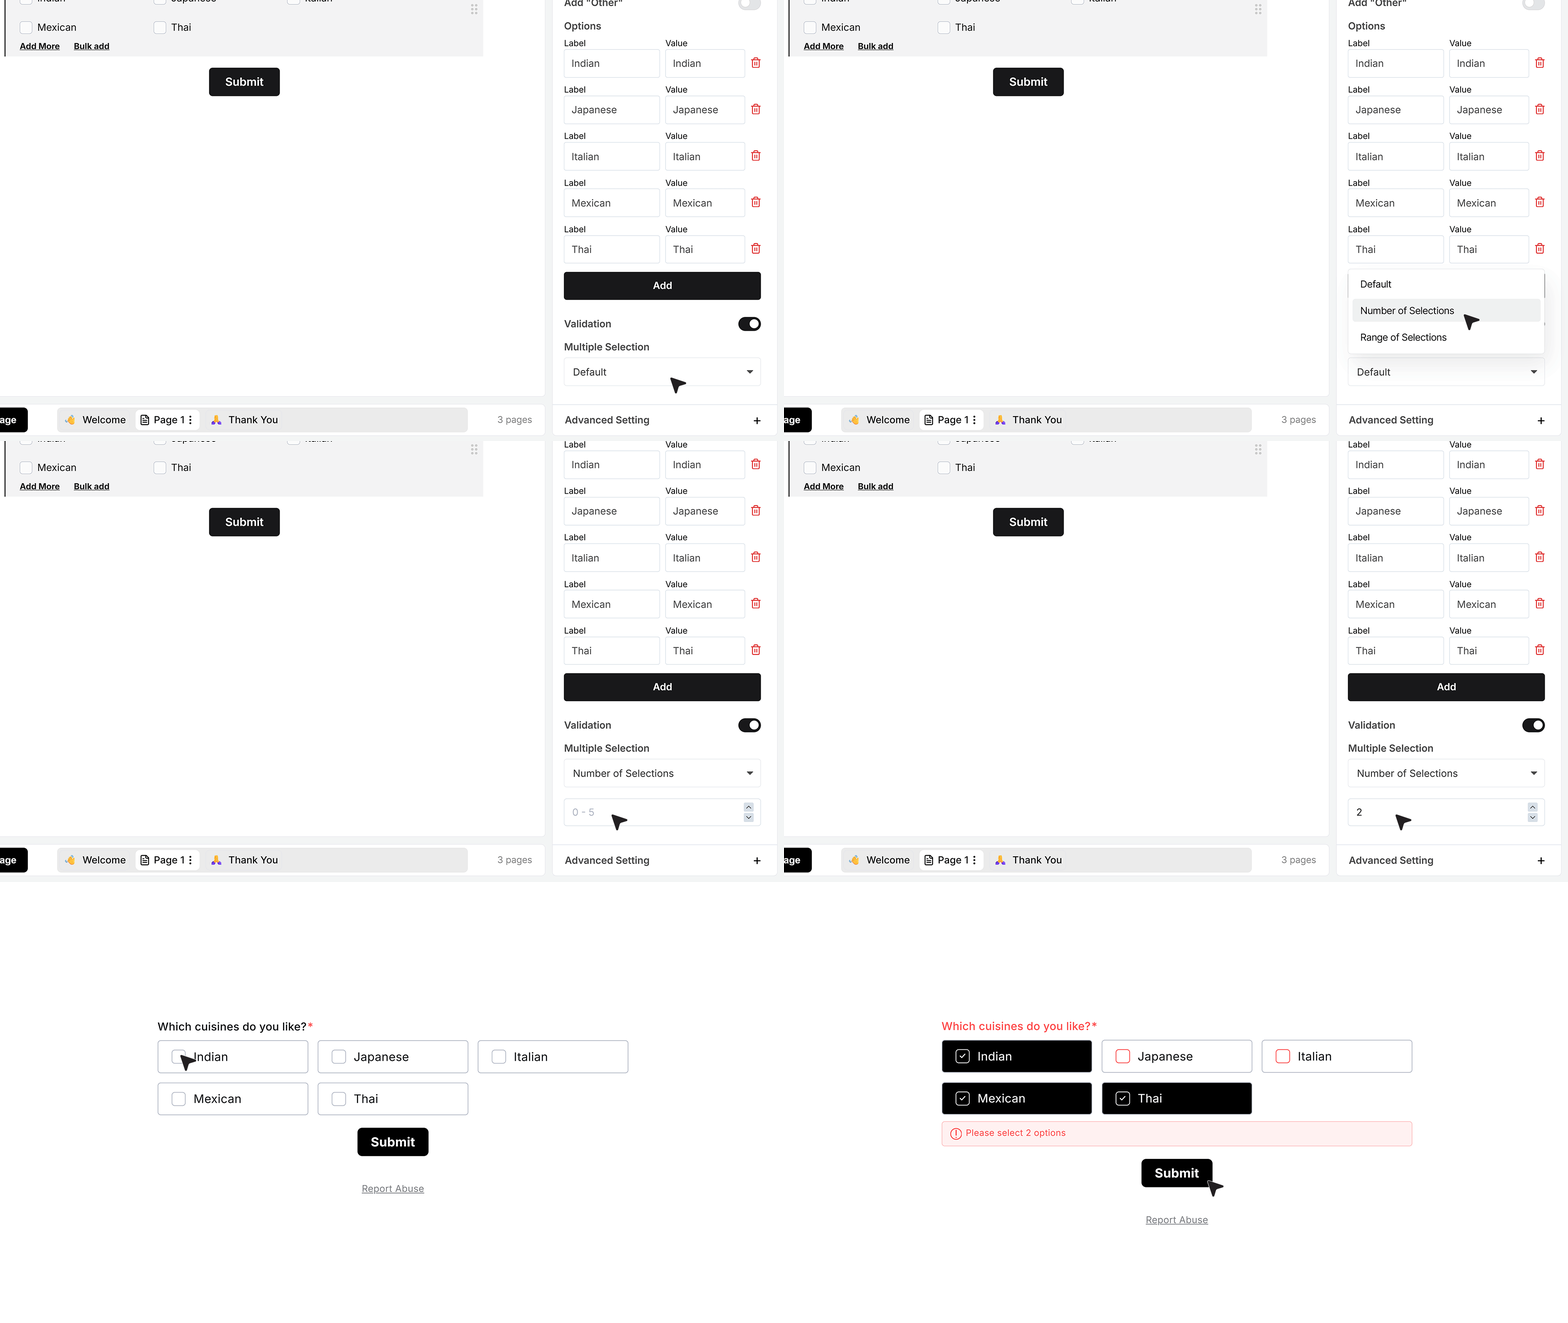
- If you want to control this, you can set an exact number of selections. For example, you can require exactly two cuisines. In that case, if the user selects fewer or more than two and tries to submit the form, MakeForms will show an error and stop the submission until they adjust their selection.
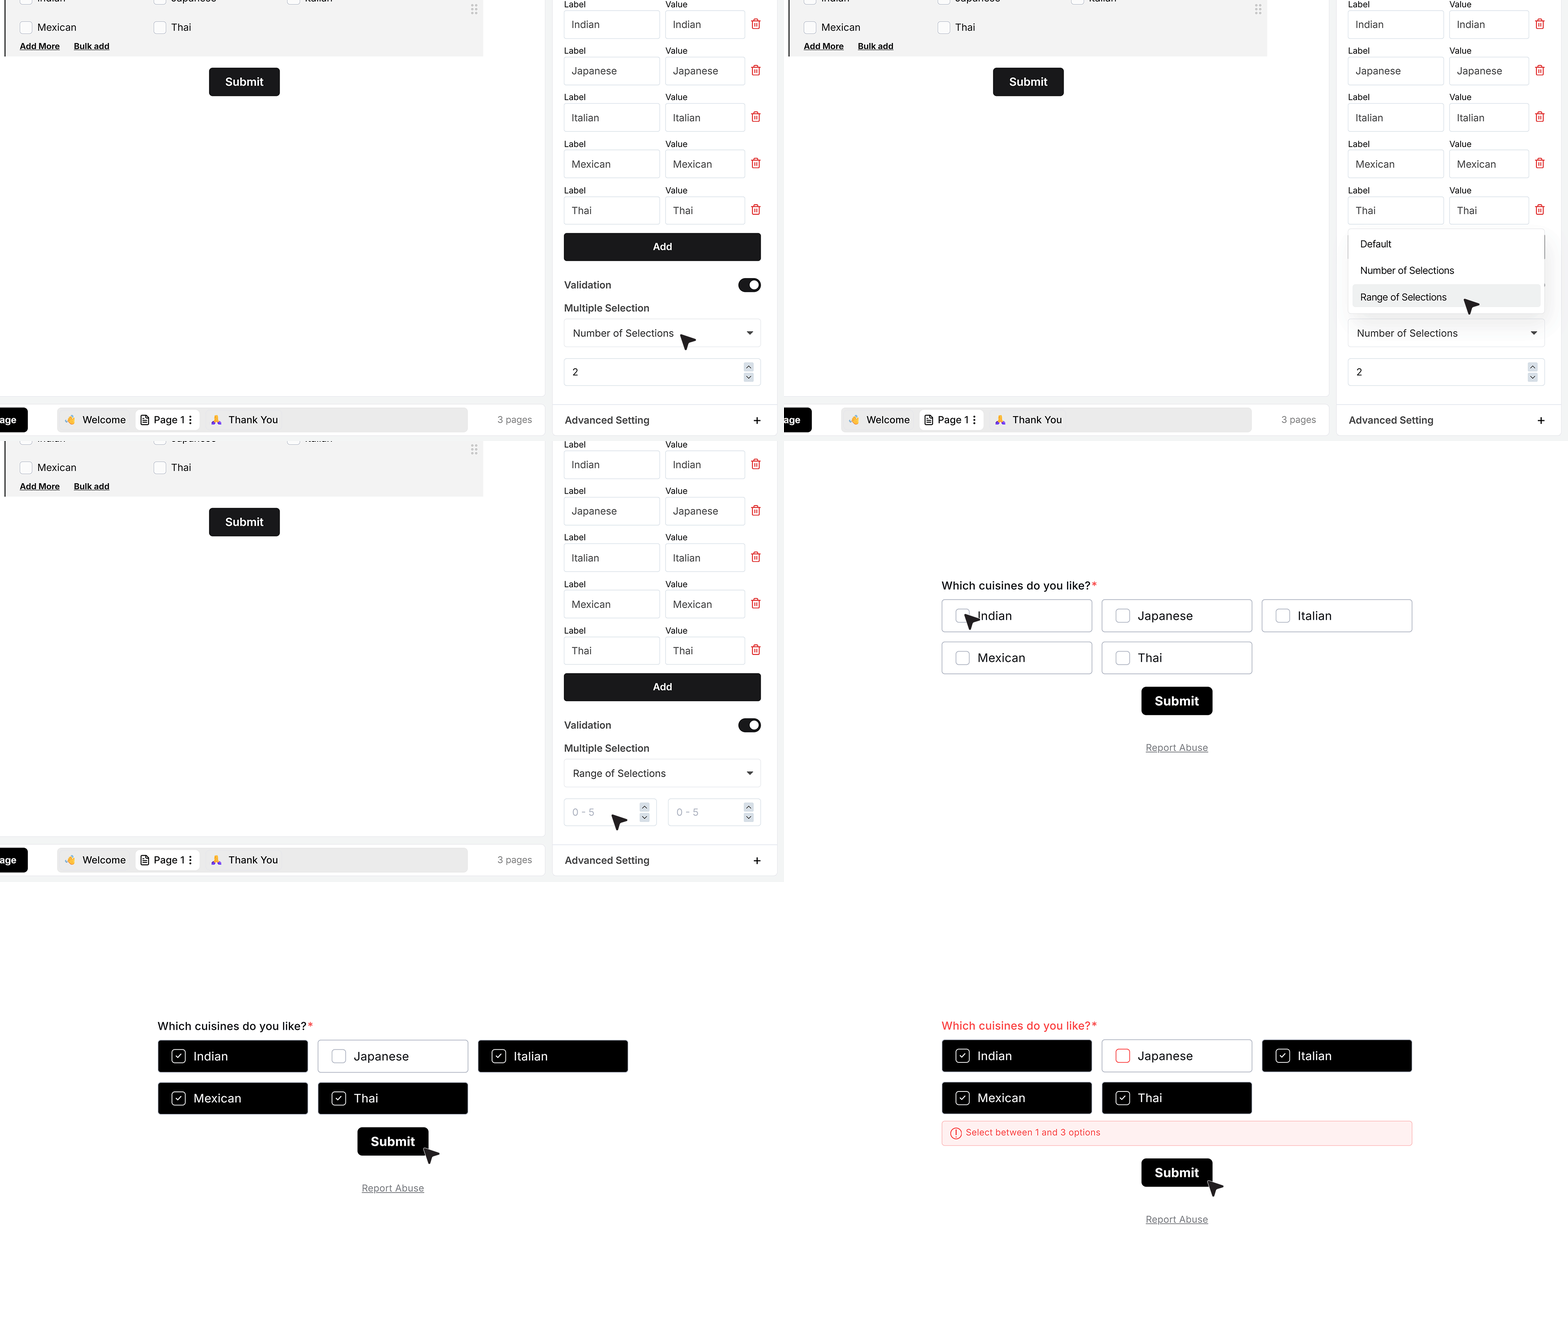
- You can also set a range. For example, you may allow between one and three cuisines. If the user selects none or more than three, they will see an error asking them to stay inside that range. Once their selection count is within the allowed limit, the form can be submitted.
Advanced Settings
Repeat This Field
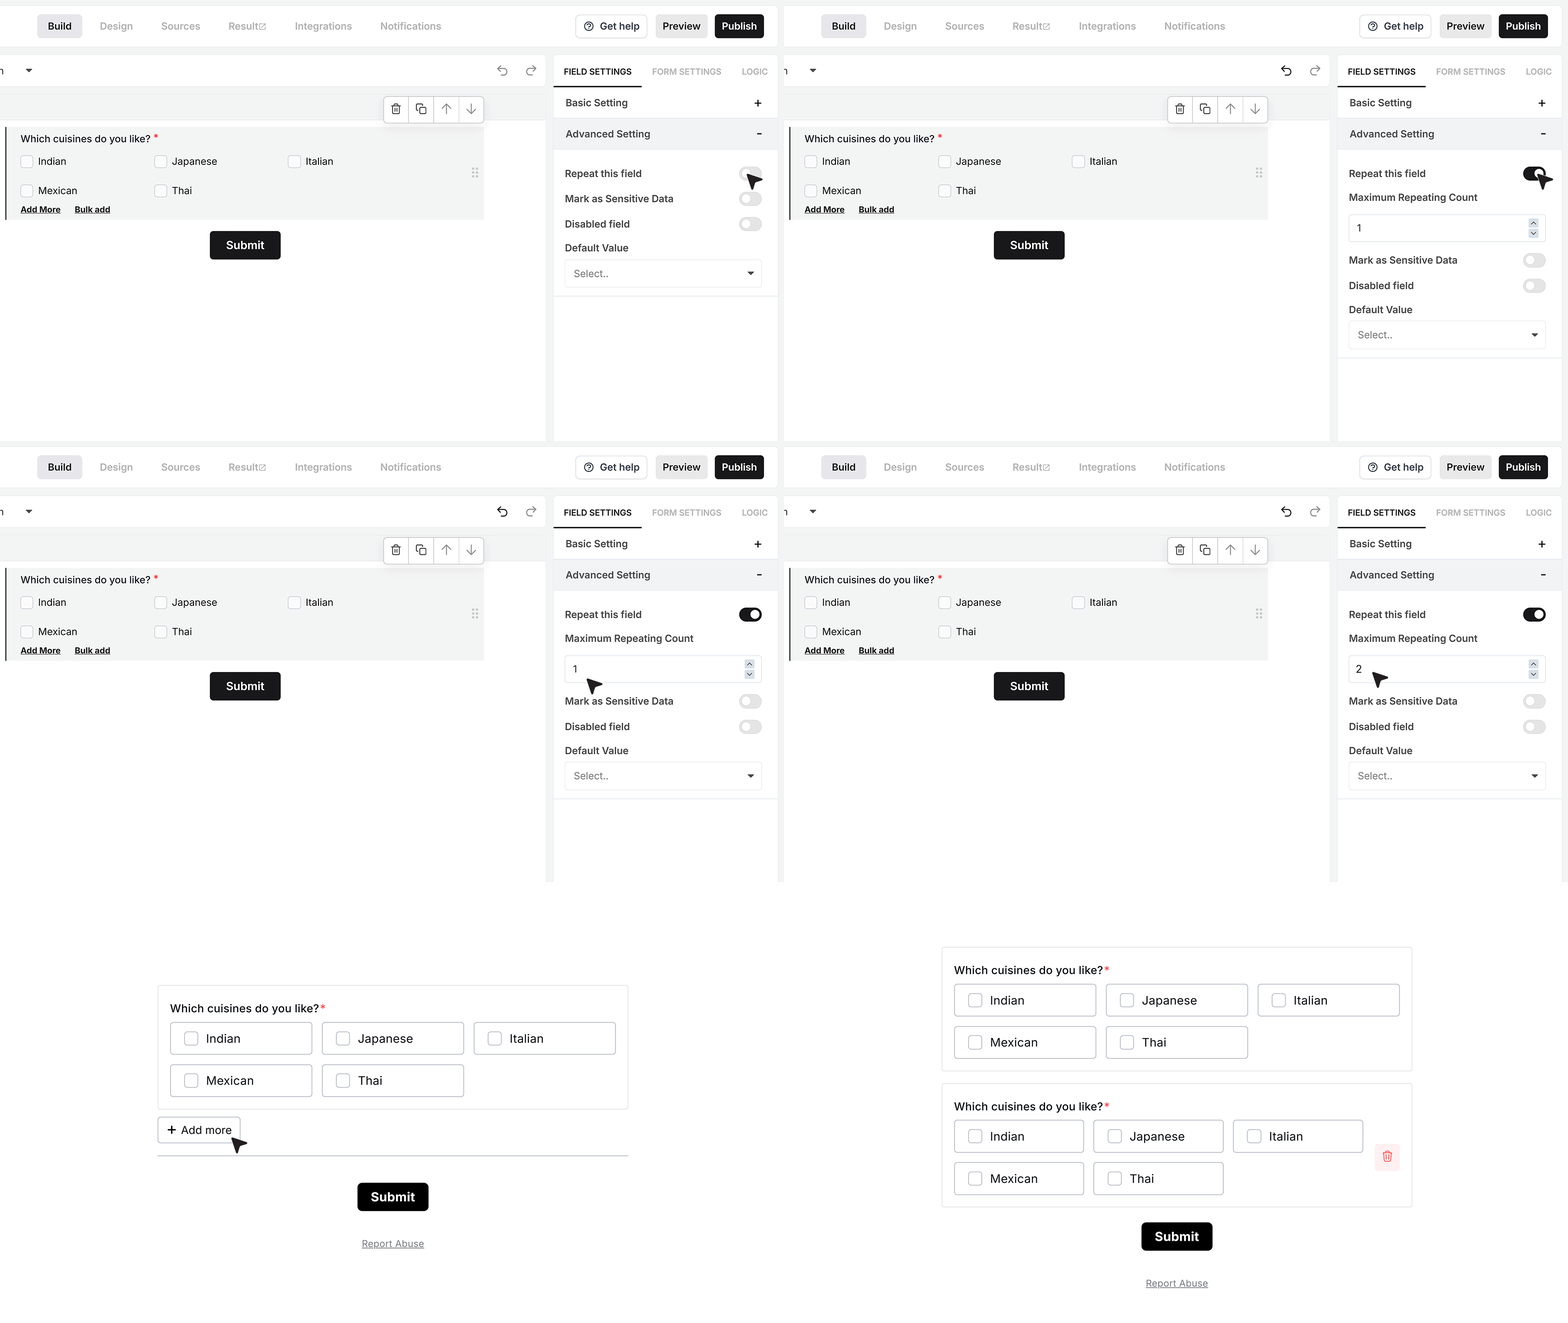
Repeat This Field is useful when you want the same Multi Choice question to appear more than once in the form.
When you turn it on, a box appears where you can set how many times the field can repeat. If you set the limit to two, the form will show one Multi Choice block by default, and the user will see an “Add more” button under it. When they click that button, a second Multi Choice block is added.
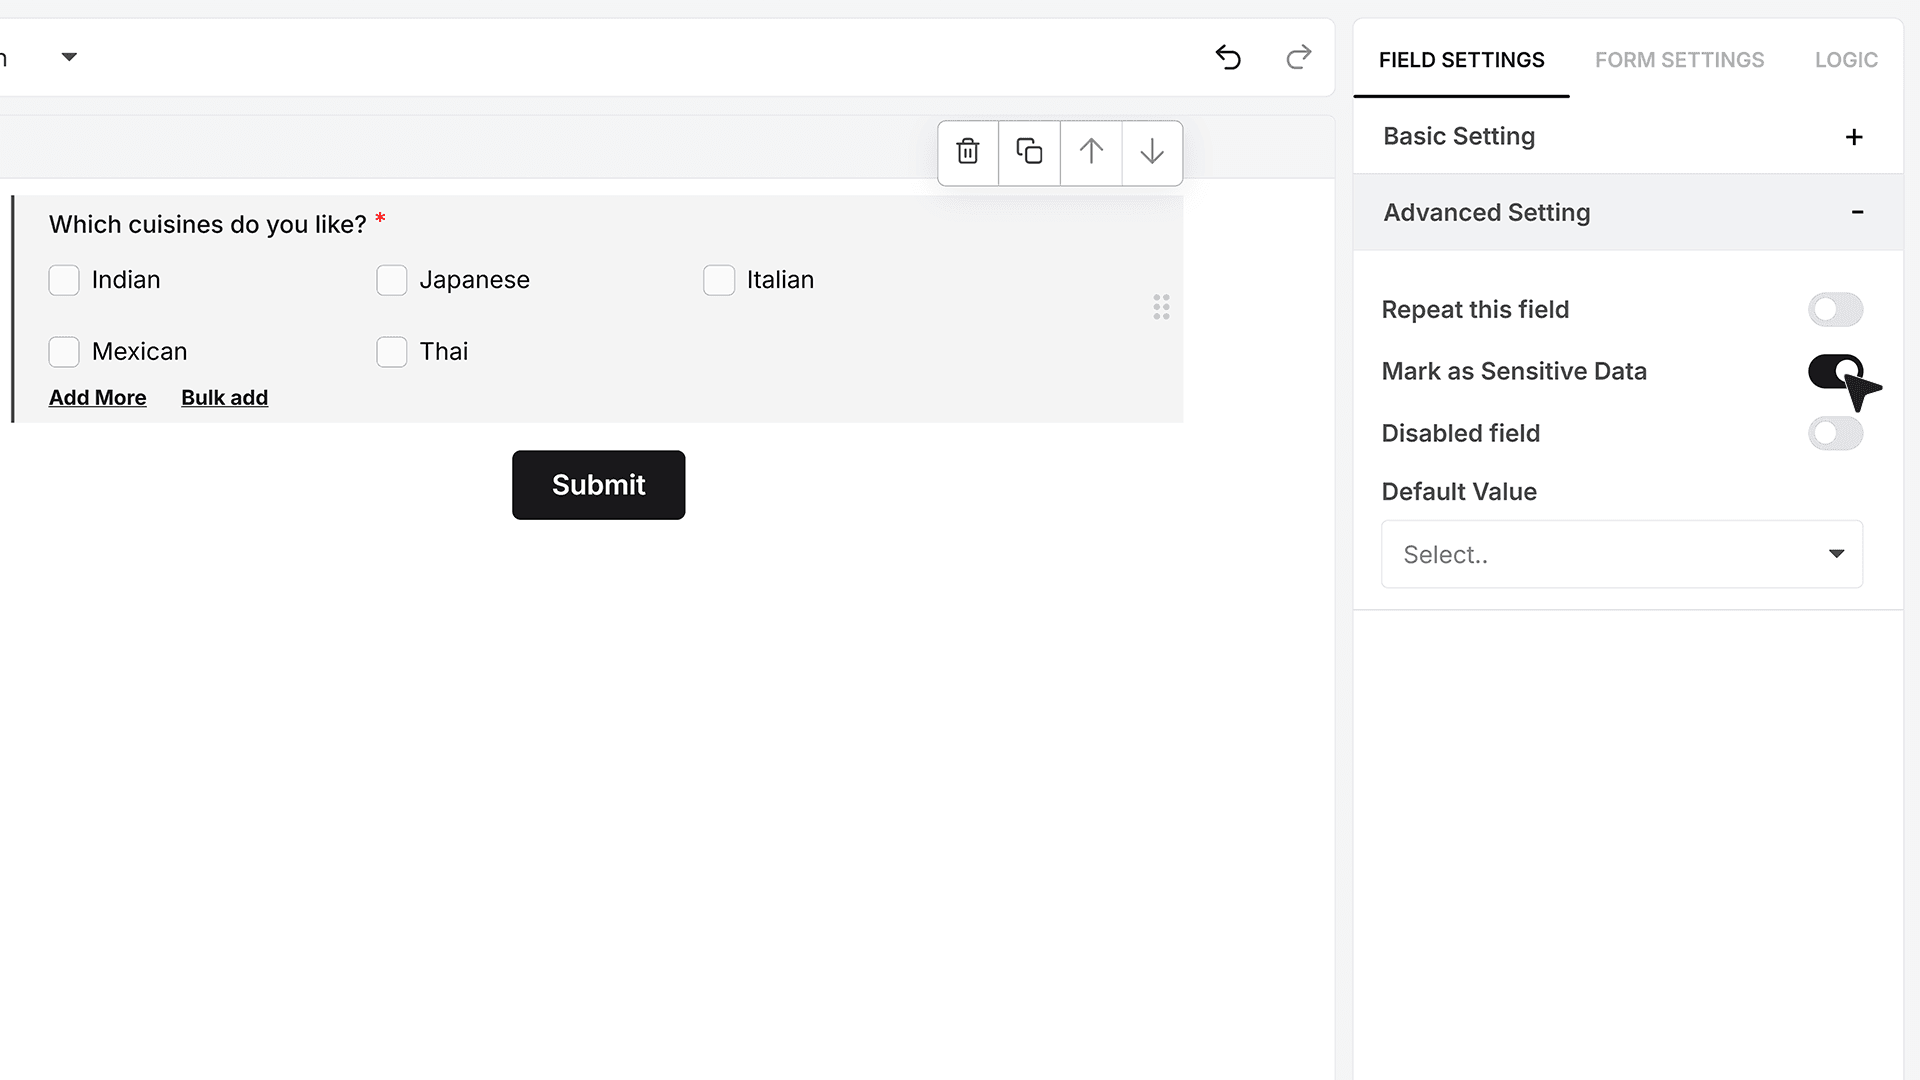
Mark as Sensitive Data
Mark as Sensitive Data should be turned on if the choices or responses should not be visible to everyone on your team.
When this is enabled, only team members with the right permissions inside MakeForms will be able to see the selected values in the responses.
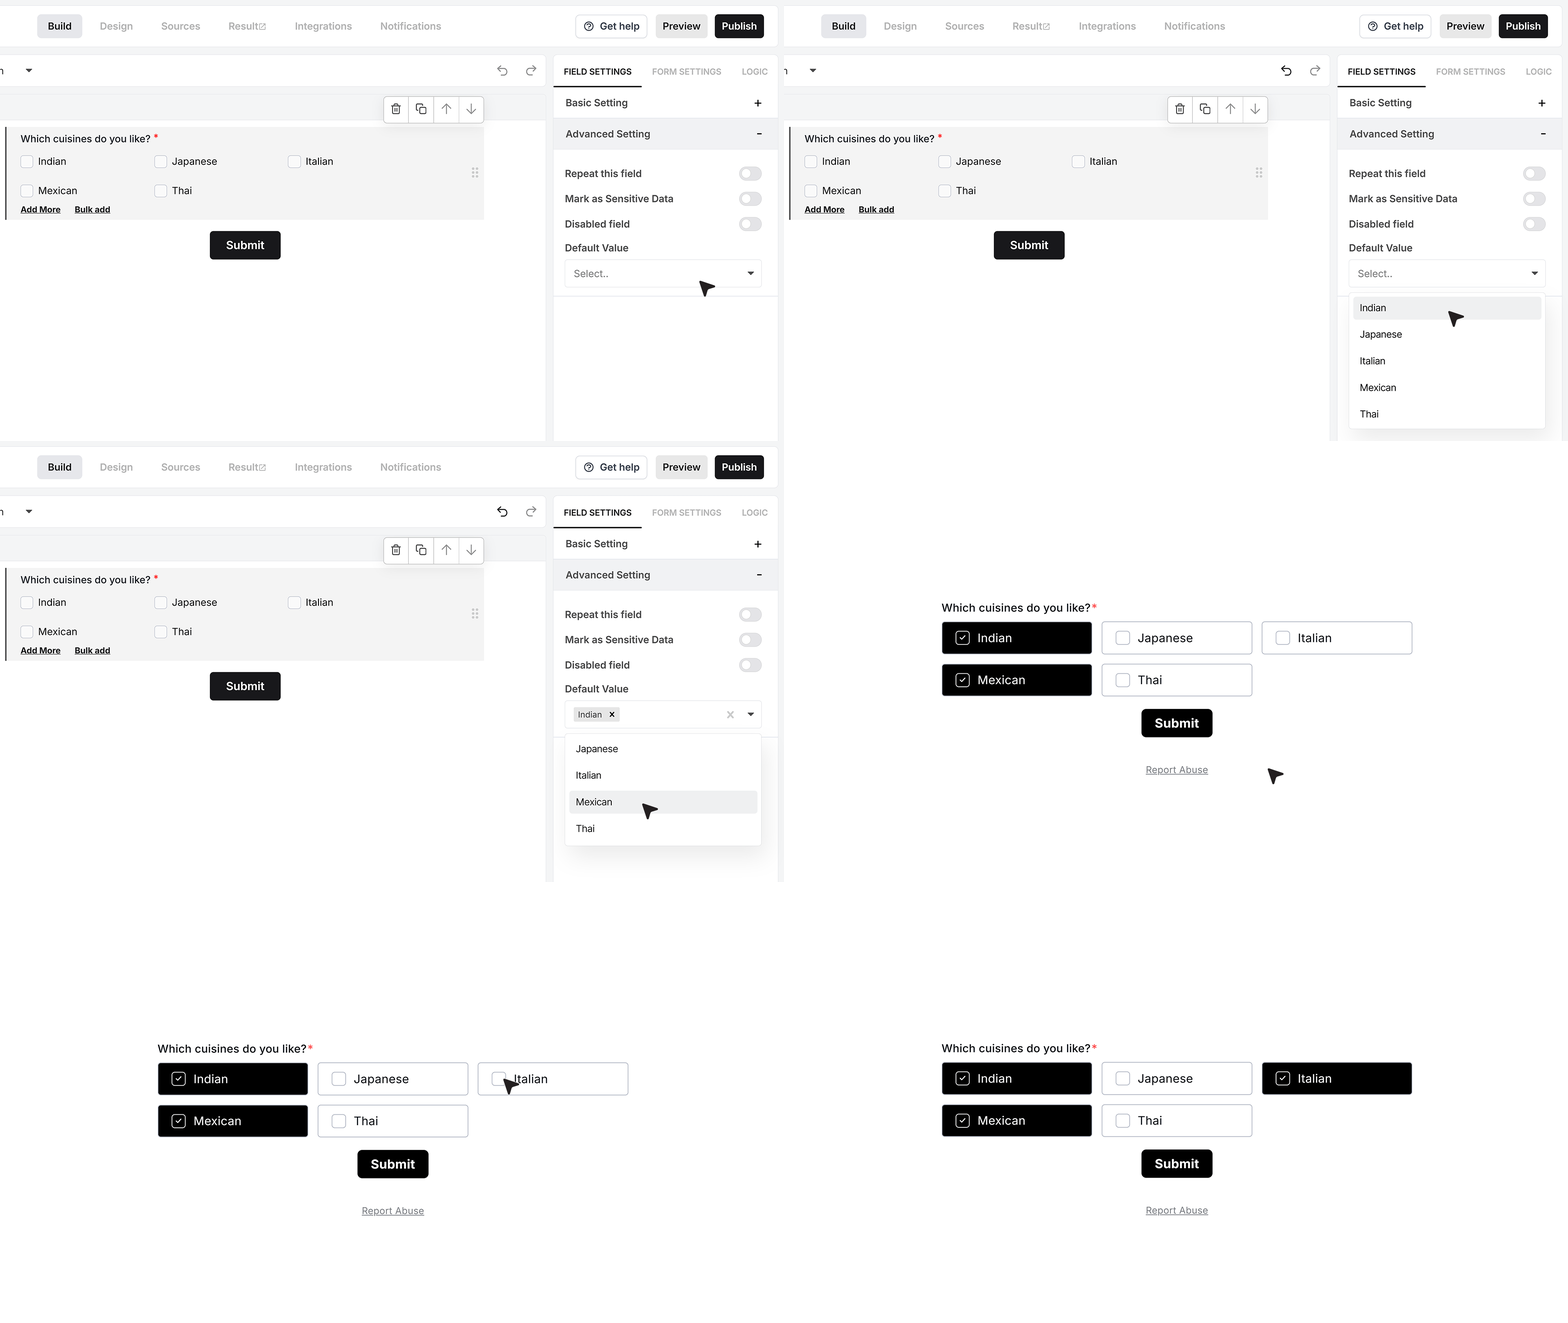
Default Value
Default Value lets you pre-select one or more options before the user starts interacting with the field. For example, if most of your users usually like Indian and Italian, you can set those two cuisines as default selections. When the form loads, they will already be checked. The user can still add or remove selections unless the field is disabled.
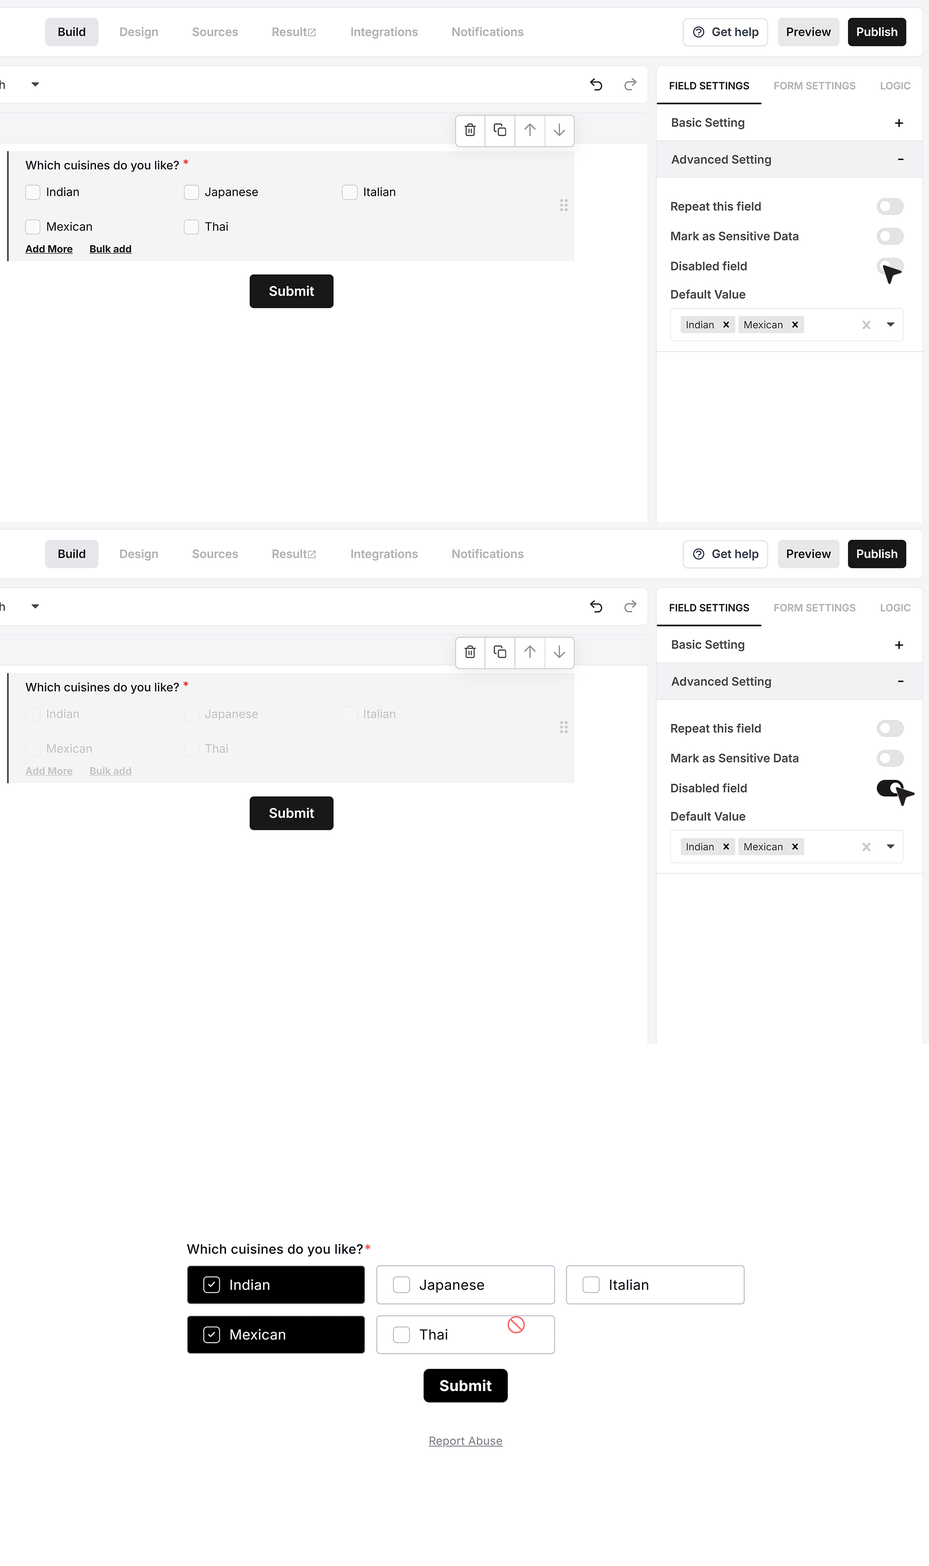
Disable Field
Disable Field turns the Multi Choice field into a read-only view.
When you enable this, the user can see which cuisines are selected, but cannot make any changes. This works well when the values are set by an earlier step or come from another system and you only want to display them.
FAQ's
Yes. In MakeForms, open the Multi Choice field settings, enable Validation, then go to Multiple Selection. You can enforce an exact count (for example, exactly 2) or a min and max range (for example, 1 to 3). If the response is outside the limit, the form shows an error and blocks submit until it matches the rule.
Most form builders that support conditional logic can use a multi-choice answer as a rule input, for example: if the answer includes "Option A", show Field X, otherwise hide it. In MakeForms, conditional logic is configured in the form logic area, not inside the Multi Choice field settings covered in this guide.
Pricing is usually tier-based. Lower tiers often include core fields, higher tiers add advanced features like logic, integrations, sensitive-data controls, and higher response limits. This guide explains how the field works (choice styles, images, validation limits, default values, sensitive data), but it does not list pricing, so you need to map these needs to your vendor’s plan table.
In MakeForms, add a Multi Choice field from the field list and set a clear label for the question. Add options using Add, or paste a list using Bulk Add. Turn on Required Field if you need at least one selection. If the question needs context, enable Helper Text and show it as an icon or visible text. If the survey data is private, enable Mark as Sensitive Data so only permitted team members can view responses.
Randomization (shuffling option order per respondent) depends on the platform. This guide only describes manual ordering, where you drag options up or down to set the display order. If you need true randomization, check whether your platform has an option-randomize setting; it is not shown in this guide.
In most platforms, multi-choice answers are synced as a list (array) of selected option values, or as a single string joined by a separator. On the marketing automation side, you either store the full list in one field, or split it into tags or segments per selected option. This guide focuses on how values are collected and validated inside the form, not on integrations.
Create a new form, add a Multi Choice field, and enter your poll options. Use Chip mode if you want a button-style poll UI. If you want to capture answers outside your preset list, enable Add Other. If you want to prevent over-voting, set selection limits using Validation and Multiple Selection.
Common options are: share the form link directly, or embed the form on a landing page and share that page. Social platforms usually do not support full HTML embeds inside posts, so link sharing is the default. This guide covers field setup (options, layouts, validation), not publishing or embed methods.
Look for vendors that ship a template library (market research, product feedback, concept tests) and allow multi-choice fields with option sets you can edit. If your platform does not have templates, you can still build quickly by using Bulk Add to paste long option lists into the Multi Choice field.