Paragraph Text Field
The Paragraph field in MakeForms is designed for adding readable, non-editable text anywhere inside your form. It helps you guide users with clear instructions, highlight important notes, or provide extra context without requiring any input from them.
Adding a Paragraph Text field
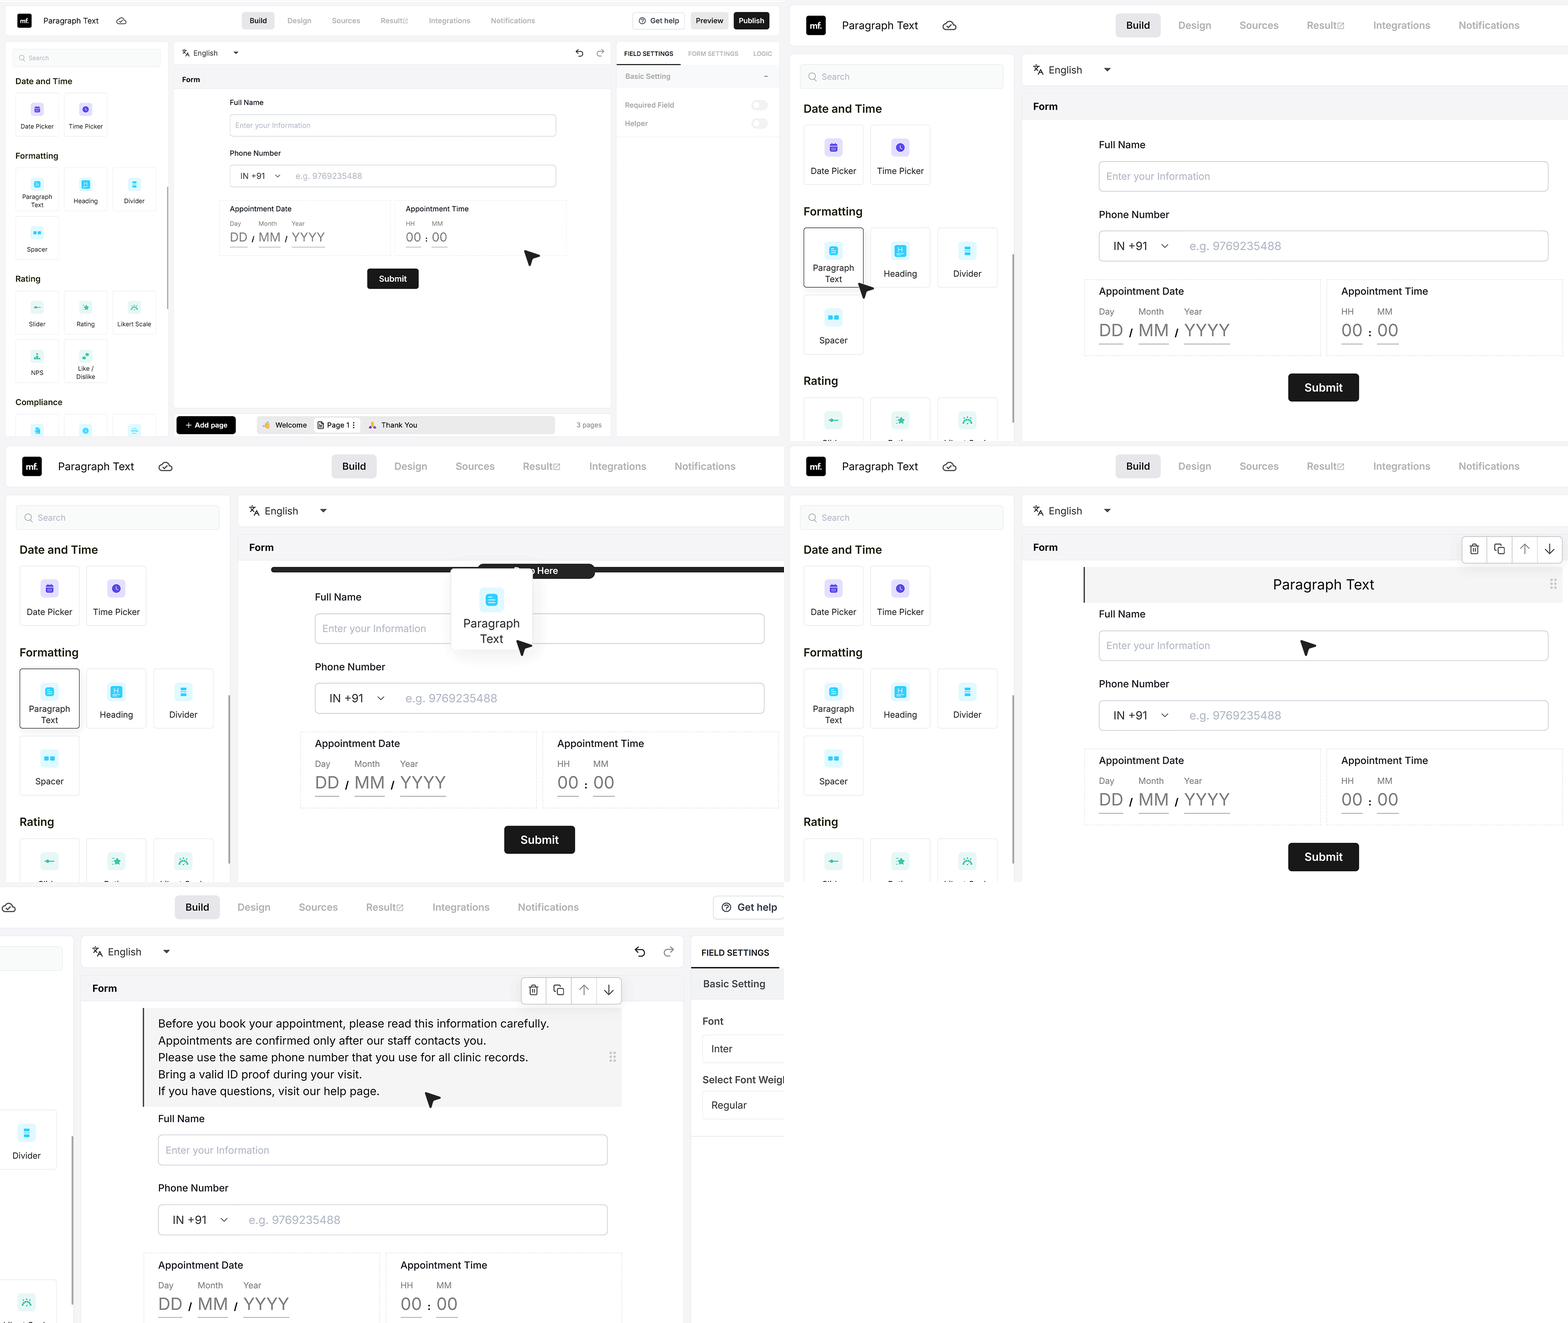
In this example, we are working with a simple appointment form that already has fields like Name, Phone Number, and Appointment Date and Time. On top of this form, we will add a Paragraph field to display clinic rules and then style that text.
To get started, drag a Paragraph field into your form. Here you can type your clinic rules or any important information you want users to read before they start filling the form.
Basic Settings
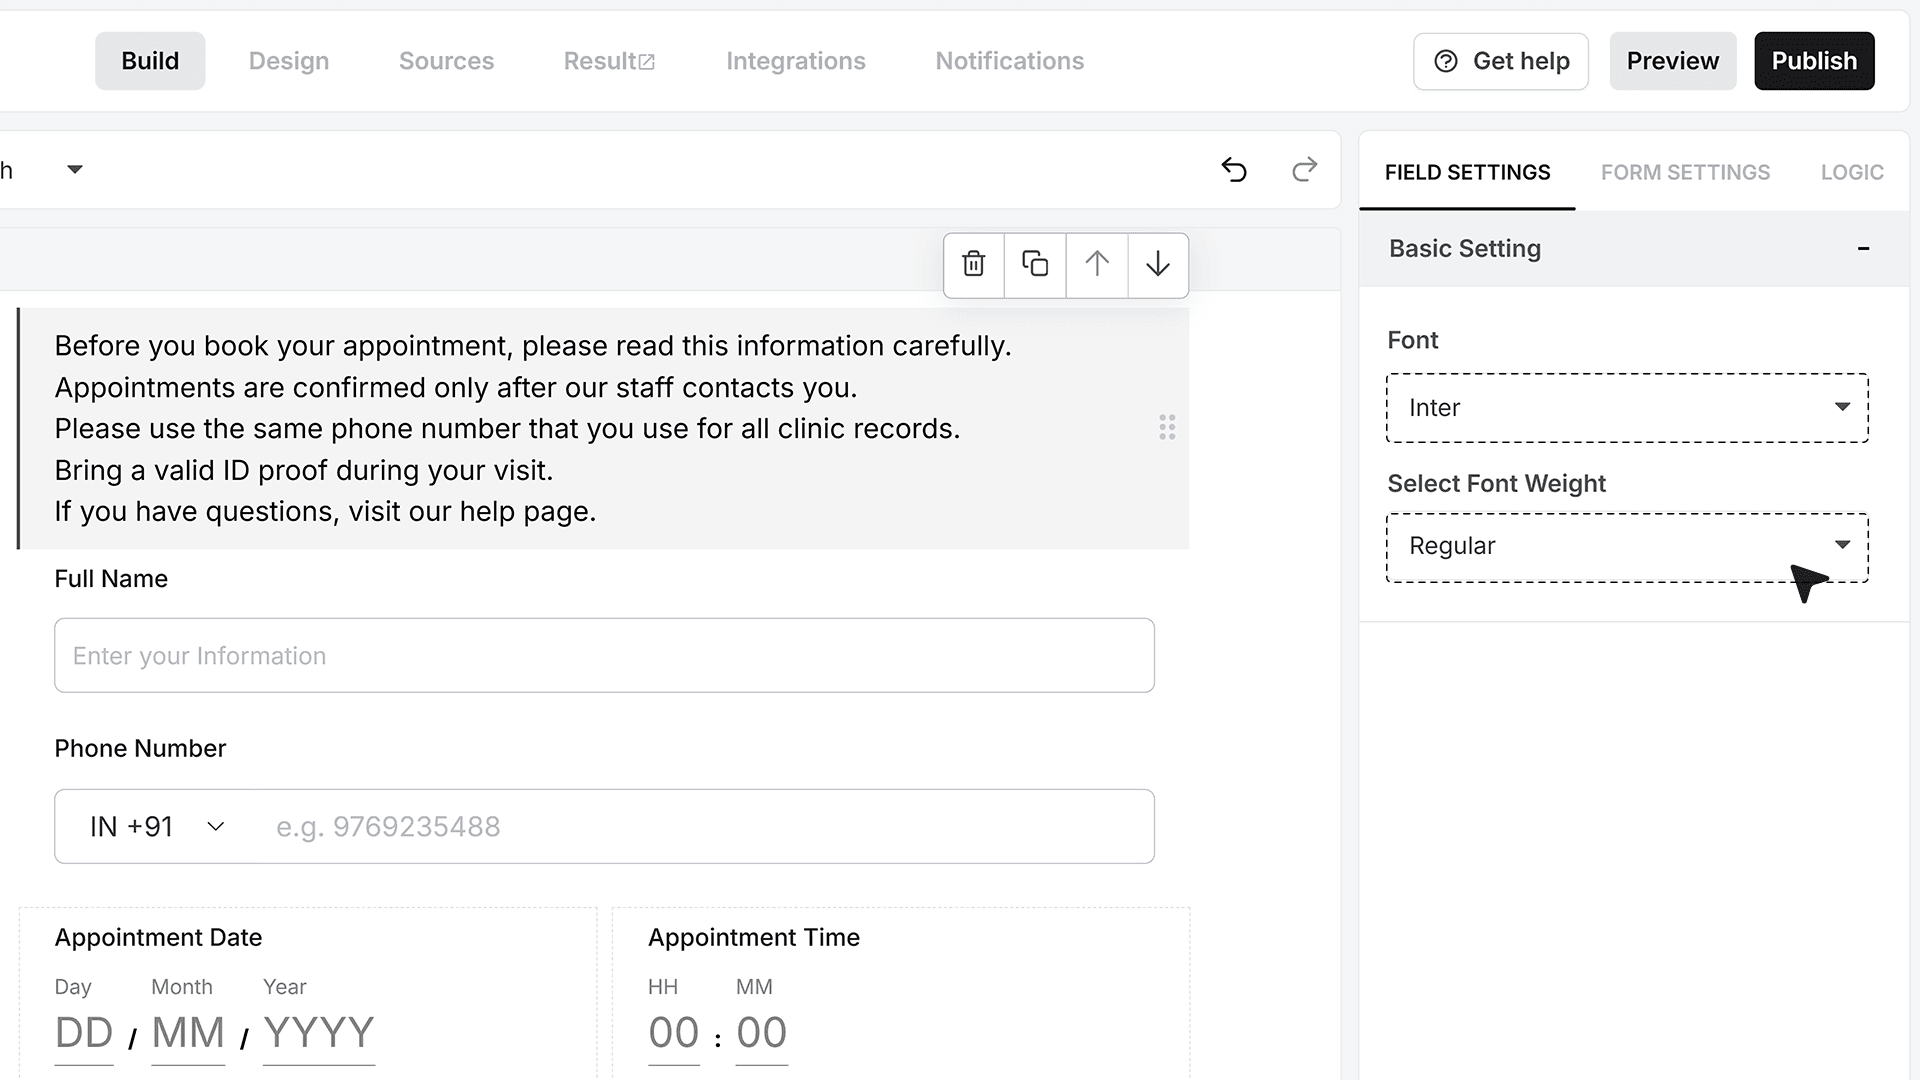
Font & Font Weight
When you select the Paragraph field, the Basic Settings panel appears on the right. This section allows you to control the overall look of your text by choosing a font that matches your brand and adjusting the font weight to make it appear lighter or heavier.
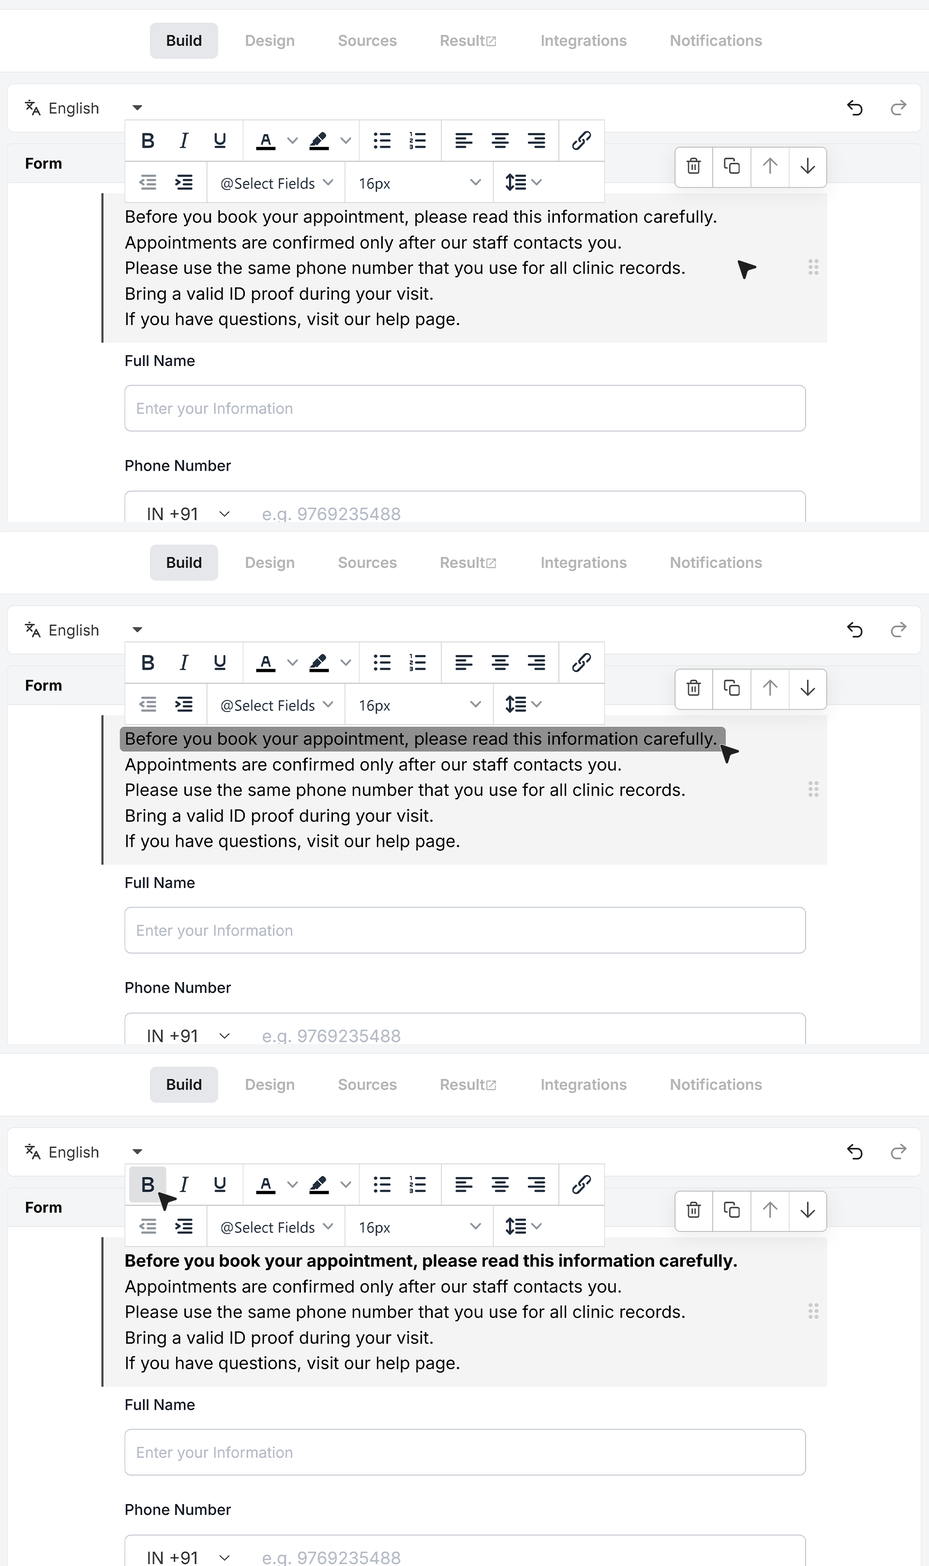
Text formatting toolbar
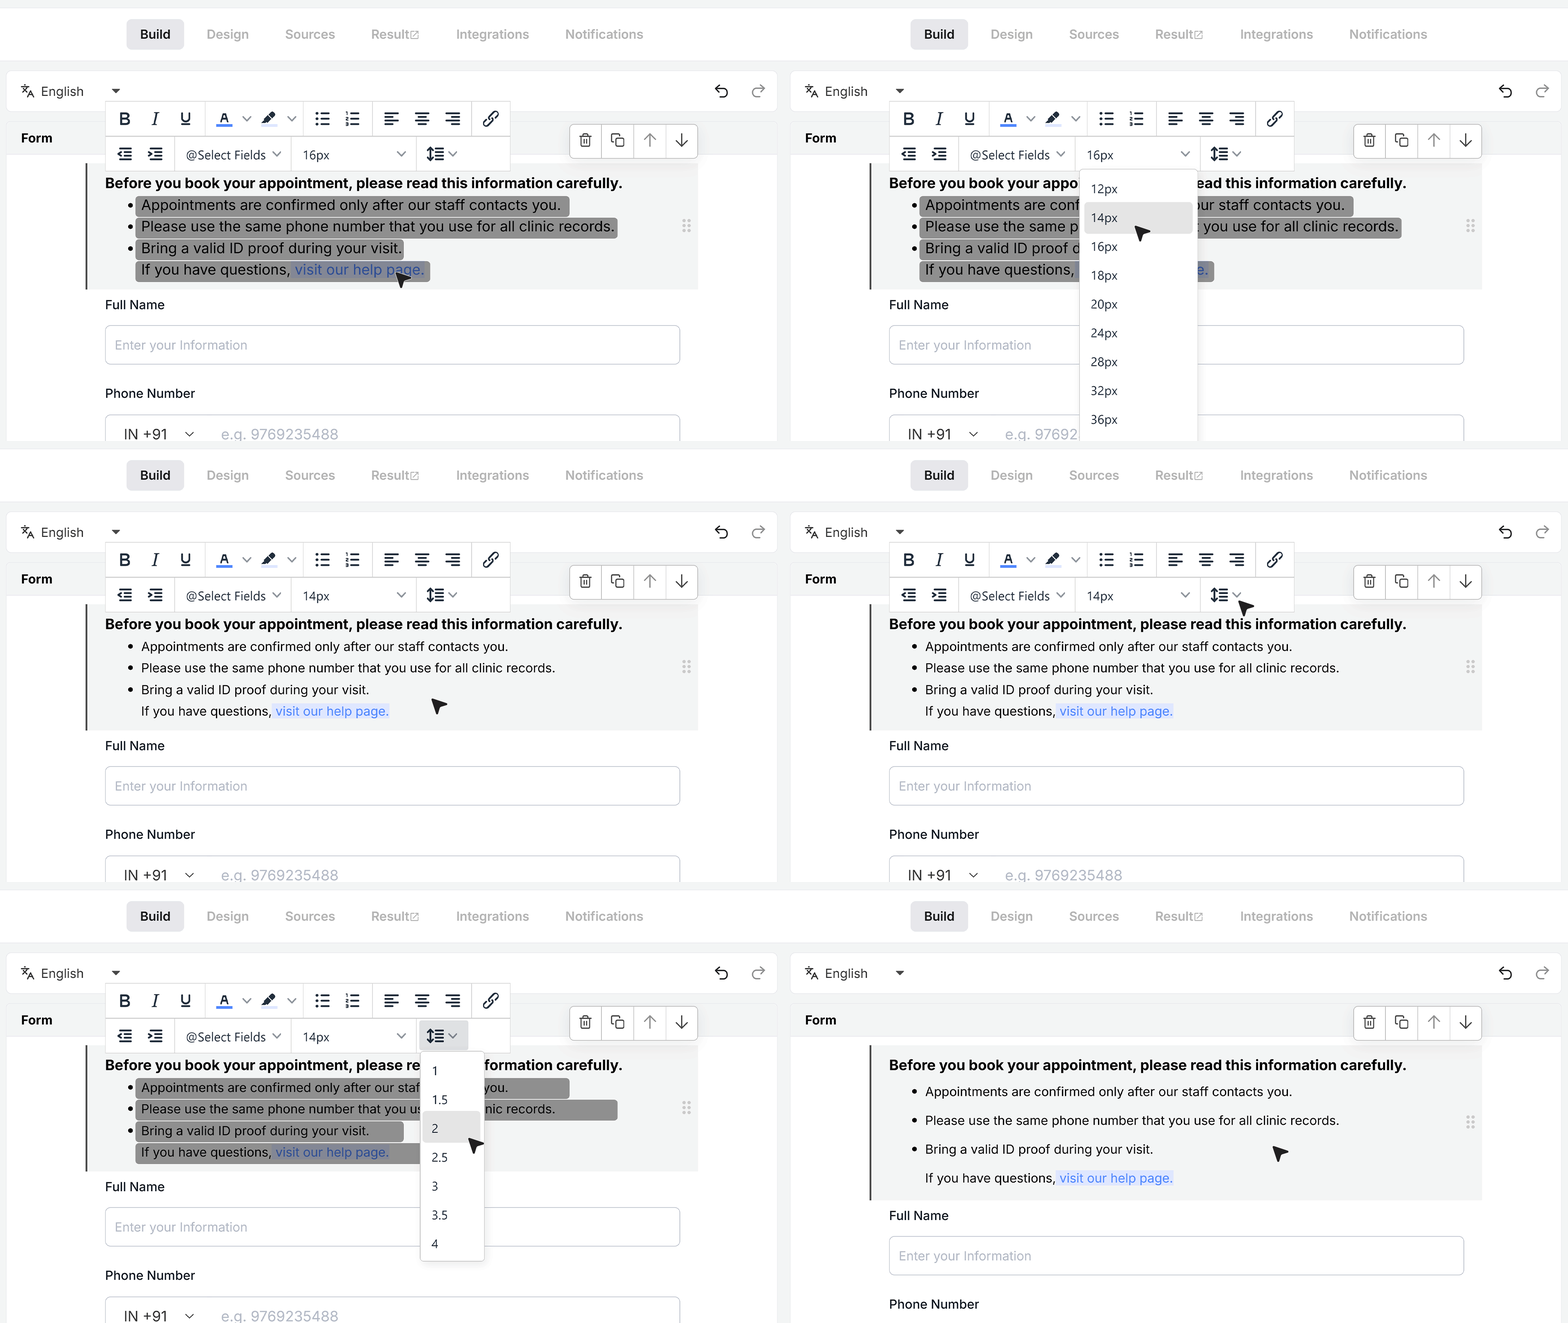
- When you move your mouse over the Paragraph text in the editor, a formatting toolbar appears above the field. You can make words bold, italic, or underlined to draw attention. For example, you can bold the first sentence so users notice it as soon as they look at the form.
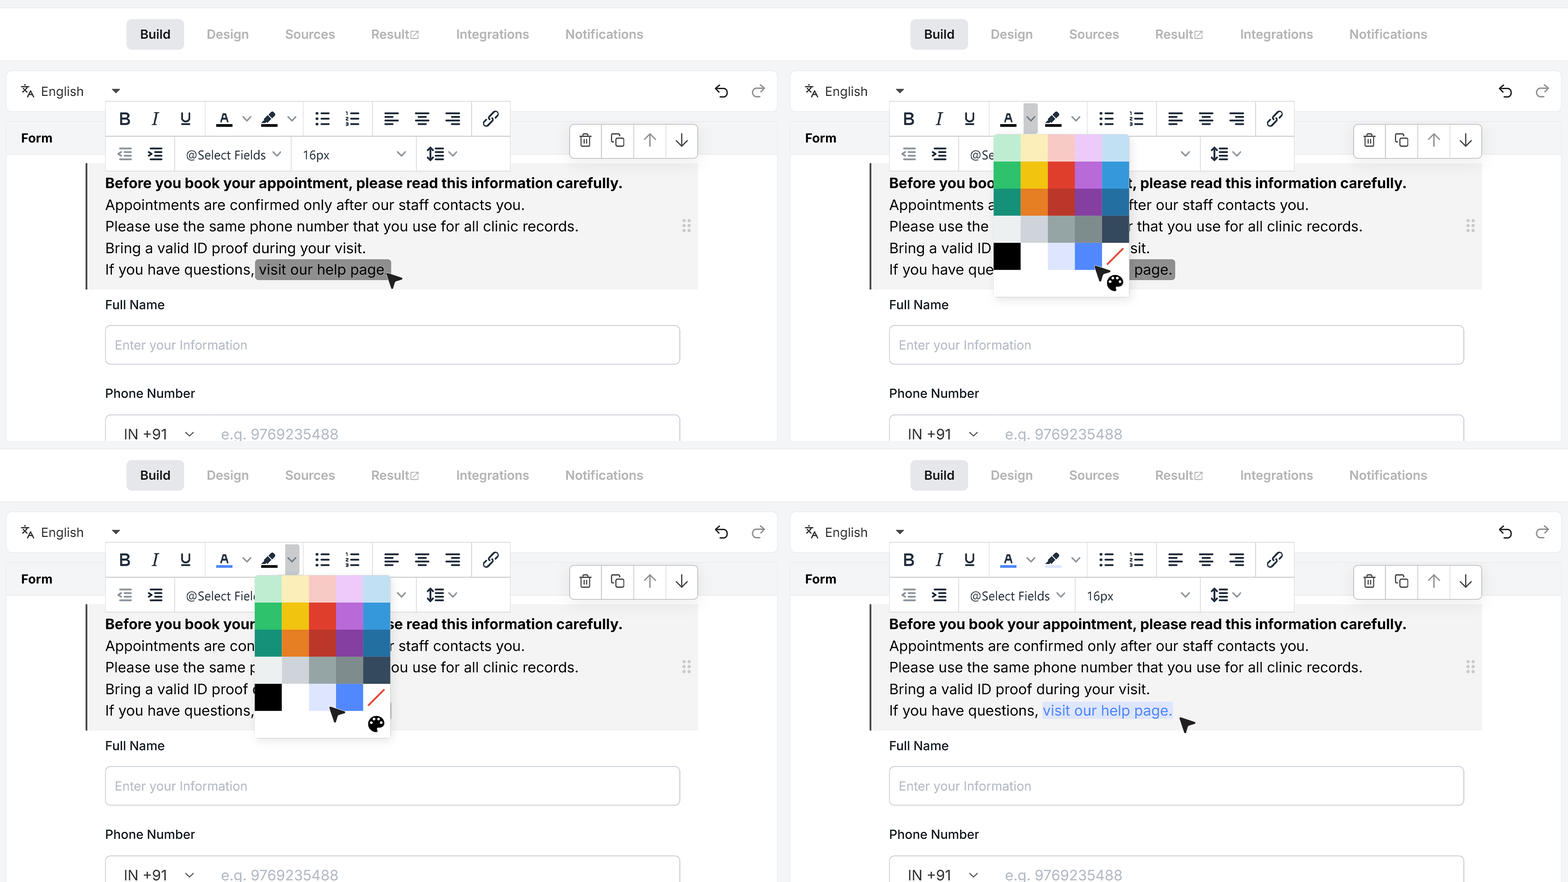
- You can change the text color and the background color to highlight warnings or key lines. For example, you can set the text “visit our help page” to a different color and add a light background behind it, especially when you are turning it into a link. This makes it easier to spot.
- You can turn lines into bullet lists or numbered lists when you want the information to read like clear points. For example, if you list three clinic rules, you can convert them into a bullet or numbered list to make them easier to follow.
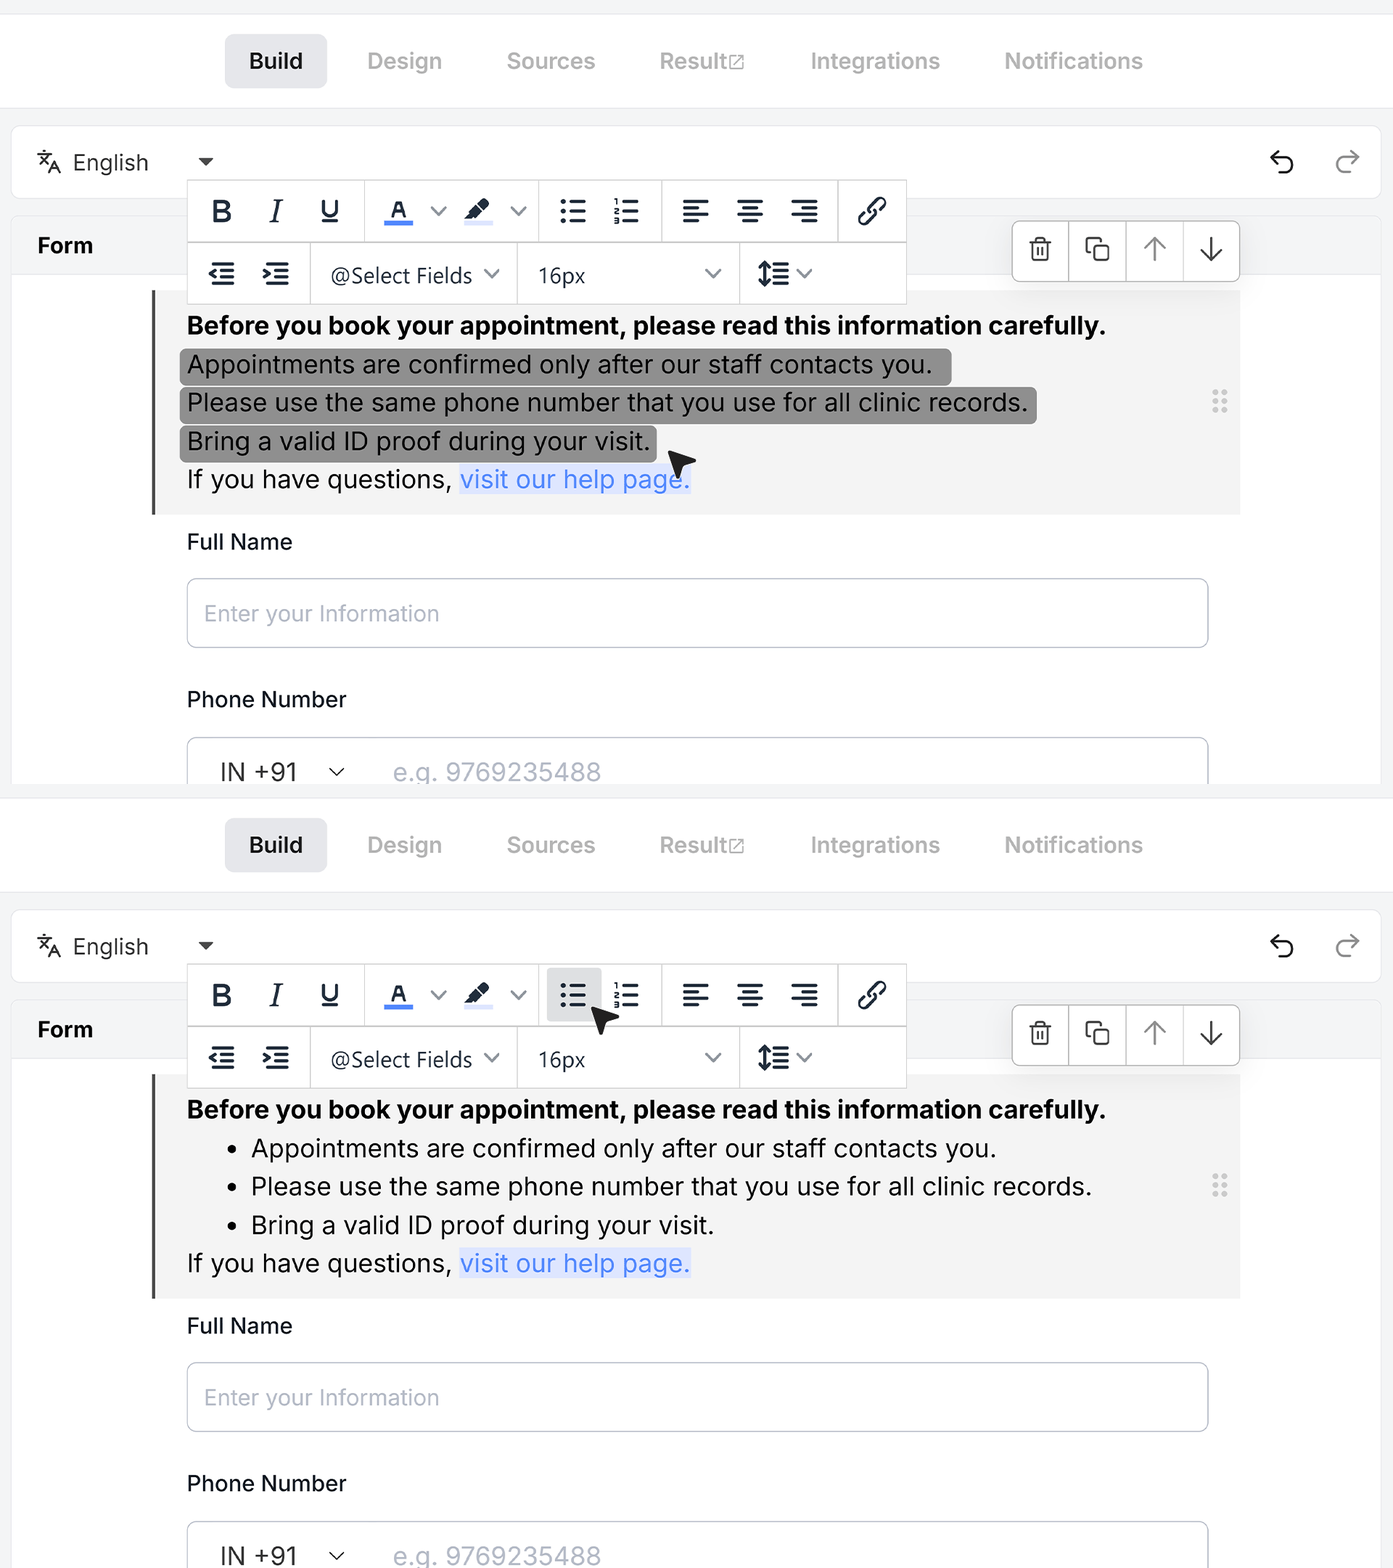
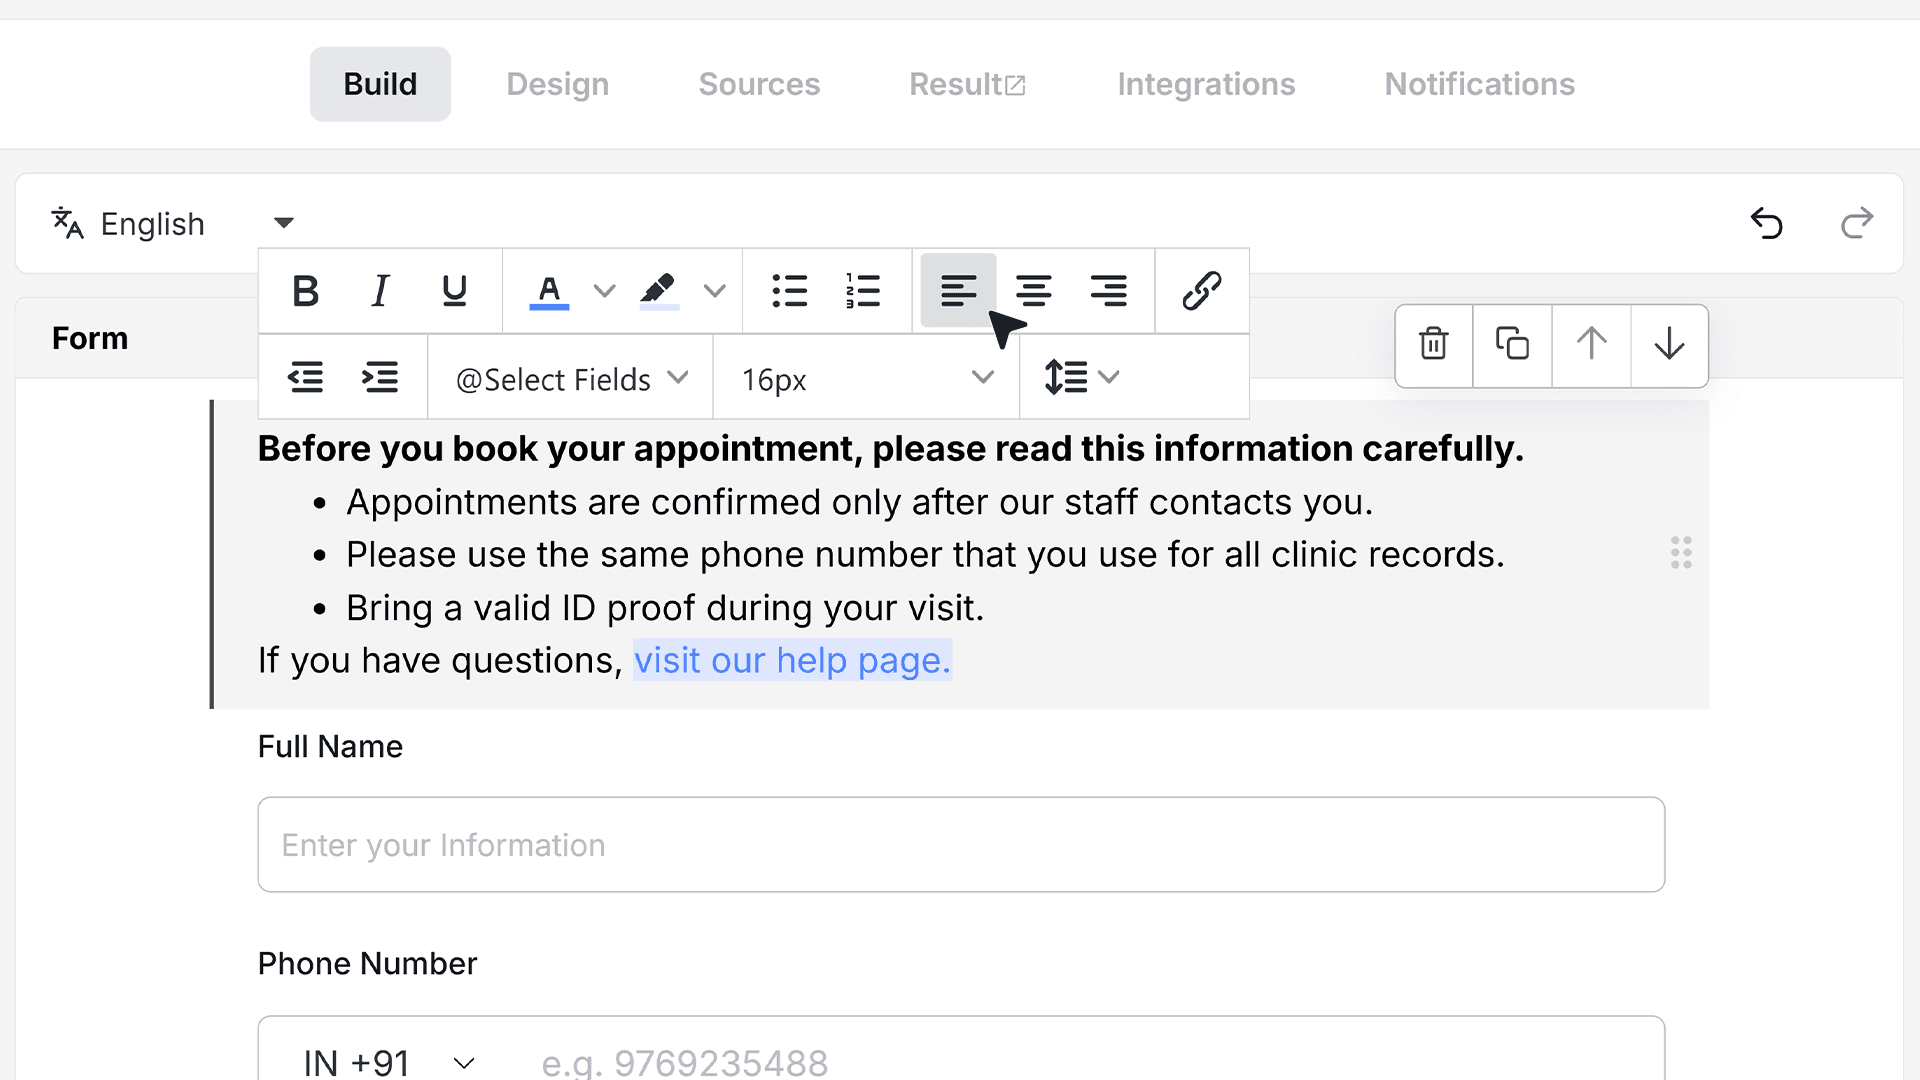
- You can use alignment options to place the text on the left, in the center, or on the right. MakeForms uses left alignment by default, which keeps the paragraph aligned with other fields.
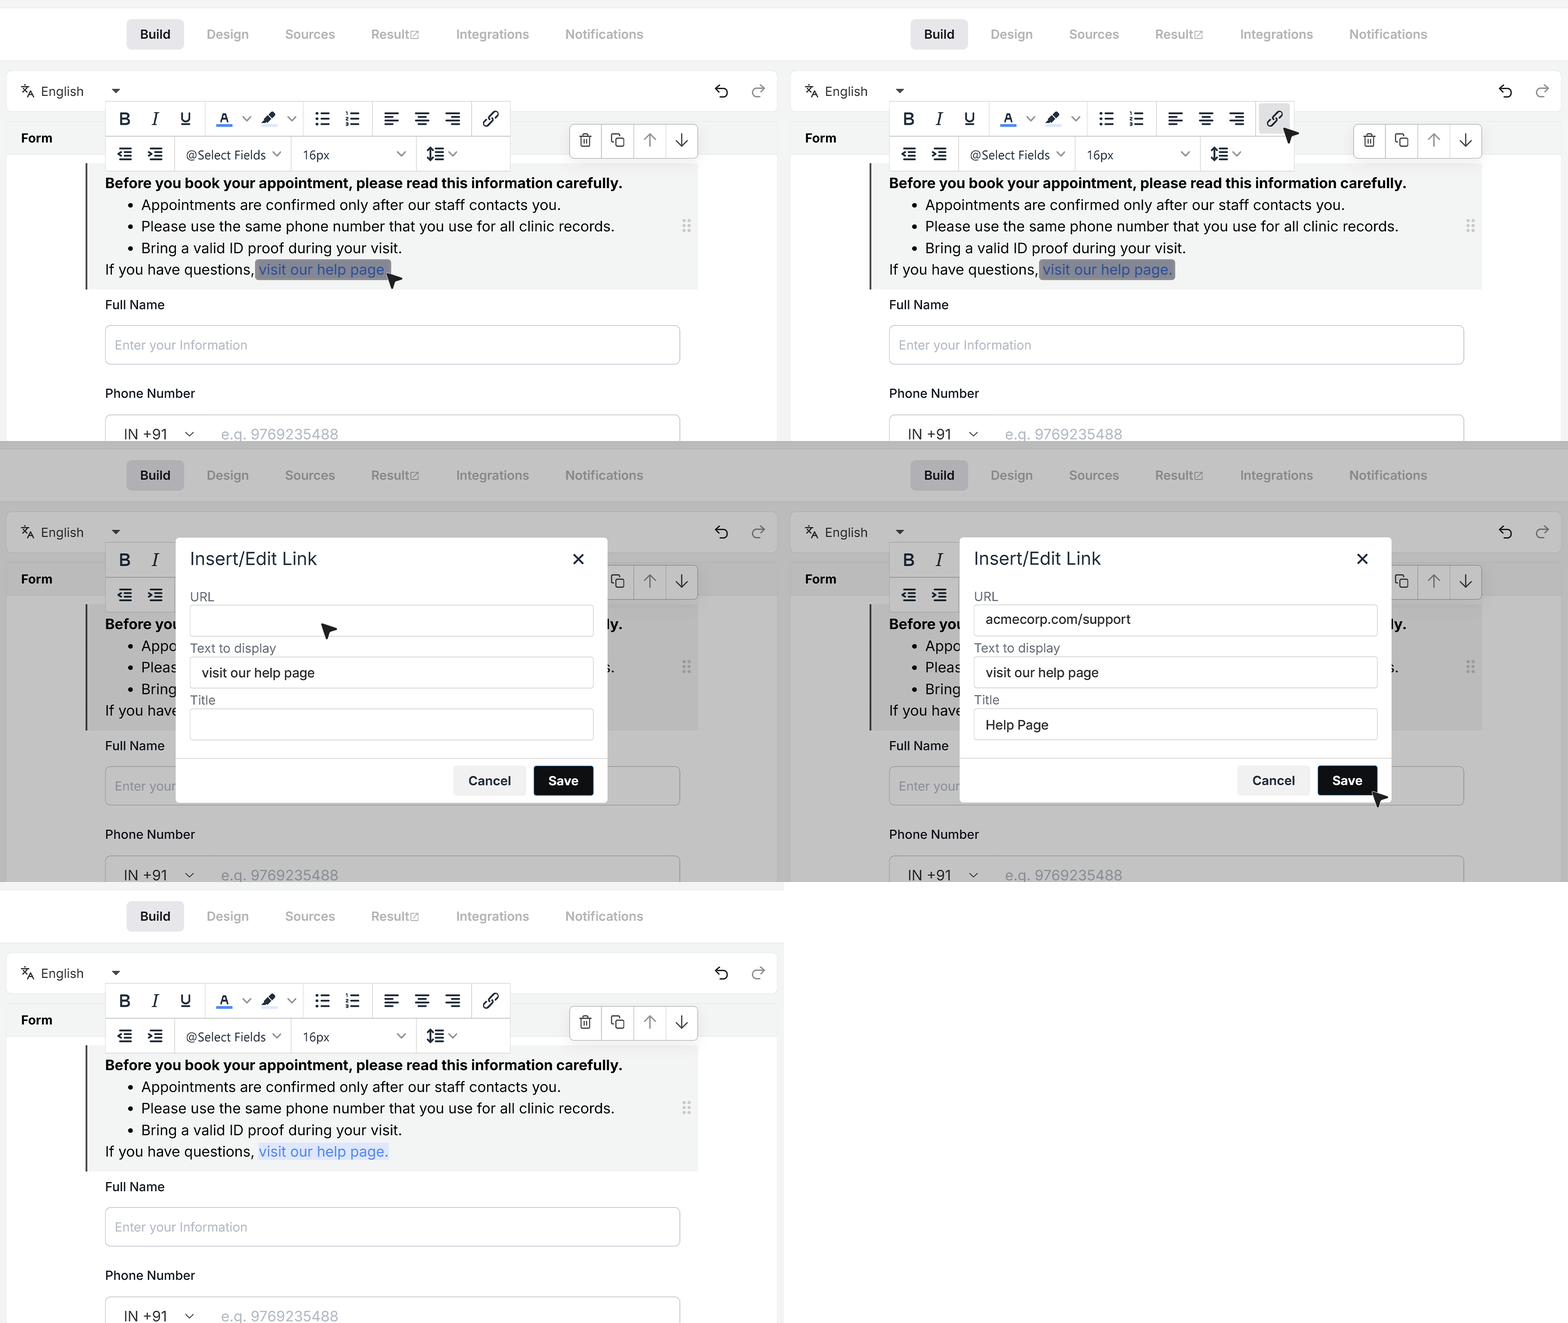
- You can insert a link inside the paragraph. For example, you can select the words “visit our help page” and link them to your support or FAQ page. When users click that text in the live form, it will open the link in a new tab.
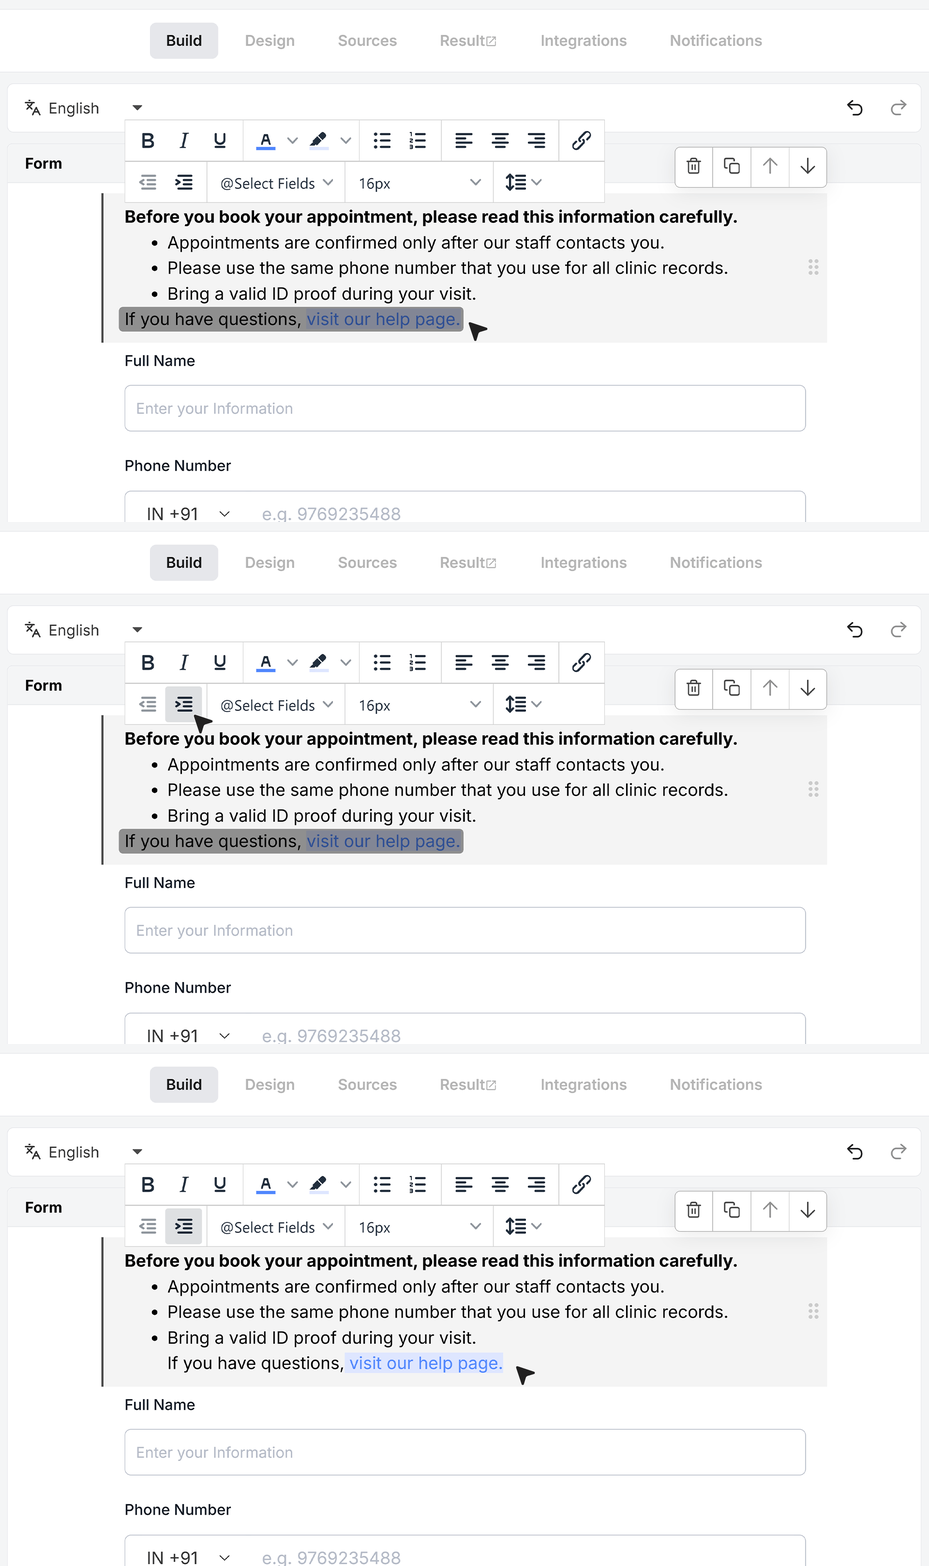
- The indent option lets you shift text inward from the left, which helps create nested or offset lines when needed.
- You can adjust the font size and line height to make the paragraph easier to read. You might reduce the size for less important notes, or increase it for the main line. You can also add more spacing between lines so the instructions feel clear and comfortable, especially on smaller screens.
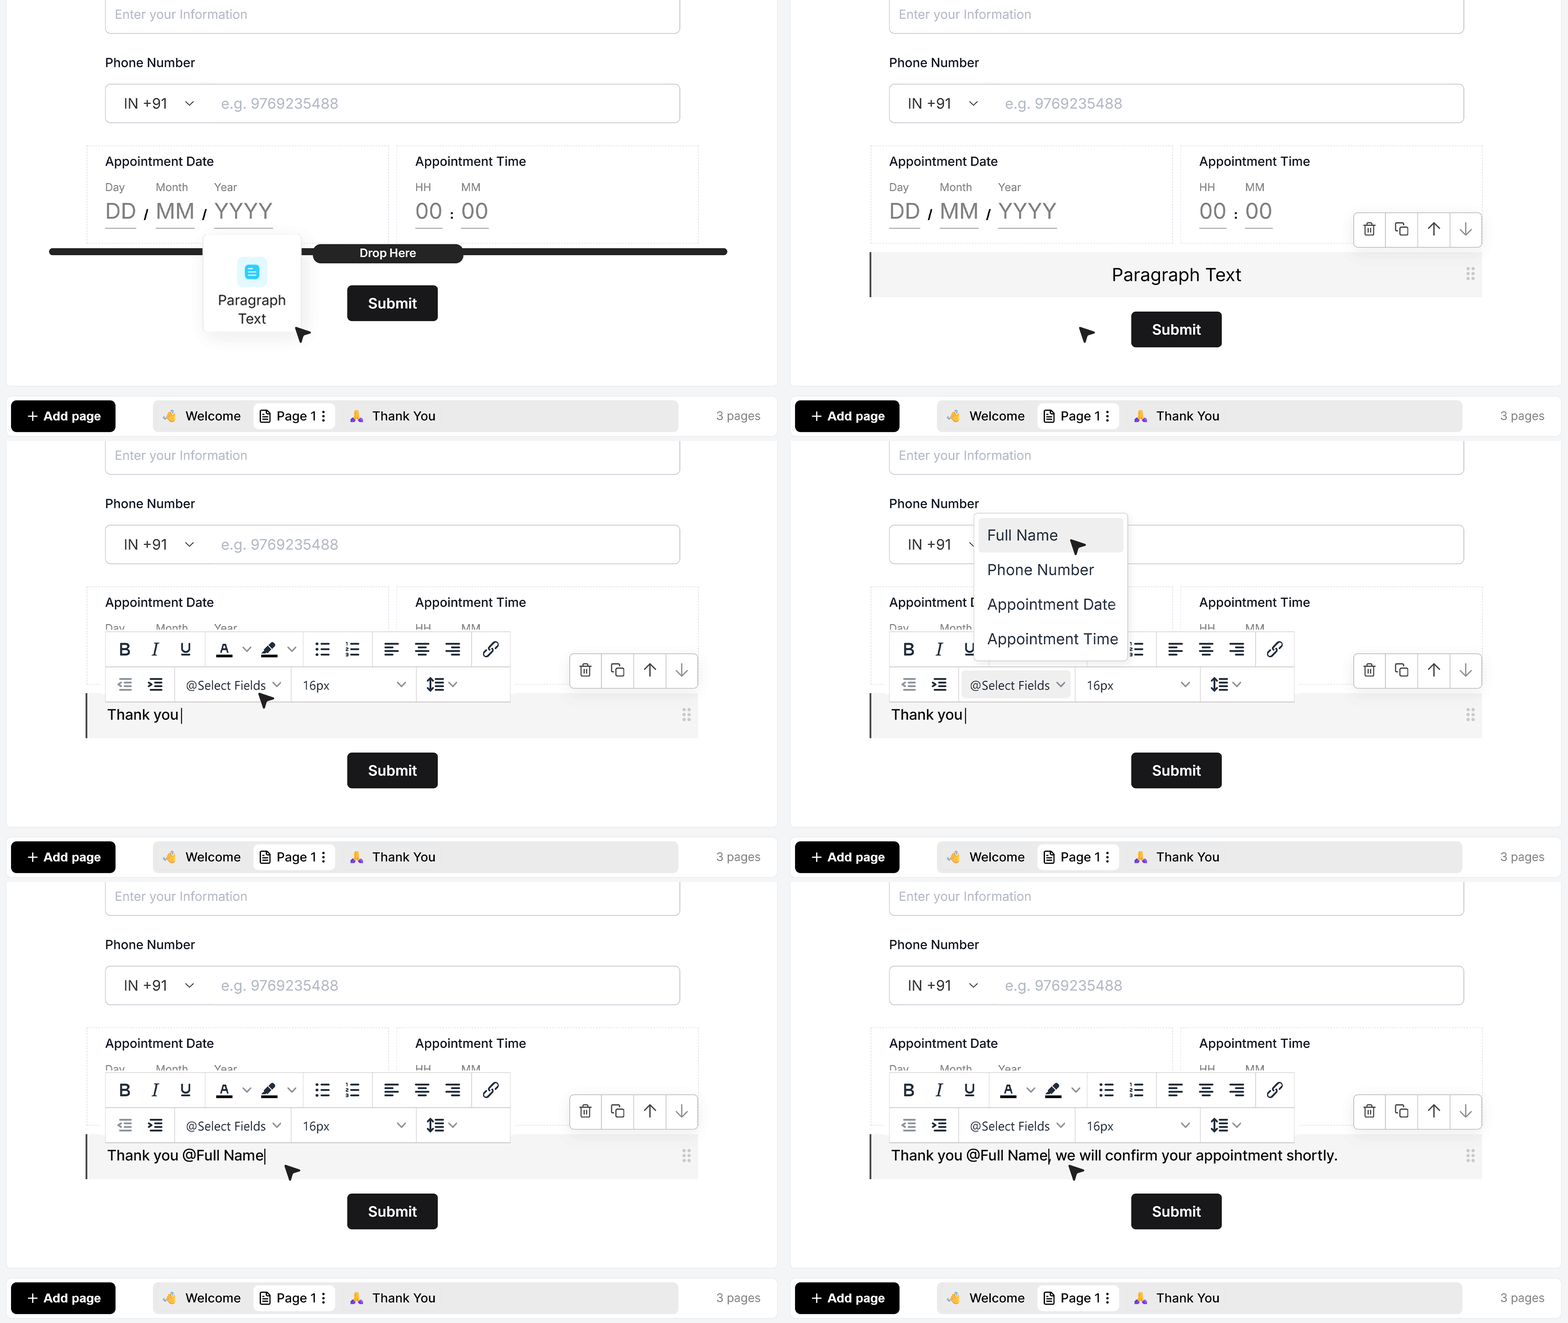
- The Paragraph field can also show values from other fields in the same form using the @select field option.
In the same appointment form, you already have a Name field near the top. Now scroll to the bottom of the form and add another Paragraph field. In this new Paragraph field, start by typing “Thank you ” and then use the @select field option in the toolbar to insert the Name field. After the tag, type the rest of the sentence, for example “, we will confirm your appointment shortly.”
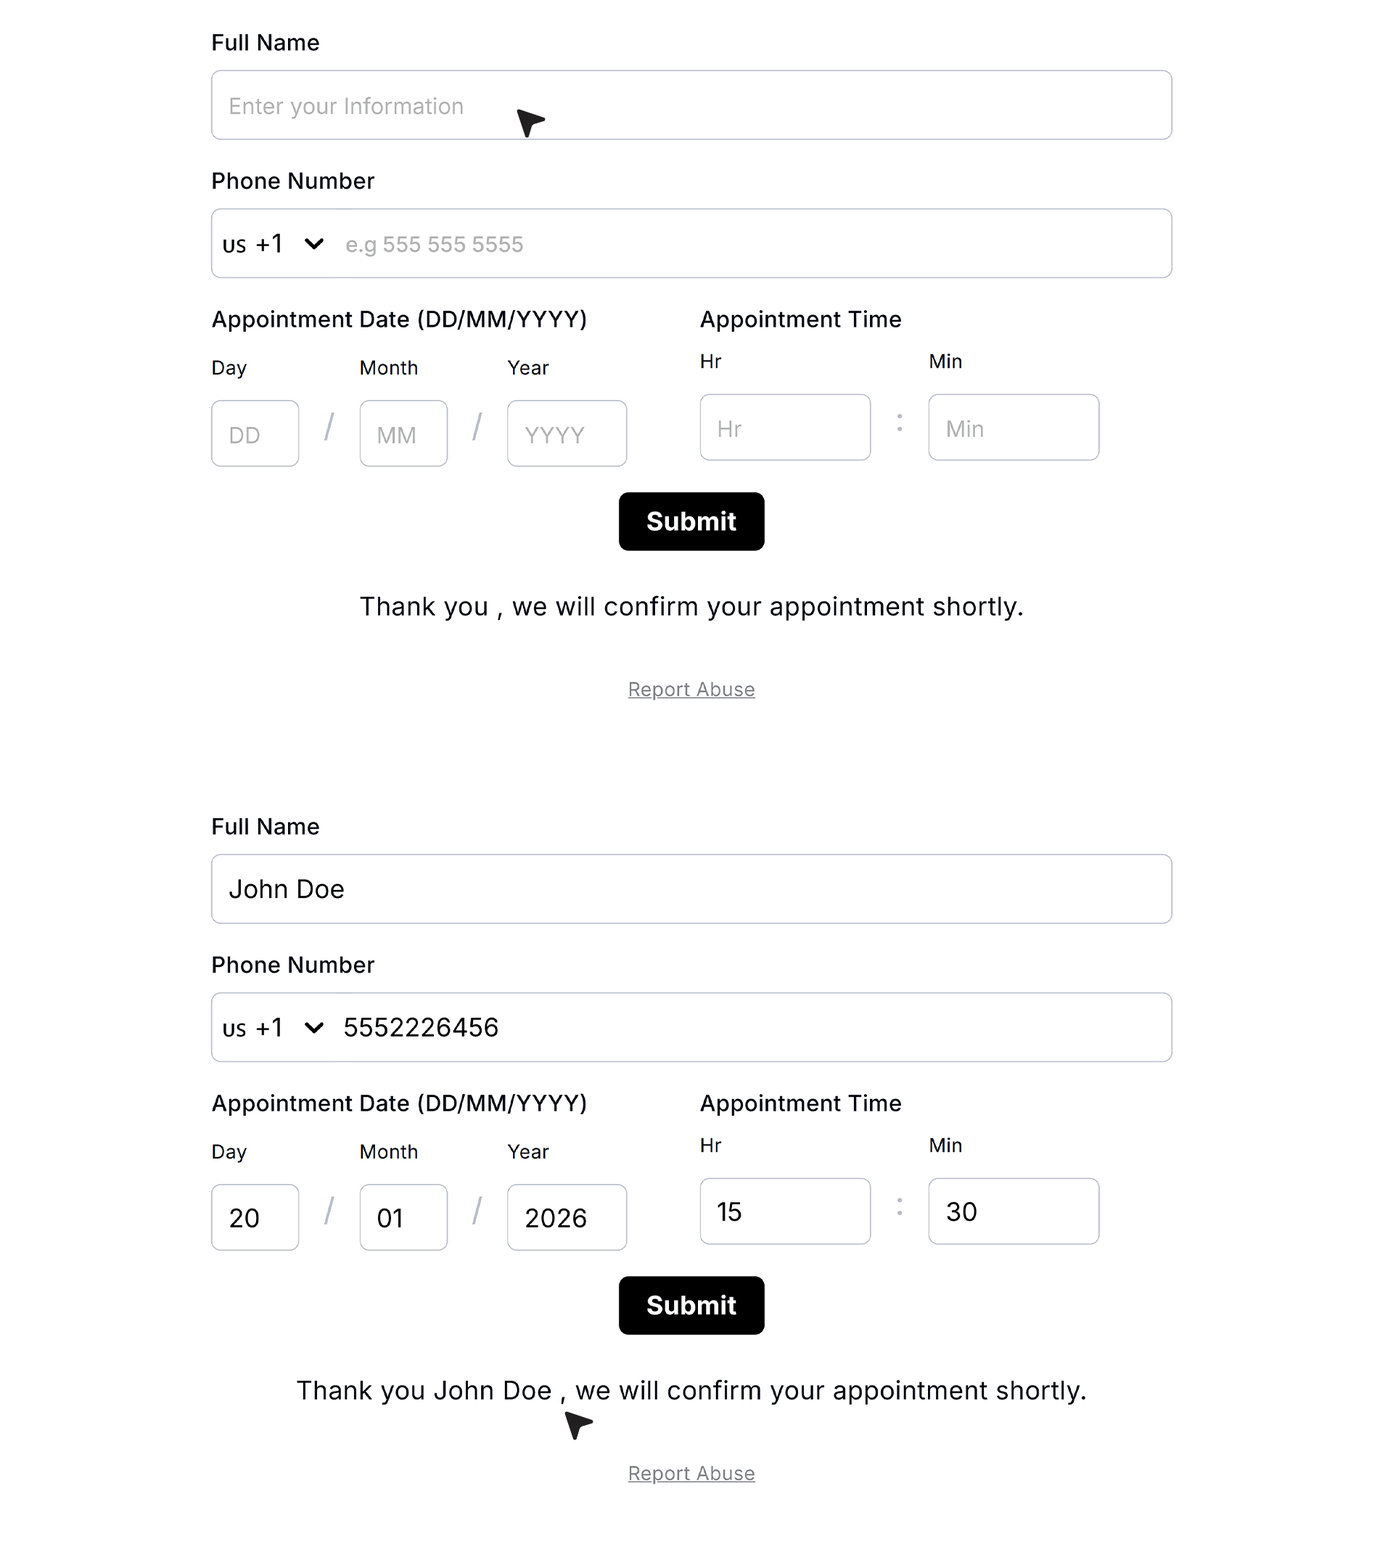
- On the live form, when a user fills in the Name field, this Paragraph field will automatically include that name in the sentence. If the user types “John Doe” in the Name field, the paragraph at the end of the form will show:
Thank you John Doe, we will confirm your appointment shortly.
This helps you add a simple personal touch using the user’s input, without adding any extra logic.
FAQ's
In MakeForms, open your form in the builder, then drag the field from the field list into the form. Click the label to rename it, then set the date format and separator so users enter dates the way you want. If the date must be provided, enable Required Field. If you need to restrict valid dates, enable Limit to date range and set the From and To dates.
MakeForms uses a built-in field with format, separator, default value, and range limits, and this document does not mention adding third-party date picker plugins. If you specifically need third-party date picker libraries, look for builders that support custom HTML and custom JavaScript embeds (that is usually the requirement for plugin-based date pickers).
In MakeForms, the field stores a clean, consistent date value based on the Date Format and Separator you choose. When you export responses (for example, to CSV), the date values will come out in that same format, so pick a format your reporting tools can parse reliably (YYYY-MM-DD is often the easiest).
In MakeForms, the field is a date-only field with formatting and validation options, and there is no timezone setting described for it in the field settings. If timezone matters to your logic, handle timezone at the workflow level (for example, calculate the correct date in your backend, then prefill the field using Autofill from the Query Parameter).
MakeForms input is numeric (day, month, year) and controlled by Date Format and Separator, so the field itself is not language-heavy. For the user-facing language, set the field label and helper text in the user’s language. This document does not list a setting for month-name language or locale-specific text beyond format and separator.
MakeForms does not expose a timezone-aware mode in its settings in this document. For global flows where the “correct date” depends on timezone, a practical approach is to compute the date per user (based on their timezone) and prefill it via query parameter, then keep a fixed Date Range From/To to enforce validity.
Use the Date Range limit. Turn on Limit to date range, then set Date Range To to the latest allowed birth date (for example, “today minus 18 years” for 18+), and set Date Range From to an earlier cutoff (for example, “today minus 120 years”). If the user tries to enter a date outside your allowed range, the field shows an error and will not accept it.