File Upload Field
The File Upload Field in MakeForms lets you collect documents, images, and other files directly through your form. It’s often used for PDFs, images, resumes, IDs, and any other upload requirement.
Open your form in the builder and add a File Upload field from the fields list. Once it is added, click on the field to see all its settings in the right-hand panel.
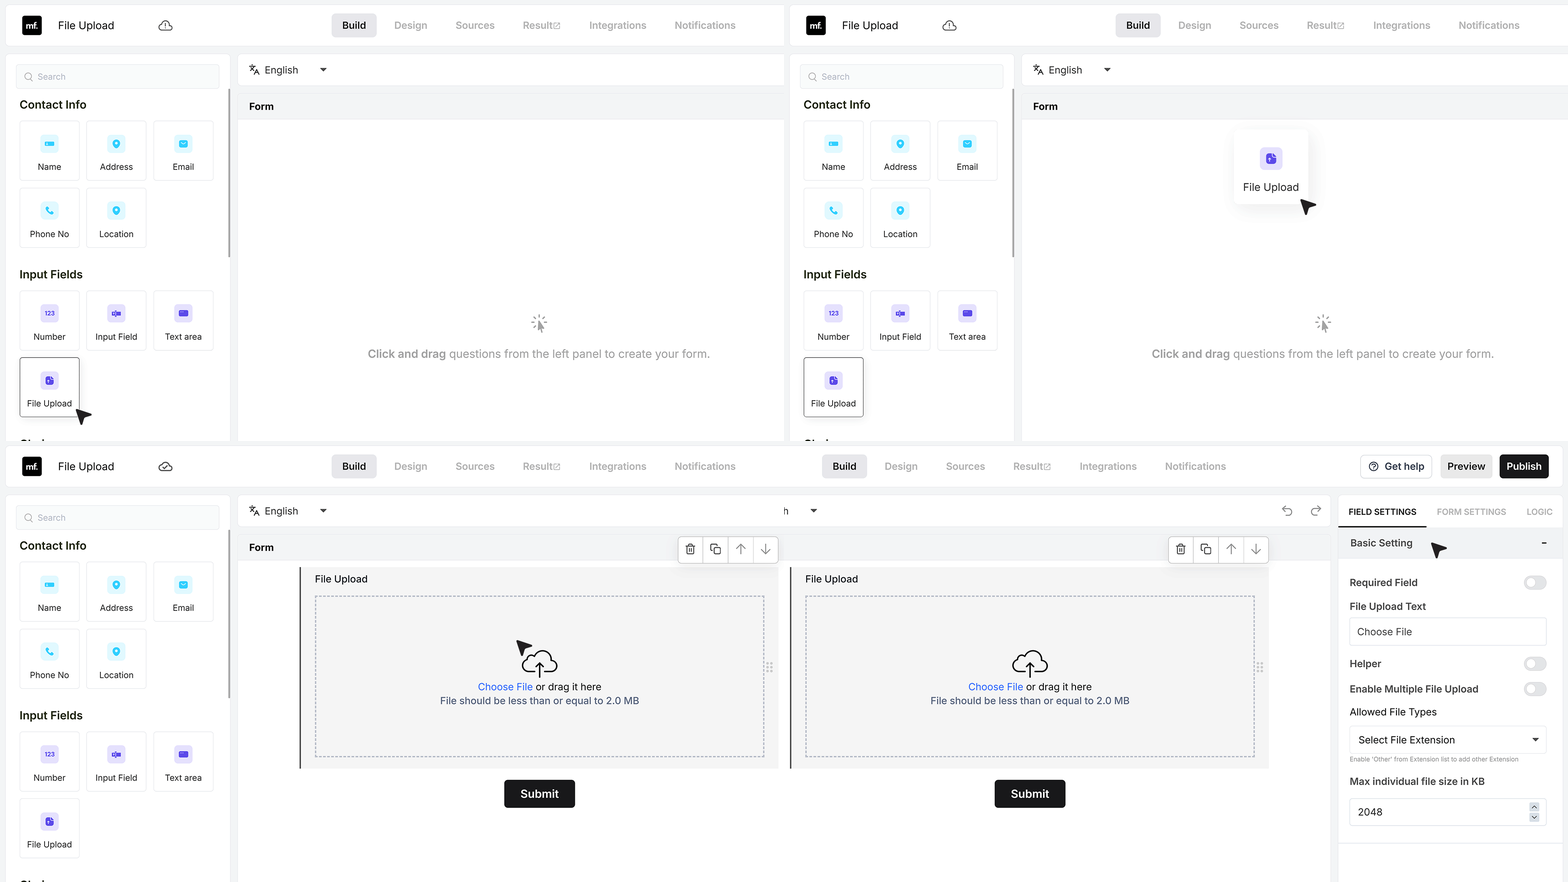
Basic Settings
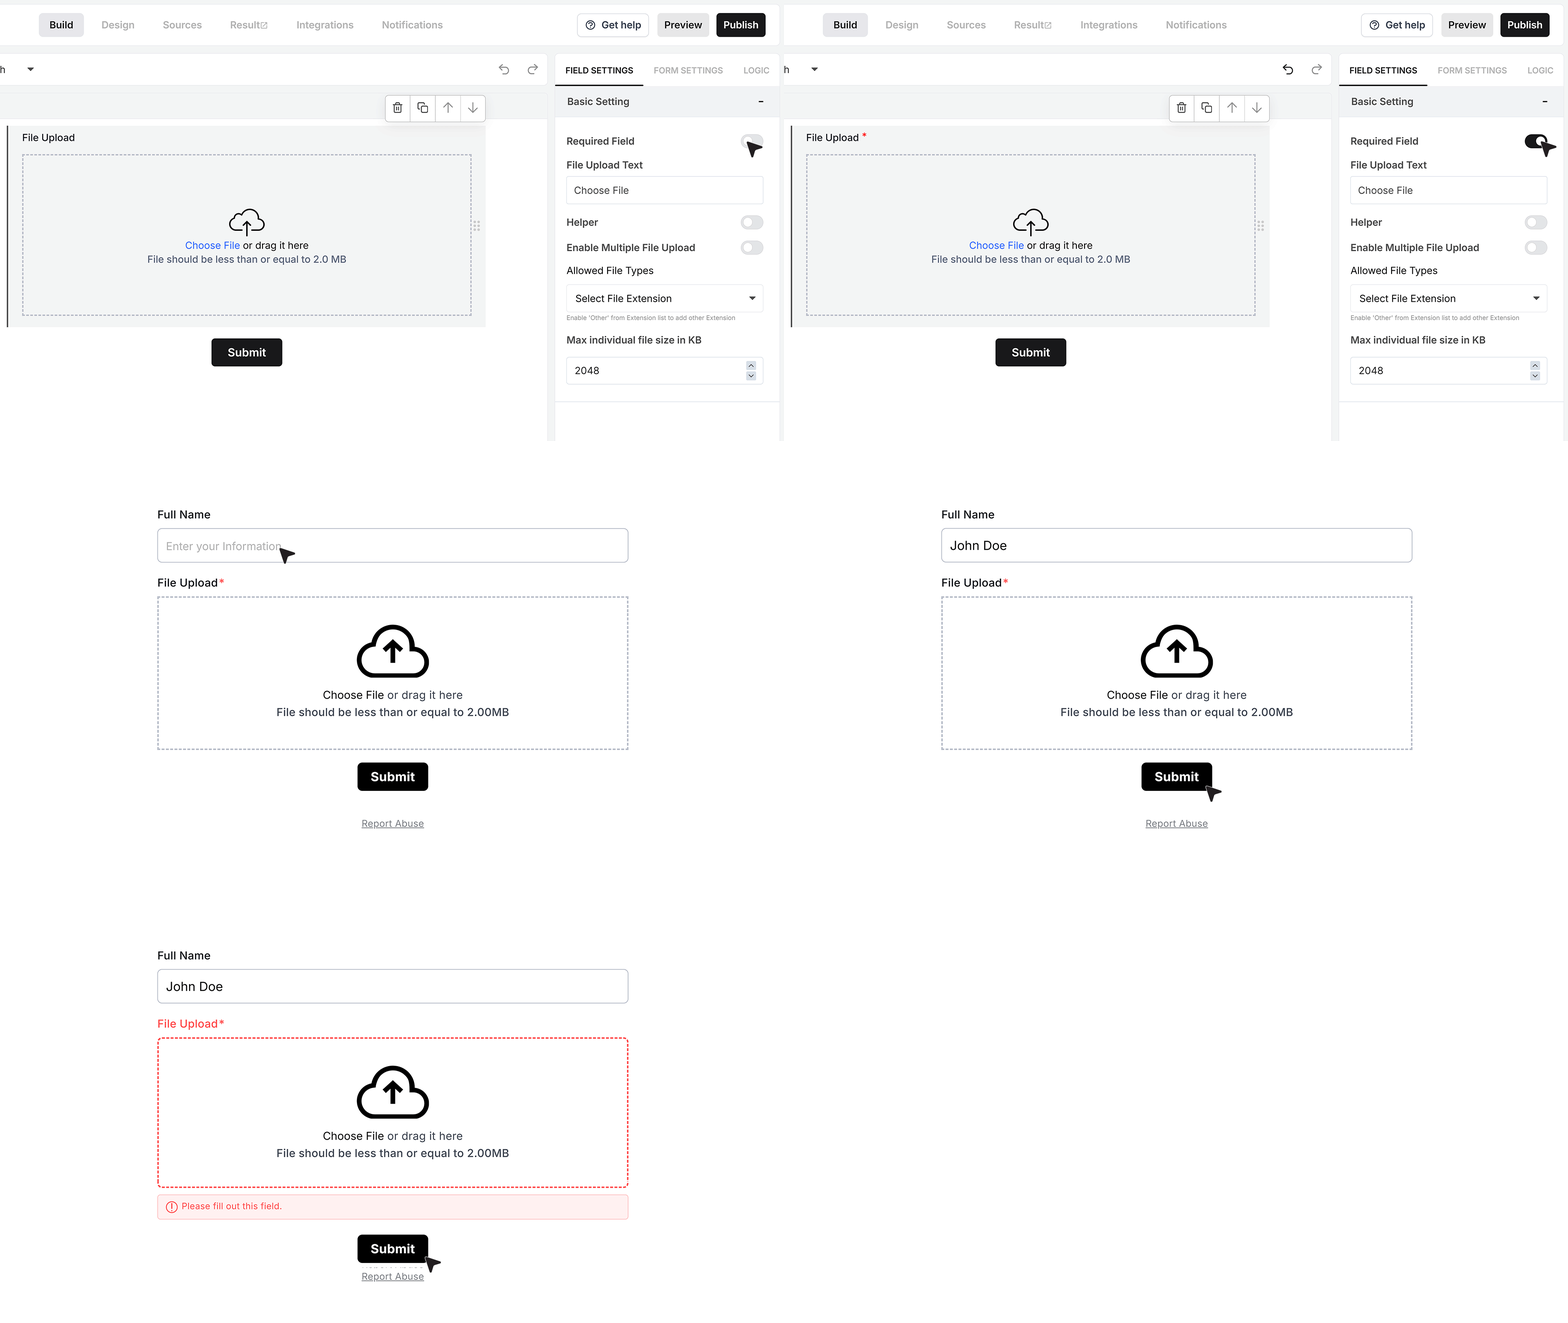
Required Field
At the top, you will see the Required Field toggle.If you turn this on, the File Upload field becomes mandatory. Users must upload at least one valid file before they can submit the form. If they try to submit without a file, MakeForms will show an error and block the submission until they upload a file.
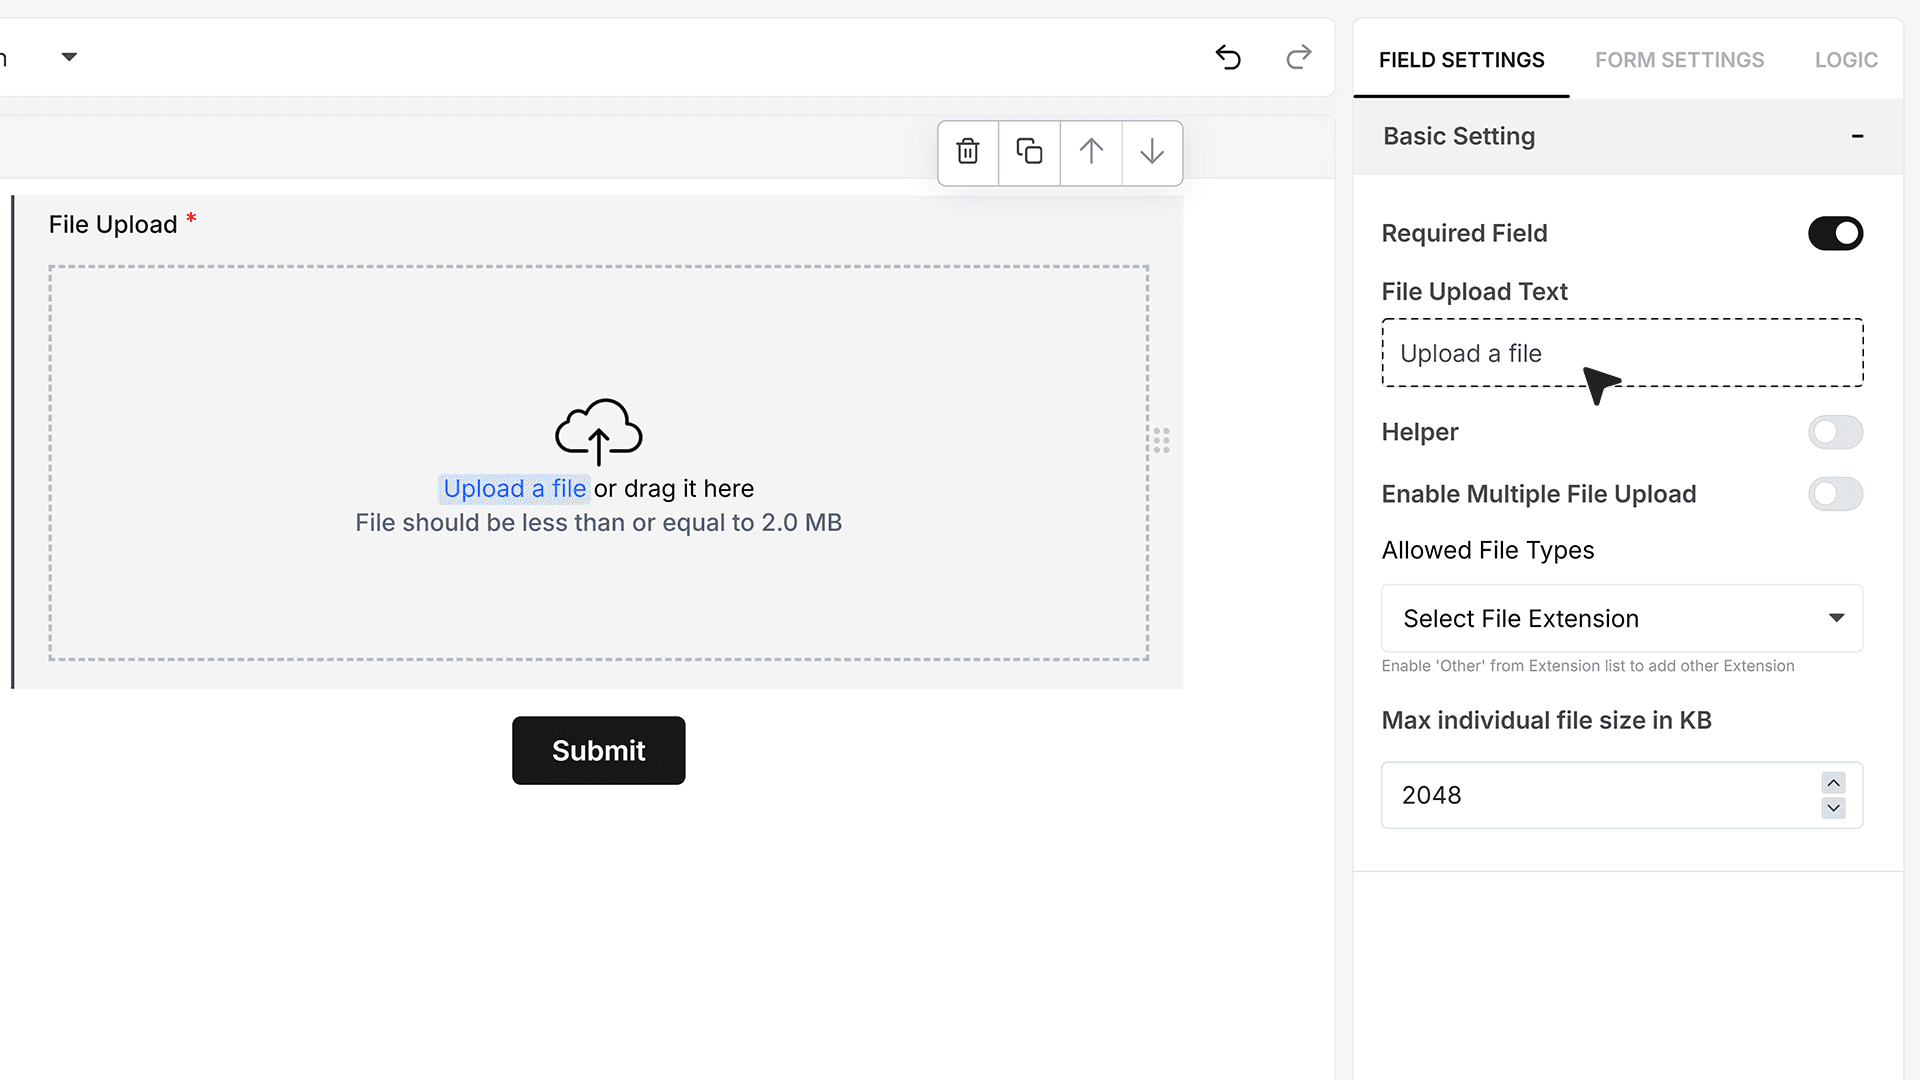
File Upload Text
This setting controls the clickable blue text shown beneath the upload icon. The default wording usually says something like Choose files, but you can rename it to match your form’s purpose, such as Upload a file or Upload ID proof. This helps guide the user more clearly.
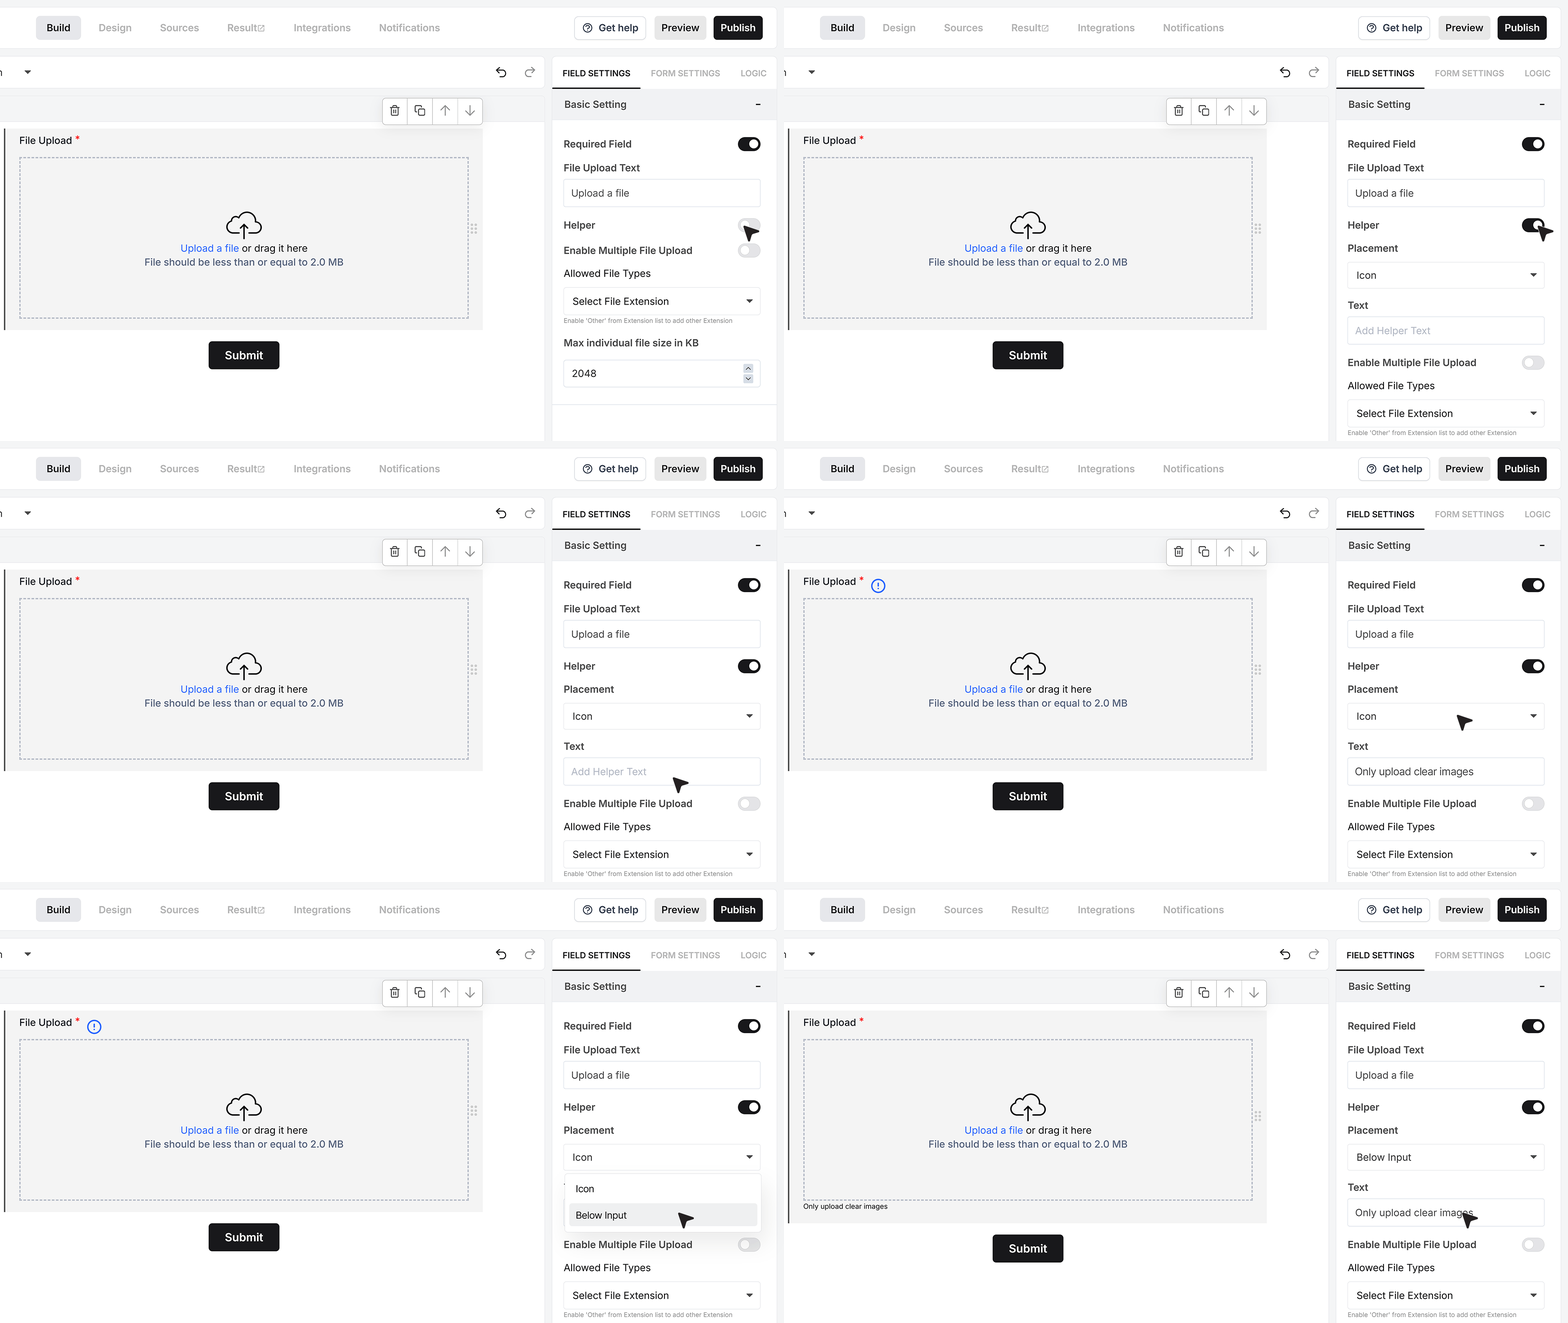
Helper Text
Helper Text allows you to display short guidance for your users. After enabling it, you can type a message such as Only upload clear images. You can also choose whether this note should appear as a small info icon next to the field or as a line of text directly below the upload box.
Multiple File Upload
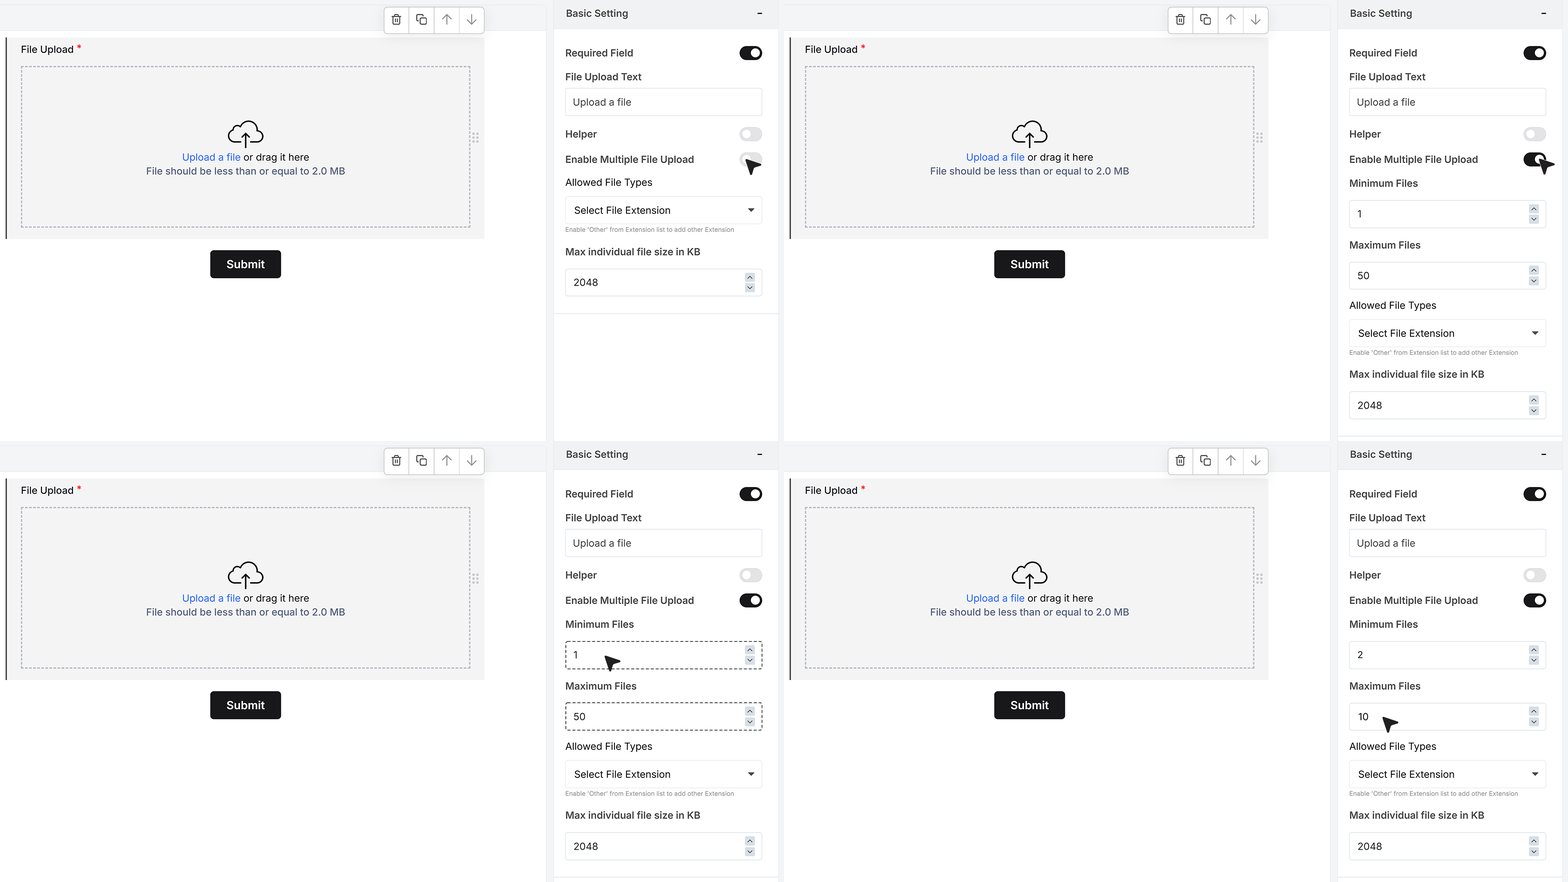
If your form needs to accept more than one file at a time, you can enable the Multiple File Upload option. Once activated, the field expands with two additional controls: one defines the minimum number of files the user must upload, and the other specifies the maximum number they are allowed to upload. This ensures your form accepts the exact range of files required for your use case.
Allowed File Types
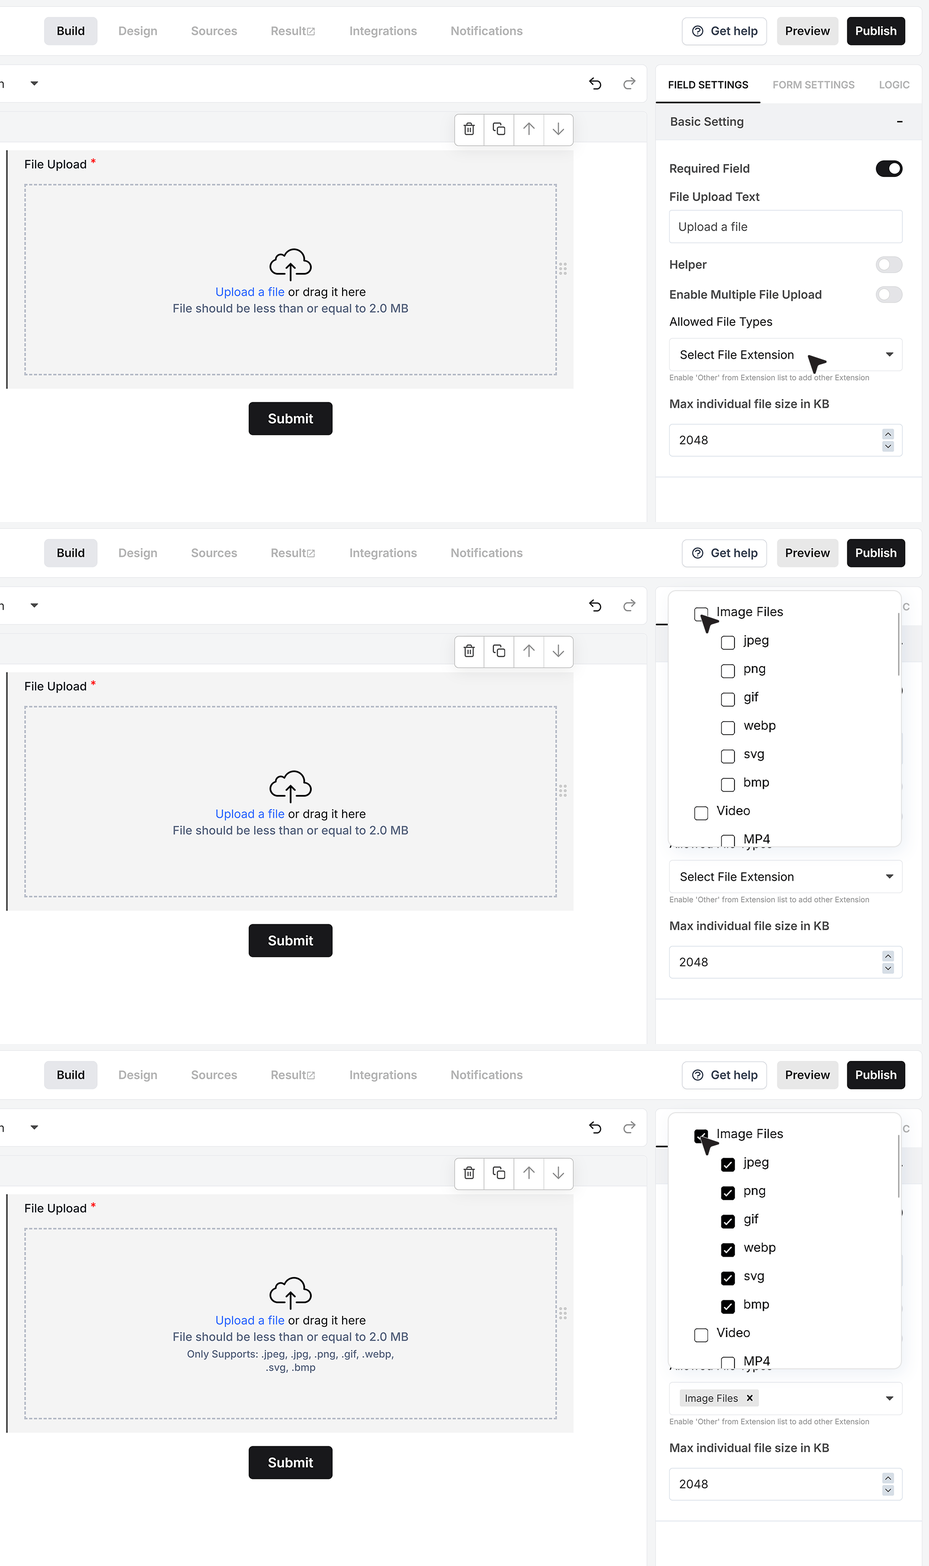
This section determines the types of files your users are permitted to upload. MakeForms offers predefined categories such as images, videos, audio, documents, spreadsheets, and presentations. You can enable a full category, choose specific extensions from the list, or manually enter a custom extension if you need something outside the preset options.
Max individual file size
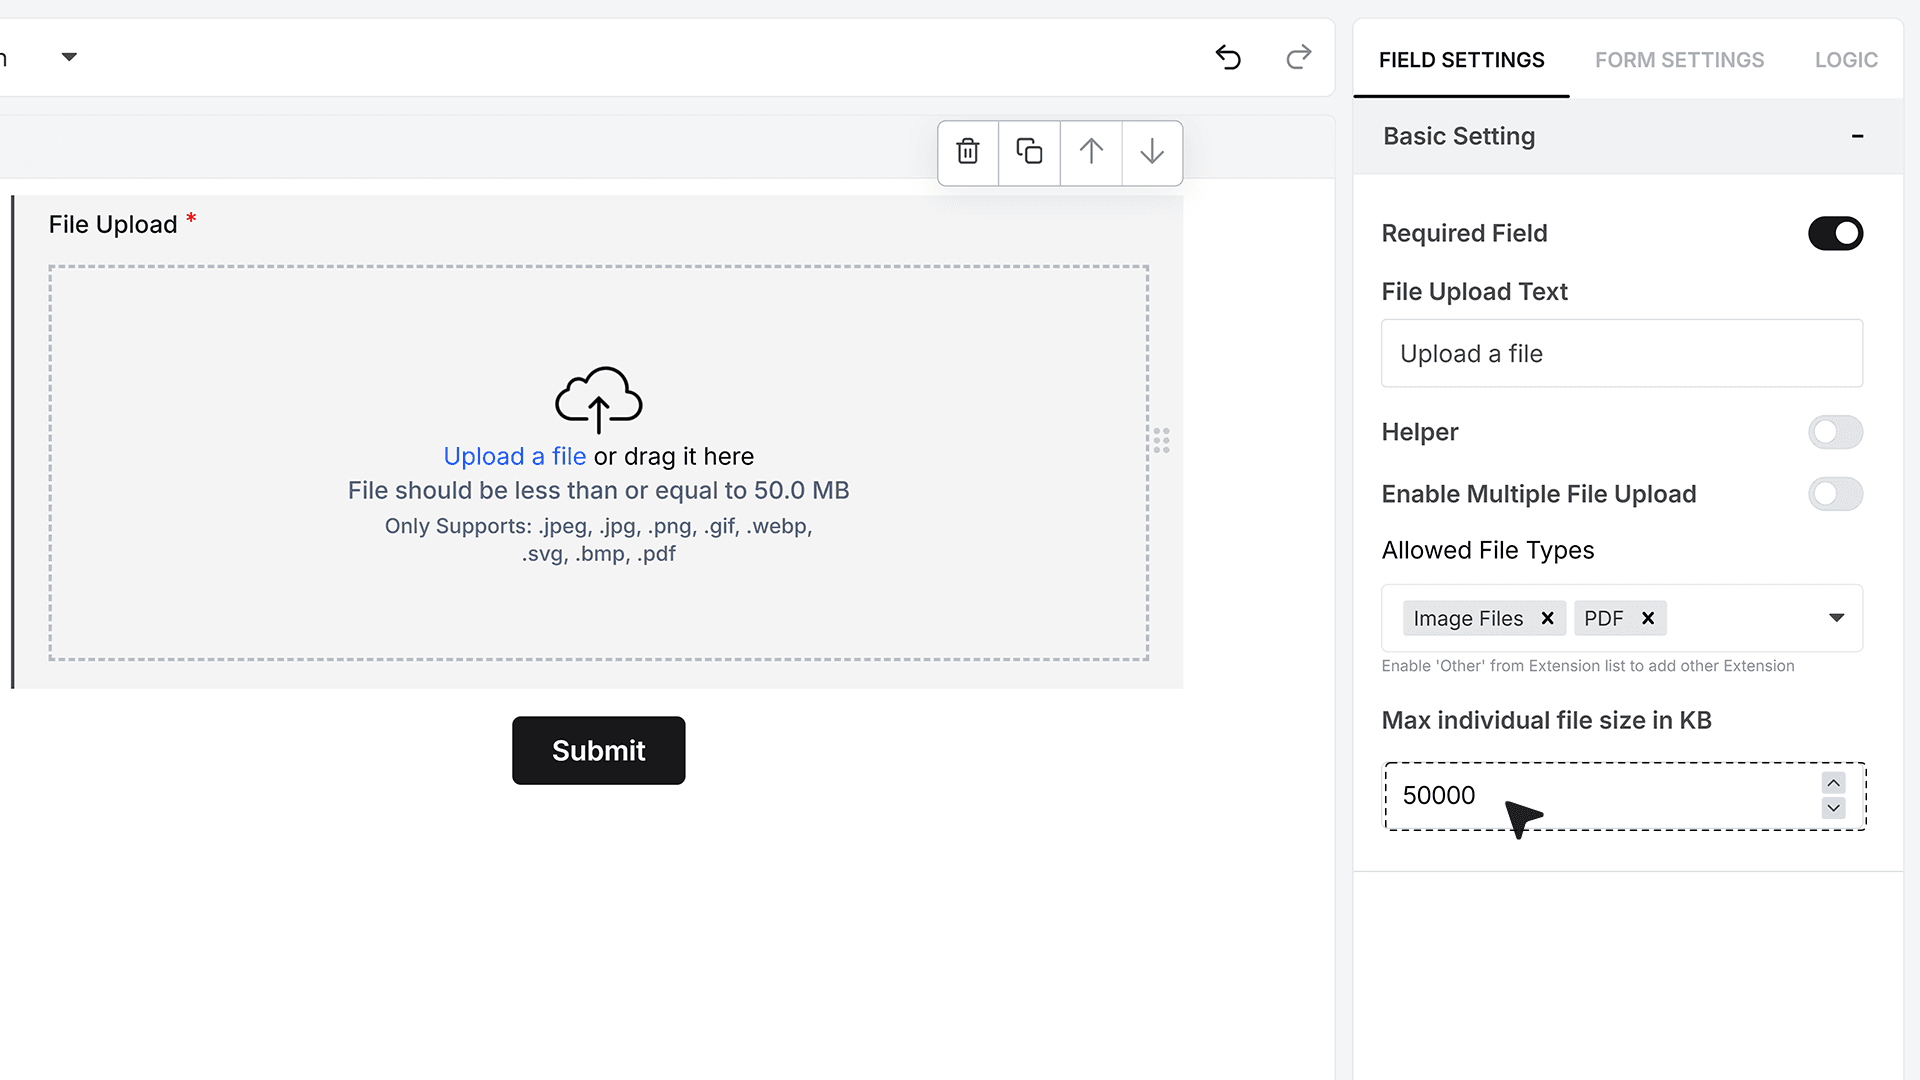
The Maximum Individual File Size option sets a limit for how large each uploaded file can be, and this value is entered in kilobytes. You may choose a small limit like 500 KB or a larger one like 50 MB. If a file exceeds the limit you’ve defined, MakeForms automatically blocks it and displays an error message to the user.
Viewing Uploaded Files
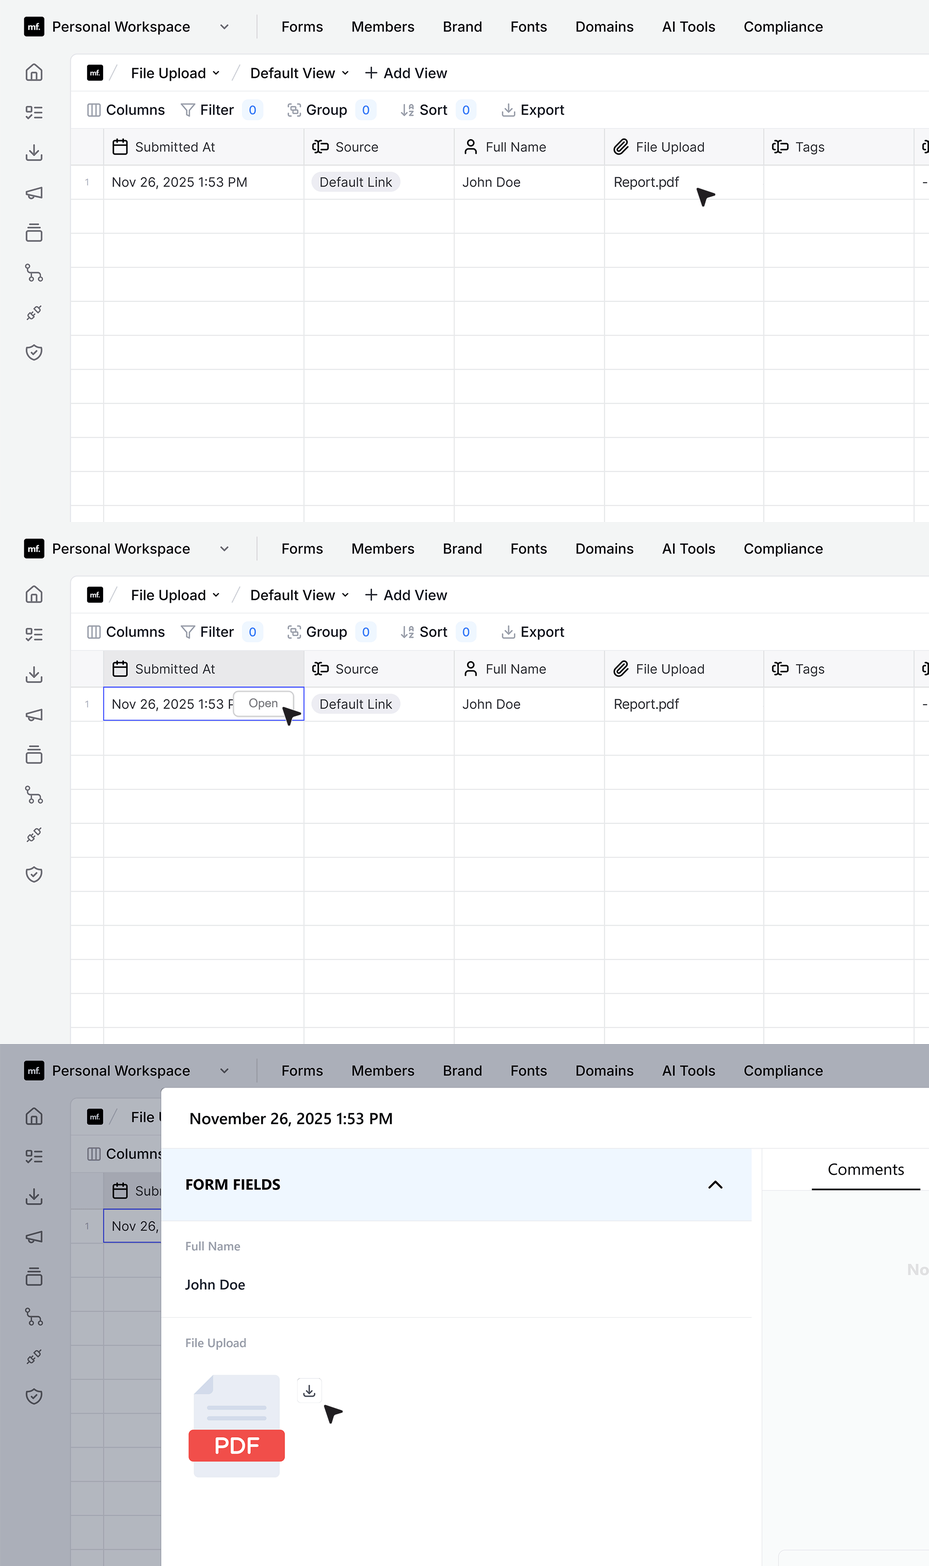
After the form is submitted, all uploaded files are stored with the response. You can access them in the Responses section, where each submission displays the file names along with options to download the files whenever needed.
FAQ's
In MakeForms, open your form in the builder, then add the upload field from the fields list. After you place it in the form, click the field to open its settings in the right-side panel.
MakeForms includes a native upload field with controls for required uploads, allowed file types, per-file size limits, and multi-file rules.
Other common options with built-in upload support include Jotform, Formstack, Cognito Forms, Wufoo, and Typeform (plan limits vary by vendor).
In the upload field settings, set the Maximum Individual File Size value. MakeForms expects this value in kilobytes. If a user selects a file larger than your limit, MakeForms blocks the upload and shows an error.
In MakeForms, you can change the clickable upload text shown under the upload icon. Update the Upload Text setting to match your use case, for example “Upload a file” or “Upload ID proof”.
Visual styling (colors, borders) depends on your form theme and design settings and is not covered in this field guide.
Use Allowed File Types in the upload field settings. In MakeForms, you can allow full categories (images, videos, audio, documents, spreadsheets, presentations), pick specific extensions, or enter a custom extension.
Some form builders handle large uploads by sending files directly to object storage (S3-style) using a direct upload flow, which reduces timeout risk. This MakeForms field guide does not state maximum file size limits or the upload method, so the safe approach is to set realistic per-file limits, test on slow networks, and use a storage-first upload setup if your use case involves very large files. You can still enforce per-file size limits in MakeForms using the Maximum Individual File Size setting.
Any vendor can support GDPR needs if they provide a DPA, clear data handling terms, access controls, and options for retention and deletion. This MakeForms guide confirms that uploaded files are stored with each submission and can be accessed in Responses.
For GDPR decisions, you should check the vendor’s compliance documentation and DPA, because GDPR compliance is not confirmed by field settings alone.
Uploaded files are stored with the submission and can be accessed in the Responses section.
Automation usually works by sending the submission to an integration or webhook, then copying the uploaded file from the submission into Google Drive, Dropbox, or S3. This specific automation flow is not described in the PDF, so the exact steps depend on which integration options are enabled in your MakeForms workspace.
Create the upload field first, then use field logic to show or hide it based on answers to earlier questions (for example, show “Upload ID proof” only when “ID type” is selected). The PDF focuses on upload field settings and does not document the full logic setup, but conditional display is typically configured from the field’s logic settings in the builder.
The PDF covers restriction controls, not malware scanning. In MakeForms, start by restricting allowed file types and setting a maximum individual file size to reduce risk.
For stronger protection, treat all uploads as untrusted, store them privately, and run a malware scan after upload (for example, scan files in your storage or processing step) before any internal user downloads or uses them.
Yes. Turn on multiple uploads, then set the minimum number of files required and the maximum number allowed. This forces submissions to stay within the range you set.