Name Field
The Name Field in MakeForms lets you collect a user’s name in a single box or split format. You can configure its layout, validation, placeholder, helper text, and advanced settings like autofill, default value, and data sensitivity..
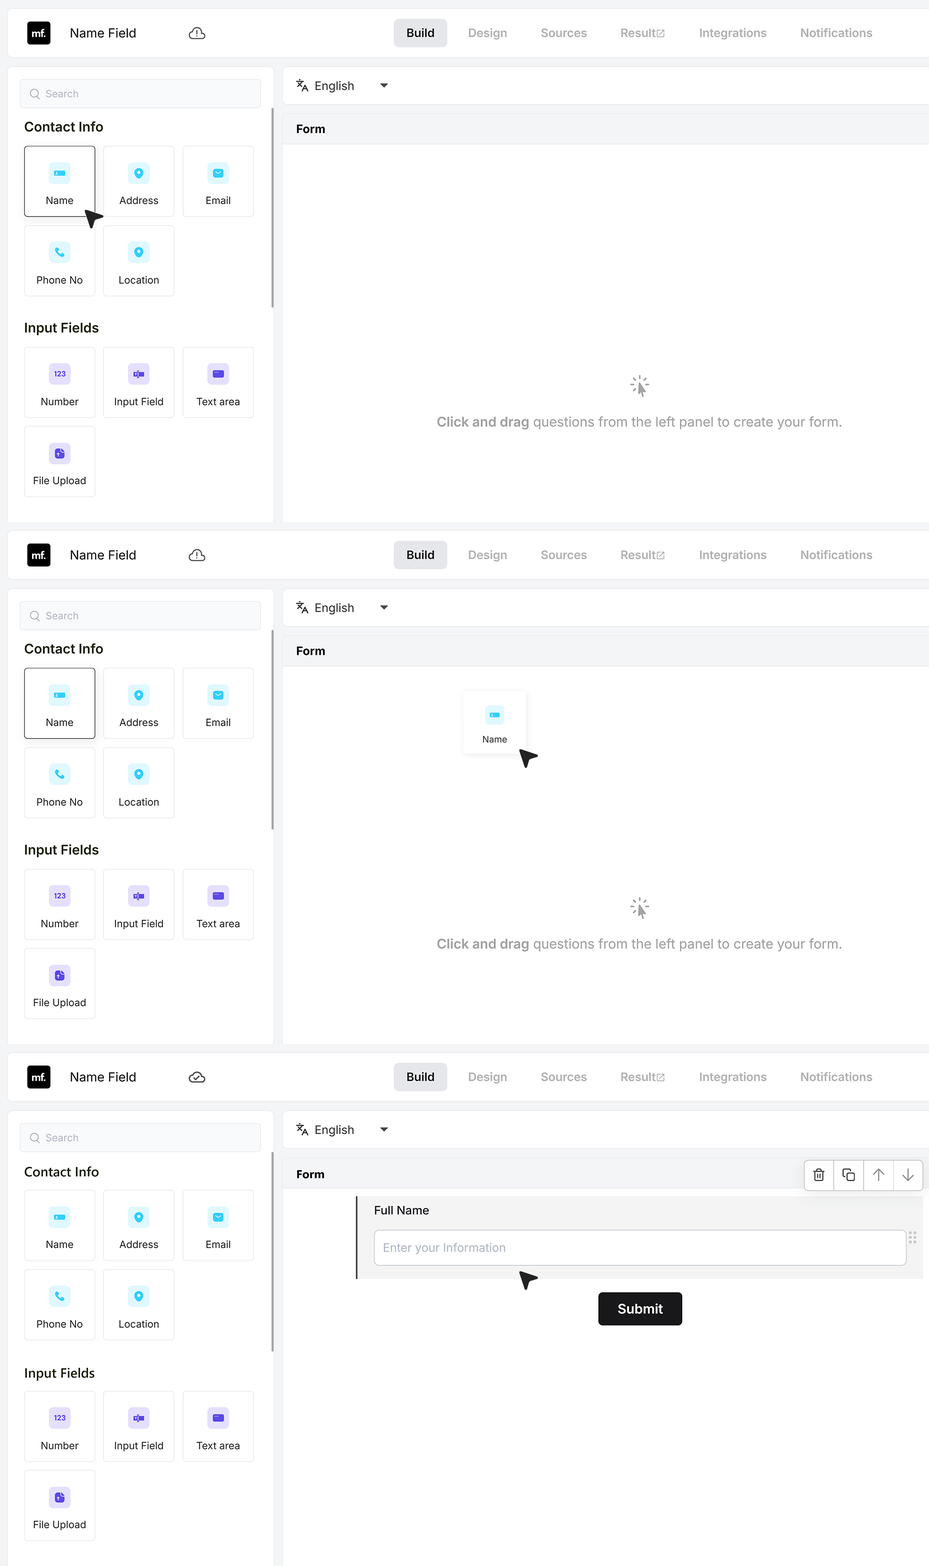
To get started, add a Name field to your form. You can drag it from the field list or click to insert it.
Basic Settings
Required Field
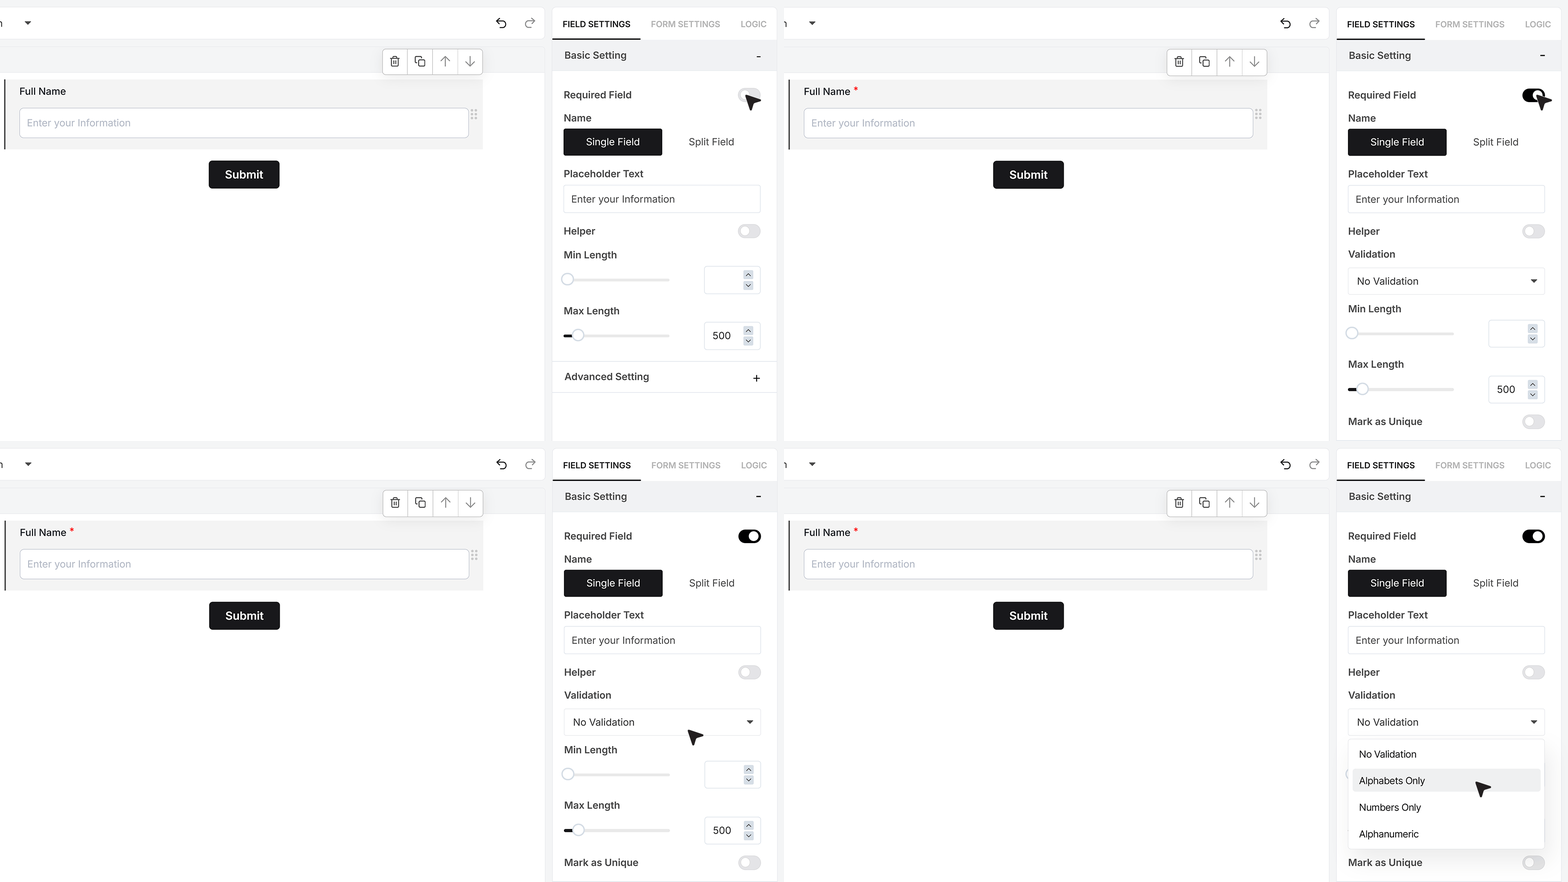
At the top of the settings panel, you’ll see a toggle for Required Field. When enabled, a Validation dropdown appears below it. You can choose the input type you want to allow — Alphabets, Numeric, or Alphanumeric. If you turn off the toggle, no validation will apply to this field.
Mark as Unique Field
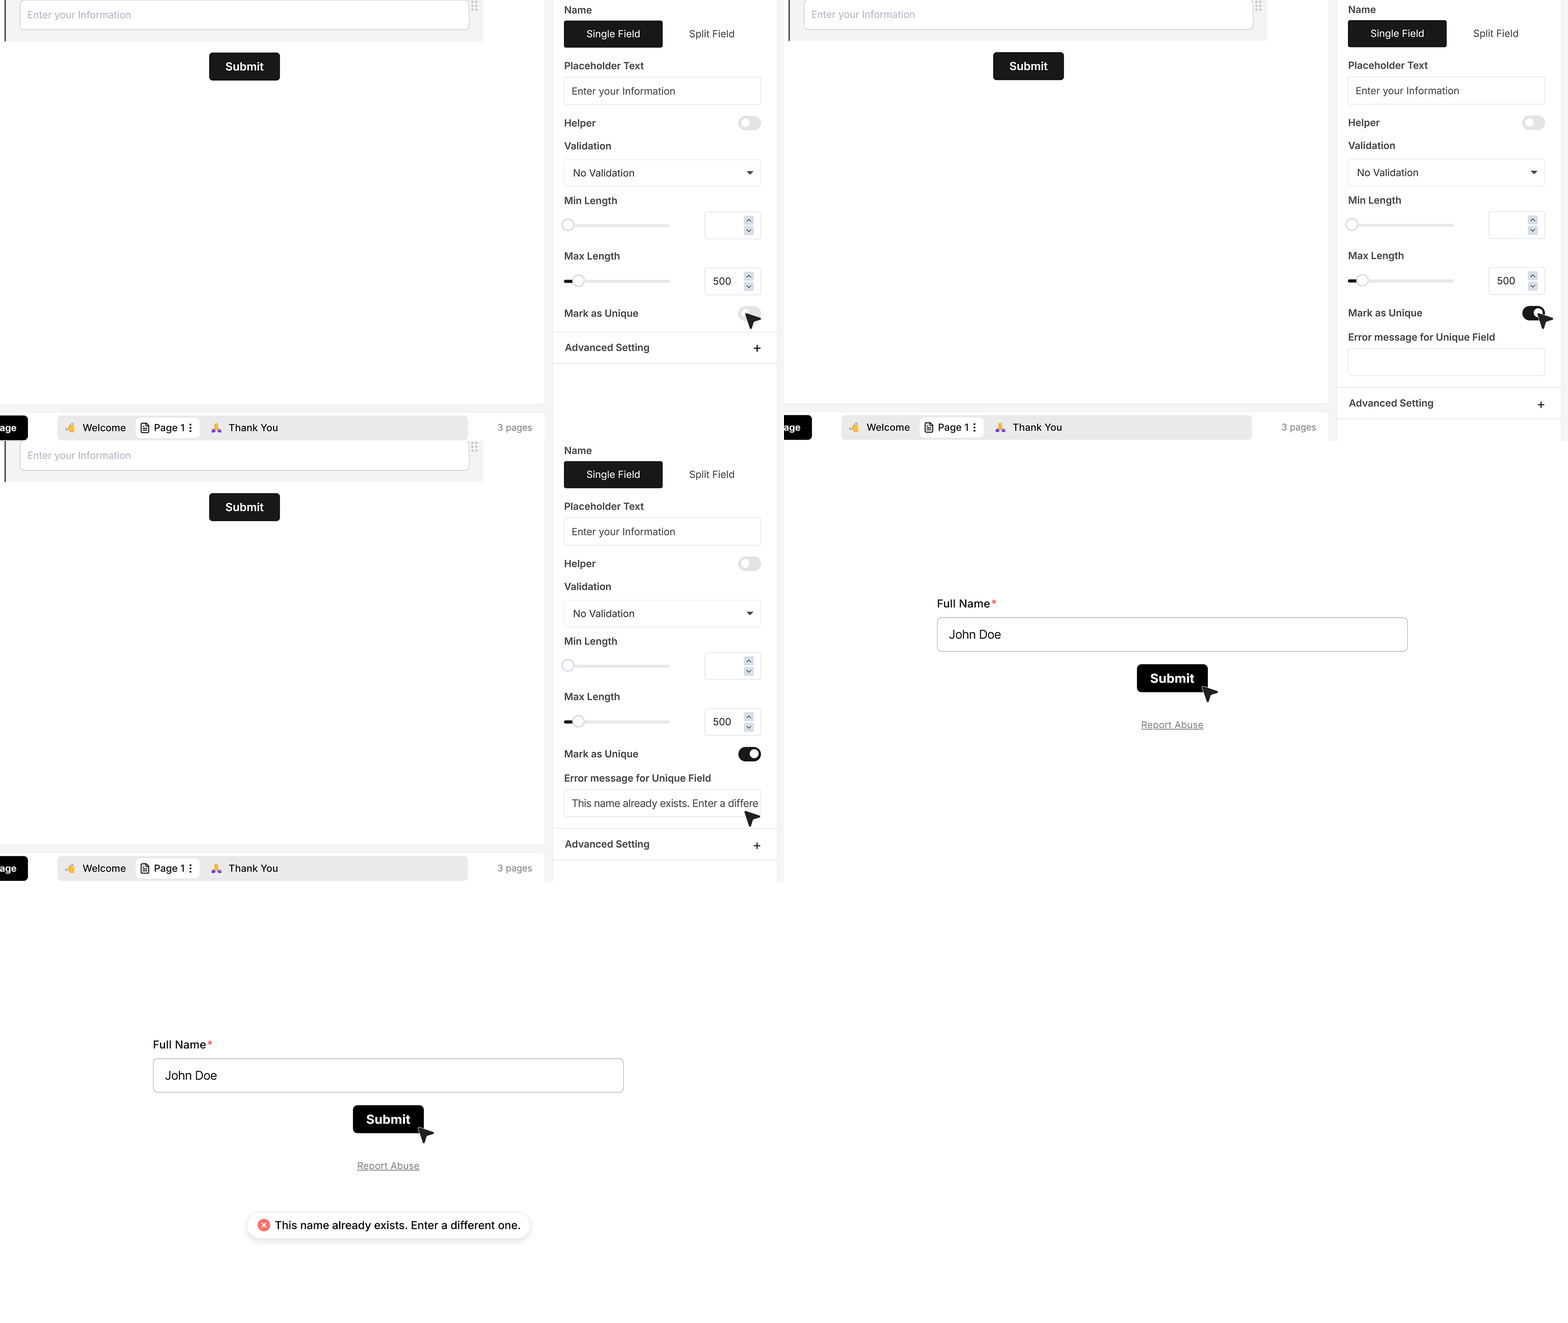
You’ll also find the Mark as Unique Field option — available only in the single field layout and visible when the Required Field toggle is turned on.
Turn it on to make sure each submission has a distinct name.
Once enabled, a box labeled Error Message for Unique Field will appear — here, you can write the message shown when someone enters a duplicate name.
When a user tries to submit a name that already exists in your responses, the message will appear, preventing duplicate entries.
Single or Split Field
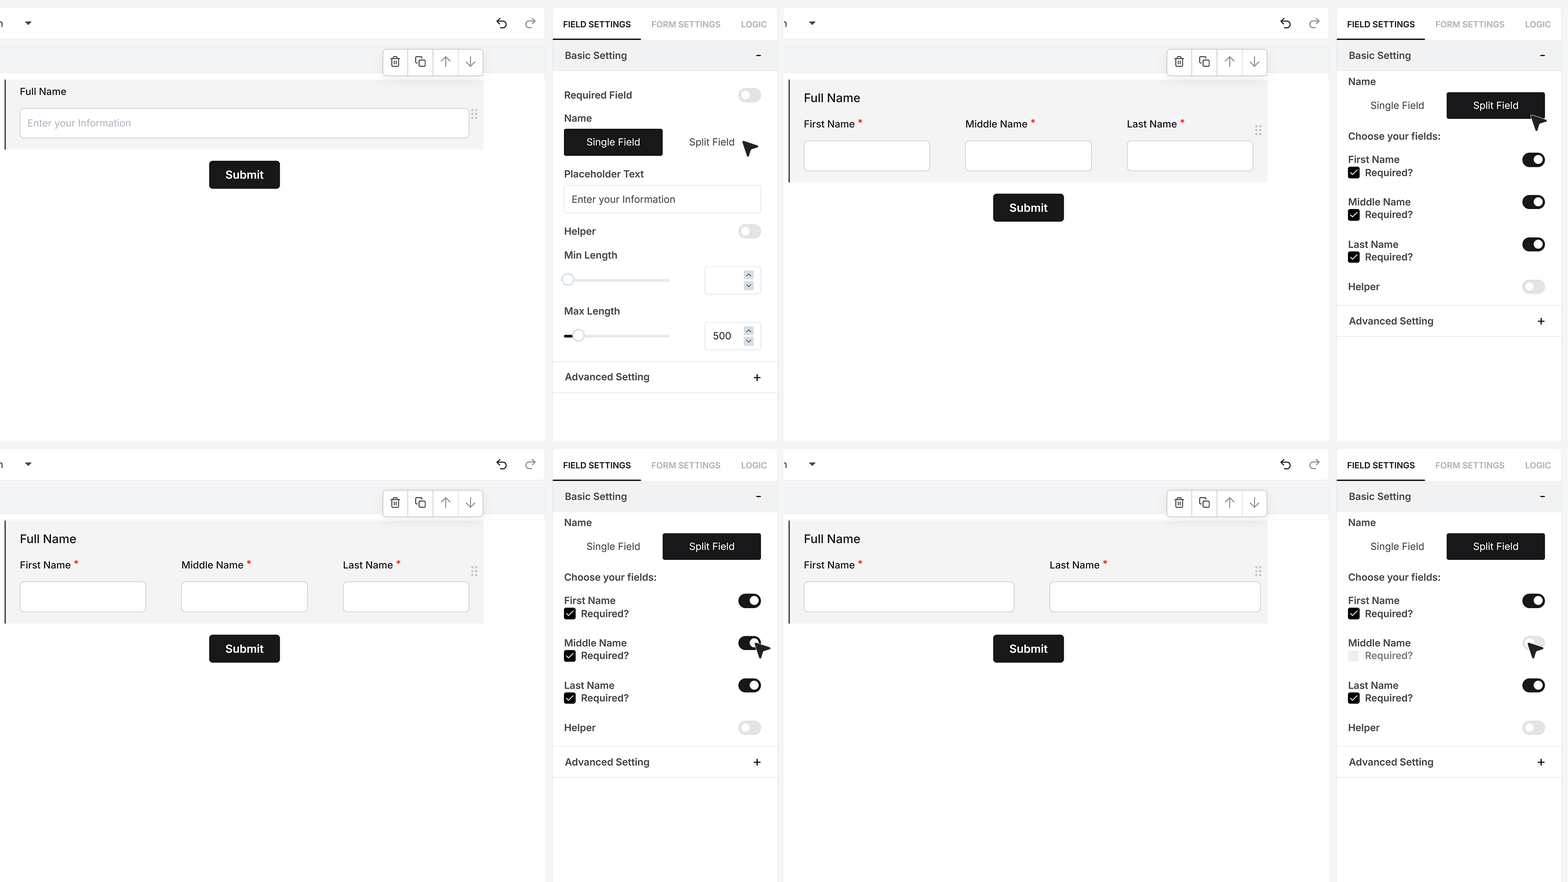
By default, the Name field appears as a single input box for the full name. To divide it into separate fields, turn on the Split Field toggle. This automatically creates three sub-fields — First Name, Middle Name, and Last Name.
You can hide any of these parts if not needed — for example, turn off the middle name. Each sub-field also has its own Required setting, allowing more control over which parts must be filled in.
Placeholder Text
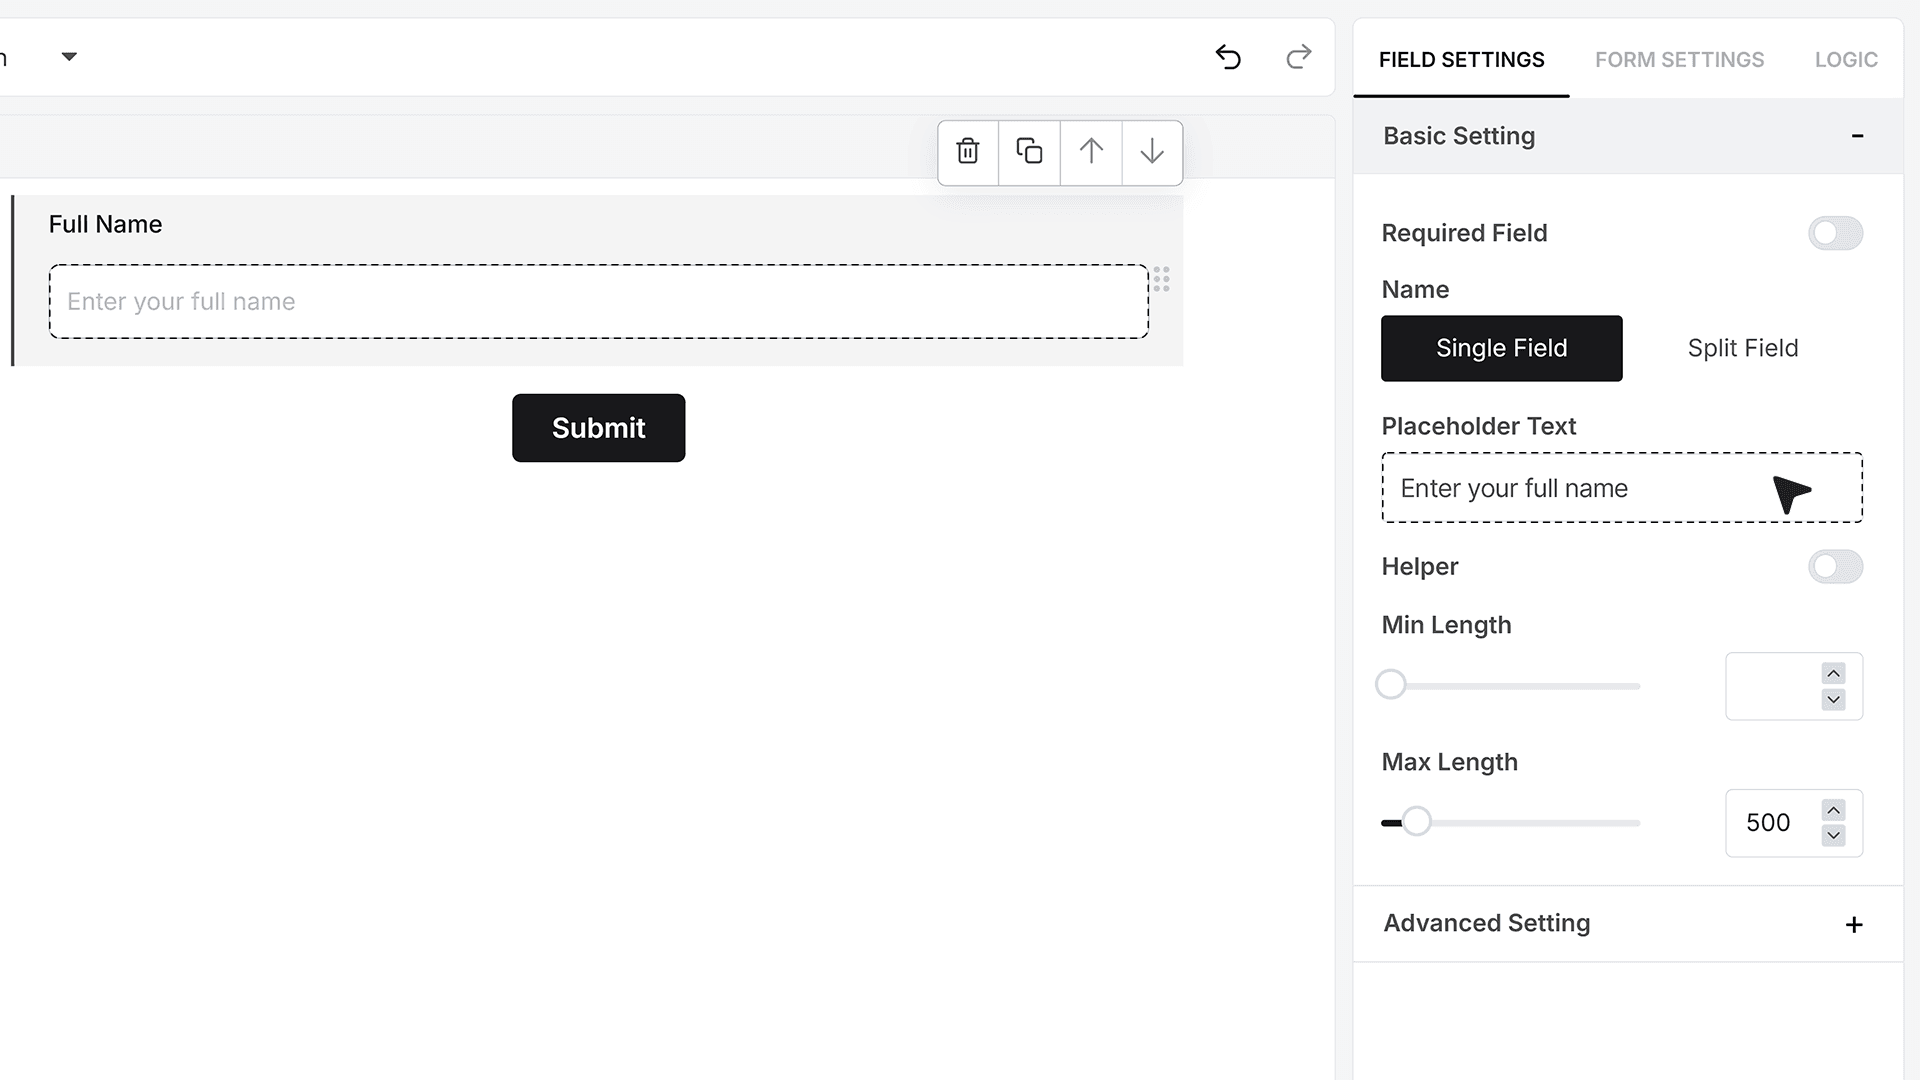
Use Placeholder Text to show sample text inside the input field — for example, Enter your full name. This option is available only when the field is in single-input mode.
Helper Text
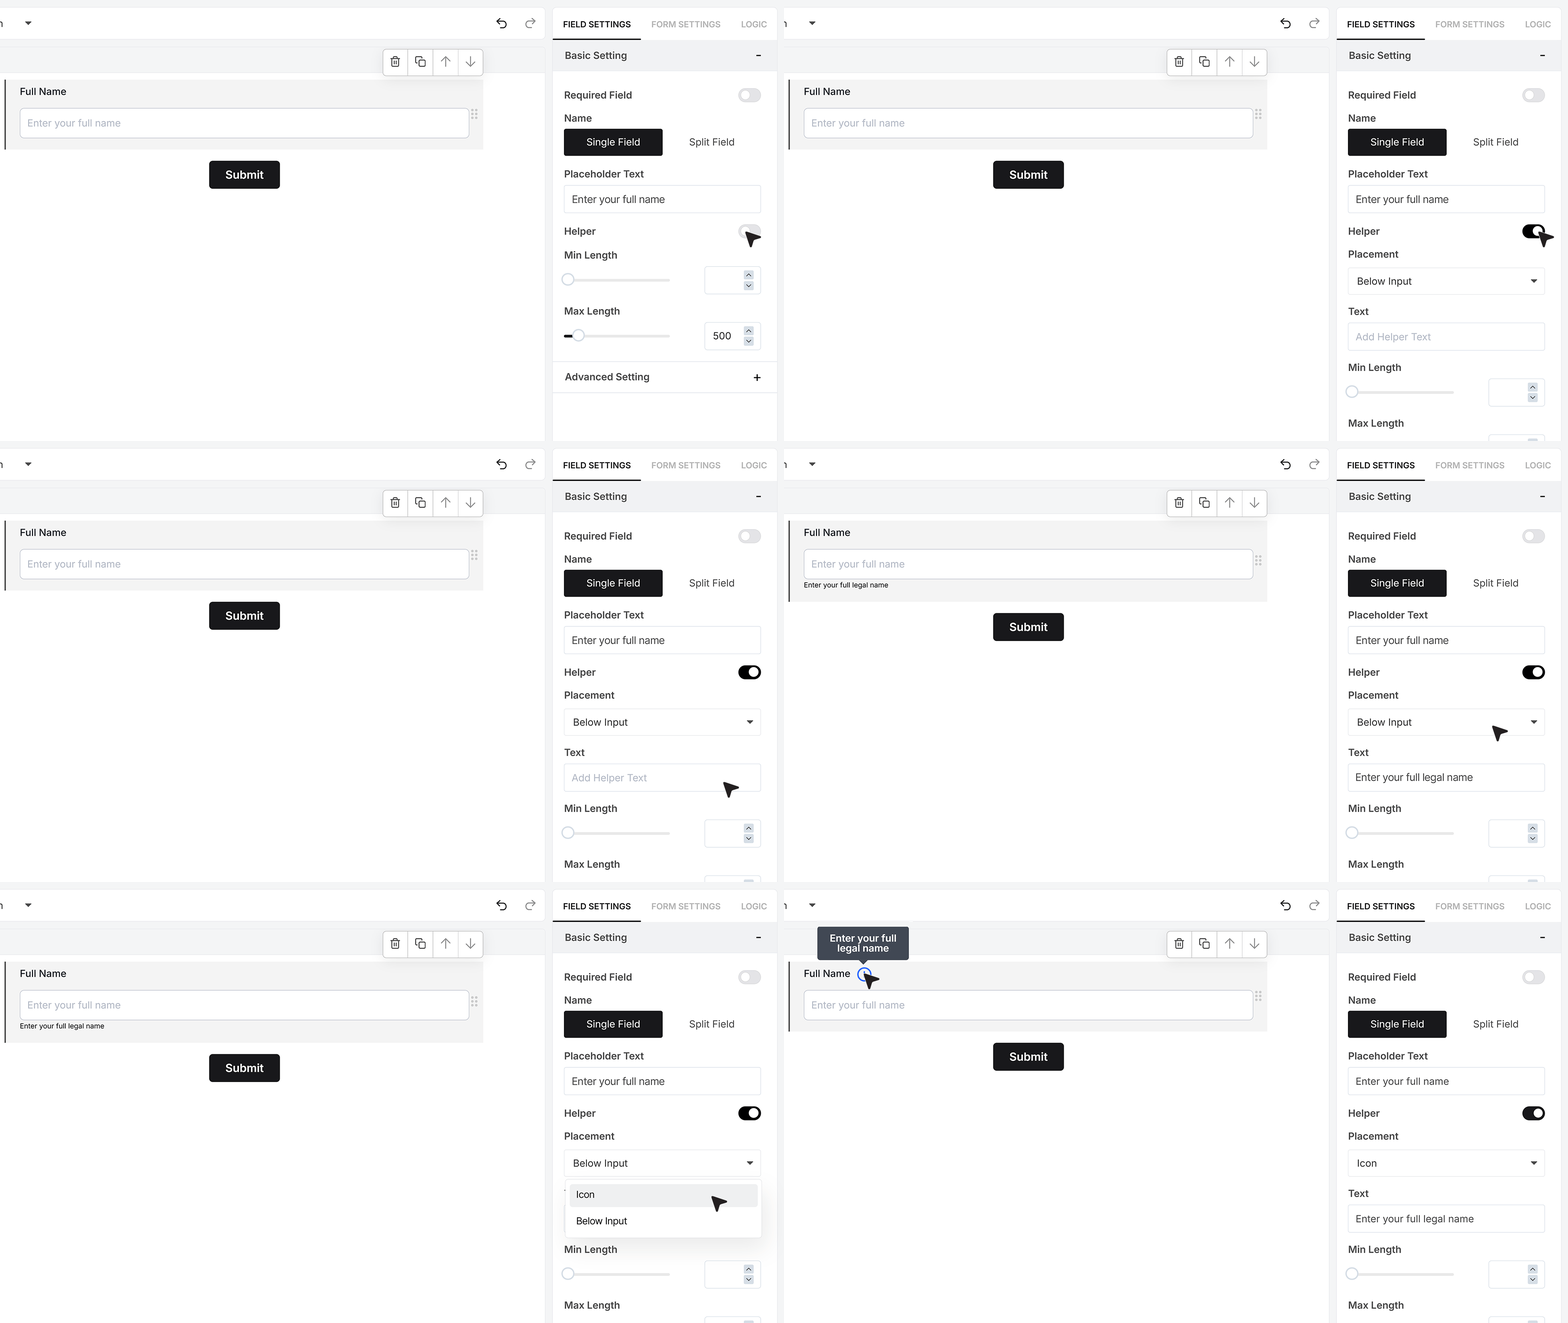
The Helper Text toggle lets you provide additional guidance for users. Once you enable it, you’ll see two options — Placement and Text. You can add your helper message in the text box, for example, “Enter your full legal name.” Under Placement, you can choose whether to show the helper text below the input field or as an icon beside it.
Minimum and Maximum Length
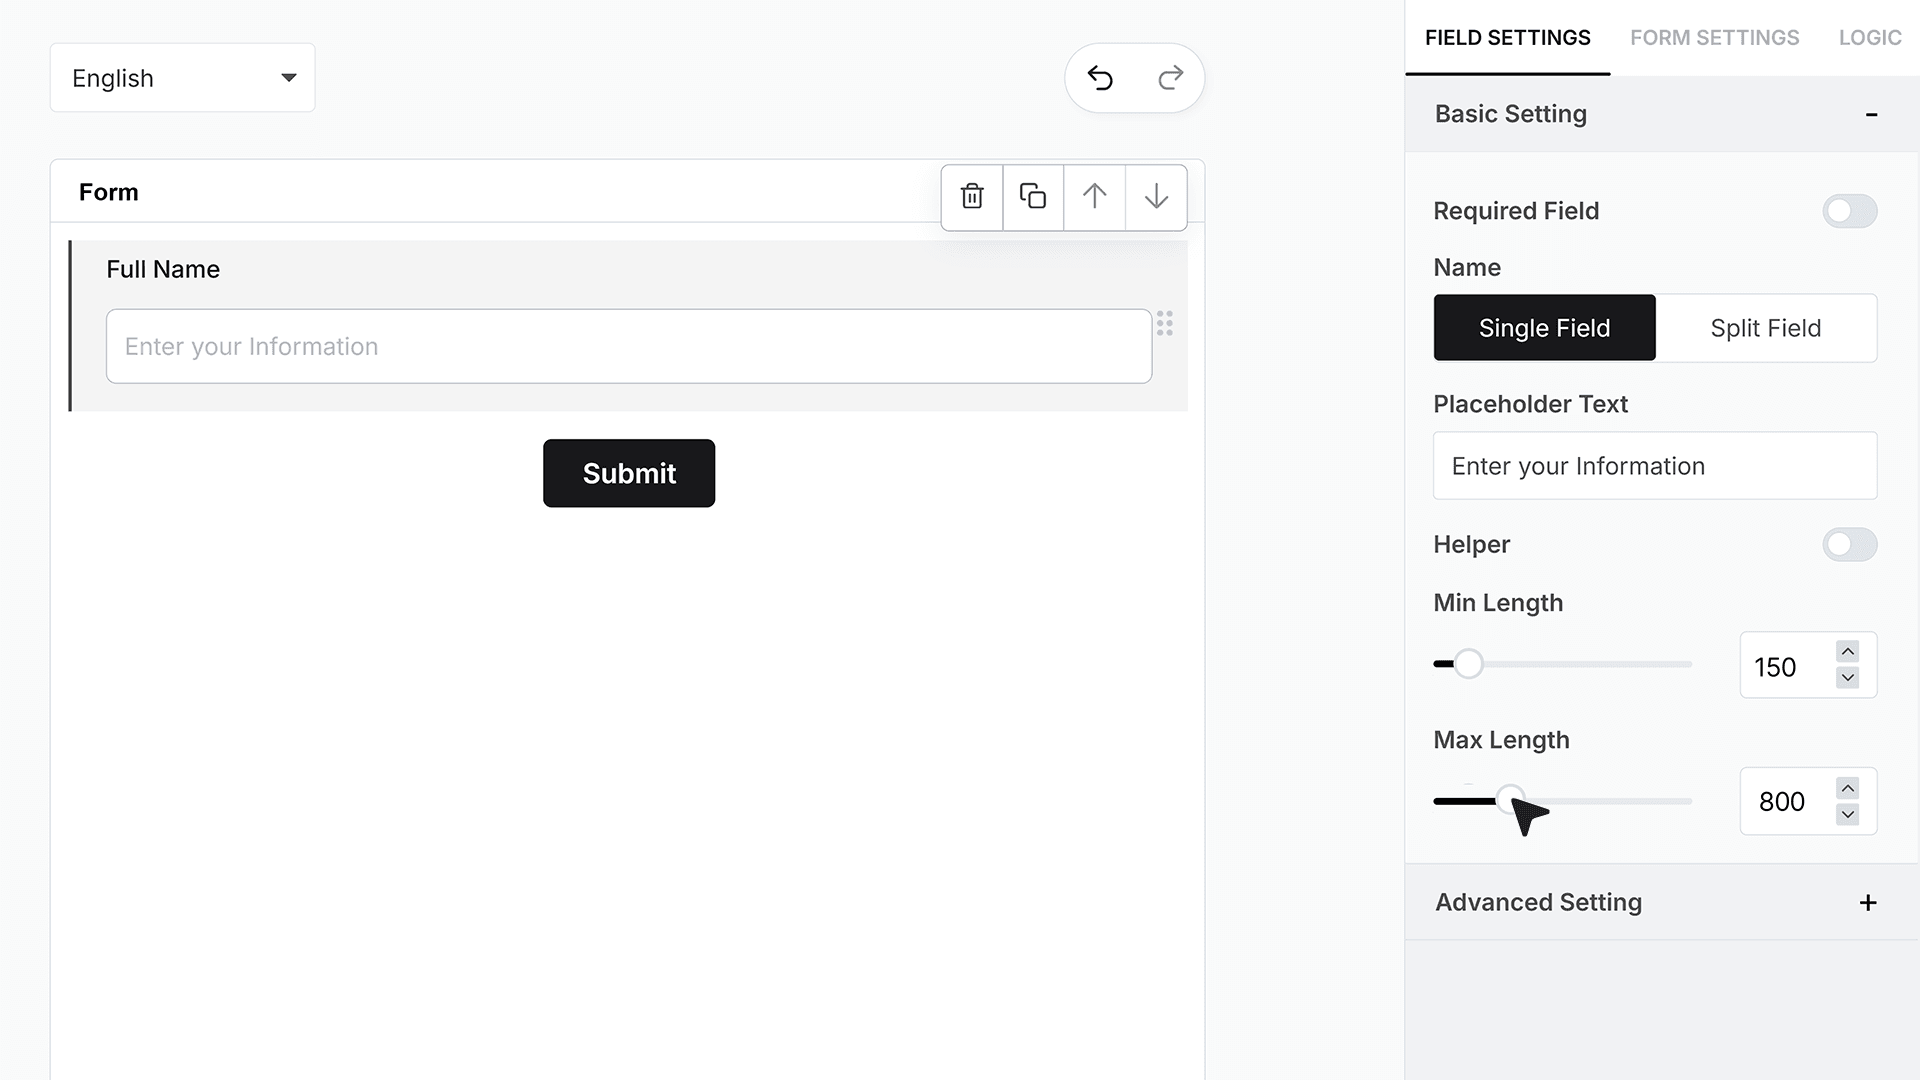
To control how short or long an input can be, you can set the Minimum and Maximum Length for this field.
Advanced Settings
Repeat This Field
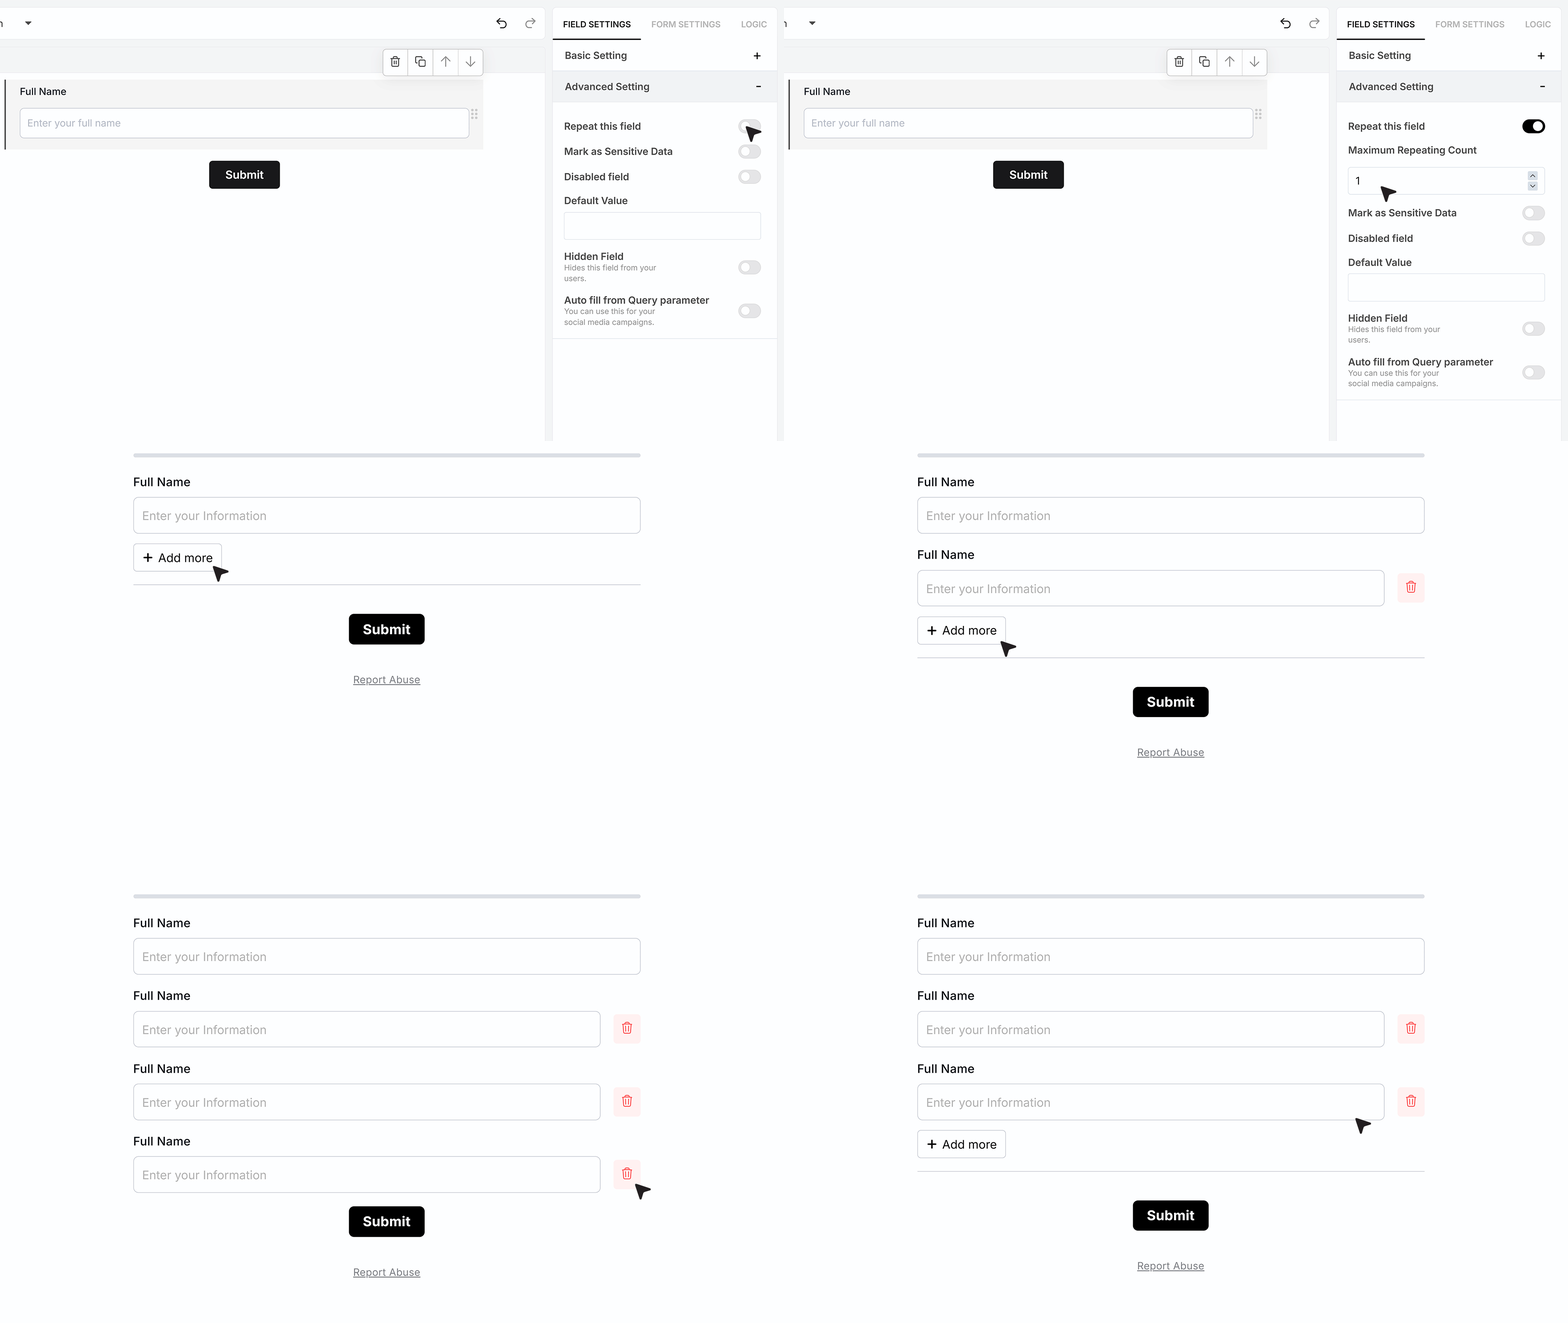
Moving on to the Advanced Settings, you’ll find the Repeat This Field option, which allows users to enter multiple values for the same field. Once enabled, you can set a limit on the number of repeats — for example, up to four entries for founder names. When the form is live, an “Add more” button appears below the field. Users can click this to add another entry or remove any they no longer need.
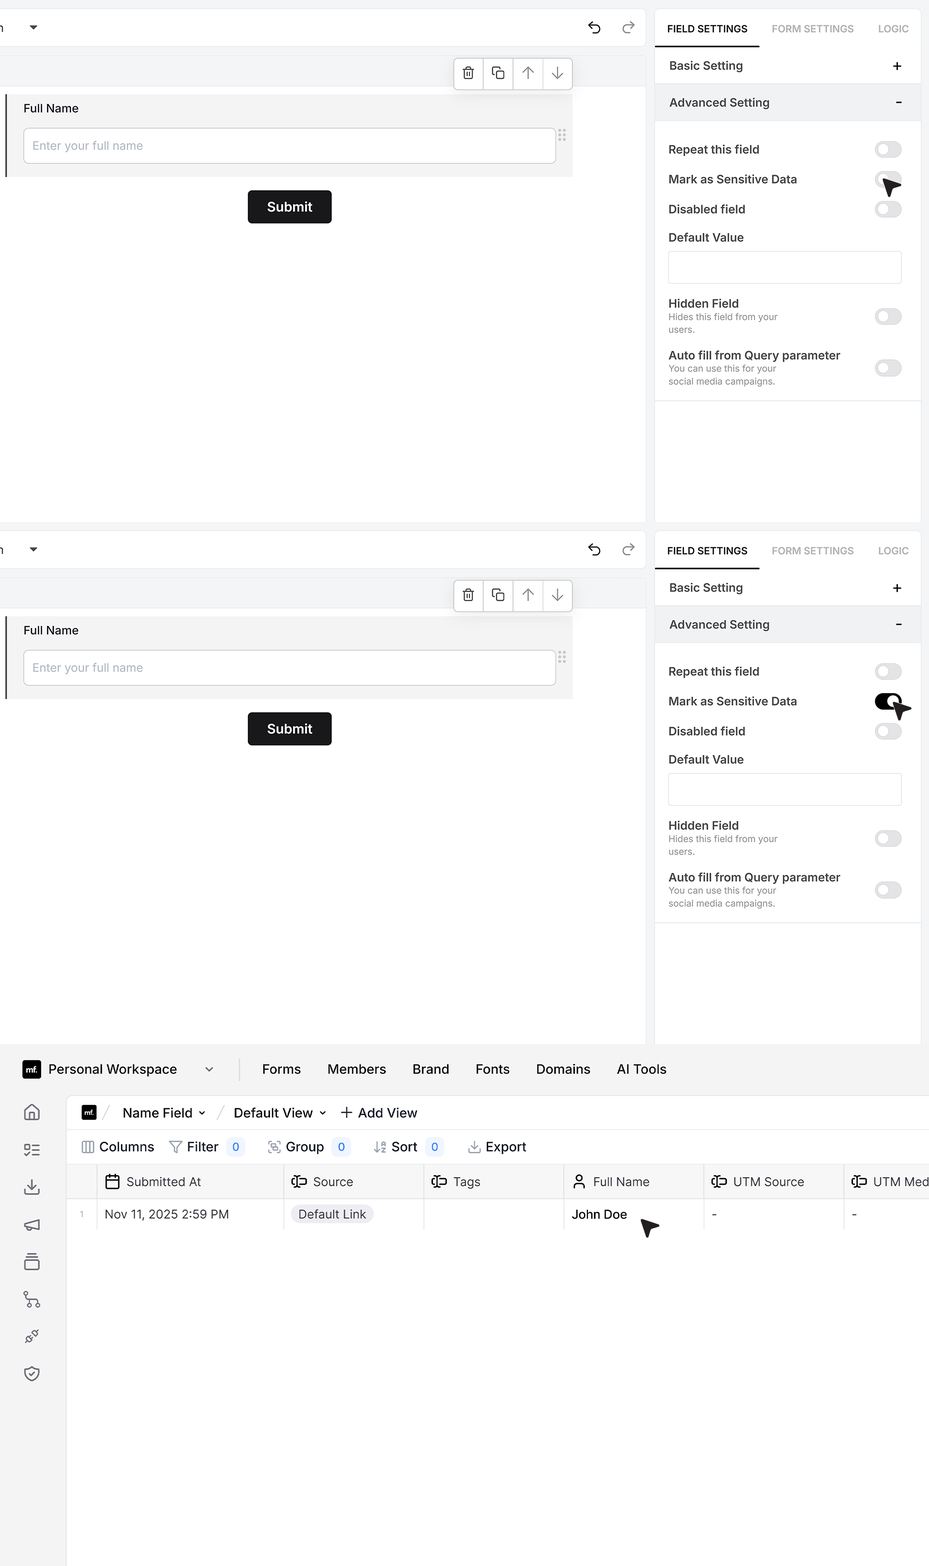
Mark as Sensitive Data
Enable Mark as Sensitive Data to protect confidential information. When this is on, the field’s data will be hidden from general access and only visible to team members with permission to view sensitive data.
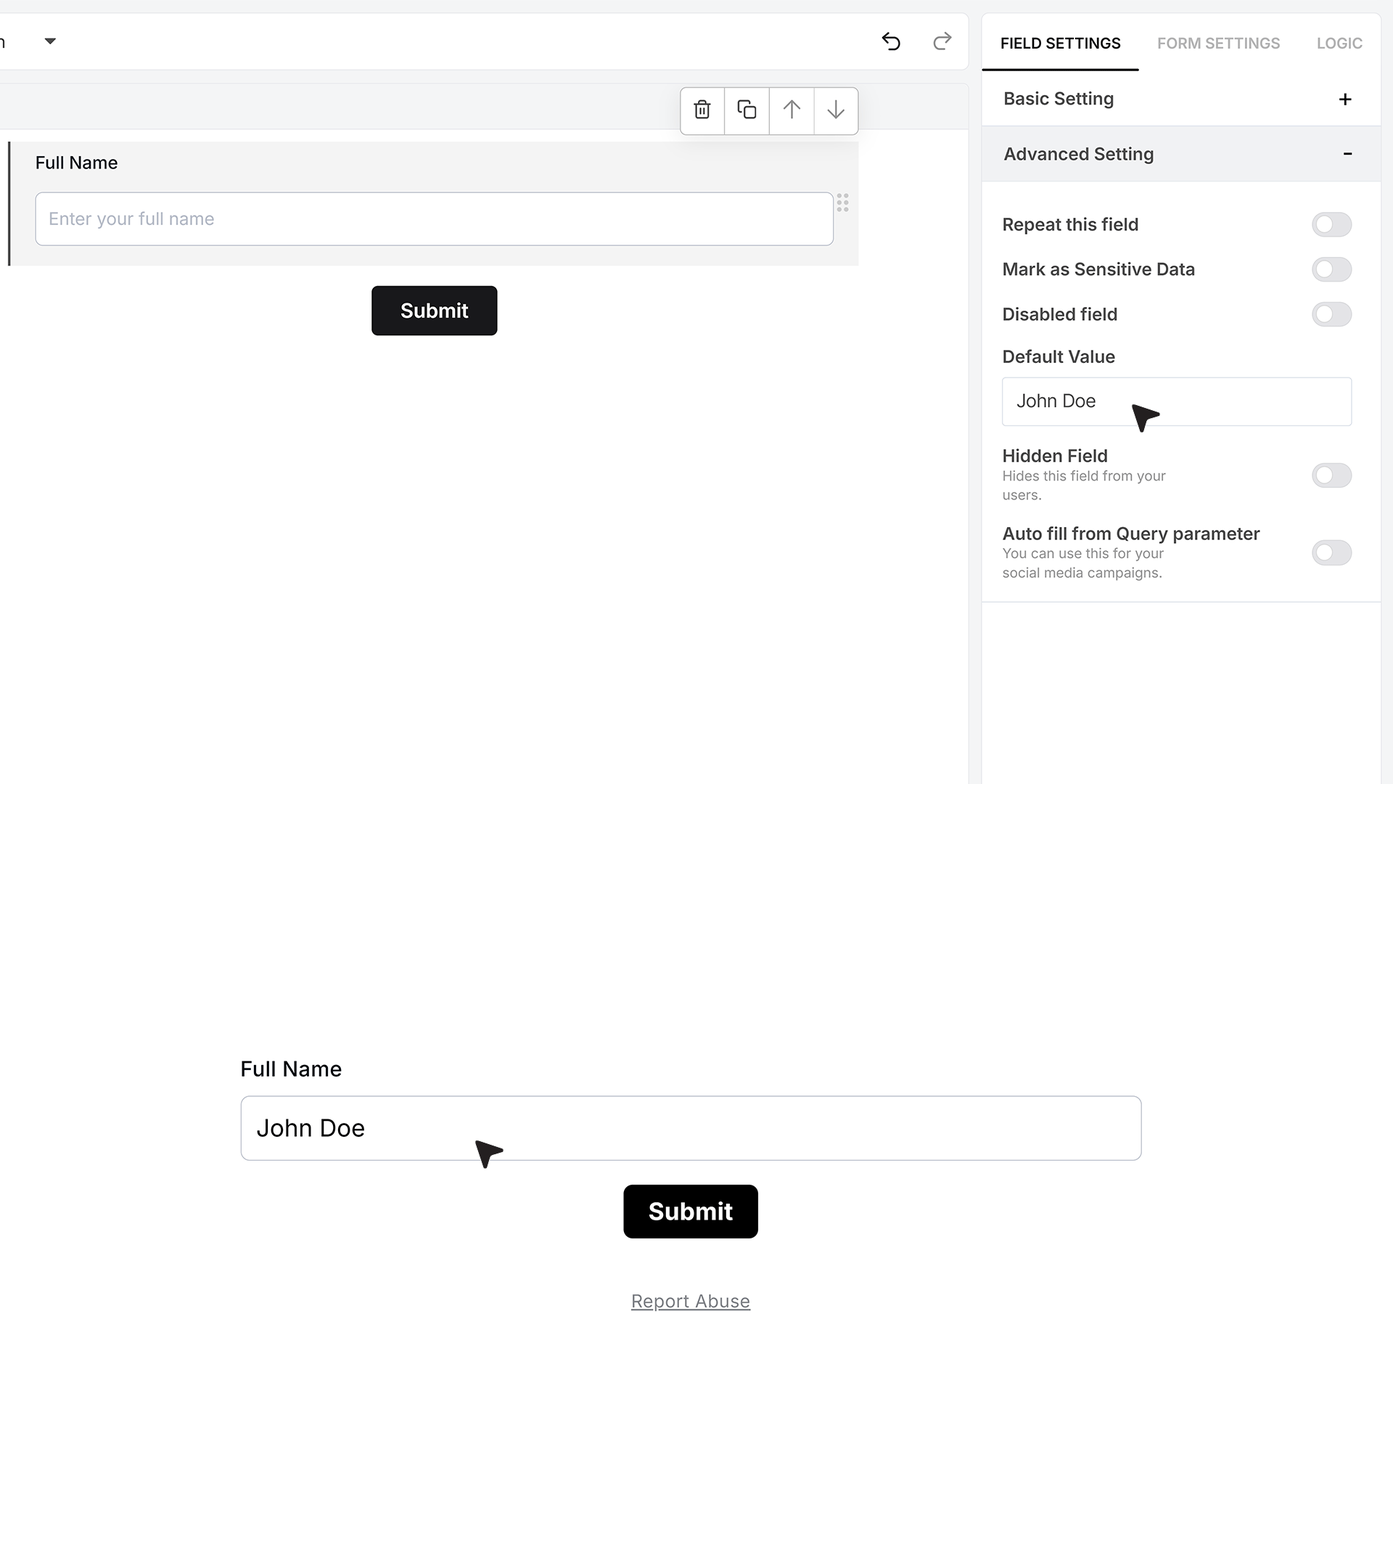
Default Value
The Default Value option allows you to pre-fill the field with a preset value that appears automatically when the form loads. Users can keep it unchanged or modify it if the field remains editable.
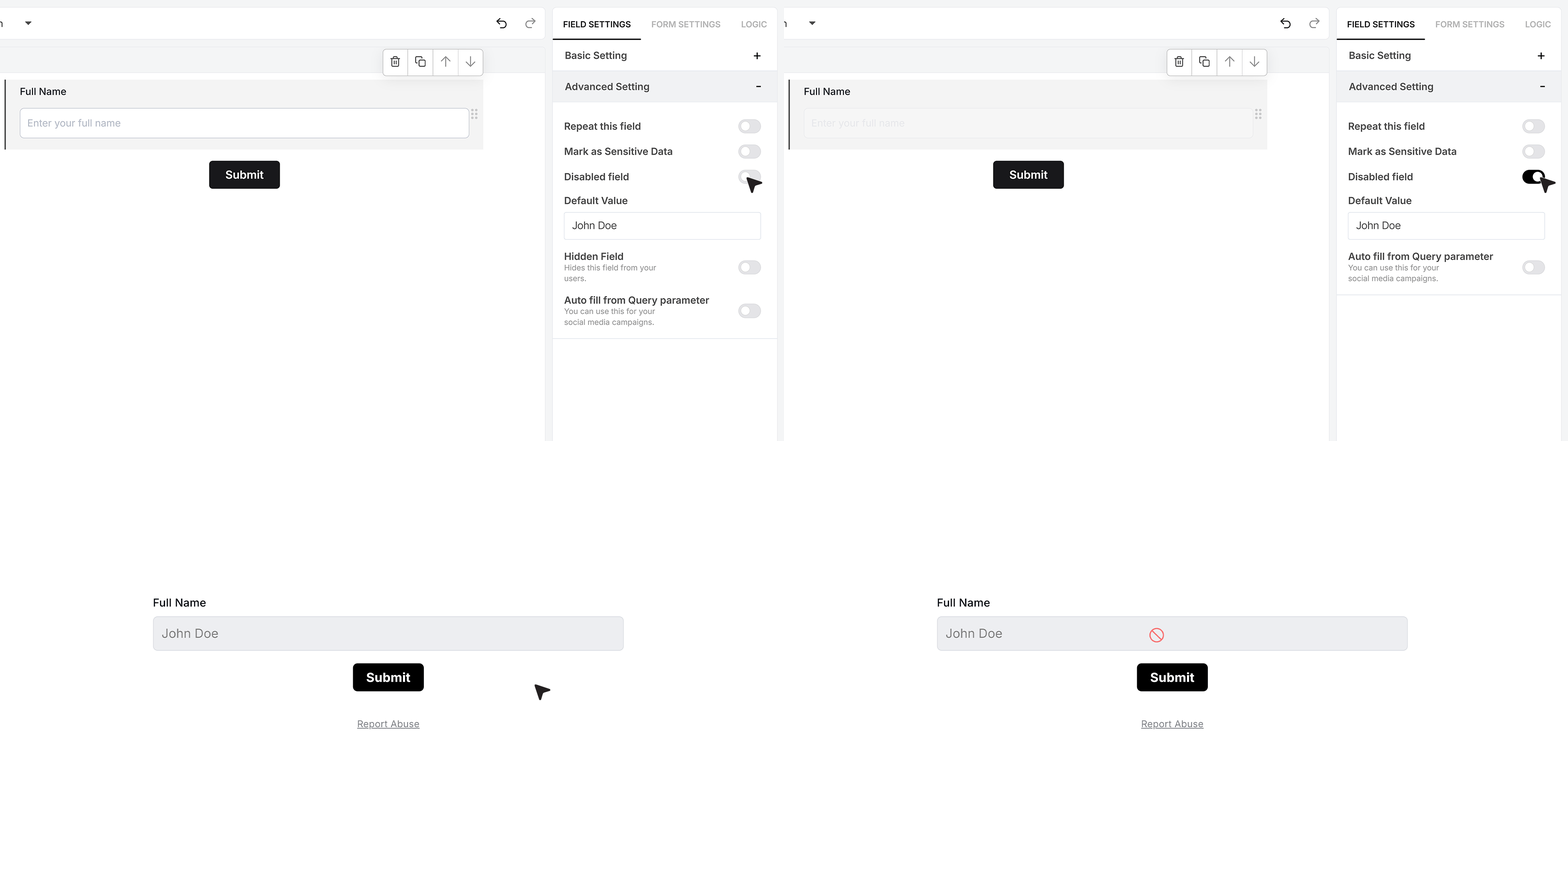
Disable Field
Enable Disable Field to make the field visible but non-editable.
This is useful when you want to display pre-filled information that users should not change.
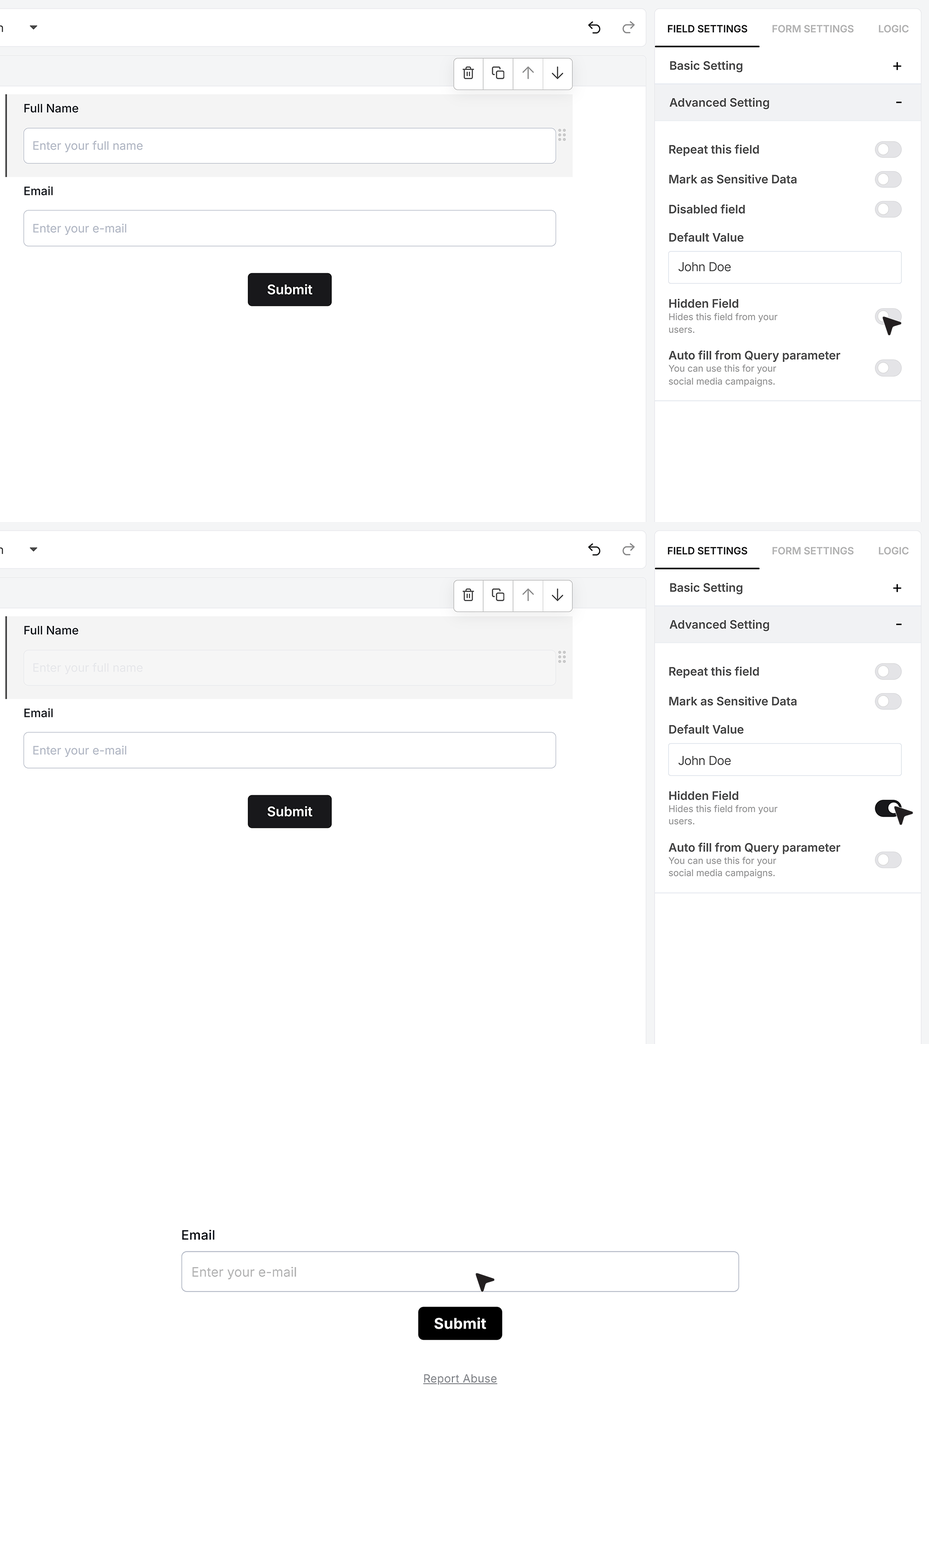
Hidden Field
Enable Hidden Field to keep the field invisible on the live form while still capturing its default value in responses. Note that a form must include at least one visible field (for example, Email ID) before you can publish it.
Autofill from Query Parameter
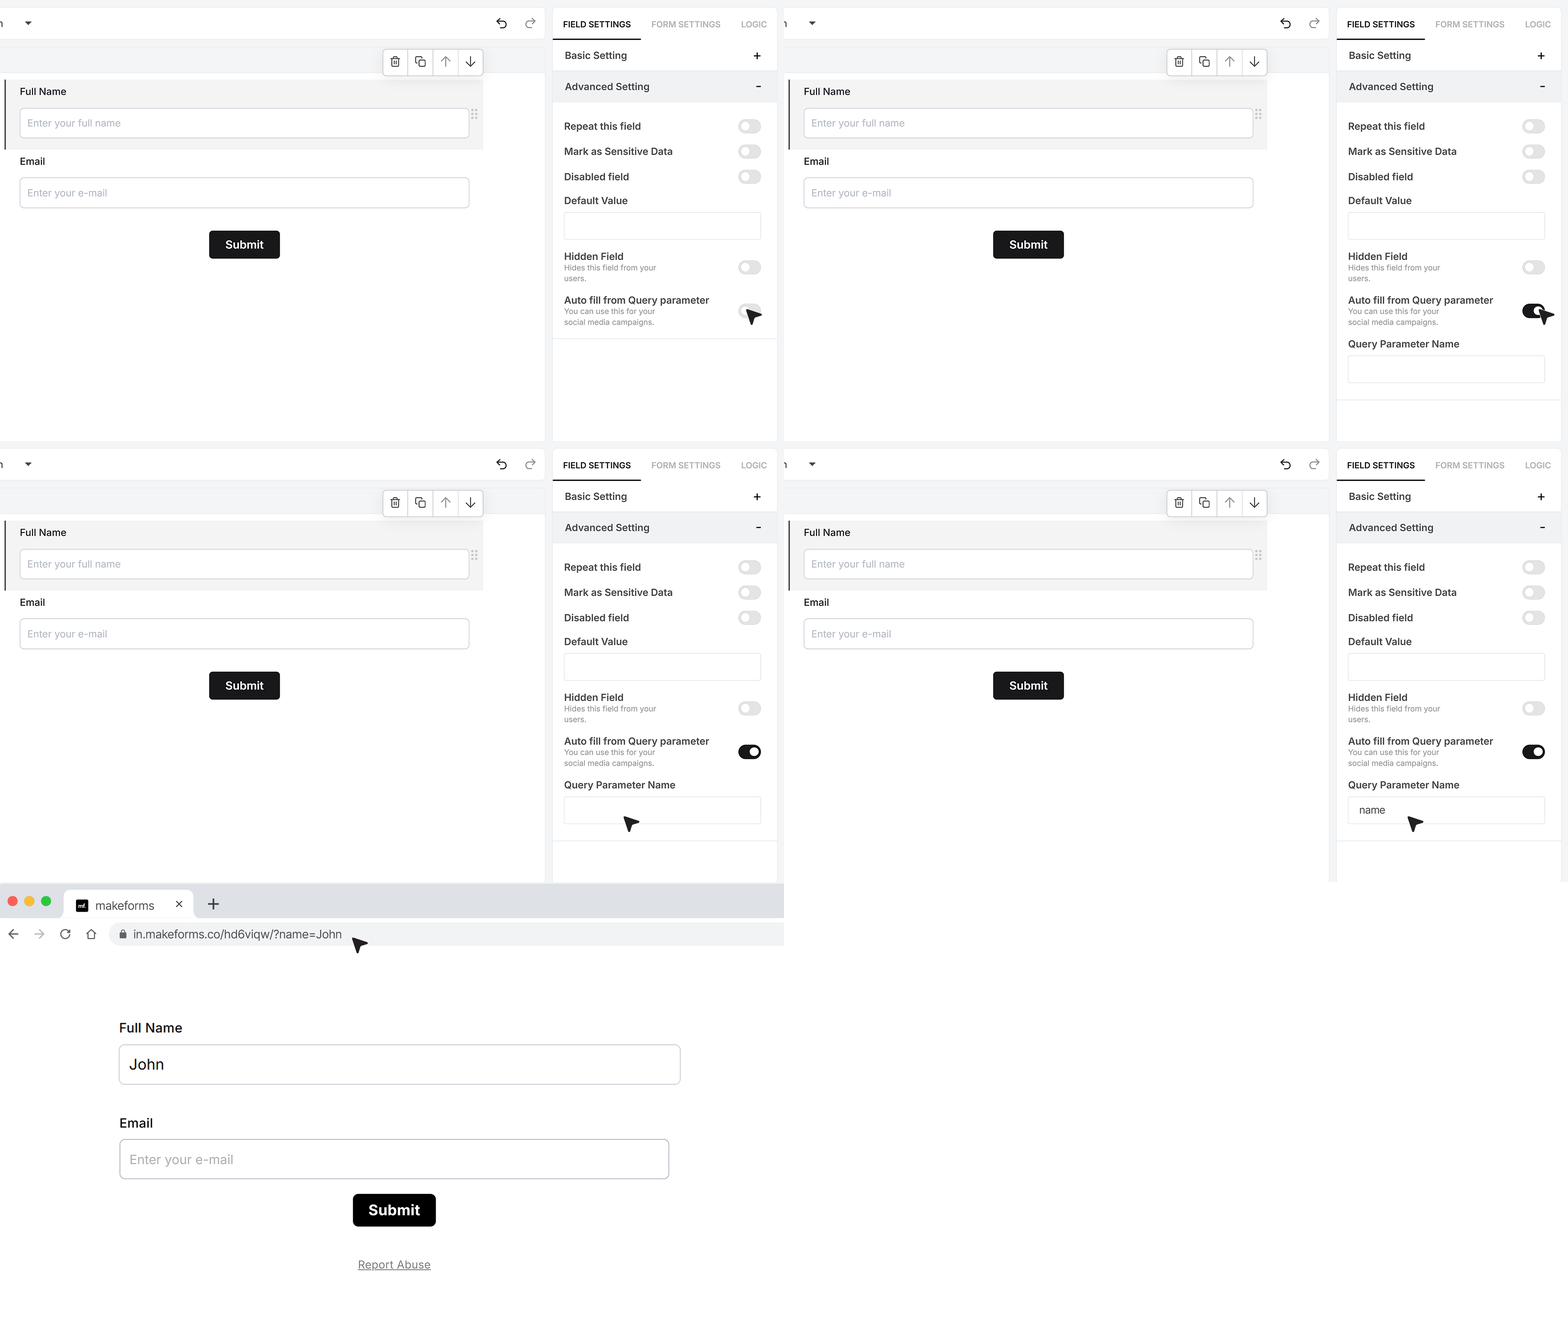
Finally, the Autofill from Query Parameter option allows you to pre-fill the Name field using a query string in the form URL. For example, adding “?name=John” to the URL will automatically fill the field with “John.” If the Name field is split, you can use separate parameters for firstname, middlename, and lastname.
FAQ's
MakeForms provides advanced name field controls for enterprise use, including single or split name formats, per-part required rules, validation, uniqueness checks, sensitive data marking, autofill, and query-based prefill. Other enterprise form builders with similar capabilities include Formstack, Jotform Enterprise, and Typeform Enterprise, though feature depth and control levels vary.
In MakeForms, add a Name Field to the form, enable the Required Field toggle, then select a validation type such as alphabets, numeric, or alphanumeric. You can also set minimum and maximum length limits. Validation applies before submission and blocks invalid input.
MakeForms sends name field data through native integrations and webhooks. When the name field is split, first name, middle name, and last name are stored as separate values, which map cleanly to CRM fields like Salesforce or HubSpot. Single-field names are passed as one value.
Some free plans from tools like Google Forms and Jotform support basic name fields. Advanced options such as split names, uniqueness checks, sensitive data handling, and query-based autofill are typically part of paid or enterprise plans, including MakeForms.
In MakeForms, the name field is embedded as part of the full form. You publish the form and embed it using the provided embed code or share link. The name field renders automatically based on its configuration, including split layout and validation rules.
Yes. In MakeForms, enable the Split Field option to create separate fields for first name, middle name, and last name. Each part can be shown or hidden and marked as required or optional. Many enterprise form builders support this, but MakeForms allows control at each sub-field level.
MakeForms supports autofill using query parameters. Enable the Autofill from Query Parameter option, then pass values in the form URL. For example, name=John fills a single name field. In split mode, you can use separate parameters for first name, middle name, and last name.
MakeForms supports conditional logic on name fields, both single and split. Conditions can be based on full name values or individual parts like first or last name. Other platforms such as Formstack and Jotform also support logic, but behavior may differ for split fields.
In MakeForms, name field data is included in response exports such as CSV or via API and webhooks. Split name fields are exported as separate columns, while single name fields appear as one column.
MakeForms supports international name formats by allowing split fields, optional middle names, and flexible validation rules. This works well for regions where names do not follow a strict first and last structure. Other tools may support this only through custom fields.
In MakeForms, enable the Split Field toggle in the Name Field settings. This creates first name, middle name, and last name fields automatically. You can hide the middle name if not required and set required rules for each part separately.