Calendly Field
Normally, a calendar lets users book a slot right away. If they leave midway, you lose their details. With the Calendly Field, users first submit the form. Only after submission do they see the Calendly booking screen. Even if they do not finish the booking, their form response is already saved in MakeForms. Common use cases include demo requests, consultation bookings, and quote forms.
Adding the Calendly Field to your form
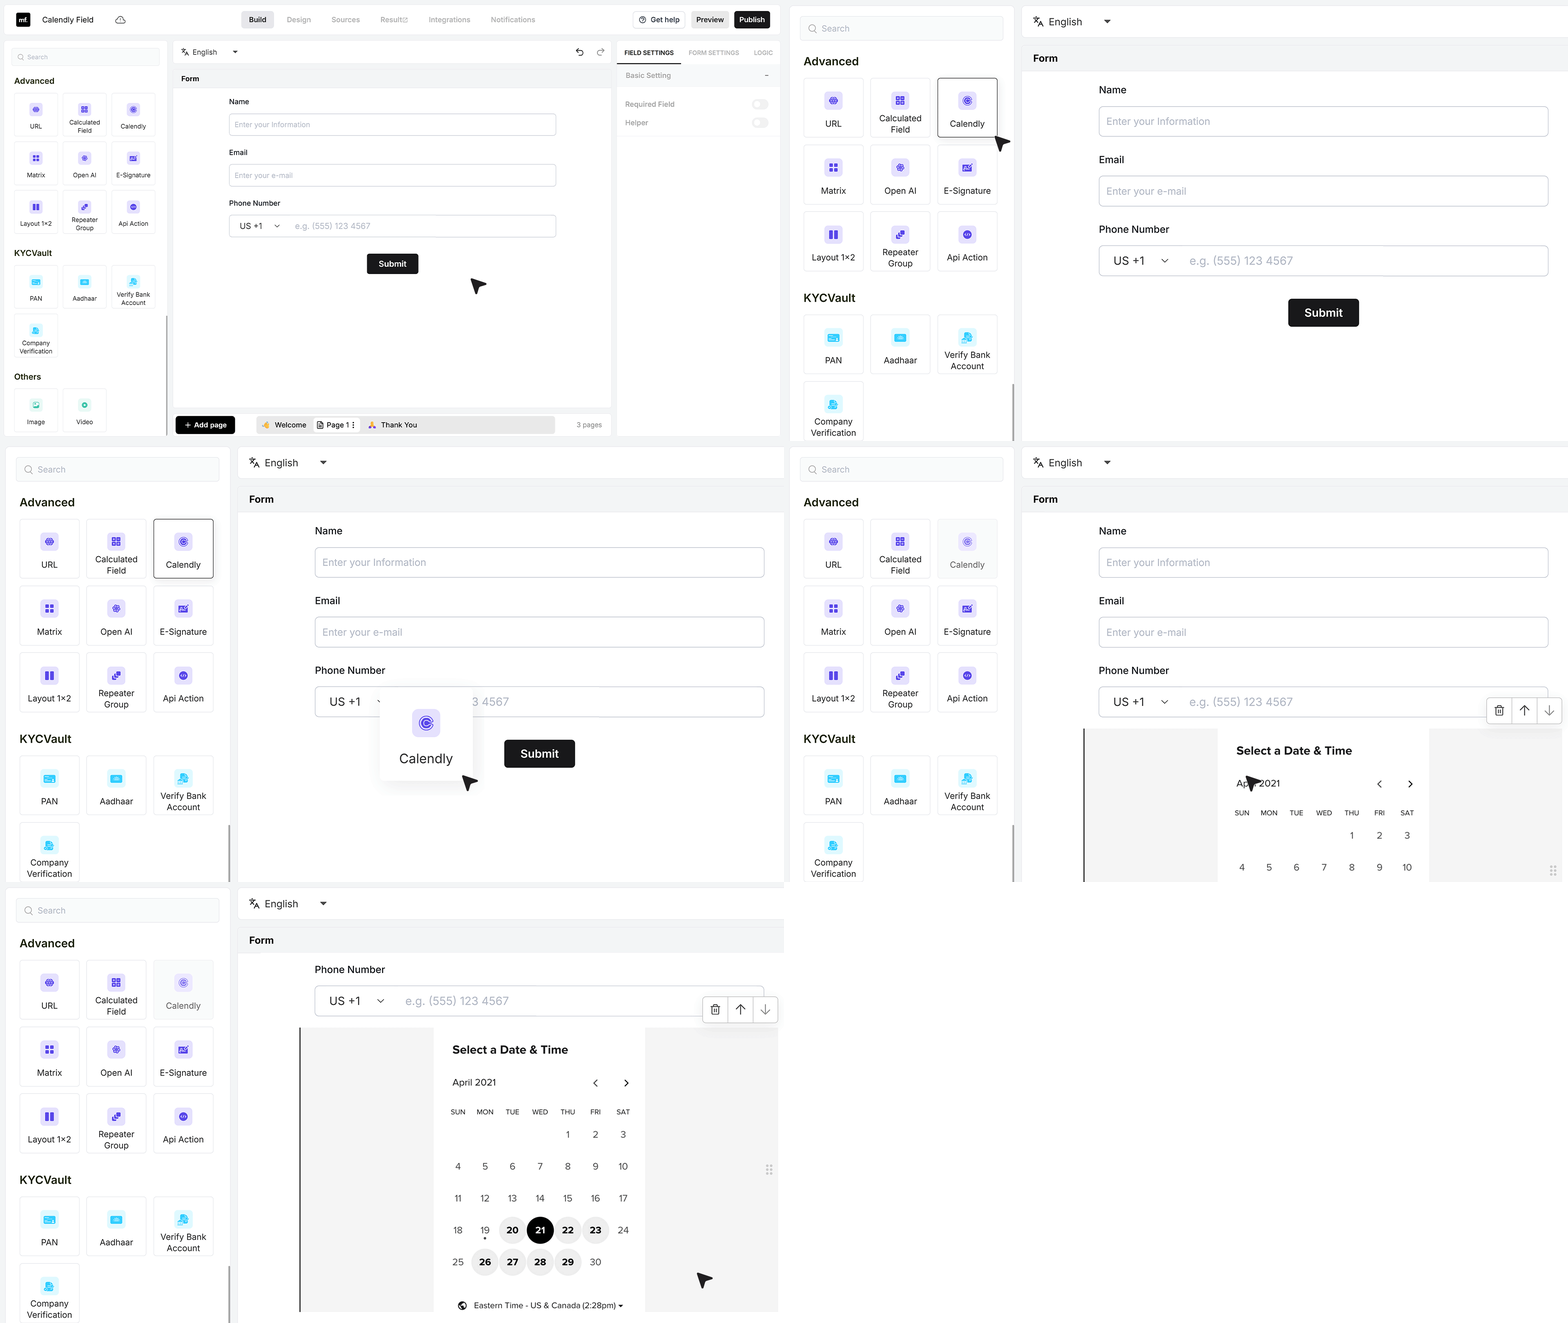
Start with a form that already has fields like Name, Email, and Phone Number. From the field list, drag the Calendly Field into the form. As soon as you add it, the settings panel opens on the right.
Connecting your Calendly account
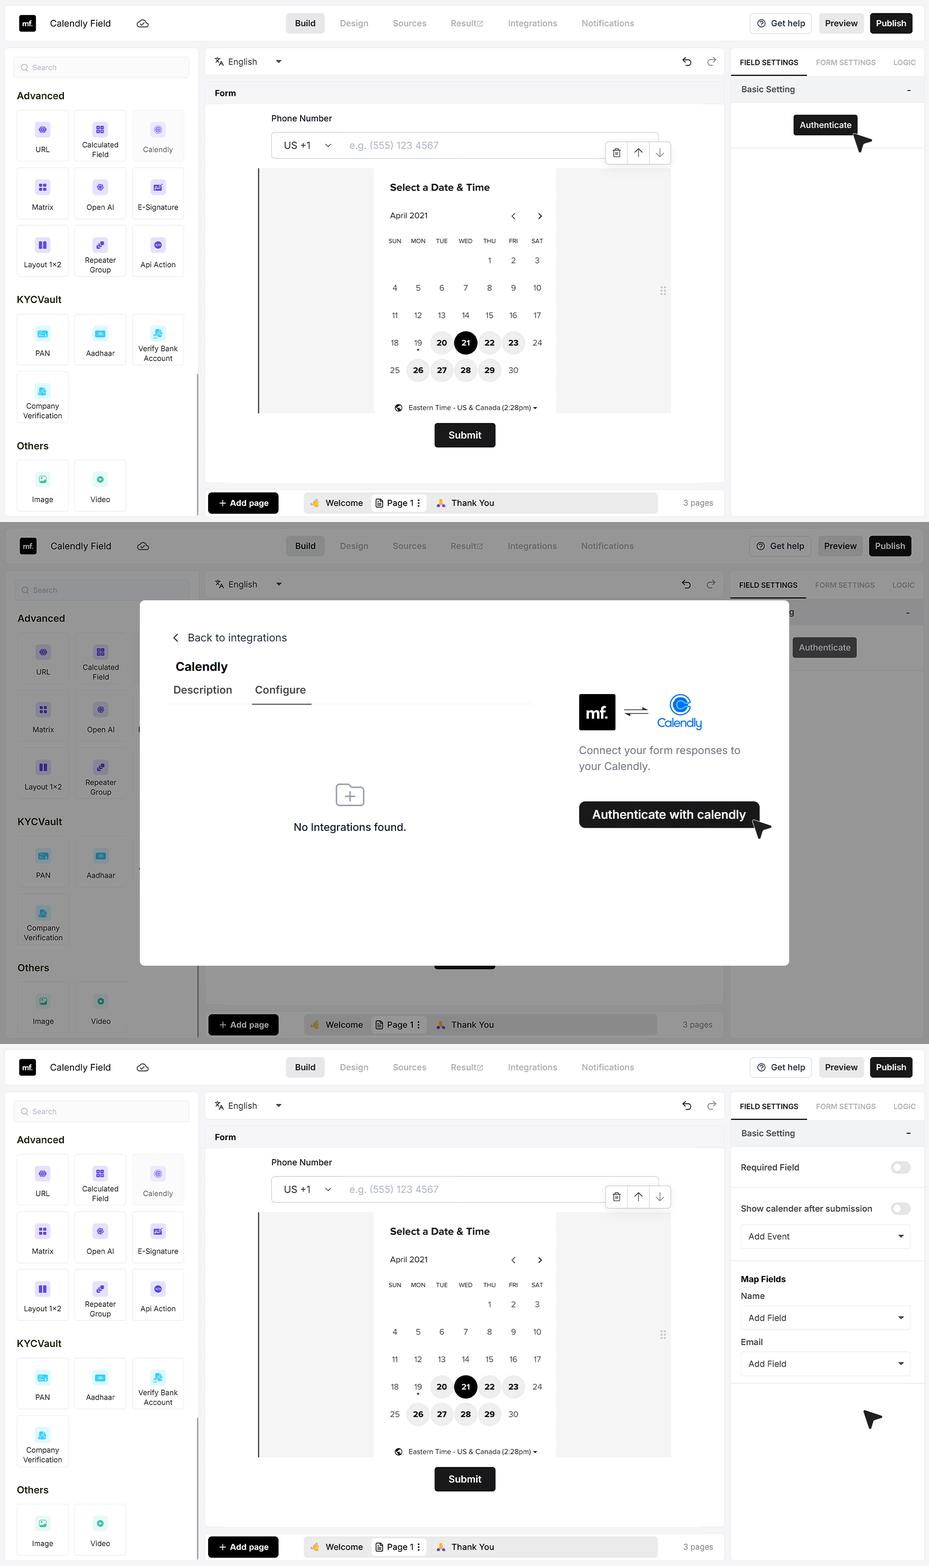
In the Basic Settings, you will see an option called Authenticate. Click this to connect your MakeForms account with your Calendly account. A popup opens from the Integrations section.
Click Authenticate with Calendly and complete the connection. Once the connection is successful, additional Calendly-related settings become available.
Basic Settings
Required field
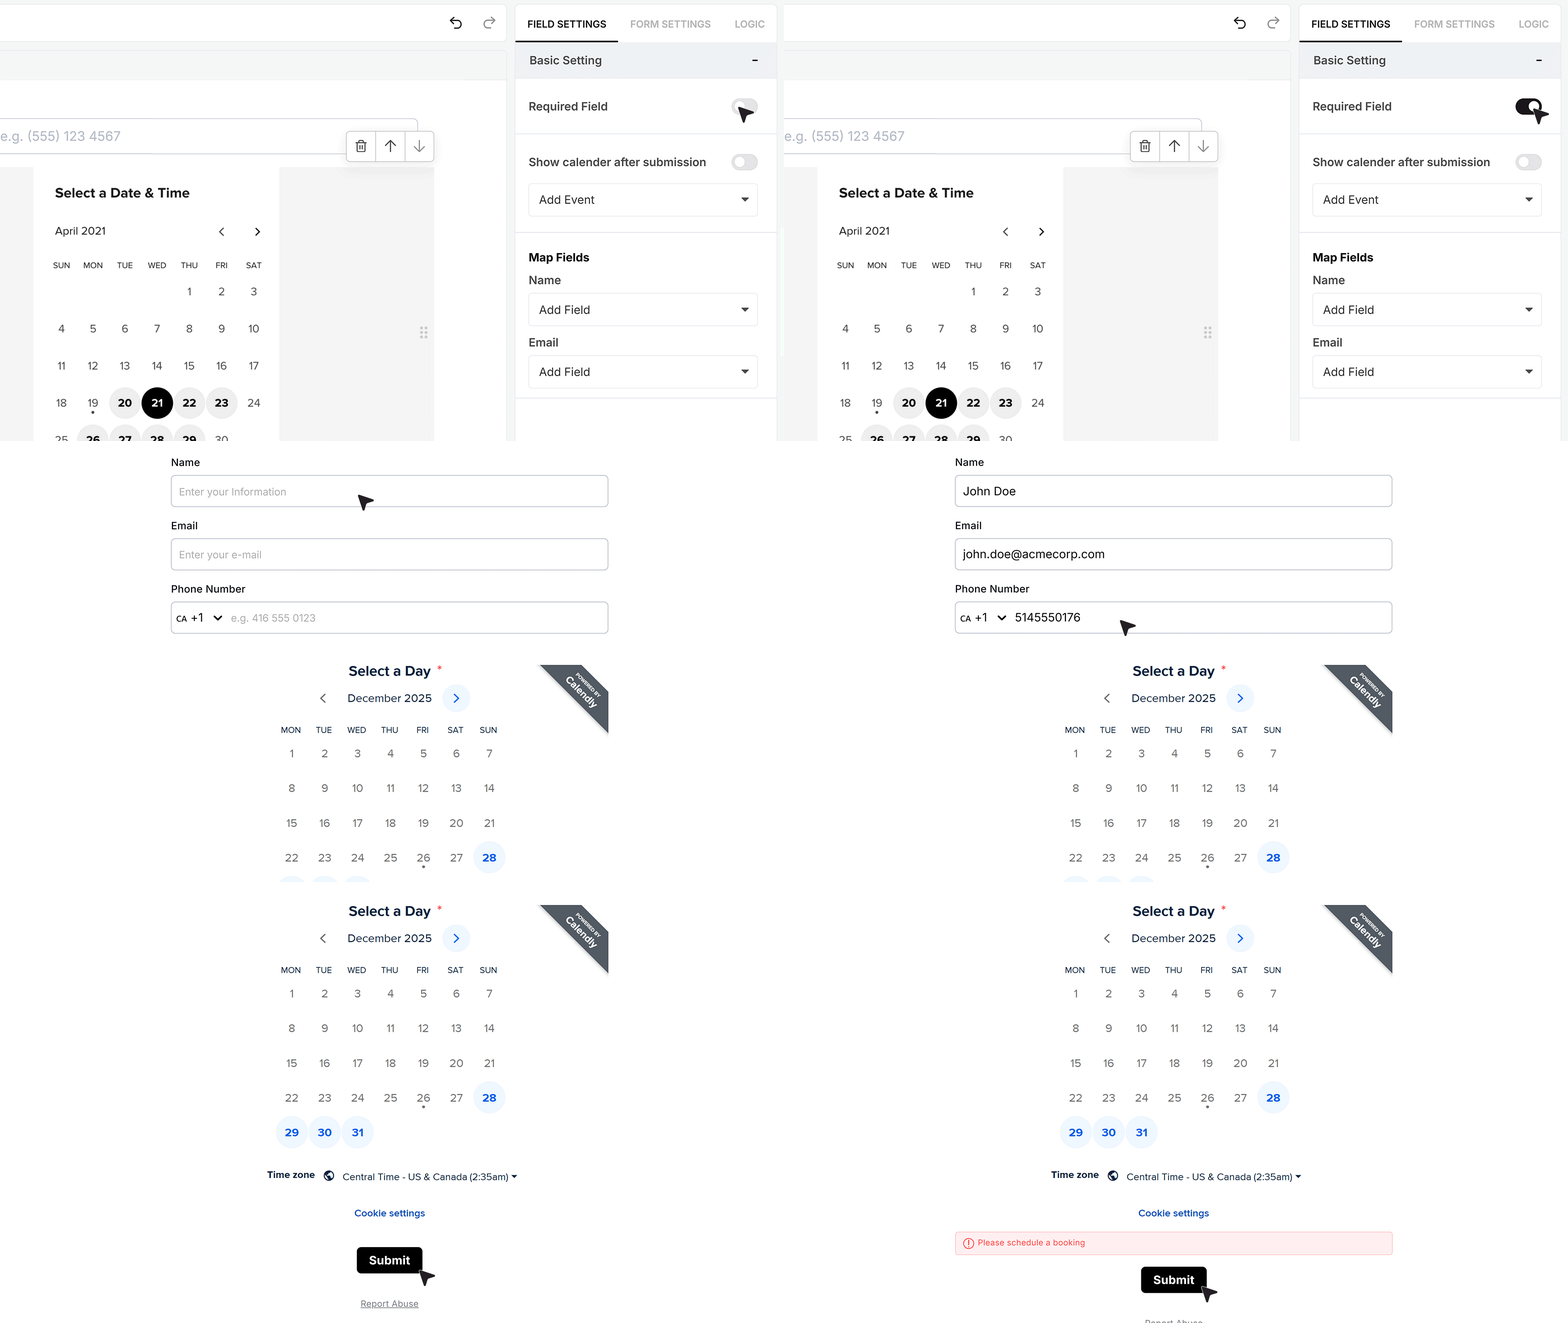
You can mark the Calendly Field as required. When enabled, the user must select a time slot before submitting the form. If no slot is selected, the form cannot be submitted. This option works only when the calendar is shown inside the form.
Selecting a Calendly event
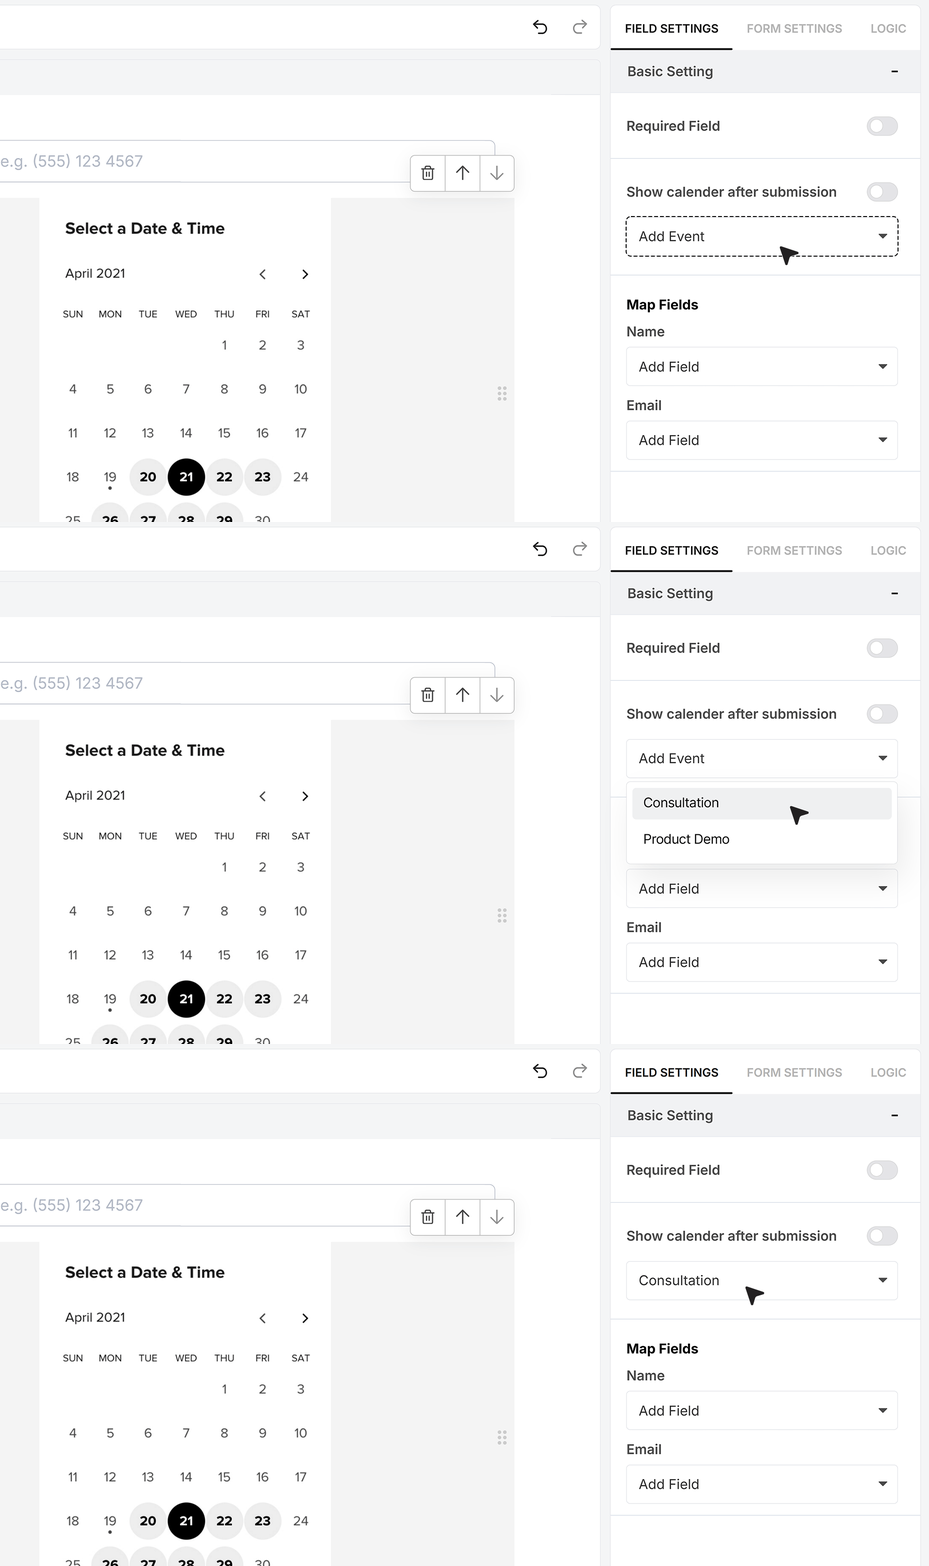
After connecting Calendly, your available Calendly events appear in a dropdown. Select the event you want users to book, such as a consultation call or a product demo. This selected event is the one that opens when the calendar is shown to the user.
Showing the calendar after submission
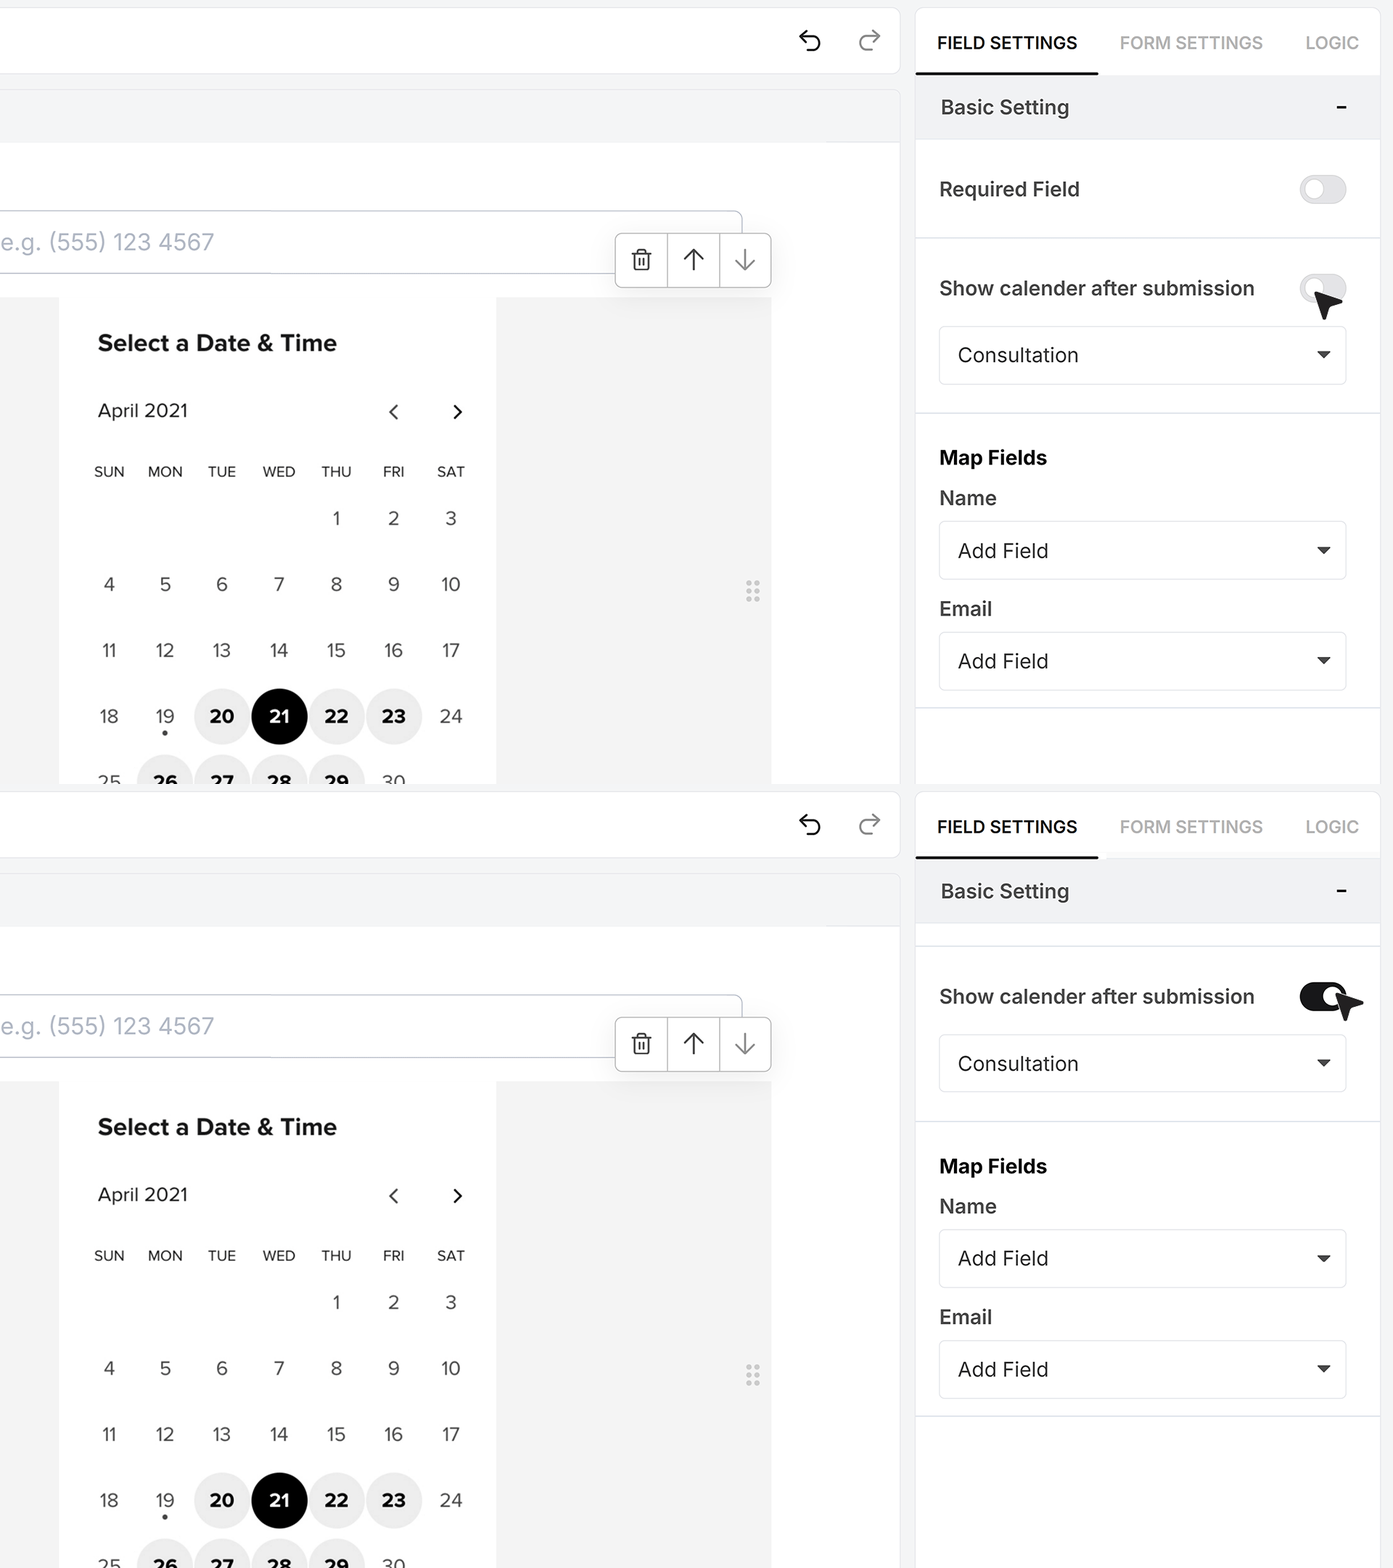
By default, the calendar is embedded inside the form. If you want users to fill the form first and see the calendar only after submission, turn on Show calendar after submission.
When this option is enabled, the Required Field setting is turned off automatically. This is because the calendar is no longer part of the form input. With this setting on, the calendar loads only after the form is submitted.
Mapping form fields to Calendly
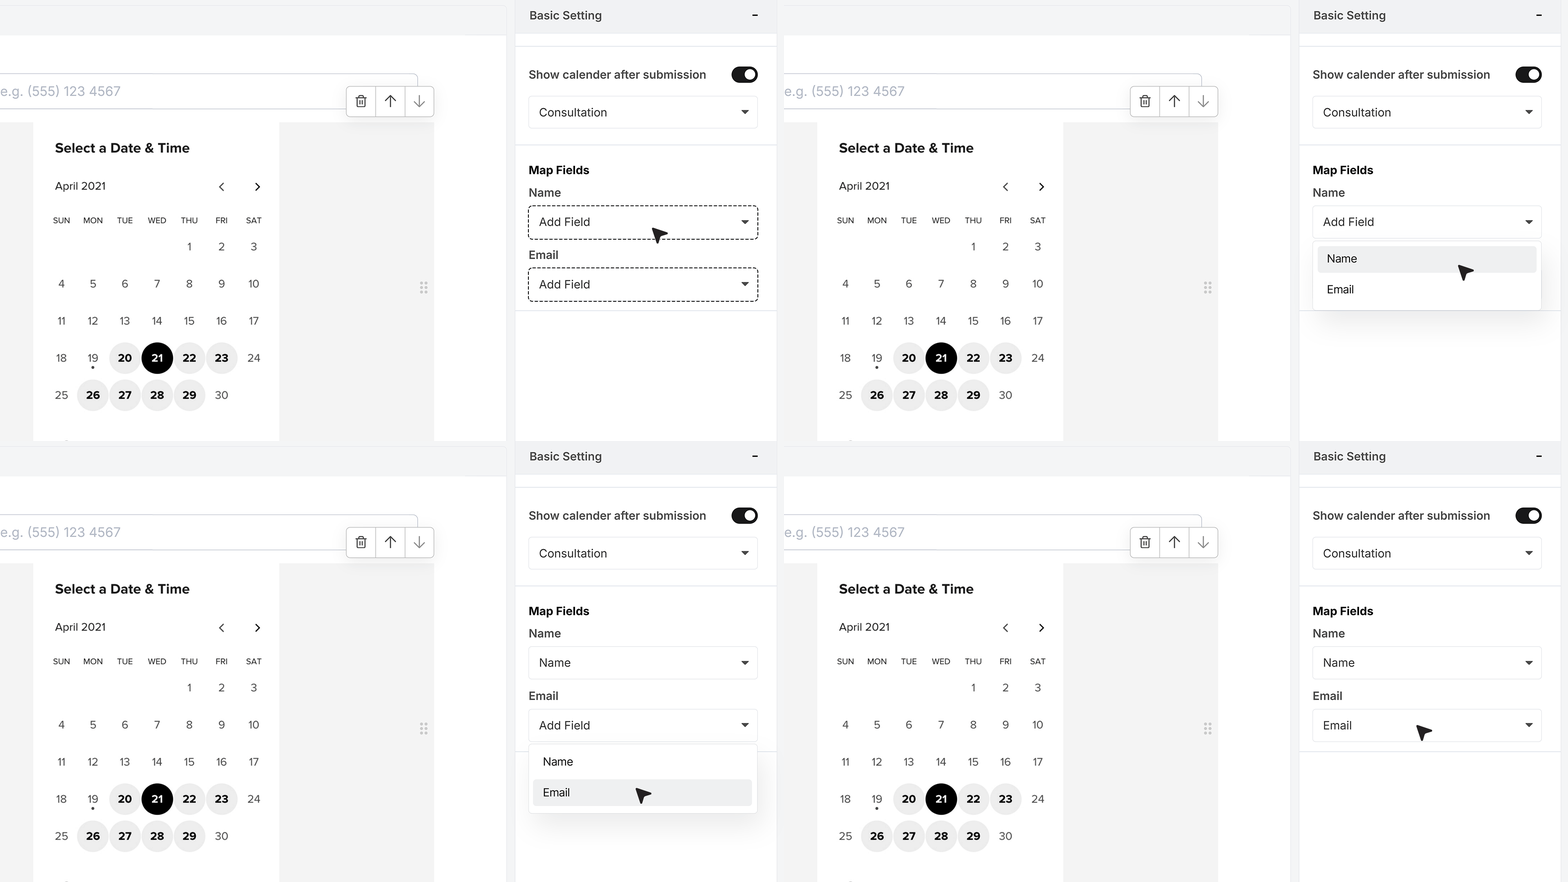
Next, open Map Fields. Here you can pass values from your form to Calendly. You can map the Name field to the name. You can map the Email field to the email address.
This ensures that when the calendar opens, these values are already filled in for the user.
Publishing the form
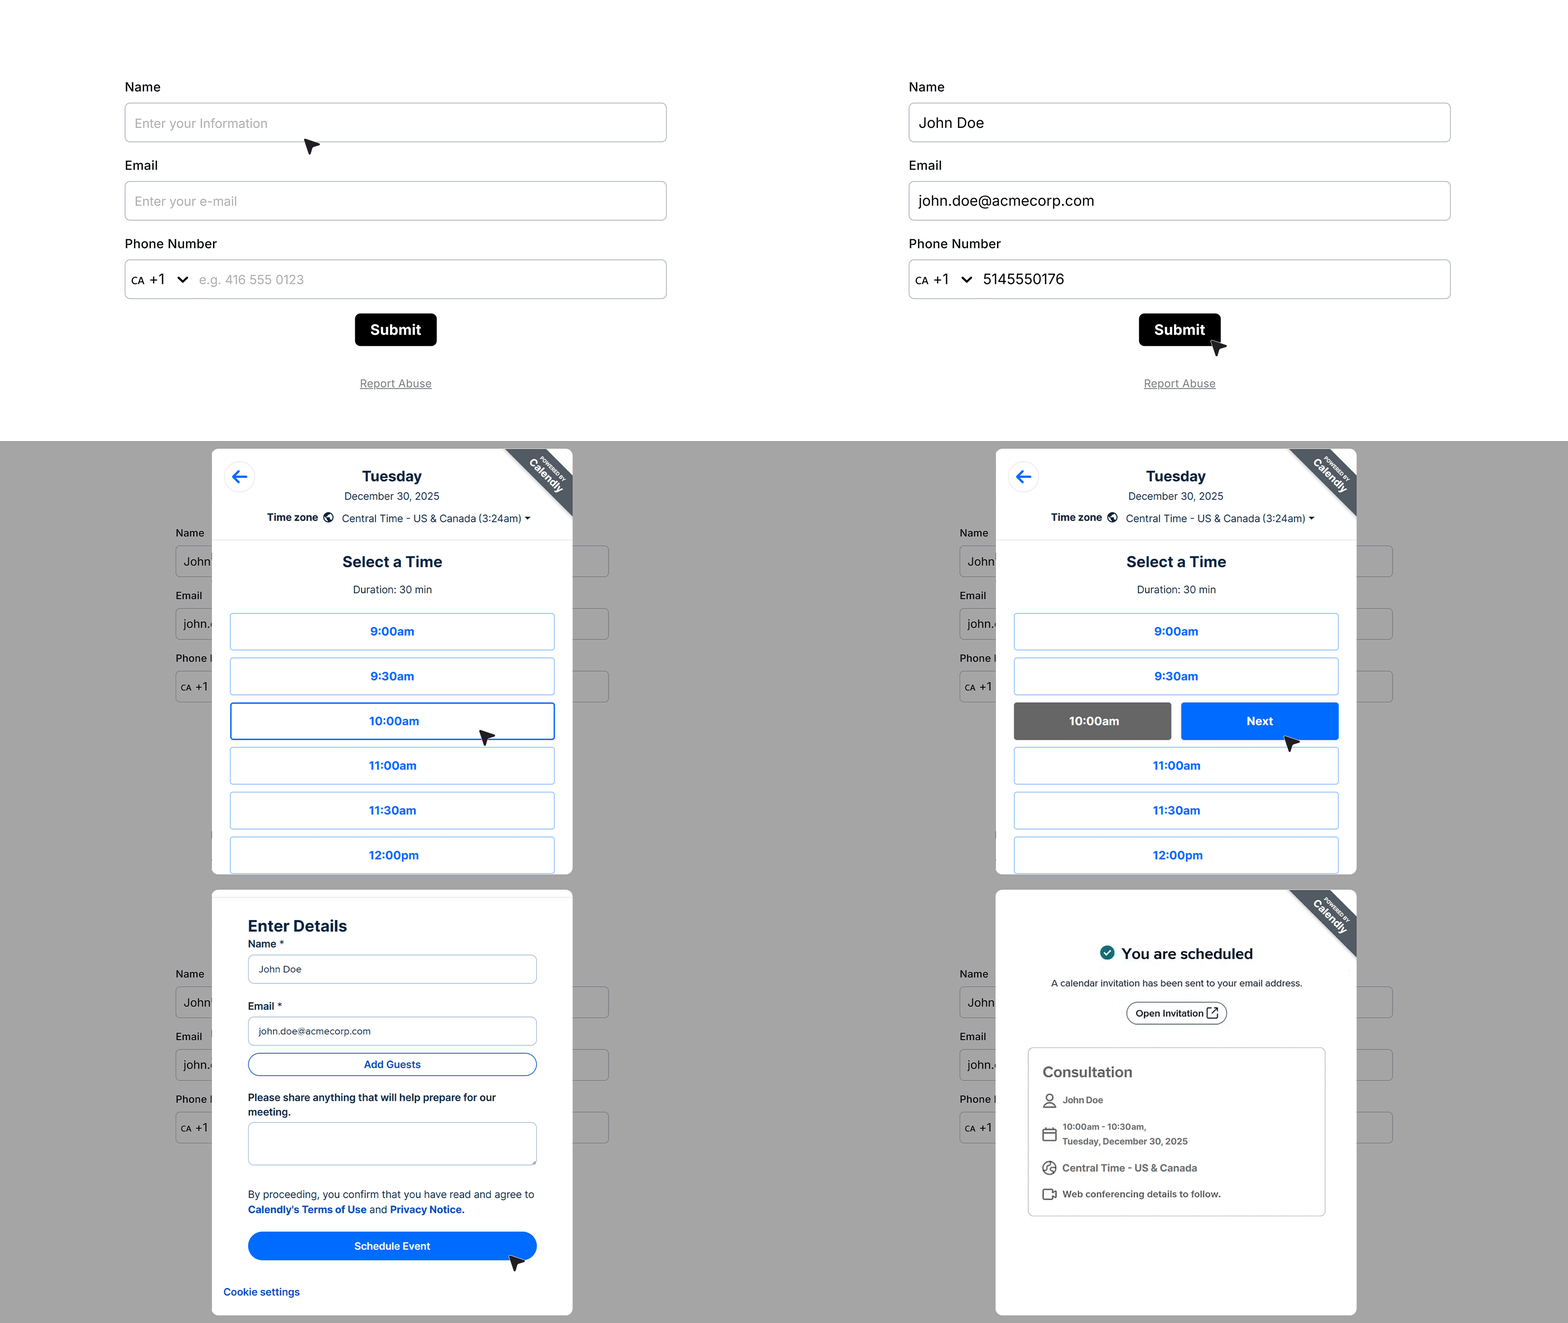
Publish the form. You will notice that the calendar is not visible right away. Fill in the name, email, and phone number, then submit the form. After submission, the Calendly popup appears.
The user selects a date and time, reviews the details, and confirms the booking.
The name and email are already filled using the form data.
Viewing responses
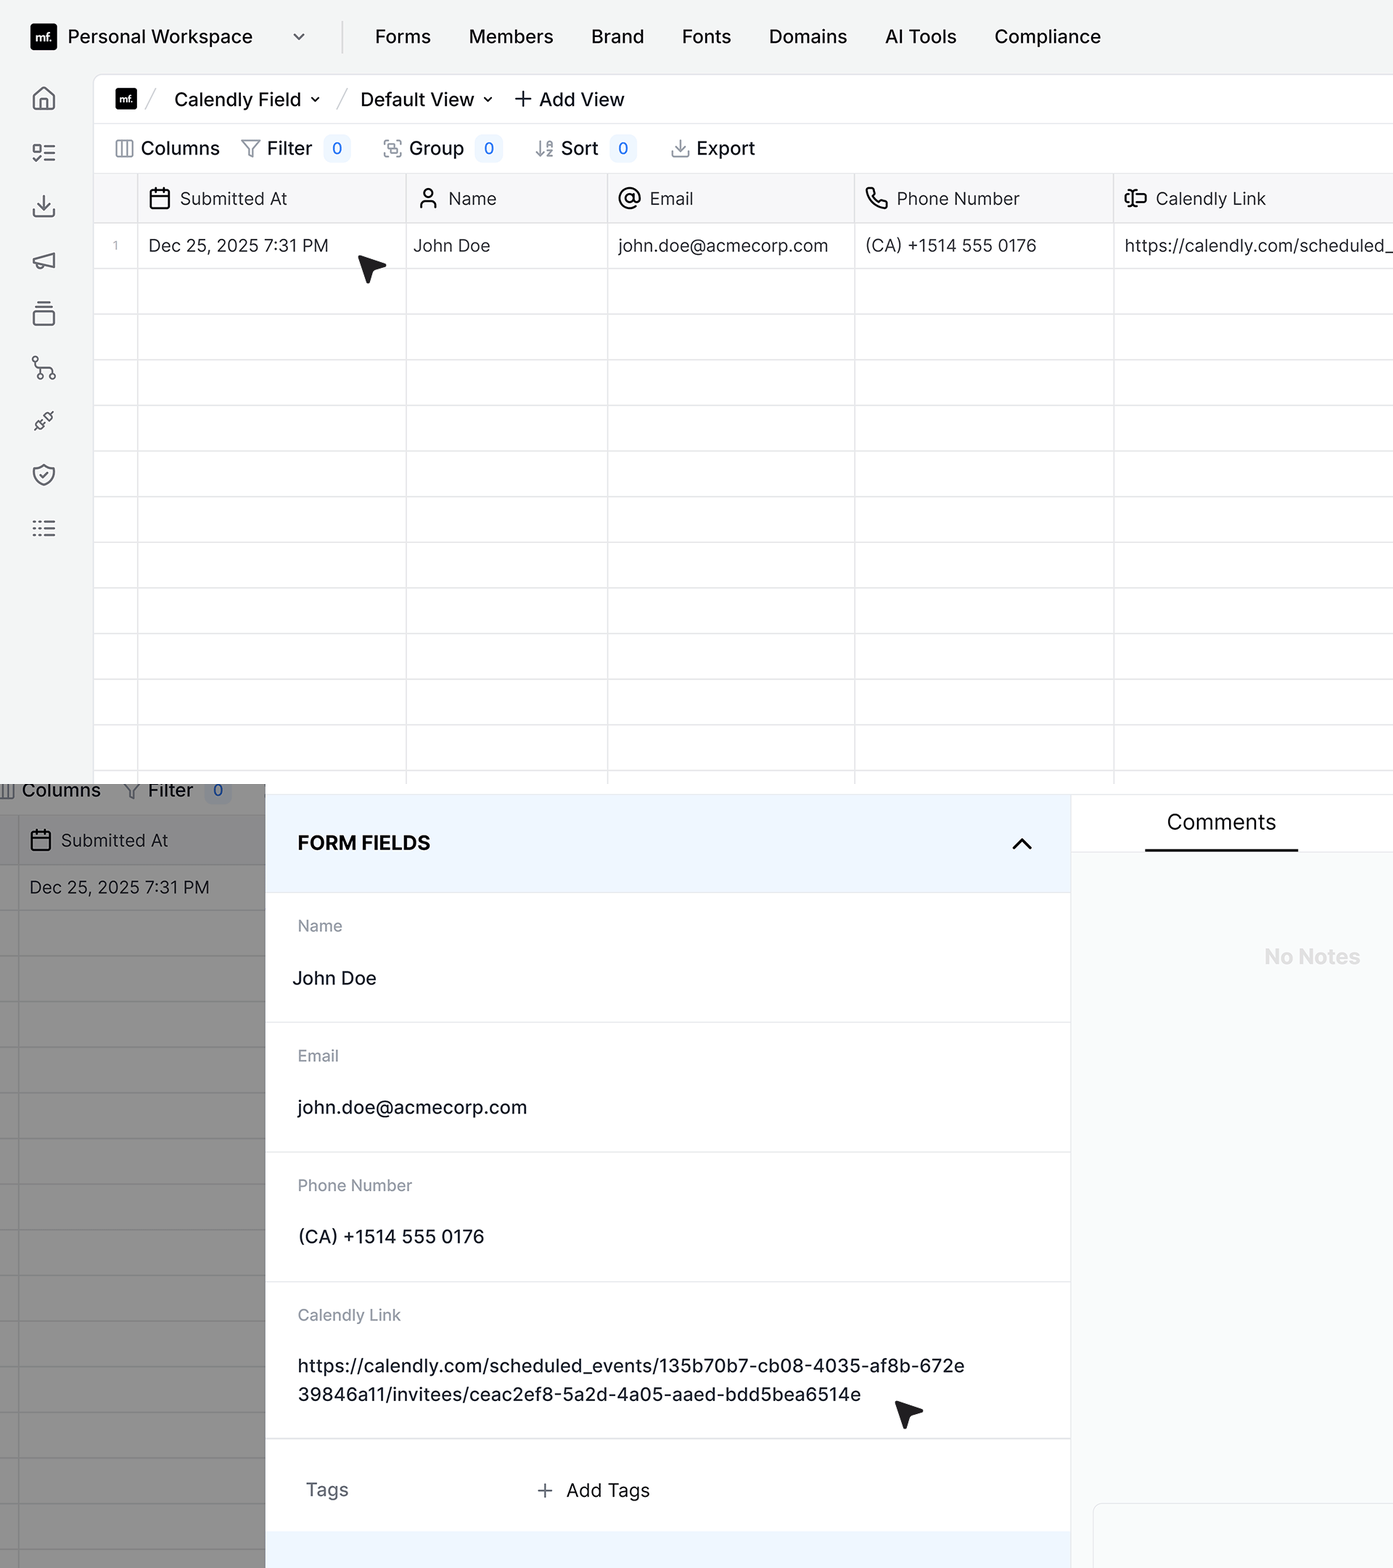
Go to the Responses tab in MakeForms. You will see the form submission along with the Calendly booking link and the user details collected in the form.
FAQ's
The Calendly field in MakeForms lets you collect form responses first and then allow users to book a time slot using Calendly. This ensures you never lose user data, even if they do not complete the booking.
In a normal booking flow, users pick a slot first. If they leave midway, you lose their details. With the Calendly field, users submit the form first. Their data is saved before they see the booking calendar.
Yes. You can enable the option to show the calendar after form submission. This makes sure all user details like name, email, and phone are captured before booking starts.
You can connect Calendly by clicking the Authenticate option in the Calendly field settings. Once connected, you can select your events and start using them inside your form.
Yes. You can map fields like name and email from your form to Calendly. This means users do not have to enter the same details again while booking.
Yes. You can mark the Calendly field as required, but only when the calendar is shown inside the form. If the calendar appears after submission, this option is disabled.
Even if the user does not complete the booking, their form submission is already saved in MakeForms. This helps you follow up later without losing leads.
You can view all submissions in the Responses tab in MakeForms. It includes form data and the Calendly booking link if the user completes the booking.
Yes. The Calendly field is perfect for demo requests, consultation bookings, and quote forms where you want to collect details before scheduling.
You can choose both options. You can embed the calendar inside the form or show it after submission based on your use case.
Using a Calendly field helps you capture user data first. With a direct link, you risk losing users if they drop off before booking. This makes your lead collection more reliable.
Yes. It improves lead capture by saving user details before booking. This is especially useful for sales teams, agencies, and service businesses.
Yes. After connecting Calendly, you can choose from your available events like demos, calls, or meetings and link them to your form.
MakeForms stores the form response and booking reference. The actual scheduling is handled by Calendly, but you can track bookings from your responses.
Yes. It improves conversions by reducing drop-offs and making the booking flow smooth. Users fill details once and continue to booking without friction.