MakeForms Payments Setup Guide
MakeForms allows you to collect payments directly through your forms using trusted payment providers. Whether you need to calculate totals dynamically based on user input or charge a fixed registration fee, the platform provides flexible configuration options to support different pricing models.
This guide explains how to connect a payment gateway, configure dynamic and flat fee payments, and display appropriate messages based on payment status.
Connecting Your Payment Gateway
- To start collecting payments, you first need to connect a payment provider.
From your dashboard, open Integrations and navigate to the Payments category. Here you will see the supported gateways such as Stripe, Mollie, Square, and Razorpay.
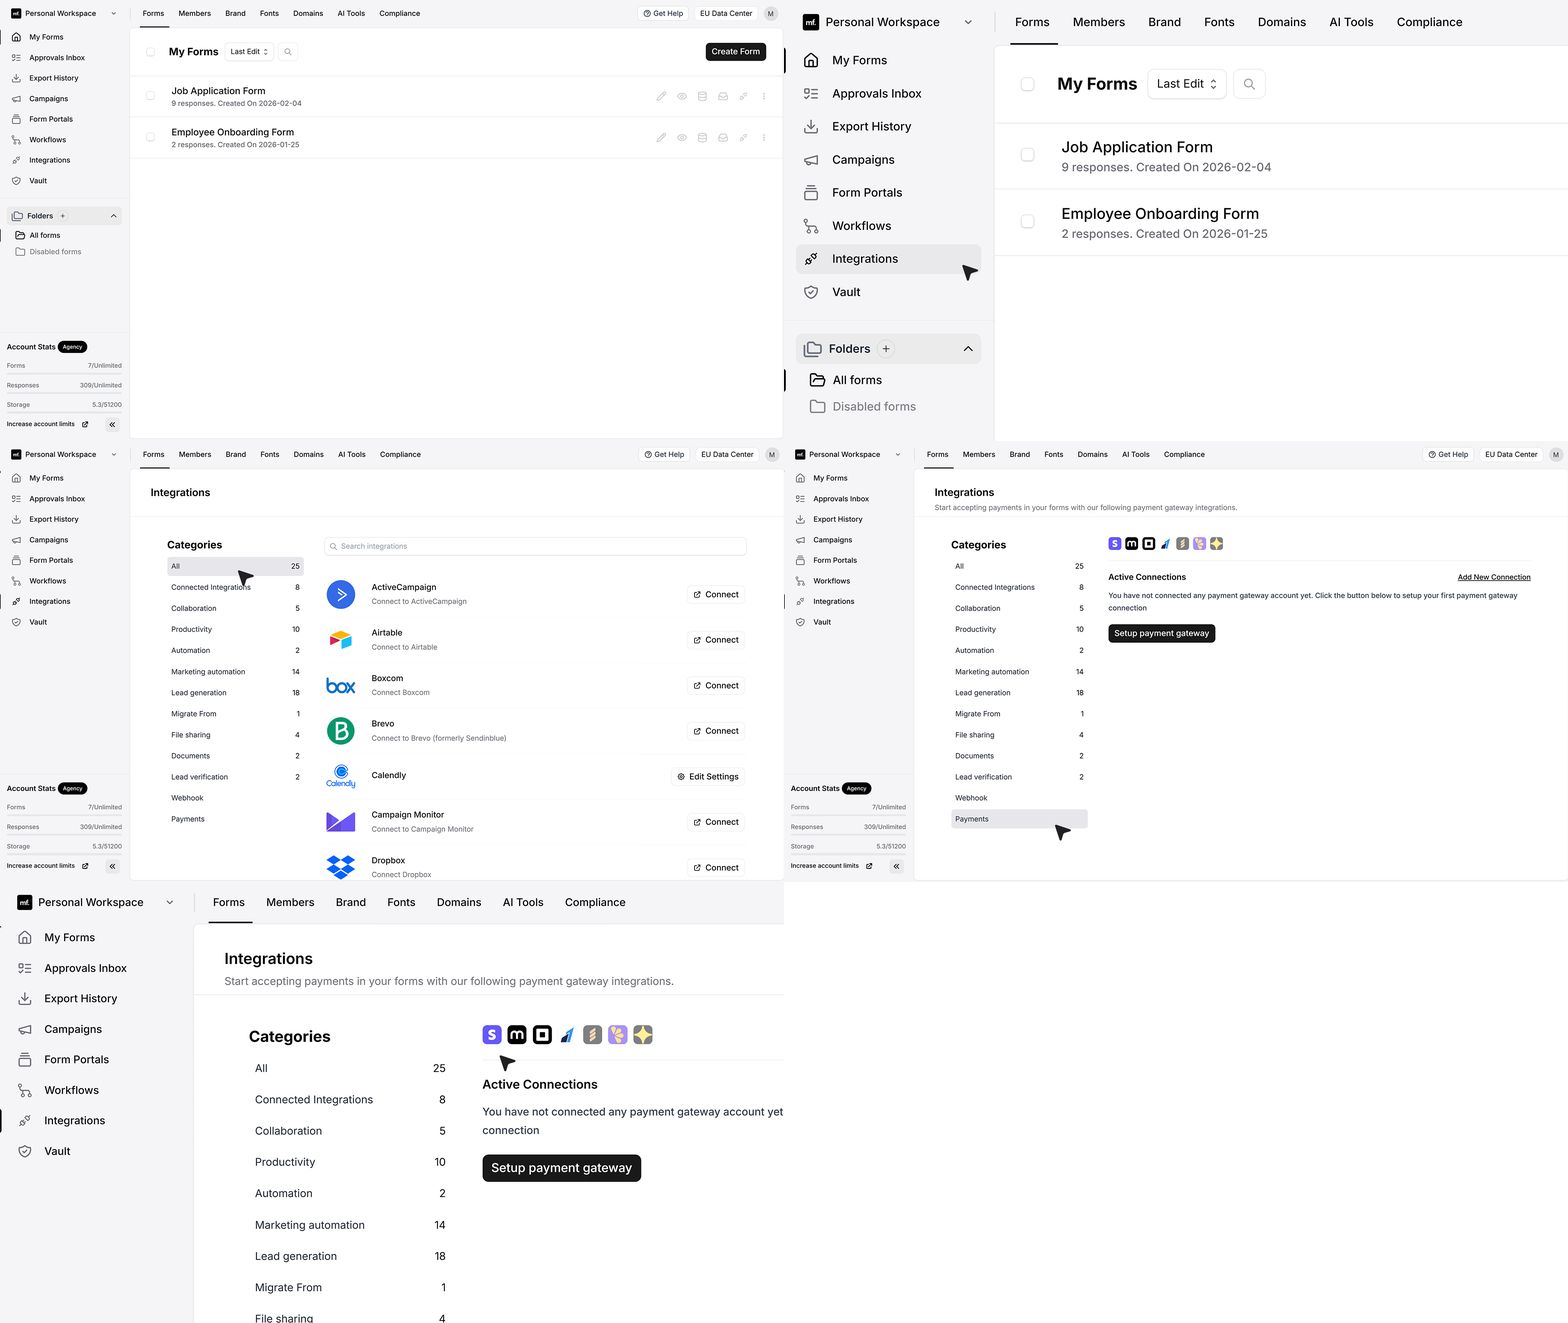
- Click Set Up Payment Gateway to create a new connection. Select your preferred provider from the dropdown. For this example, we will use Stripe. Enter a connection name. This name helps you identify the connection later when enabling payments inside a form.
Next, choose the appropriate mode. Sandbox mode is used for testing and does not charge real money. Production mode is used when you are ready to collect real payments from users. For testing purposes, select Sandbox.
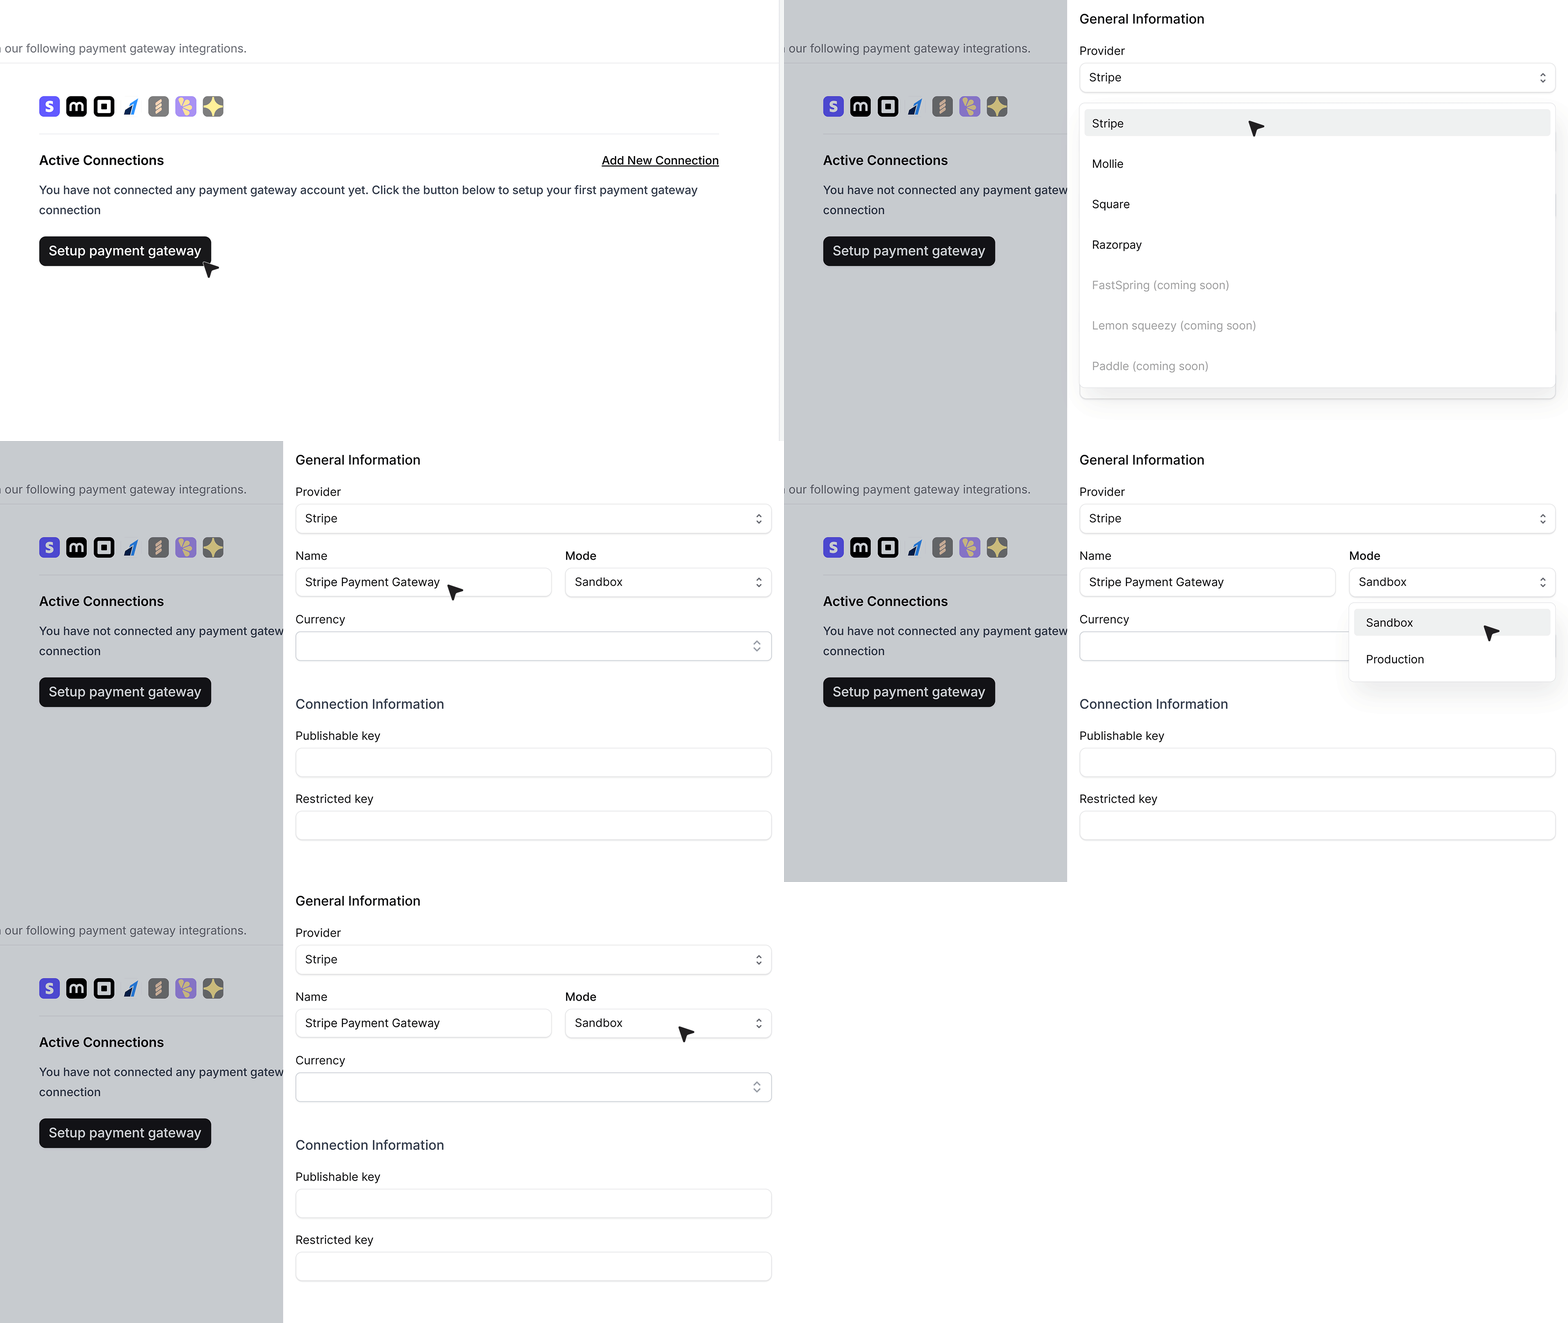
- Choose your default currency. This currency will automatically appear inside forms when payments are enabled, although it can be changed later at the form level.
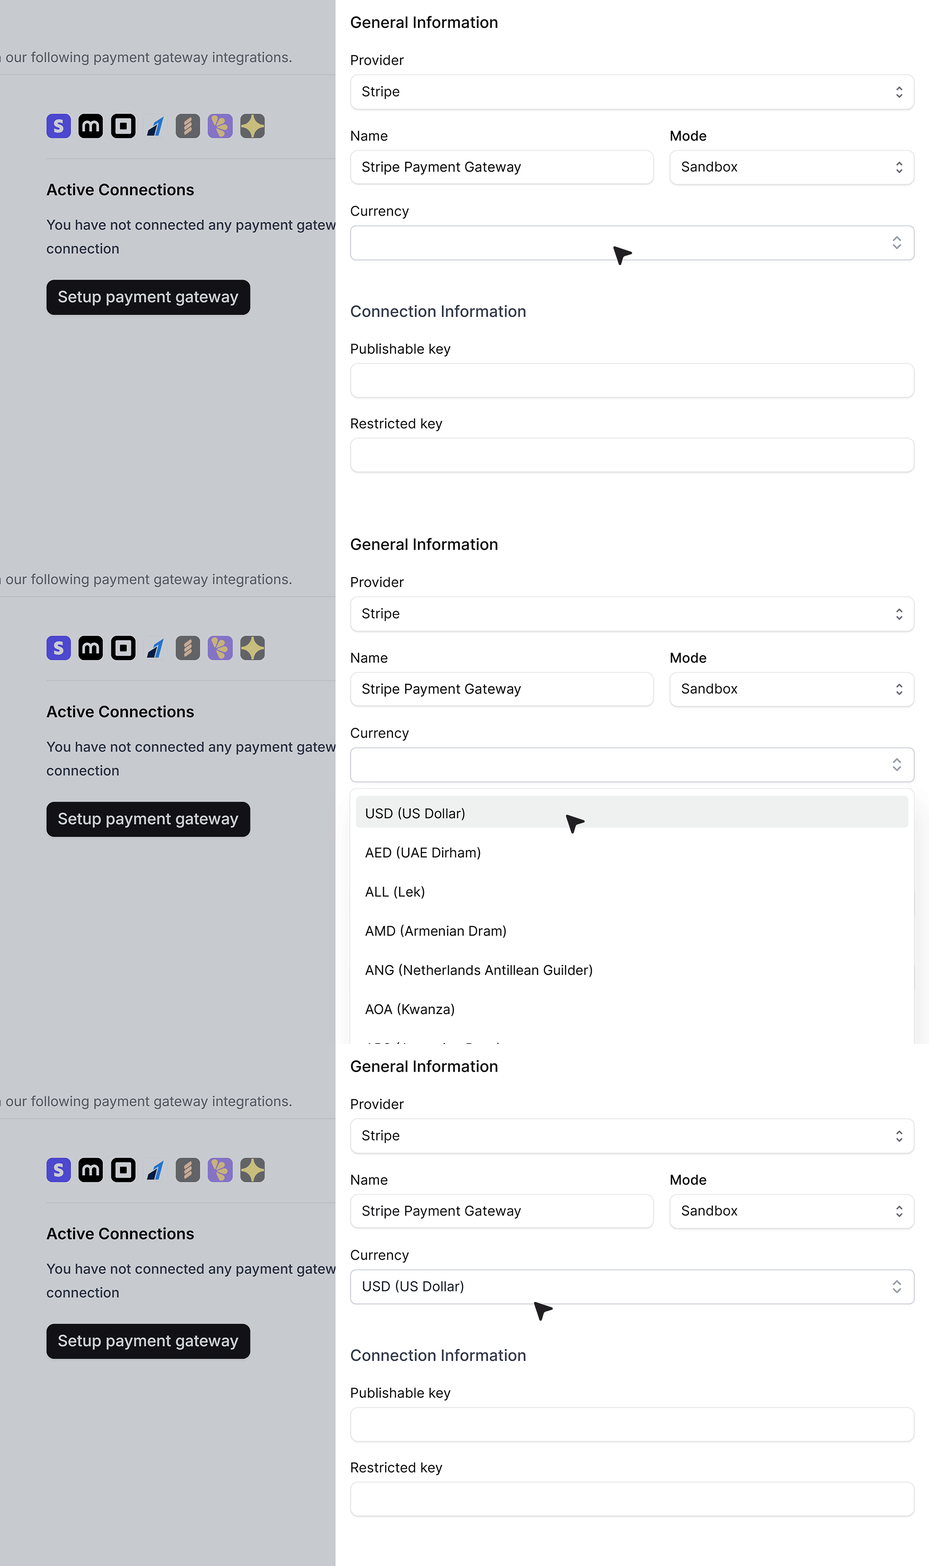
- Next, enter your API credentials in the required fields. For Stripe, this includes your Publishable Key and Restricted Key, which you can obtain from your Stripe dashboard. These credentials securely connect MakeForms to your payment account and authorize transactions.
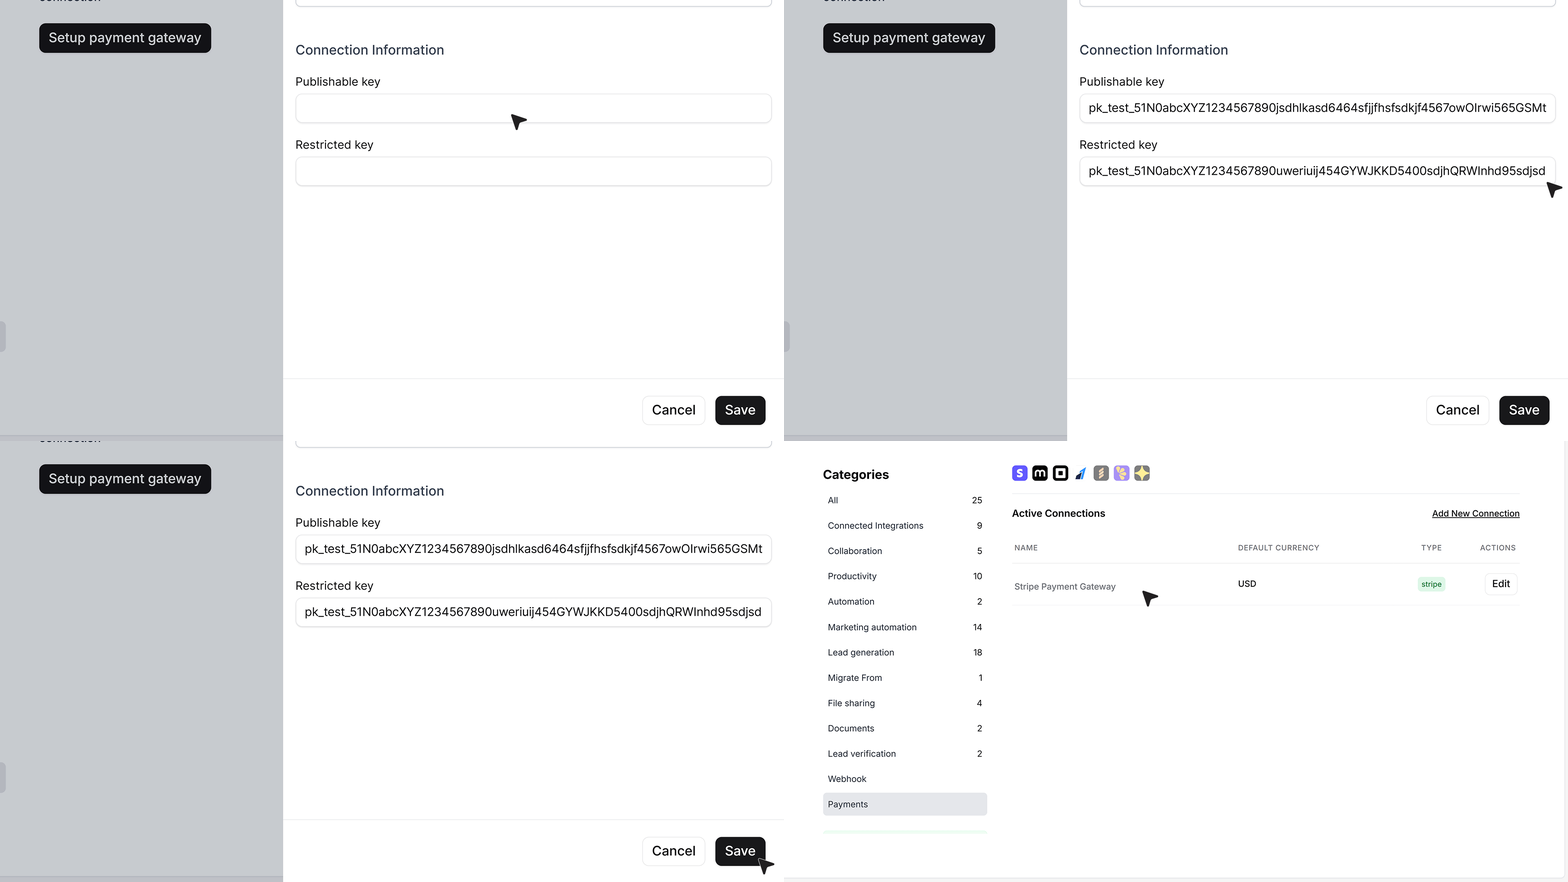
After entering the credentials, click Save. Once saved, your payment connection becomes active and available for use inside forms.
MakeForms allows you to create multiple connections for the same gateway. This is useful if you manage payments for different clients within the same workspace.
Dynamic Pricing Using Calculated Fields
- Dynamic pricing is used when the payment amount depends on user input, such as event ticket bookings.
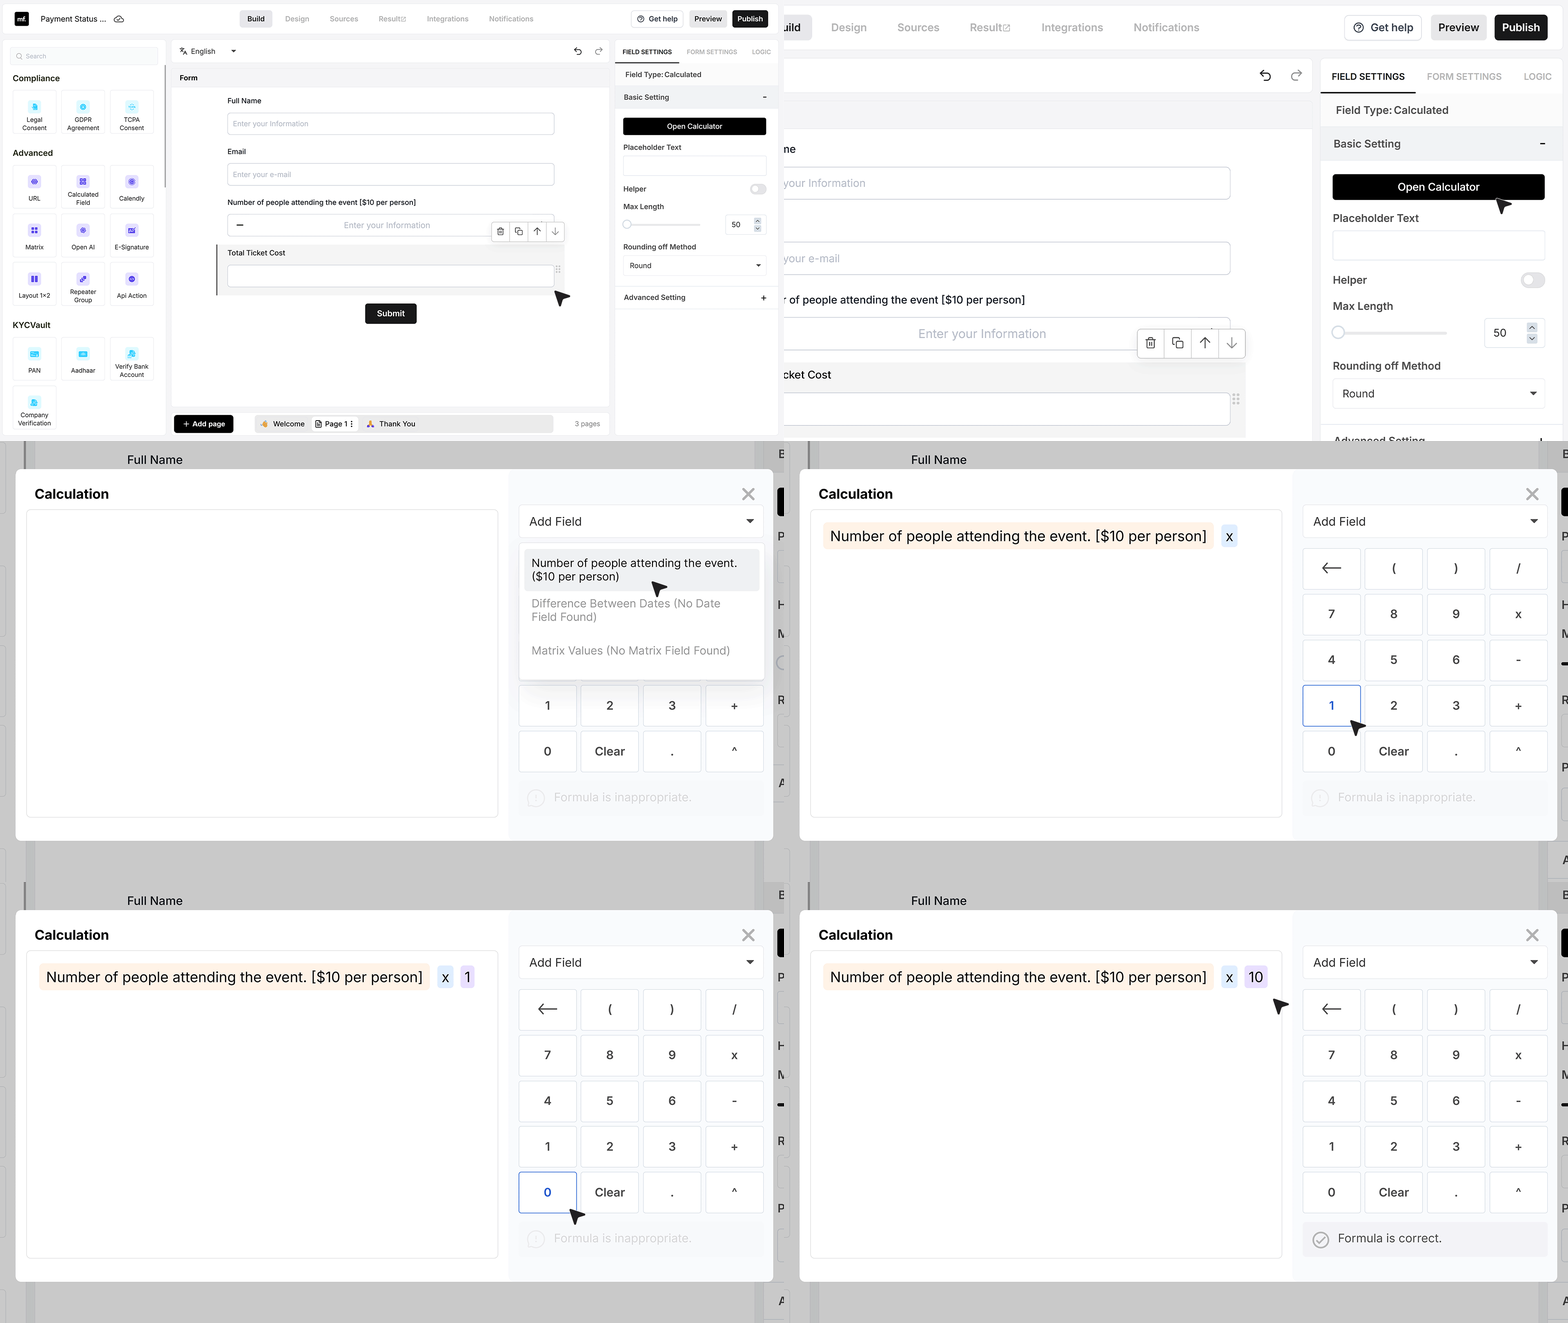
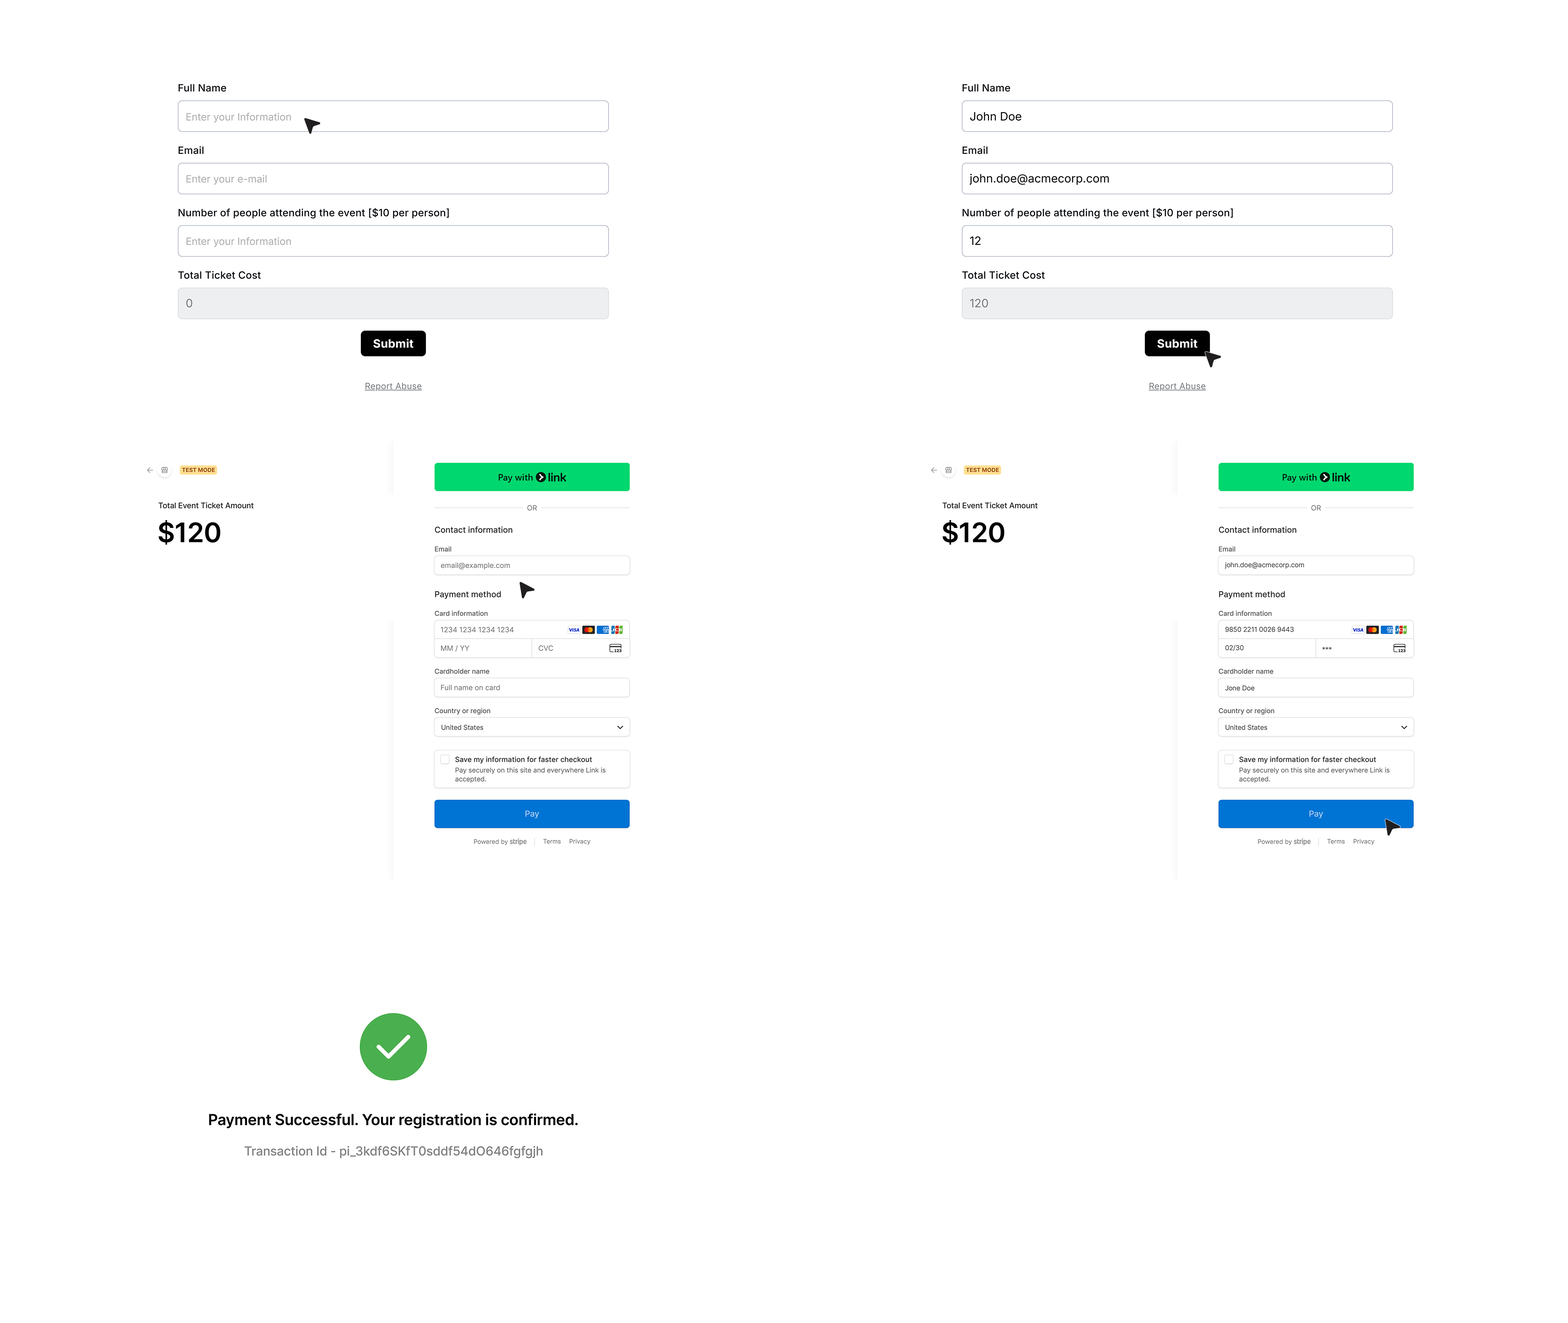
Create or open a form and add standard fields such as Name and Email. Add a Number field labeled “Number of Attendees ($10 per person).” Then add a Calculated field named “Total Ticket Cost.”
Open the Field Settings of the Calculated field and launch the Calculator. Select the Number of Attendees field and multiply it by 10. Save the calculation. The Total Ticket Cost field will now update automatically based on the number entered.
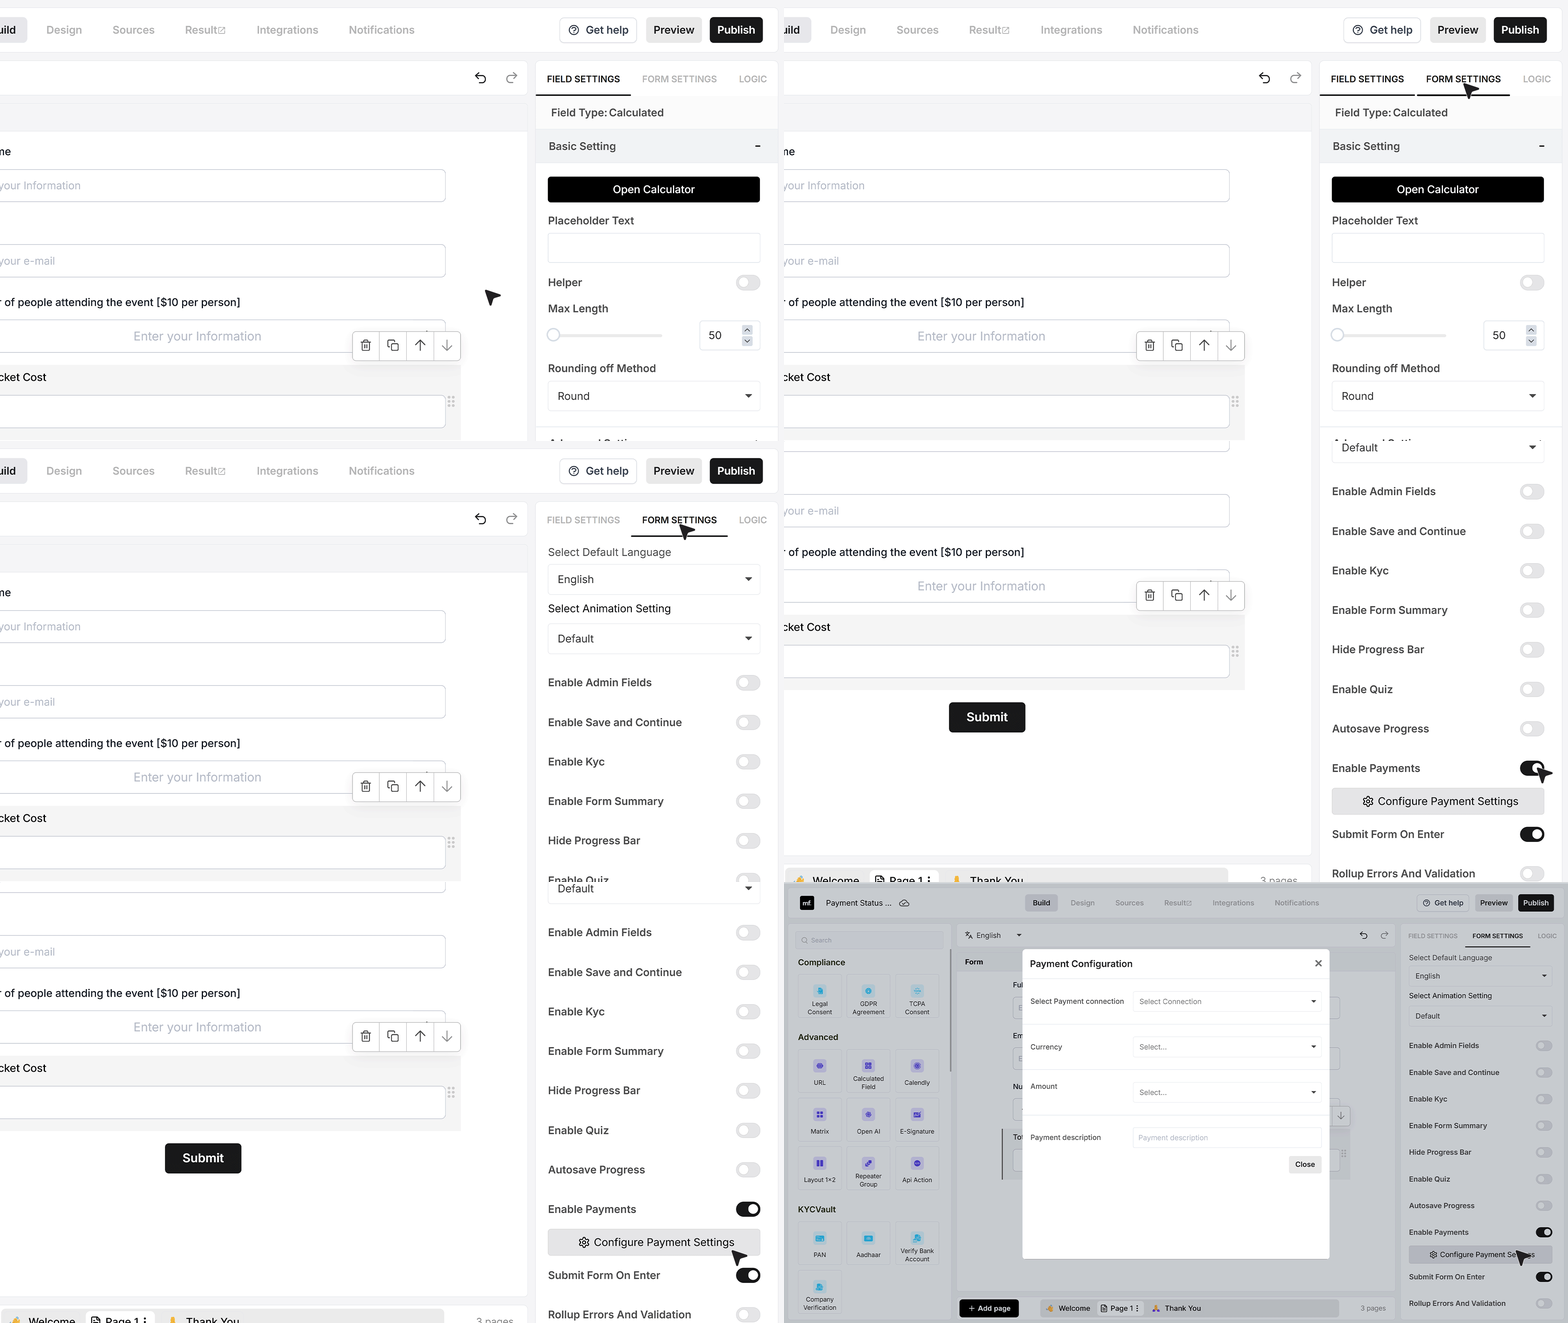
- To connect payments, open Form Settings and enable Payments. Click Configure Payment Setting.
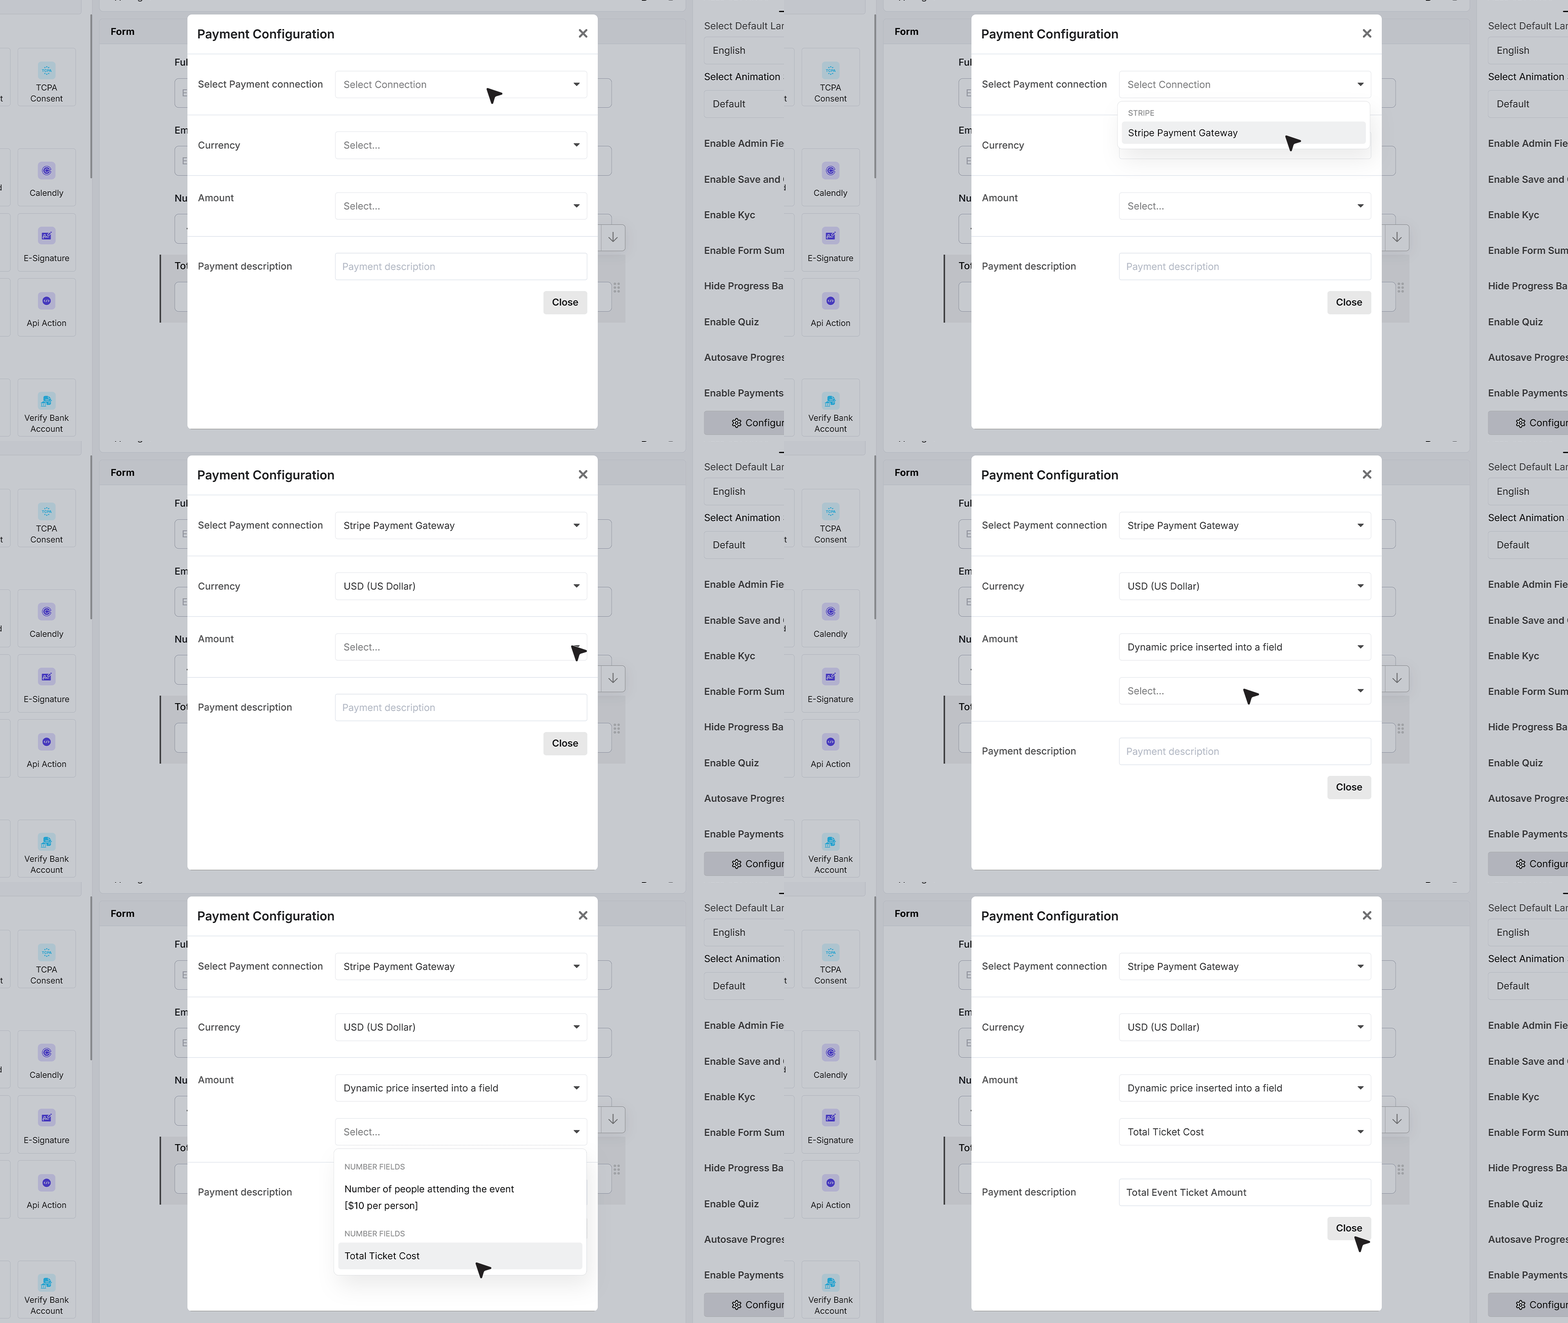
- select the payment connection you created earlier. The default currency linked to that connection will appear automatically. Under Amount Configuration, choose “Dynamic price inserted into a field” and select the “Total Ticket Cost” field. Enter a payment description such as “Total Event Ticket Amount” This description appears on the checkout screen and in transaction details.
Your configuration saves automatically.
Customizing Success and Failure Messages
After configuring payments, you can customize what users see based on the payment outcome.
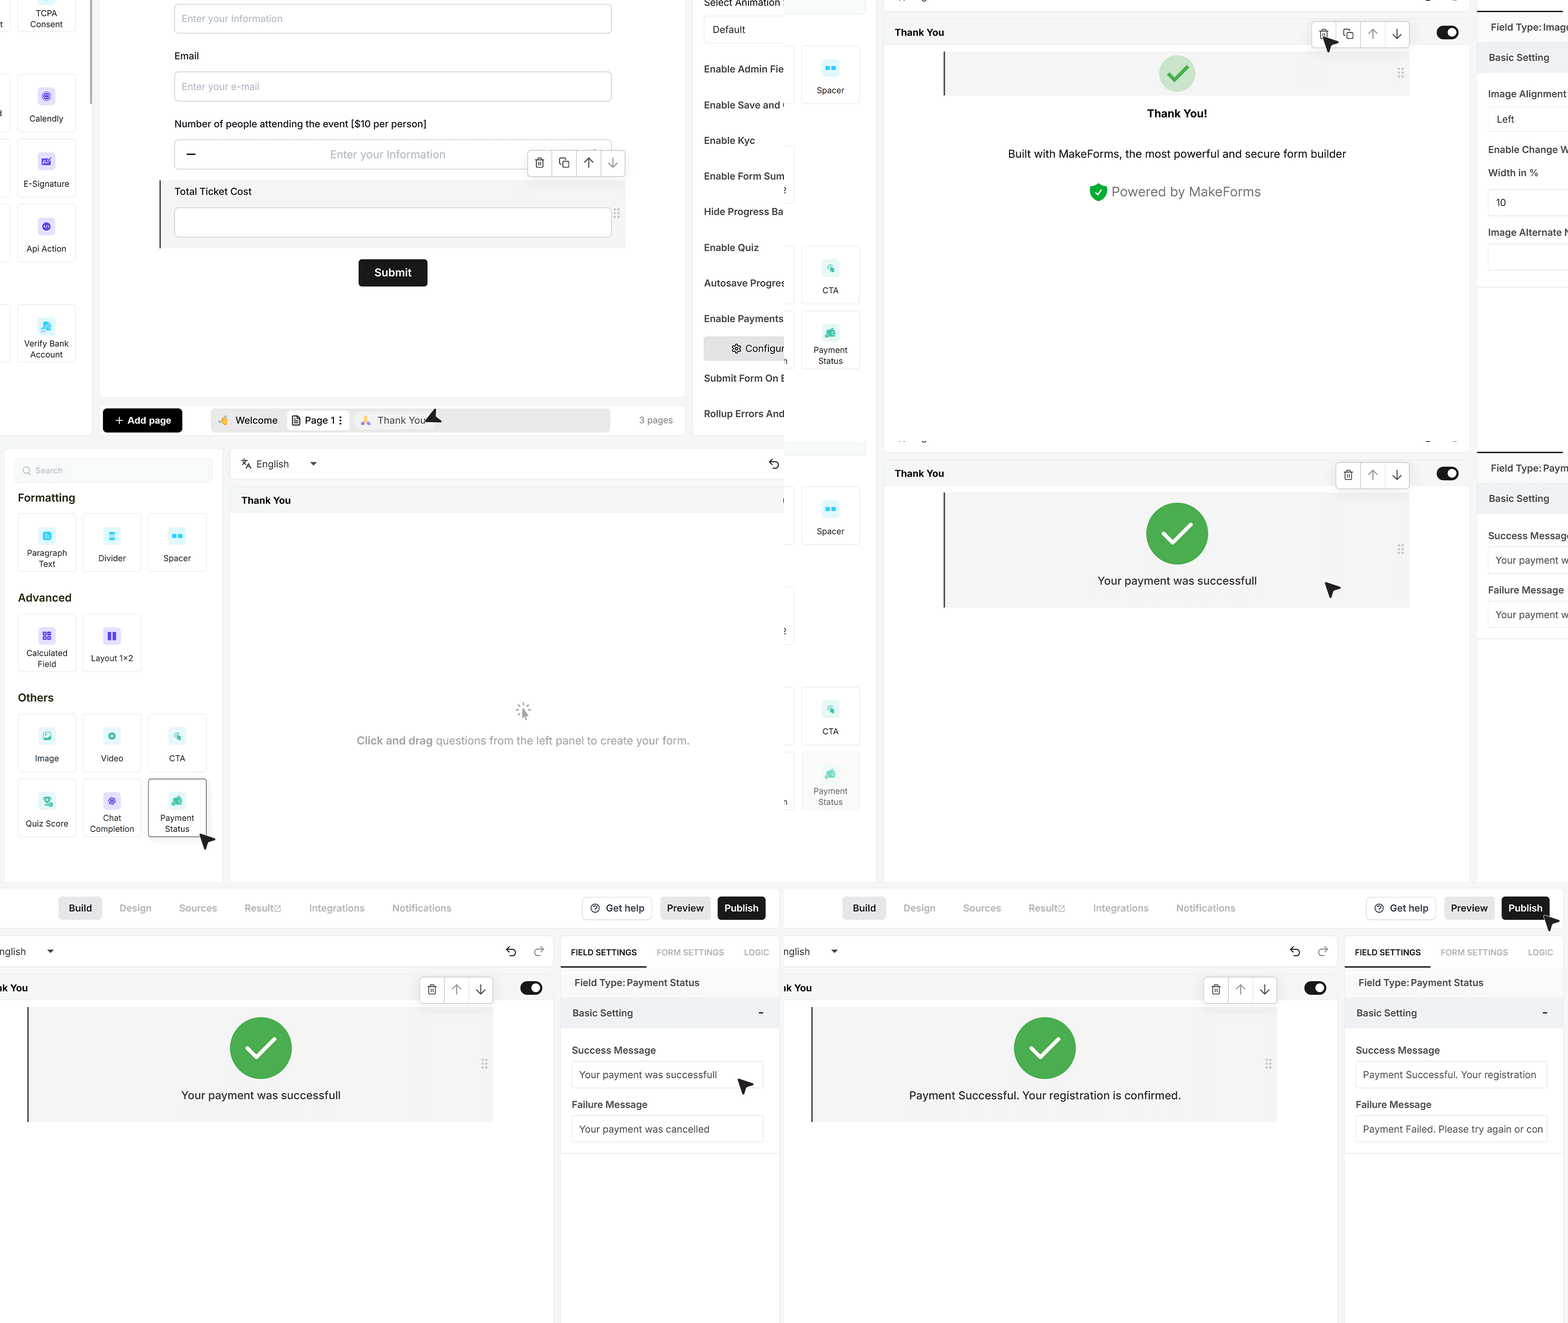
Open the Thank You settings for the form. Remove the default message and drag the Payment Status field onto the Thank You screen.
Configure separate messages for successful and failed payments. For successful payments, display a confirmation message indicating that the registration is complete and payment has been received. For failed payments, display a message informing users that the payment was not processed and advising them to try again or contact support.
Publishing and Payment Flow
Once published, the form is ready to collect payments. When a user fills out the form and proceeds, they are automatically redirected to the selected payment gateway with the exact calculated or configured amount.
If the payment is successful, the user is redirected back to the Thank You screen and sees the configured success message.
If the payment fails or is canceled, the user is redirected back and shown the configured failure message.
Fixed Amount (Flat Fee)
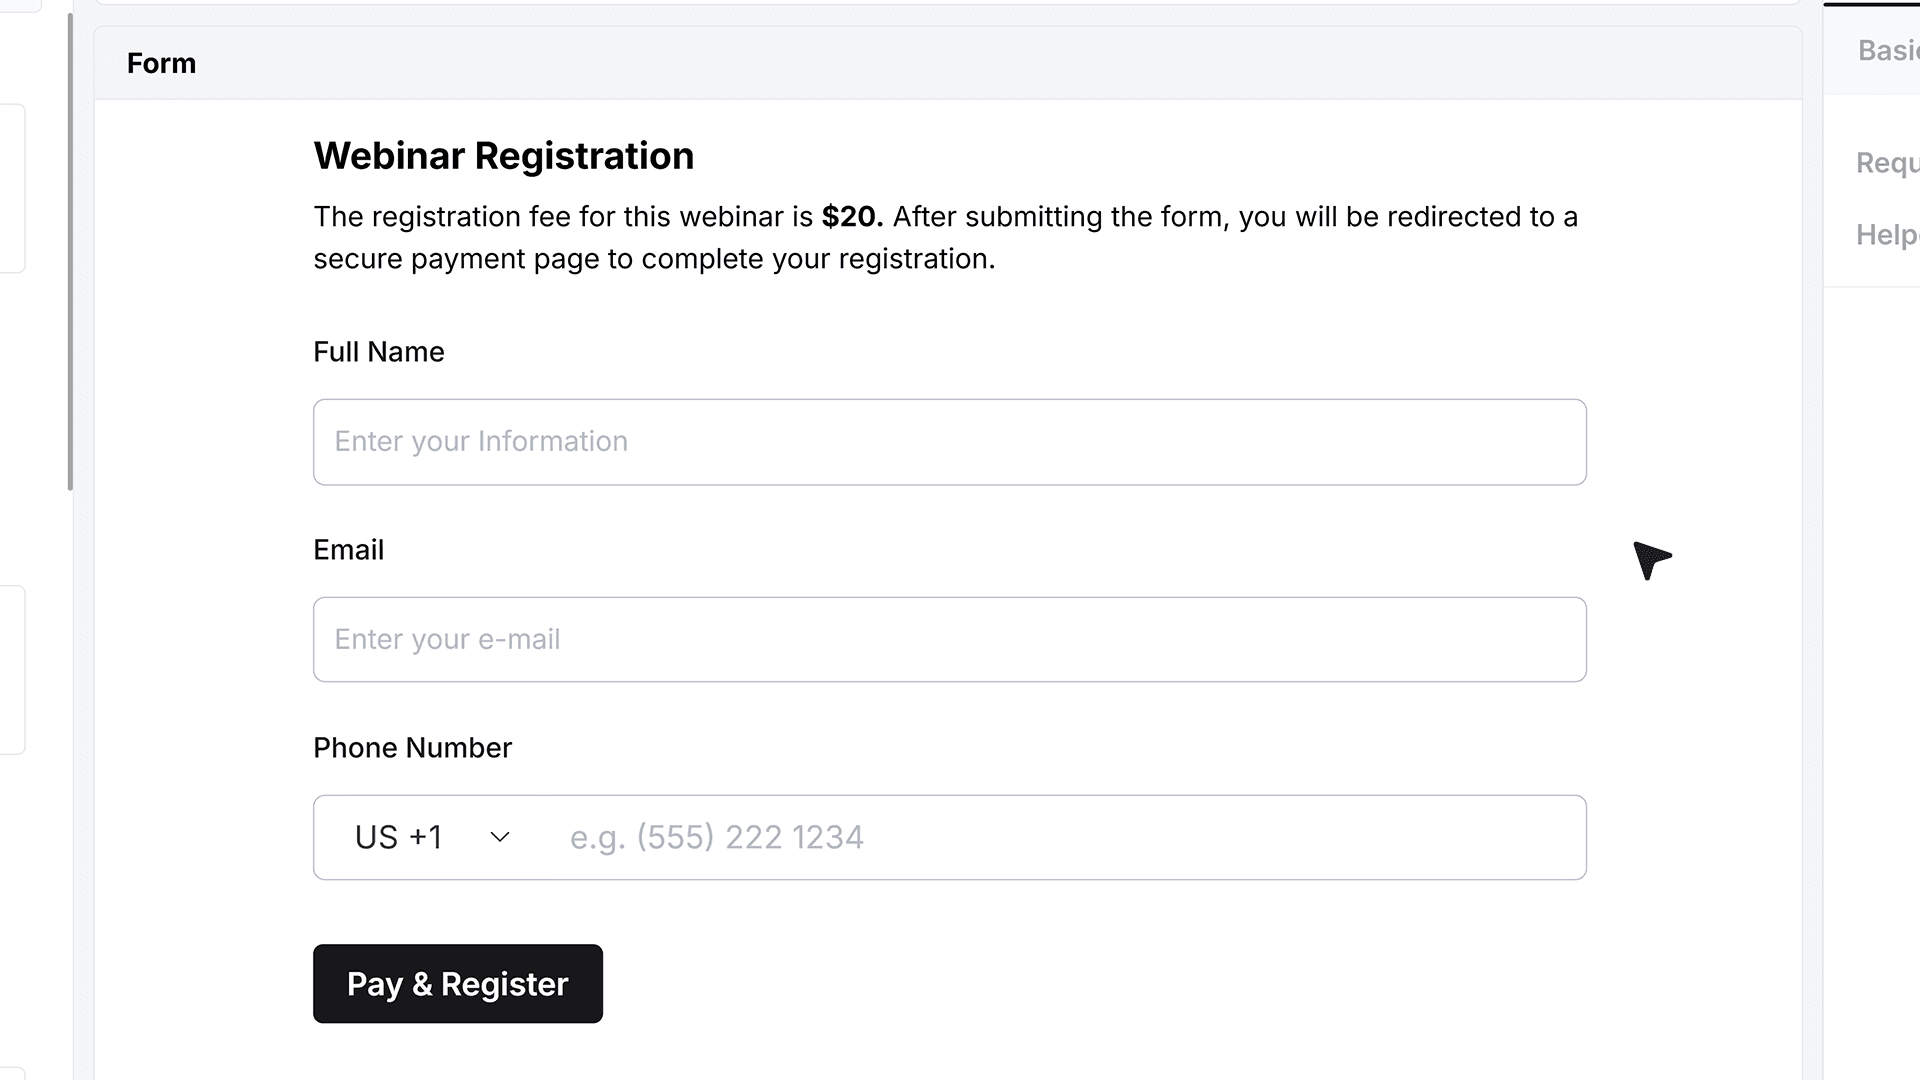
- A fixed amount configuration is used when the price does not change, such as a webinar registration. In this example, we use an existing webinar form that includes Name, Email, and Phone Number fields. A Paragraph field at the top explains the registration fee, and the submit button is labeled “Pay and Register.”
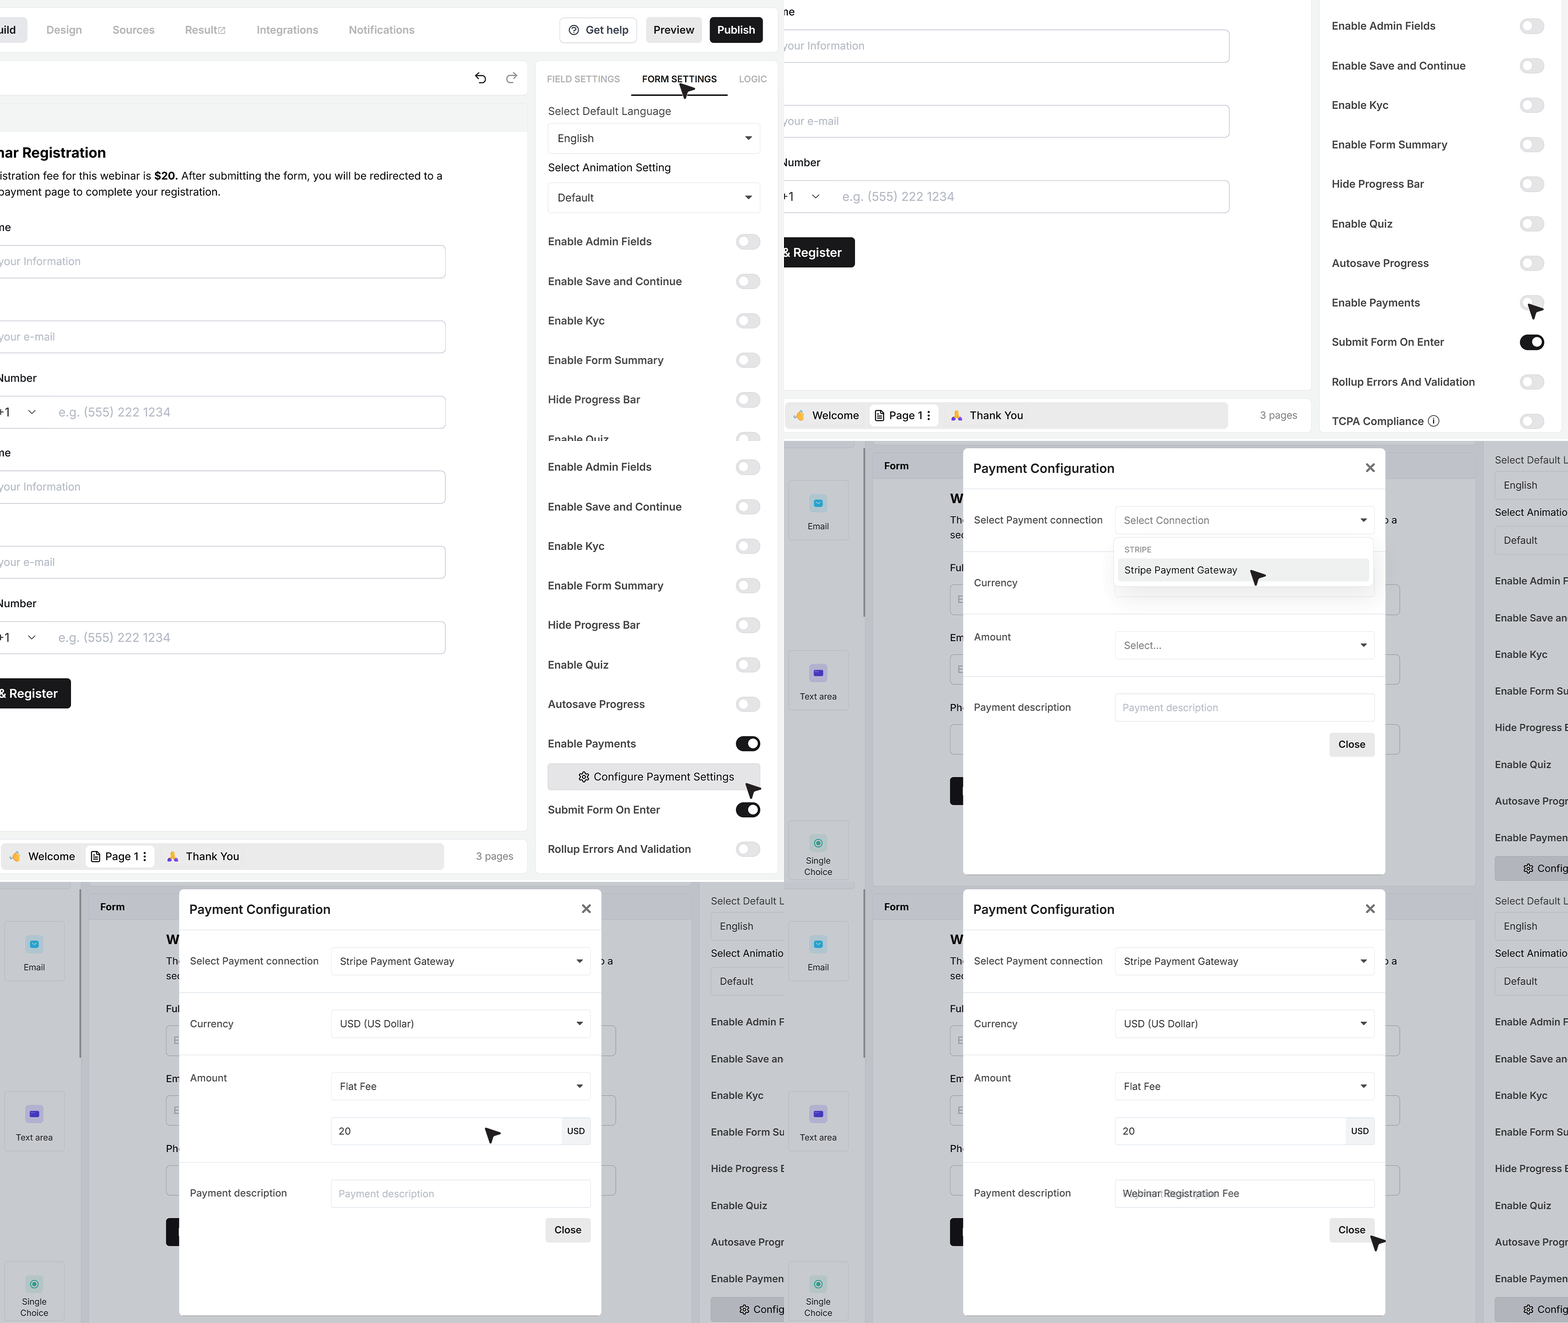
- Open Form Settings and enable Payments. Select your payment connection. Under Amount Configuration, choose Flat Fee and enter the fixed amount, which in this case is $20. Add a payment description such as “Webinar Registration Fee.”
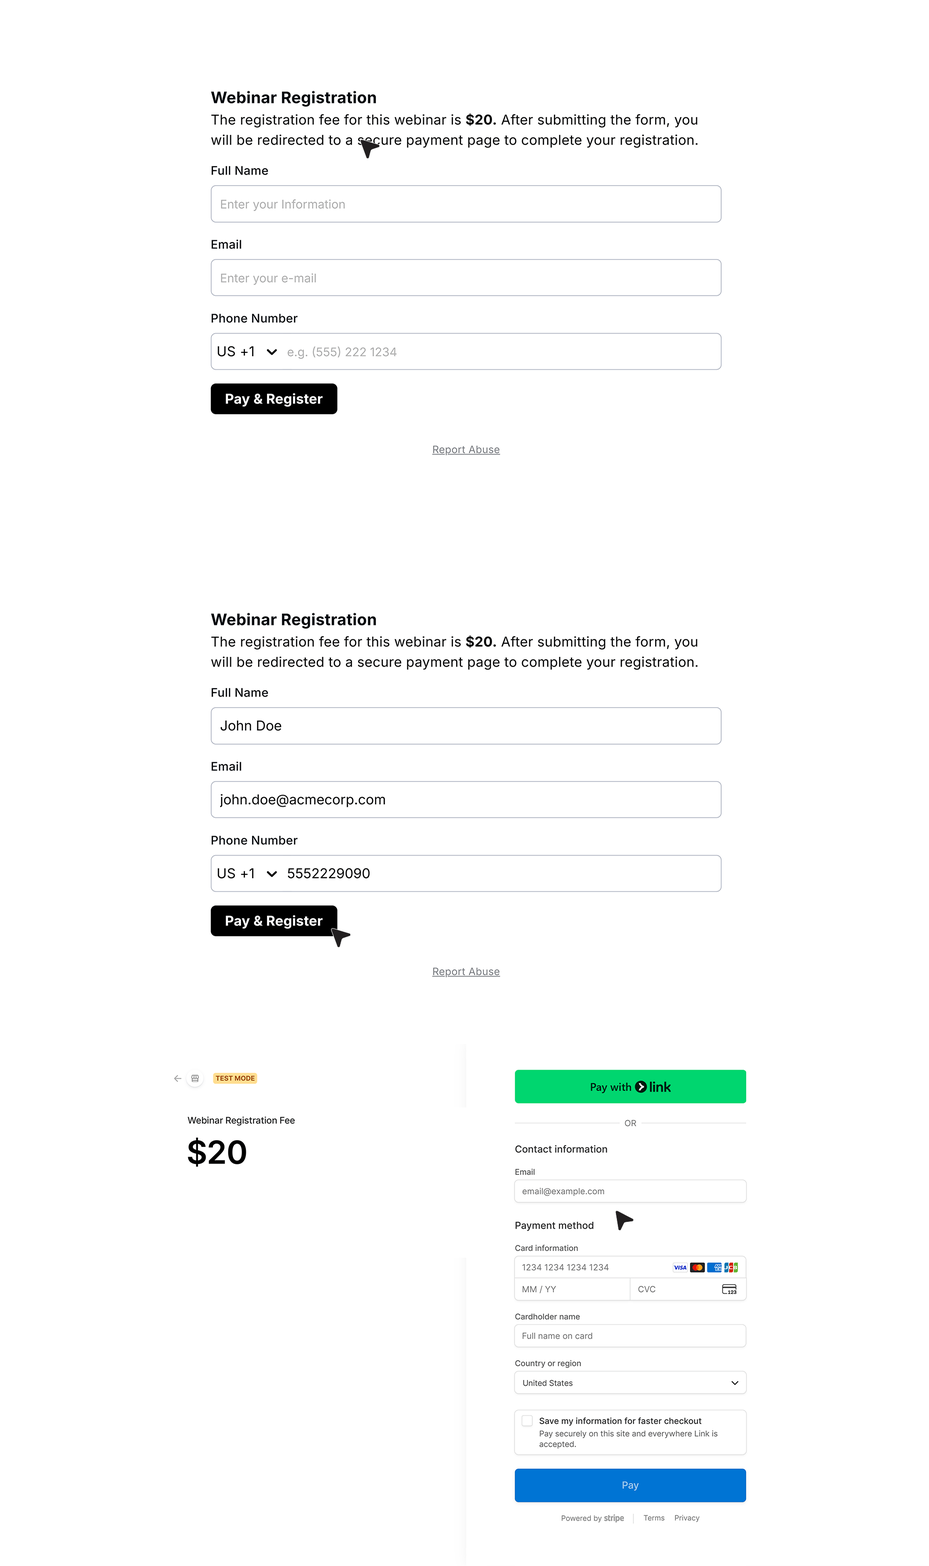
- Publish the form. Users will fill in their details, click Pay and Register, and be redirected to complete the fixed payment.
FAQ's
The Payment Status field shows whether a payment was successful or failed after a user submits a form. It helps you display the right message on the Thank You screen based on the payment result.
Once a user completes the form and pays through the selected gateway, MakeForms checks the payment result. Based on this, the Payment Status field shows either a success or failure message on the Thank You screen.
Go to the Thank You screen settings, remove the default message, and drag the Payment Status field into the layout. Then set custom messages for success and failure cases.
Yes. You can set different messages for each case. For example, show a confirmation message for successful payments and a retry message for failed payments.
If the payment fails or is canceled, the user is redirected back to the form’s Thank You screen. The Payment Status field will display your failure message so the user knows what to do next.
Yes. The Payment Status field works with all supported gateways like Stripe, Razorpay, Mollie, and Square, as long as payments are enabled in the form.
Yes. Whether you use dynamic pricing with calculated fields or a fixed fee, the Payment Status field will still show the correct payment result.
Yes. You can display confirmation details, next steps, or access links only when the payment is successful. This helps create a better user experience.
No. It only appears on the Thank You screen after the payment process is completed.
Yes. Payment status is linked to each submission, so you can see whether a user completed the payment or not in your response data.
You can use the Sandbox mode while setting up your payment gateway. This lets you test success and failure flows without charging real money.
Show a clear message asking users to try again or contact support. You can also guide them back to the payment step to reduce drop-offs.
Yes. It works well for event forms, webinar registrations, ticket bookings, or any use case where payment confirmation is needed.
The field itself reflects payment status, but it works with any currency set in your payment gateway or form settings.
It improves clarity for users, reduces confusion after payment, and ensures they know if their payment was successful or needs action.